> ## Documentation Index
> Fetch the complete documentation index at: https://www.carstoragesoftware.com/docs/llms.txt
> Use this file to discover all available pages before exploring further.
# Customize your Overview dashboard
> Build a facility command center with widgets, charts, maps, and reusable app components on the Dashboard (beta) page.
If you are brand new to the app, start with [Getting started](/docs/getting-started) before customizing widgets.
## What you will accomplish
You will open the **Dashboard** page (labeled **Beta** in the sidebar), add panels that show schedule, parking, inbox, and other live data, save your personal layout, and know how team admins set a default layout for new staff.
When this is set up well, managers and front-desk staff see the same live picture of the facility without opening five different pages.
## When to use this page
* You want one screen that shows today’s schedule, parking map, inbox, or charts together.
* You are a manager setting up how new teammates first see the app after sign-in.
* Your role works better with a **billing** or **floor operations** layout than the default mix of widgets.
**Dashboard vs Create event home**
The sidebar has two related entries:
* **Dashboard** (with a **Beta** badge) opens [Dashboard](https://www.carstoragesoftware.com/dashboard/v2) — the customizable widget page this guide covers.
* **Create event** opens [Create event](https://www.carstoragesoftware.com/dashboard) — the classic home with workflow cards.
You can use both. Many teams keep **Dashboard** as their daily starting point.
## Before you start
* You can sign in to the staff dashboard.
* Your facility already has some data (customers, cars, schedule events, or parking spots) so panels are not empty. If you are brand new, finish [Prepare your first customer and car](/docs/basics/prepare-your-first-customer-and-car) first.
* Use a desktop or laptop with a wide screen when dragging and resizing panels. Phones can reorder panels but cannot resize the grid the same way.
* To change the **team default** layout for everyone, you need **team admin** access.
## What you can add to the dashboard
**Panels from existing pages** — slices of Schedule, Cars, Parking Spots, Inbox, Payments, and more. They use the same components as the full pages, sized for your dashboard.
**Charts** — revenue, occupancy, customer stages, and other metrics.
**Shortcuts** — quick actions such as creating an event or opening common pages.
**Alerts** — a compact list of items that need attention.
**Layout templates** — starter layouts named **Operations standard**, **Billing focus**, and **Floor operations**. You can apply a template, then adjust panels.
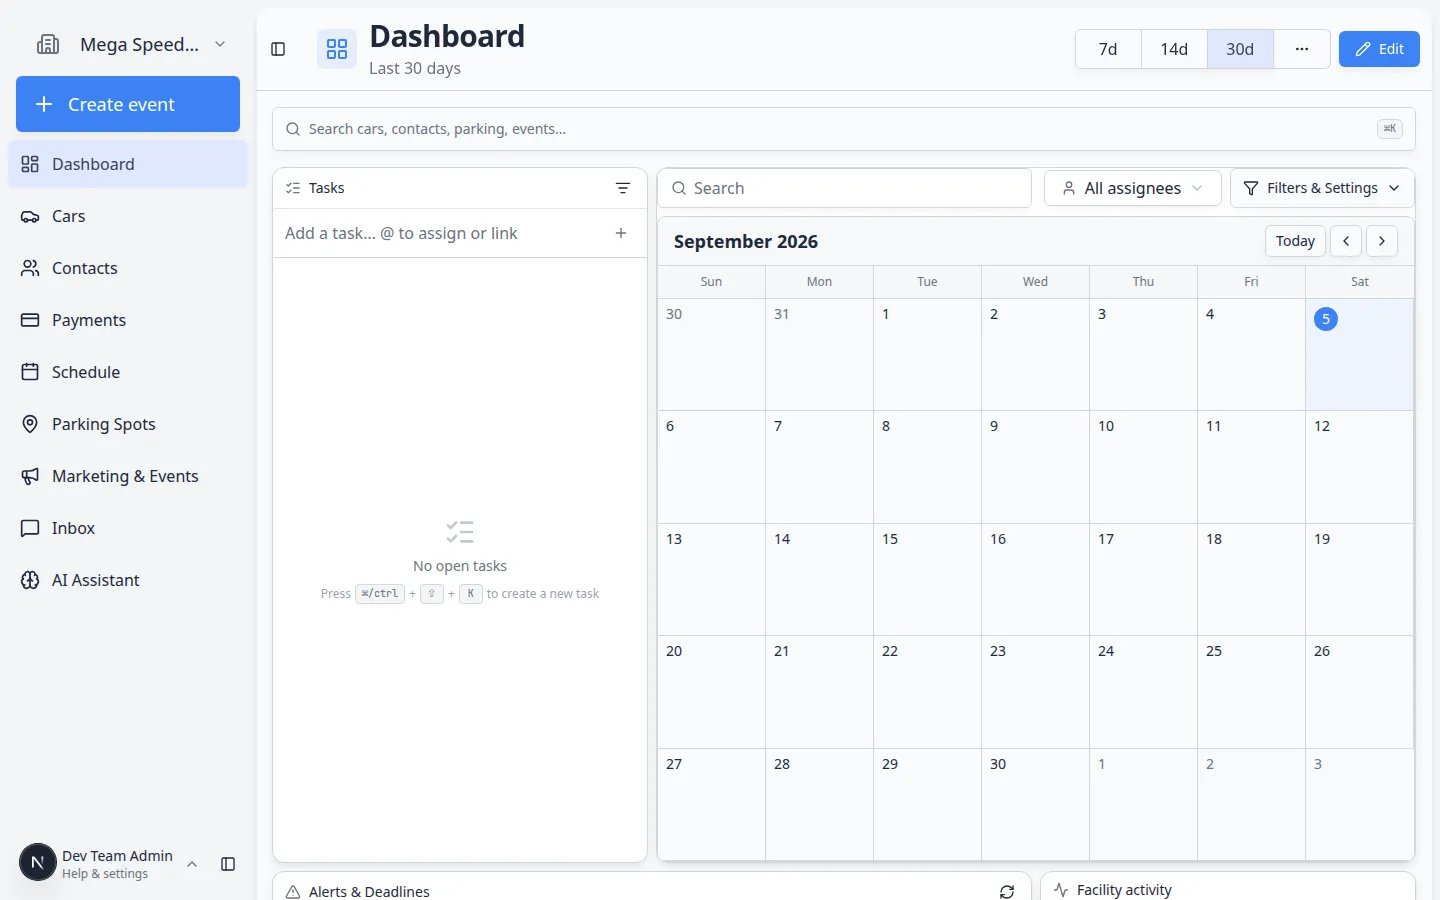 *A populated dashboard shows live facility data. Empty panels usually mean filters, permissions, or missing records—not a broken page.*
## Customize your own layout
In the left sidebar, click **Dashboard** (you may see a small **Beta** badge next to it).
Or go directly to [Dashboard](https://www.carstoragesoftware.com/dashboard/v2).
**Expected result:** The page title at the top says **Dashboard**. You see your current panels (schedule, tasks, parking map, or similar).
To change your personal layout, open [Dashboard in edit mode](https://www.carstoragesoftware.com/dashboard/v2?edit=true).
**Why this matters:** The page switches to layout editing. The subtitle changes to mention dragging panels, and **Save** appears in the top-right corner.
**Expected result:** You see a dashed **Add panel** box above the grid. The top button says **Save** (not **Edit**).
Click the dashed **Add panel** box.
**Expected result:** A window titled **Add panel** opens. It lists groups such as Schedule, Cars, Parking, Charts, Shortcuts, and Alerts.
Click the panel you want (for example **Schedule · calendar** or **Parking map**).
The window closes and the panel appears on your dashboard.
**Tip:** Start with two or three panels you will actually look at every day. You can add more later.
Some panels have a small **gear** icon in the corner while you are in edit mode. Click it to change date range, filters, or how much data the panel shows.
**Why this matters:** A schedule panel set to “today only” looks very different from “this month.” Match the setting to how you use the dashboard.
On a wide screen, drag a panel by its handle to move it. Drag corners or edges to change size when handles appear.
**Expected result:** The layout matches how your team works — for example, schedule on the left and parking on the right.
Click **Save** on the dashboard page.
**Expected result:** You see a short success message at the top of the page (for example **Dashboard layout saved**). Edit mode ends. Your layout is stored for your user account.
*A populated dashboard shows live facility data. Empty panels usually mean filters, permissions, or missing records—not a broken page.*
## Customize your own layout
In the left sidebar, click **Dashboard** (you may see a small **Beta** badge next to it).
Or go directly to [Dashboard](https://www.carstoragesoftware.com/dashboard/v2).
**Expected result:** The page title at the top says **Dashboard**. You see your current panels (schedule, tasks, parking map, or similar).
To change your personal layout, open [Dashboard in edit mode](https://www.carstoragesoftware.com/dashboard/v2?edit=true).
**Why this matters:** The page switches to layout editing. The subtitle changes to mention dragging panels, and **Save** appears in the top-right corner.
**Expected result:** You see a dashed **Add panel** box above the grid. The top button says **Save** (not **Edit**).
Click the dashed **Add panel** box.
**Expected result:** A window titled **Add panel** opens. It lists groups such as Schedule, Cars, Parking, Charts, Shortcuts, and Alerts.
Click the panel you want (for example **Schedule · calendar** or **Parking map**).
The window closes and the panel appears on your dashboard.
**Tip:** Start with two or three panels you will actually look at every day. You can add more later.
Some panels have a small **gear** icon in the corner while you are in edit mode. Click it to change date range, filters, or how much data the panel shows.
**Why this matters:** A schedule panel set to “today only” looks very different from “this month.” Match the setting to how you use the dashboard.
On a wide screen, drag a panel by its handle to move it. Drag corners or edges to change size when handles appear.
**Expected result:** The layout matches how your team works — for example, schedule on the left and parking on the right.
Click **Save** on the dashboard page.
**Expected result:** You see a short success message at the top of the page (for example **Dashboard layout saved**). Edit mode ends. Your layout is stored for your user account.
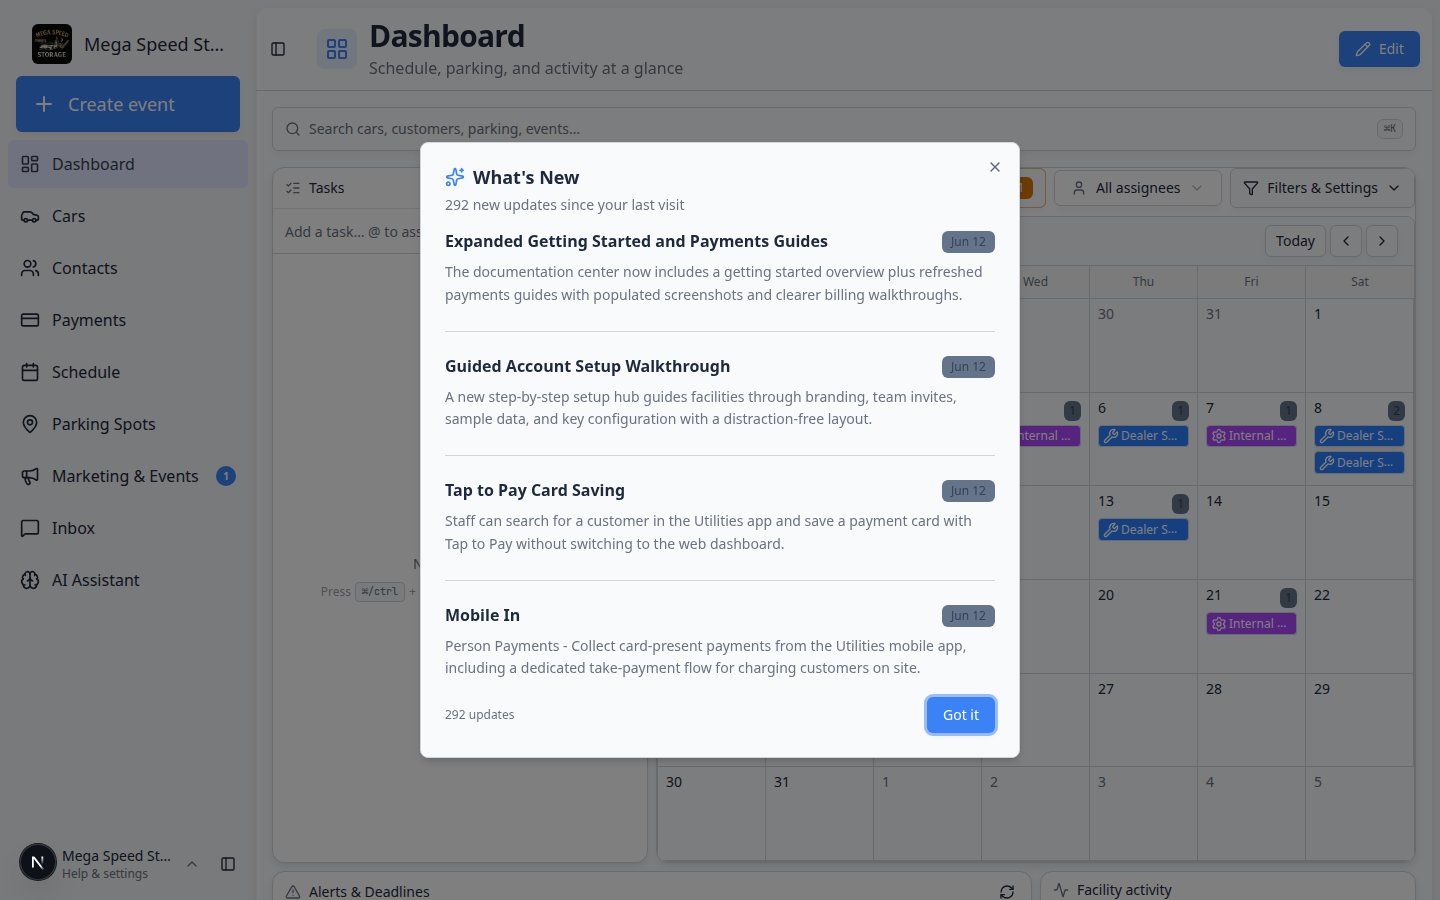 *After **Save**, the page returns to view mode. Your panels stay in place the next time you open [Dashboard](https://www.carstoragesoftware.com/dashboard/v2).*
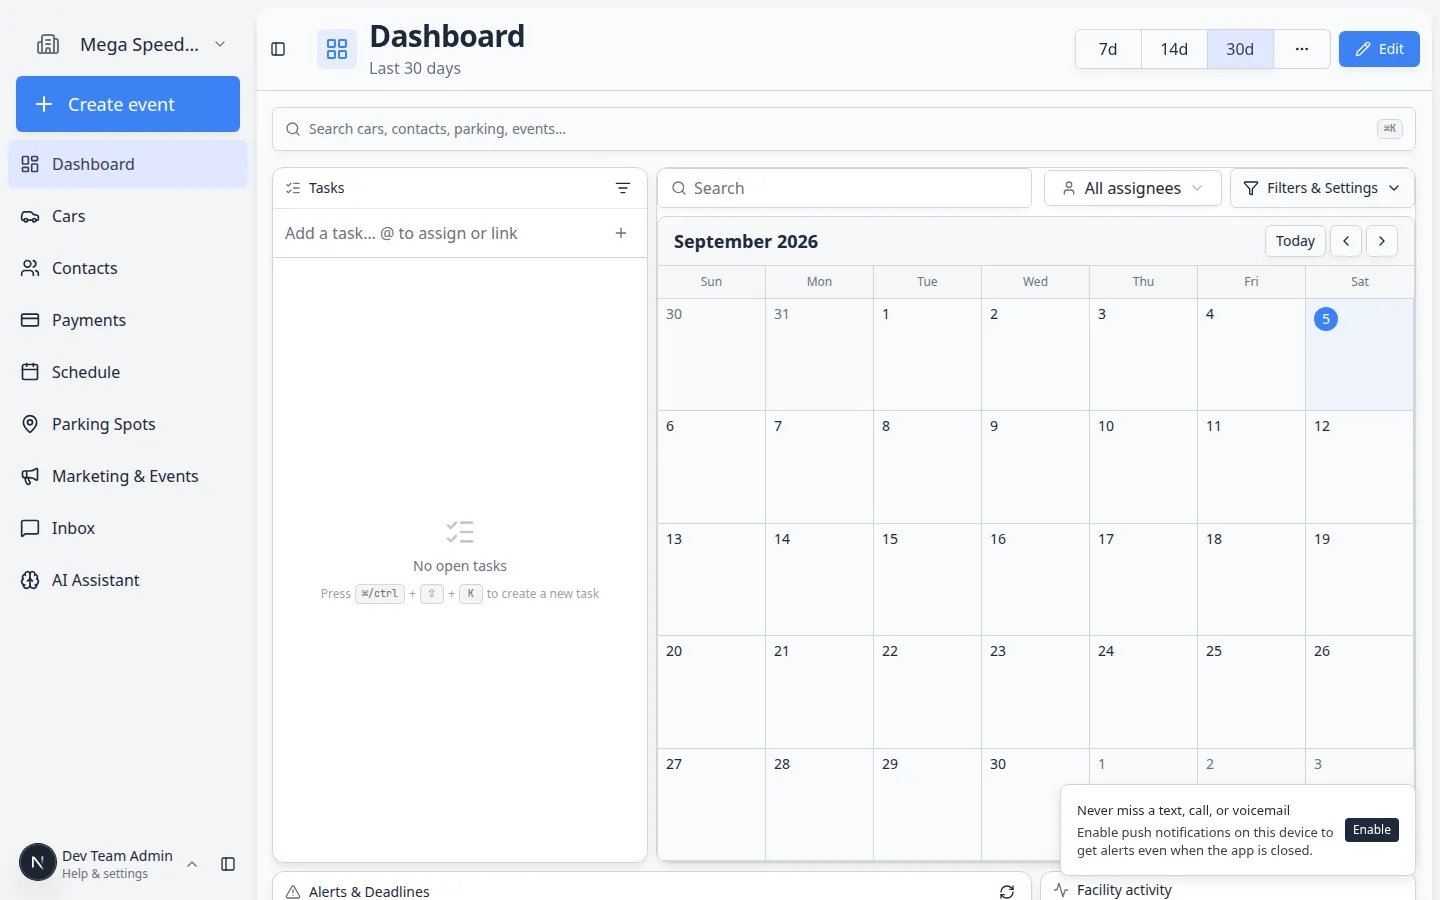 *In edit mode, use **Add panel** to insert views, then drag panels on desktop before you click **Save**.*
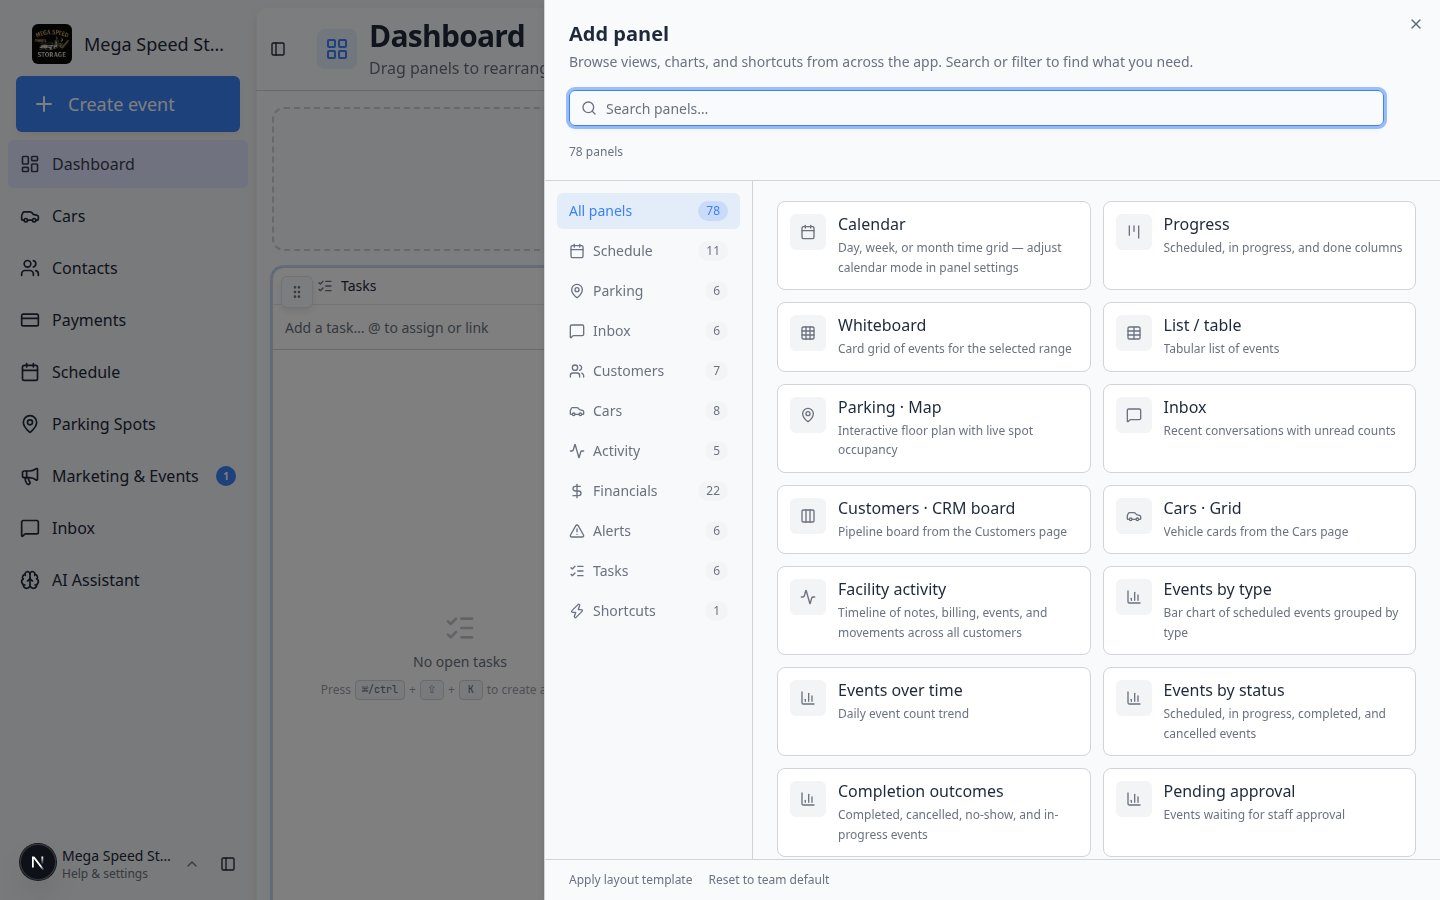 *The **Add panel** window lists views from existing pages. Pick one at a time; you can reopen the window for more panels.*
## Remove a panel you do not need
Open [Dashboard in edit mode](https://www.carstoragesoftware.com/dashboard/v2?edit=true).
**Expected result:** Panels show move handles and remove controls. **Save** appears in the top-right.
On each panel, look for **Remove**, an **X**, or a trash icon (wording varies by panel). Click it for any panel you no longer want.
**Why this matters:** Fewer panels load faster and keep your screen focused on what you check every morning.
Click **Save** to store the smaller layout.
**Expected result:** The panel disappears from your personal dashboard. You can add it back anytime with **Add panel**.
**Removing is not deleting data**
Removing a panel only changes your dashboard layout. It does not delete schedule events, cars, or inbox messages. Open the full page (for example [Schedule](https://www.carstoragesoftware.com/dashboard/schedule)) to work with the underlying records.
## Apply a layout template
Templates replace your current panel arrangement with a tested starter layout. Use them when you prefer not to build from a blank grid.
Open [Dashboard in edit mode](https://www.carstoragesoftware.com/dashboard/v2?edit=true).
Click **Add panel**.
At the bottom of the **Add panel** window, click **Apply layout template**.
**Expected result:** A window titled **Apply layout template** lists **Operations standard**, **Billing focus**, and **Floor operations** with short descriptions.
Click the template that fits your role.
* **Operations standard** — month calendar, facility activity, charts, and parking map.
* **Billing focus** — inbox, events table, quick actions, and CRM-style board.
* **Floor operations** — parking map, progress board, whiteboard, and five-day schedule.
**Why this matters:** You get a full layout in one click, then tweak only what you need.
Click **Save** on the dashboard page.
**Expected result:** Your personal dashboard uses the new template until you change it again.
*The **Add panel** window lists views from existing pages. Pick one at a time; you can reopen the window for more panels.*
## Remove a panel you do not need
Open [Dashboard in edit mode](https://www.carstoragesoftware.com/dashboard/v2?edit=true).
**Expected result:** Panels show move handles and remove controls. **Save** appears in the top-right.
On each panel, look for **Remove**, an **X**, or a trash icon (wording varies by panel). Click it for any panel you no longer want.
**Why this matters:** Fewer panels load faster and keep your screen focused on what you check every morning.
Click **Save** to store the smaller layout.
**Expected result:** The panel disappears from your personal dashboard. You can add it back anytime with **Add panel**.
**Removing is not deleting data**
Removing a panel only changes your dashboard layout. It does not delete schedule events, cars, or inbox messages. Open the full page (for example [Schedule](https://www.carstoragesoftware.com/dashboard/schedule)) to work with the underlying records.
## Apply a layout template
Templates replace your current panel arrangement with a tested starter layout. Use them when you prefer not to build from a blank grid.
Open [Dashboard in edit mode](https://www.carstoragesoftware.com/dashboard/v2?edit=true).
Click **Add panel**.
At the bottom of the **Add panel** window, click **Apply layout template**.
**Expected result:** A window titled **Apply layout template** lists **Operations standard**, **Billing focus**, and **Floor operations** with short descriptions.
Click the template that fits your role.
* **Operations standard** — month calendar, facility activity, charts, and parking map.
* **Billing focus** — inbox, events table, quick actions, and CRM-style board.
* **Floor operations** — parking map, progress board, whiteboard, and five-day schedule.
**Why this matters:** You get a full layout in one click, then tweak only what you need.
Click **Save** on the dashboard page.
**Expected result:** Your personal dashboard uses the new template until you change it again.
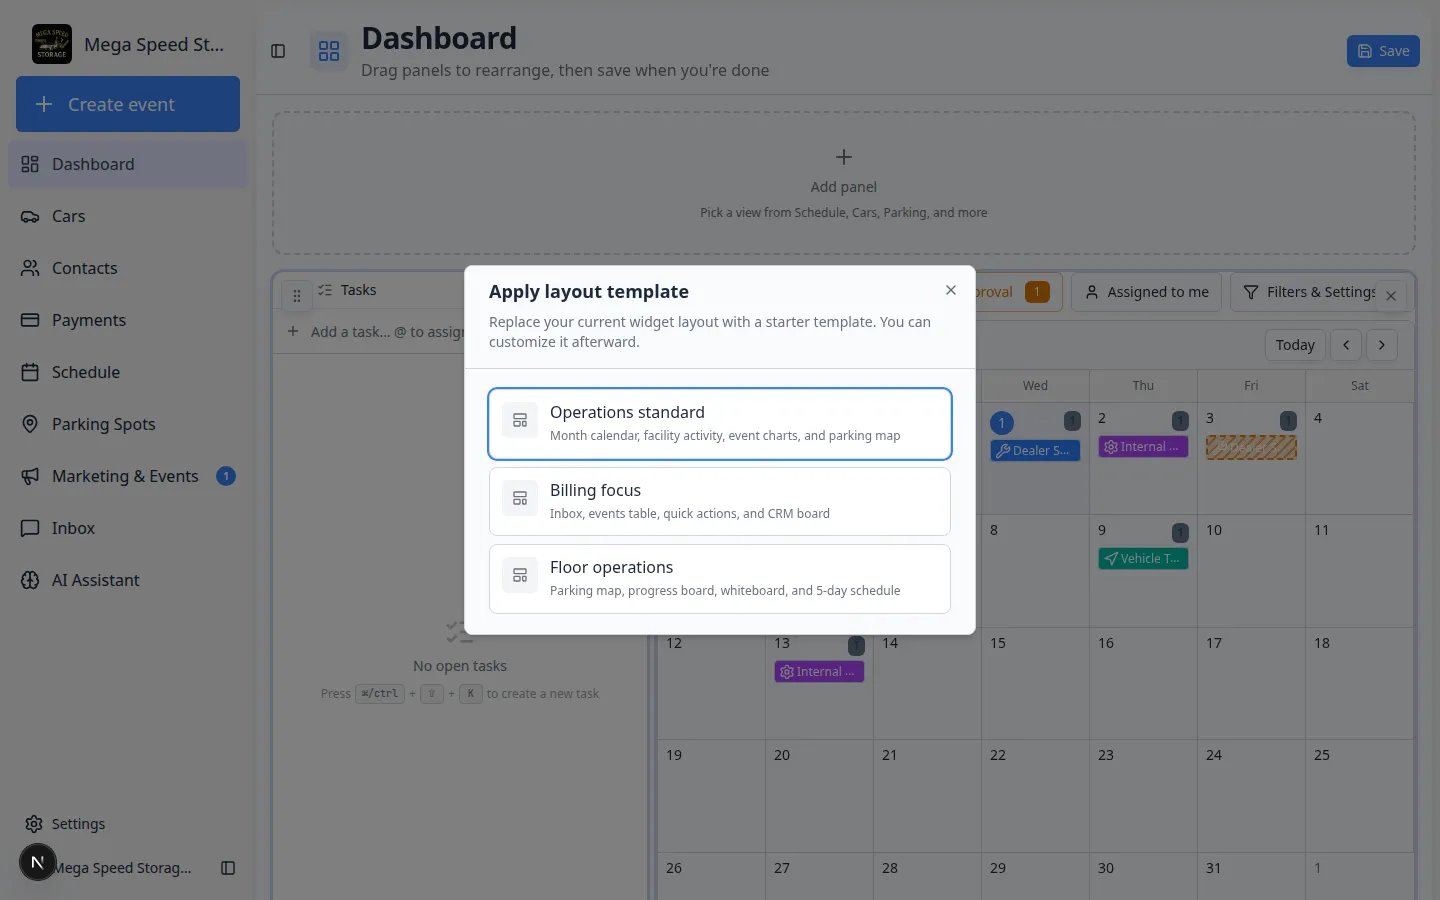 *Templates are starting points. After applying one, you can still add, remove, or move panels.*
## Reset to the team default
If your personal layout feels wrong, you can go back to what your facility admin set for the team.
Open [Dashboard in edit mode](https://www.carstoragesoftware.com/dashboard/v2?edit=true), then click **Add panel**.
At the bottom of the **Add panel** window, click **Reset to team default**.
**Expected result:** Your dashboard matches the team default layout. Any personal changes you had saved are replaced.
If you are still in edit mode, click **Save** when you are finished reviewing the layout.
**Reset is personal**
**Reset to team default** affects **your** dashboard view. It does not change the team default that admins configure in Settings.
## Team admin: set the default layout for new staff
Team admins control what **new teammates** see on [Dashboard](https://www.carstoragesoftware.com/dashboard/v2) before they customize their own view.
Go to [Settings → Team](https://www.carstoragesoftware.com/dashboard/settings/team).
Scroll to the card titled **Default dashboard layout**.
**Expected result:** You see a preview grid and **Save team default** (on desktop you can drag panels here too).
Use **Add panel** the same way as on your personal dashboard. Drag and resize on desktop.
**Why this matters:** New hires see a layout that matches how your facility actually runs — not a generic empty screen.
Click **Save team default**.
**Expected result:** Future team members start from this layout until they open [Dashboard in edit mode](https://www.carstoragesoftware.com/dashboard/v2?edit=true) and save their own.
*Templates are starting points. After applying one, you can still add, remove, or move panels.*
## Reset to the team default
If your personal layout feels wrong, you can go back to what your facility admin set for the team.
Open [Dashboard in edit mode](https://www.carstoragesoftware.com/dashboard/v2?edit=true), then click **Add panel**.
At the bottom of the **Add panel** window, click **Reset to team default**.
**Expected result:** Your dashboard matches the team default layout. Any personal changes you had saved are replaced.
If you are still in edit mode, click **Save** when you are finished reviewing the layout.
**Reset is personal**
**Reset to team default** affects **your** dashboard view. It does not change the team default that admins configure in Settings.
## Team admin: set the default layout for new staff
Team admins control what **new teammates** see on [Dashboard](https://www.carstoragesoftware.com/dashboard/v2) before they customize their own view.
Go to [Settings → Team](https://www.carstoragesoftware.com/dashboard/settings/team).
Scroll to the card titled **Default dashboard layout**.
**Expected result:** You see a preview grid and **Save team default** (on desktop you can drag panels here too).
Use **Add panel** the same way as on your personal dashboard. Drag and resize on desktop.
**Why this matters:** New hires see a layout that matches how your facility actually runs — not a generic empty screen.
Click **Save team default**.
**Expected result:** Future team members start from this layout until they open [Dashboard in edit mode](https://www.carstoragesoftware.com/dashboard/v2?edit=true) and save their own.
 *Only team admins see **Default dashboard layout** on [Settings → Team](https://www.carstoragesoftware.com/dashboard/settings/team).*
## Create an event from the dashboard
Scheduling work still happens on the full Schedule page or from **Create event**.
* Use the **Quick actions** panel on your dashboard when you added that shortcut.
* Click **Create event** in the sidebar to open [Create event](https://www.carstoragesoftware.com/dashboard).
* Open [Schedule](https://www.carstoragesoftware.com/dashboard/schedule) for the full calendar, filters, and booking tools. See [Create an appointment](/docs/schedule/create-an-appointment).
## Common mistakes to avoid
**Looking for an Edit button?**
Personal layout changes start from [Dashboard in edit mode](https://www.carstoragesoftware.com/dashboard/v2?edit=true). The page shows **Save** in the top-right while you rearrange panels. Bookmark that link if you customize often.
**A panel looks empty**
Check three things before you assume the panel is broken:
1. **Your role** — can you open the full page (for example [Schedule](https://www.carstoragesoftware.com/dashboard/schedule) or [Payments](https://www.carstoragesoftware.com/dashboard/payments/invoices))?
2. **Date range** — some panels have a gear icon in edit mode to change **Today** vs **This week**.
3. **Records** — new facilities need at least one customer, car, or event before lists and charts have data. Finish [Prepare your first customer and car](/docs/basics/prepare-your-first-customer-and-car) if panels stay empty.
**Changes on phone vs desktop**
On phones you can reorder panels in edit mode, but dragging and resizing the grid works best on a desktop. Admins configure the **team default** from desktop as well.
For quick phone access to **Create event** instead of the widget dashboard, see [Install the mobile app](/docs/basics/install-the-mobile-app).
## What success looks like
When your dashboard is set up well:
* You open [Dashboard](https://www.carstoragesoftware.com/dashboard/v2) once each morning and see today’s schedule, parking, or inbox without clicking five sidebar links.
* New teammates start from a sensible **team default** layout instead of a blank screen.
* Panels show live data — not empty placeholders — because your facility has customers, cars, and events in the system.
* You know layout editing starts from [Dashboard in edit mode](https://www.carstoragesoftware.com/dashboard/v2?edit=true) and ends with **Save**.
## Troubleshooting
**I do not see Dashboard in the sidebar**
Your role may not include access to this beta page yet. Ask a team admin to review permissions in [Settings → Team](https://www.carstoragesoftware.com/dashboard/settings/team). You can still use [Create event](https://www.carstoragesoftware.com/dashboard) and the rest of the sidebar.
**Save failed**
Wait for the page to finish loading, then try **Save** again. If it still fails, refresh the browser tab and re-enter edit mode. Ask support if the problem continues.
## What to do next
* Brand new to the app? Continue with [Getting started overview](/docs/basics/overview) for the full onboarding path.
* Need a tour of every sidebar item? Read [Learn the dashboard](/docs/basics/learn-the-dashboard).
* Start vehicle work from large buttons instead? Use [Use the Create event home page](/docs/basics/use-the-create-event-home) or [Install the mobile app](/docs/basics/install-the-mobile-app) for phone shortcuts.
* Still setting up the workspace? Use [Complete the Setup Guide](/docs/basics/complete-the-setup-guide).
* Ready for daily operations? Open [Schedule overview](/docs/schedule/overview) or [Parking Spots overview](/docs/parking-spots/overview).
## Related topics
- [Use Inbox from your Overview dashboard](/docs/inbox/use-inbox-from-your-overview-dashboard.md)
- [Inbox overview](/docs/inbox/overview.md)
- [Customize Create event screen layout](/docs/events/customize-create-event-screen-layout.md)
- [Learn the dashboard](/docs/basics/learn-the-dashboard.md)
- [Getting started overview](/docs/basics/overview.md)
This documentation is built and hosted on [Mintlify](https://mintlify.com), a developer documentation platform.
*Only team admins see **Default dashboard layout** on [Settings → Team](https://www.carstoragesoftware.com/dashboard/settings/team).*
## Create an event from the dashboard
Scheduling work still happens on the full Schedule page or from **Create event**.
* Use the **Quick actions** panel on your dashboard when you added that shortcut.
* Click **Create event** in the sidebar to open [Create event](https://www.carstoragesoftware.com/dashboard).
* Open [Schedule](https://www.carstoragesoftware.com/dashboard/schedule) for the full calendar, filters, and booking tools. See [Create an appointment](/docs/schedule/create-an-appointment).
## Common mistakes to avoid
**Looking for an Edit button?**
Personal layout changes start from [Dashboard in edit mode](https://www.carstoragesoftware.com/dashboard/v2?edit=true). The page shows **Save** in the top-right while you rearrange panels. Bookmark that link if you customize often.
**A panel looks empty**
Check three things before you assume the panel is broken:
1. **Your role** — can you open the full page (for example [Schedule](https://www.carstoragesoftware.com/dashboard/schedule) or [Payments](https://www.carstoragesoftware.com/dashboard/payments/invoices))?
2. **Date range** — some panels have a gear icon in edit mode to change **Today** vs **This week**.
3. **Records** — new facilities need at least one customer, car, or event before lists and charts have data. Finish [Prepare your first customer and car](/docs/basics/prepare-your-first-customer-and-car) if panels stay empty.
**Changes on phone vs desktop**
On phones you can reorder panels in edit mode, but dragging and resizing the grid works best on a desktop. Admins configure the **team default** from desktop as well.
For quick phone access to **Create event** instead of the widget dashboard, see [Install the mobile app](/docs/basics/install-the-mobile-app).
## What success looks like
When your dashboard is set up well:
* You open [Dashboard](https://www.carstoragesoftware.com/dashboard/v2) once each morning and see today’s schedule, parking, or inbox without clicking five sidebar links.
* New teammates start from a sensible **team default** layout instead of a blank screen.
* Panels show live data — not empty placeholders — because your facility has customers, cars, and events in the system.
* You know layout editing starts from [Dashboard in edit mode](https://www.carstoragesoftware.com/dashboard/v2?edit=true) and ends with **Save**.
## Troubleshooting
**I do not see Dashboard in the sidebar**
Your role may not include access to this beta page yet. Ask a team admin to review permissions in [Settings → Team](https://www.carstoragesoftware.com/dashboard/settings/team). You can still use [Create event](https://www.carstoragesoftware.com/dashboard) and the rest of the sidebar.
**Save failed**
Wait for the page to finish loading, then try **Save** again. If it still fails, refresh the browser tab and re-enter edit mode. Ask support if the problem continues.
## What to do next
* Brand new to the app? Continue with [Getting started overview](/docs/basics/overview) for the full onboarding path.
* Need a tour of every sidebar item? Read [Learn the dashboard](/docs/basics/learn-the-dashboard).
* Start vehicle work from large buttons instead? Use [Use the Create event home page](/docs/basics/use-the-create-event-home) or [Install the mobile app](/docs/basics/install-the-mobile-app) for phone shortcuts.
* Still setting up the workspace? Use [Complete the Setup Guide](/docs/basics/complete-the-setup-guide).
* Ready for daily operations? Open [Schedule overview](/docs/schedule/overview) or [Parking Spots overview](/docs/parking-spots/overview).
## Related topics
- [Use Inbox from your Overview dashboard](/docs/inbox/use-inbox-from-your-overview-dashboard.md)
- [Inbox overview](/docs/inbox/overview.md)
- [Customize Create event screen layout](/docs/events/customize-create-event-screen-layout.md)
- [Learn the dashboard](/docs/basics/learn-the-dashboard.md)
- [Getting started overview](/docs/basics/overview.md)
This documentation is built and hosted on [Mintlify](https://mintlify.com), a developer documentation platform.