> ## Documentation Index
> Fetch the complete documentation index at: https://www.carstoragesoftware.com/docs/llms.txt
> Use this file to discover all available pages before exploring further.
# Prepare your first customer and car
> Add the first customer and vehicle records your team needs so daily work starts with clean information.
Use this guide when your team is ready to enter real customer and vehicle information for the first time.
Part of the [Getting started](/docs/getting-started) path — complete [Set up your facility profile](/docs/basics/set-up-your-facility-profile) first when your manager asks for public details to be correct.
Customers and cars should be added early because many other workflows depend on them. A car can be linked to a customer, parking spot, appointment, invoice, contract, photo session, and message history.
**Already used the onboarding wizard?**
If you imported customers and cars during [Complete the onboarding wizard](/docs/basics/complete-the-onboarding-wizard), search [Contacts](https://www.carstoragesoftware.com/dashboard/contacts) and [Cars](https://www.carstoragesoftware.com/dashboard/cars) first — your records may already exist. Use this guide to add or fix individual records.
## What you will accomplish
You will prepare the information you need, add a customer, add a car, and check that the records are easy to find afterward.
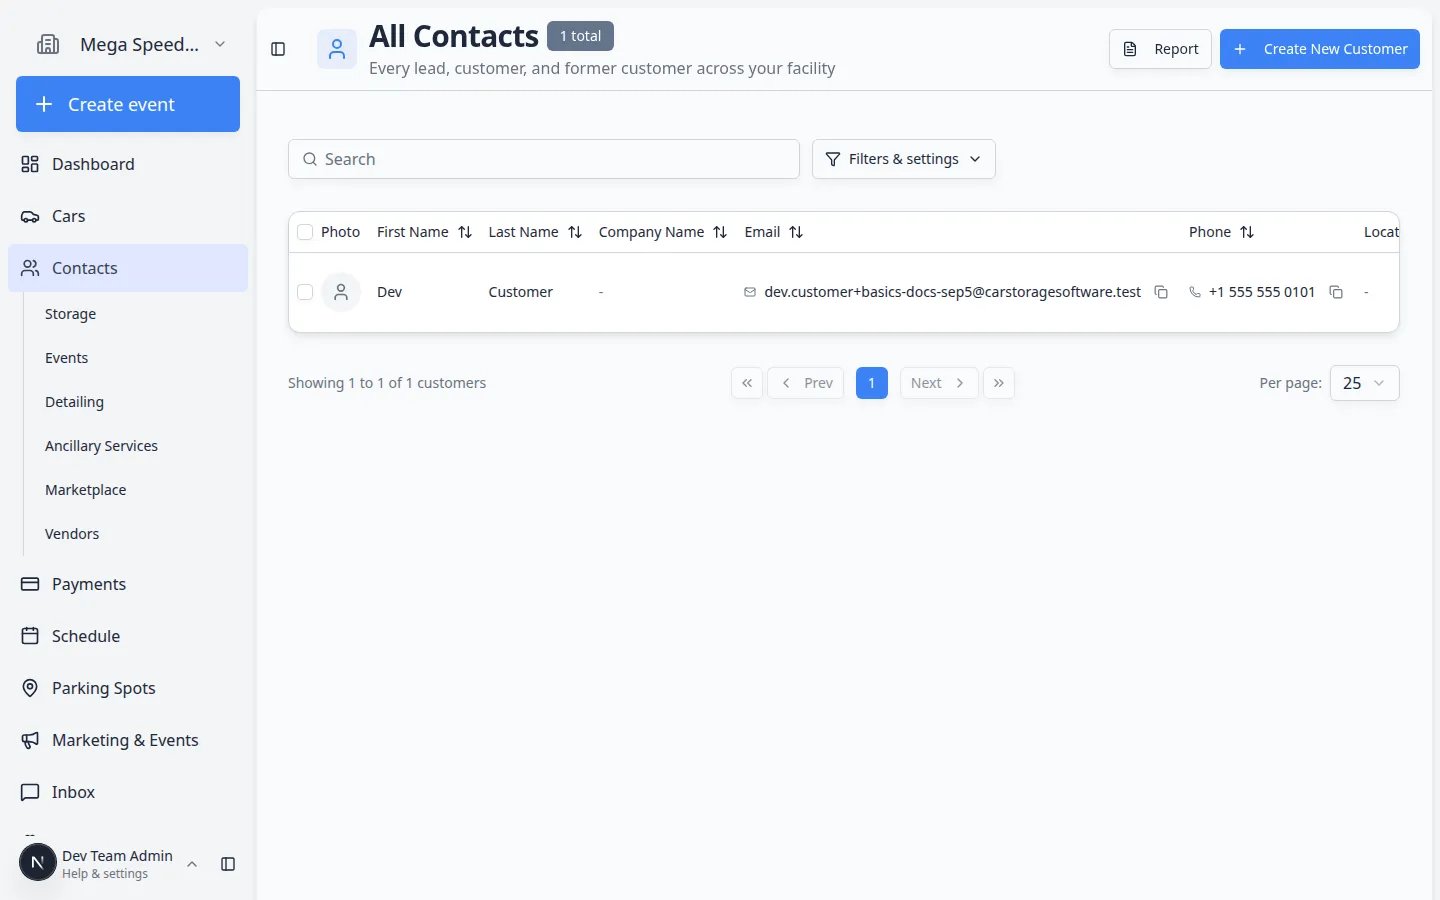 *Start with Contacts so each vehicle can be connected to the right owner.*
## Before you start
Gather the information you know is correct. You can add more later.
* Customer name
* Customer email address and phone number, if available
* Vehicle year, make, and model
* VIN or license plate, if available
* Any notes your staff needs to identify the customer or car correctly
**Why customers come first**
Adding the customer first lets you connect the vehicle to the correct owner while creating the car record. This helps prevent confusion later.
## Step 1: Search before creating anything
Go to [Contacts](https://www.carstoragesoftware.com/dashboard/contacts).
**Expected result:** You should see the customer list.
Use the search box at the top of [Contacts](https://www.carstoragesoftware.com/dashboard/contacts). Type the customer's name, email address, or phone number.
*Start with Contacts so each vehicle can be connected to the right owner.*
## Before you start
Gather the information you know is correct. You can add more later.
* Customer name
* Customer email address and phone number, if available
* Vehicle year, make, and model
* VIN or license plate, if available
* Any notes your staff needs to identify the customer or car correctly
**Why customers come first**
Adding the customer first lets you connect the vehicle to the correct owner while creating the car record. This helps prevent confusion later.
## Step 1: Search before creating anything
Go to [Contacts](https://www.carstoragesoftware.com/dashboard/contacts).
**Expected result:** You should see the customer list.
Use the search box at the top of [Contacts](https://www.carstoragesoftware.com/dashboard/contacts). Type the customer's name, email address, or phone number.
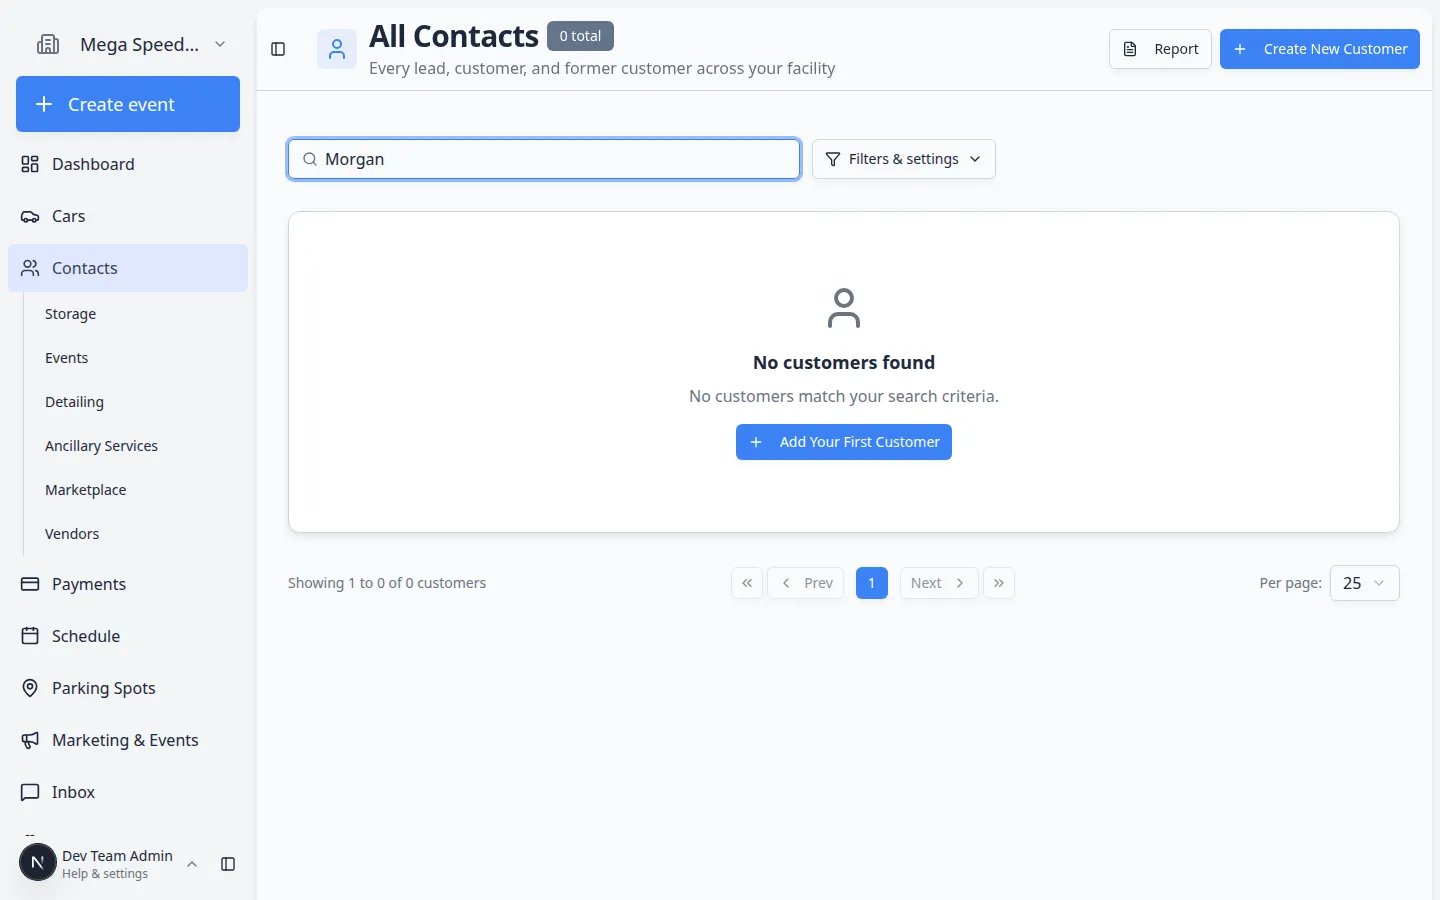 *Search before you create. If the customer already exists, open their record instead of making a duplicate.*
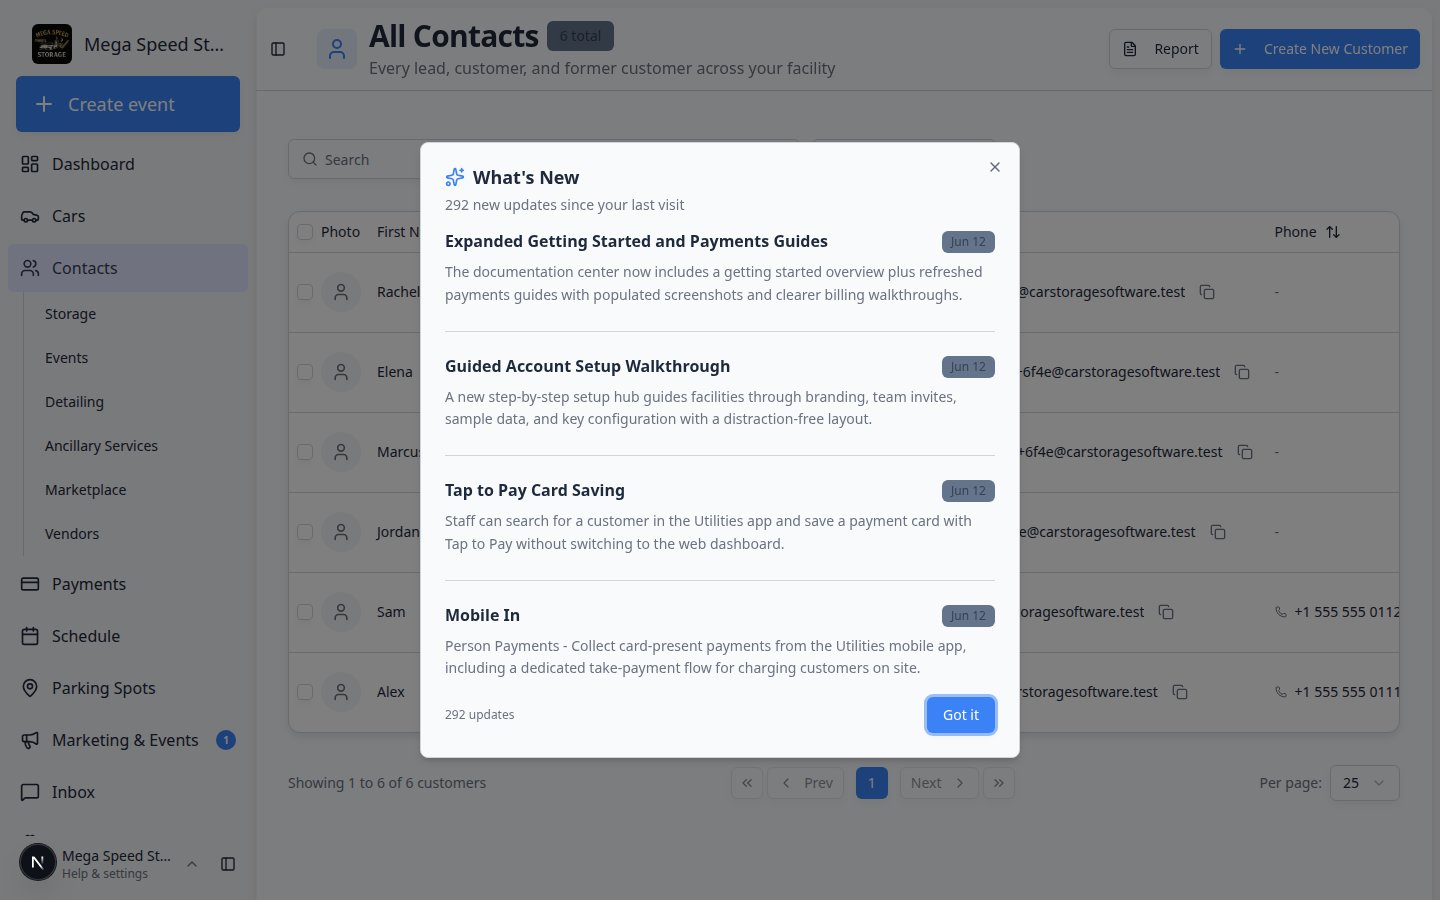 *Matching rows appear as you type. Click a name to open an existing record instead of creating a duplicate.*
**Why this matters:** The customer may already exist if another teammate entered them earlier or if they were imported during onboarding.
If the customer already exists, open that customer instead of creating a duplicate.
If you cannot find the customer, continue to the next step.
## Step 2: Add the customer
On [Contacts](https://www.carstoragesoftware.com/dashboard/contacts), click **Create New Customer** in the top-right area of the page.
**Expected result:** A customer form opens in a dialog window.
Fill in the customer's name and any reliable contact details you have.
If you do not know an optional field, leave it blank. Do not guess.
*Matching rows appear as you type. Click a name to open an existing record instead of creating a duplicate.*
**Why this matters:** The customer may already exist if another teammate entered them earlier or if they were imported during onboarding.
If the customer already exists, open that customer instead of creating a duplicate.
If you cannot find the customer, continue to the next step.
## Step 2: Add the customer
On [Contacts](https://www.carstoragesoftware.com/dashboard/contacts), click **Create New Customer** in the top-right area of the page.
**Expected result:** A customer form opens in a dialog window.
Fill in the customer's name and any reliable contact details you have.
If you do not know an optional field, leave it blank. Do not guess.
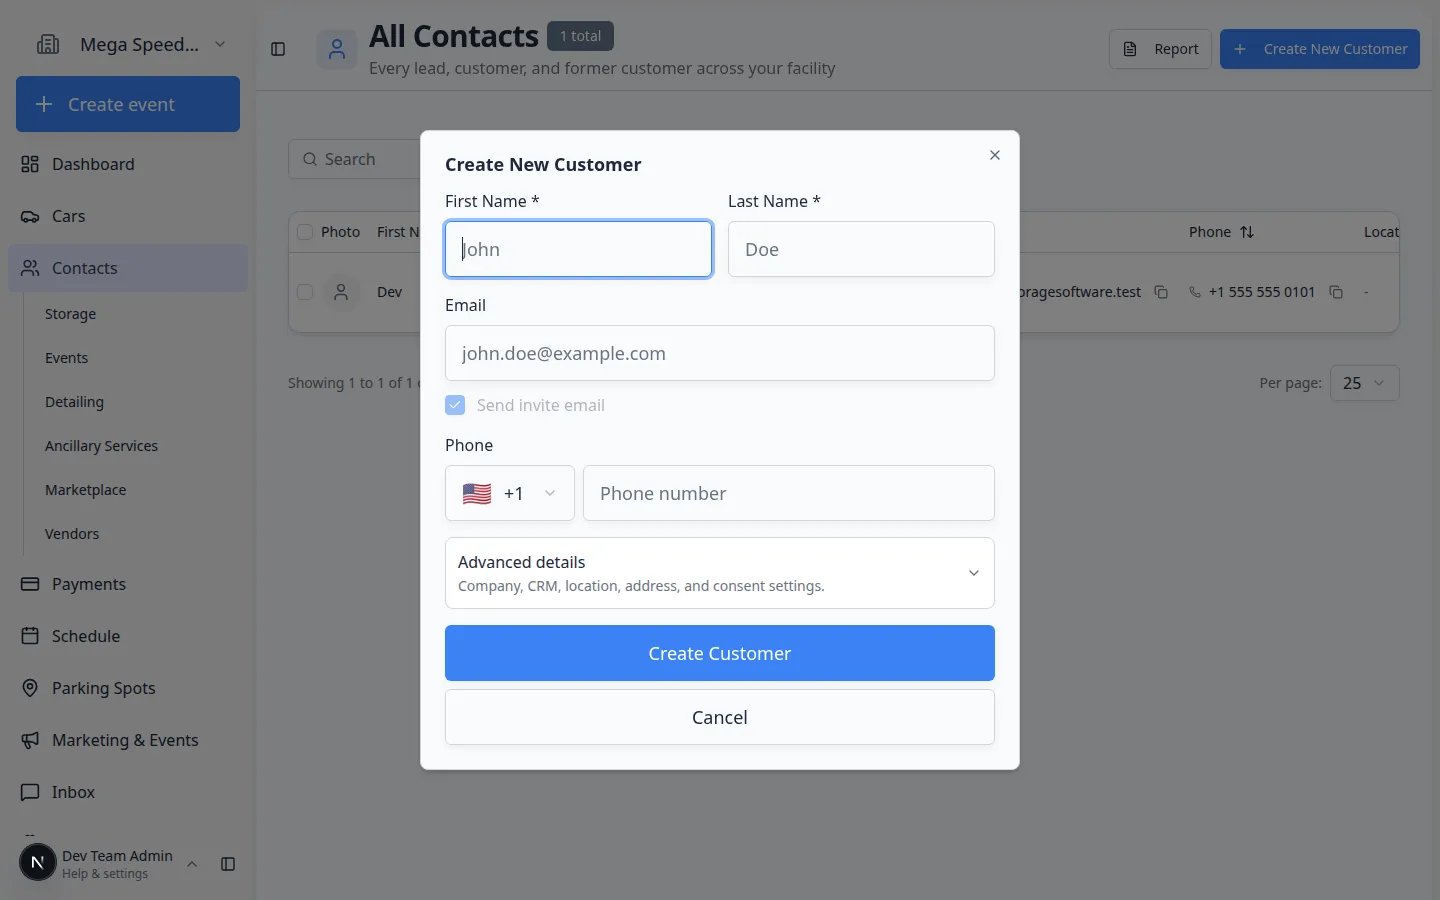 *The Create New Customer dialog collects the details your team needs to reach the owner and find the record later.*
Review the information, then save the customer.
**Expected result:** The customer appears in the Contacts list or opens on a customer detail page.
For a more detailed walkthrough, read [Add a customer](/docs/contacts/add-a-customer).
## Step 3: Add the car
*The Create New Customer dialog collects the details your team needs to reach the owner and find the record later.*
Review the information, then save the customer.
**Expected result:** The customer appears in the Contacts list or opens on a customer detail page.
For a more detailed walkthrough, read [Add a customer](/docs/contacts/add-a-customer).
## Step 3: Add the car
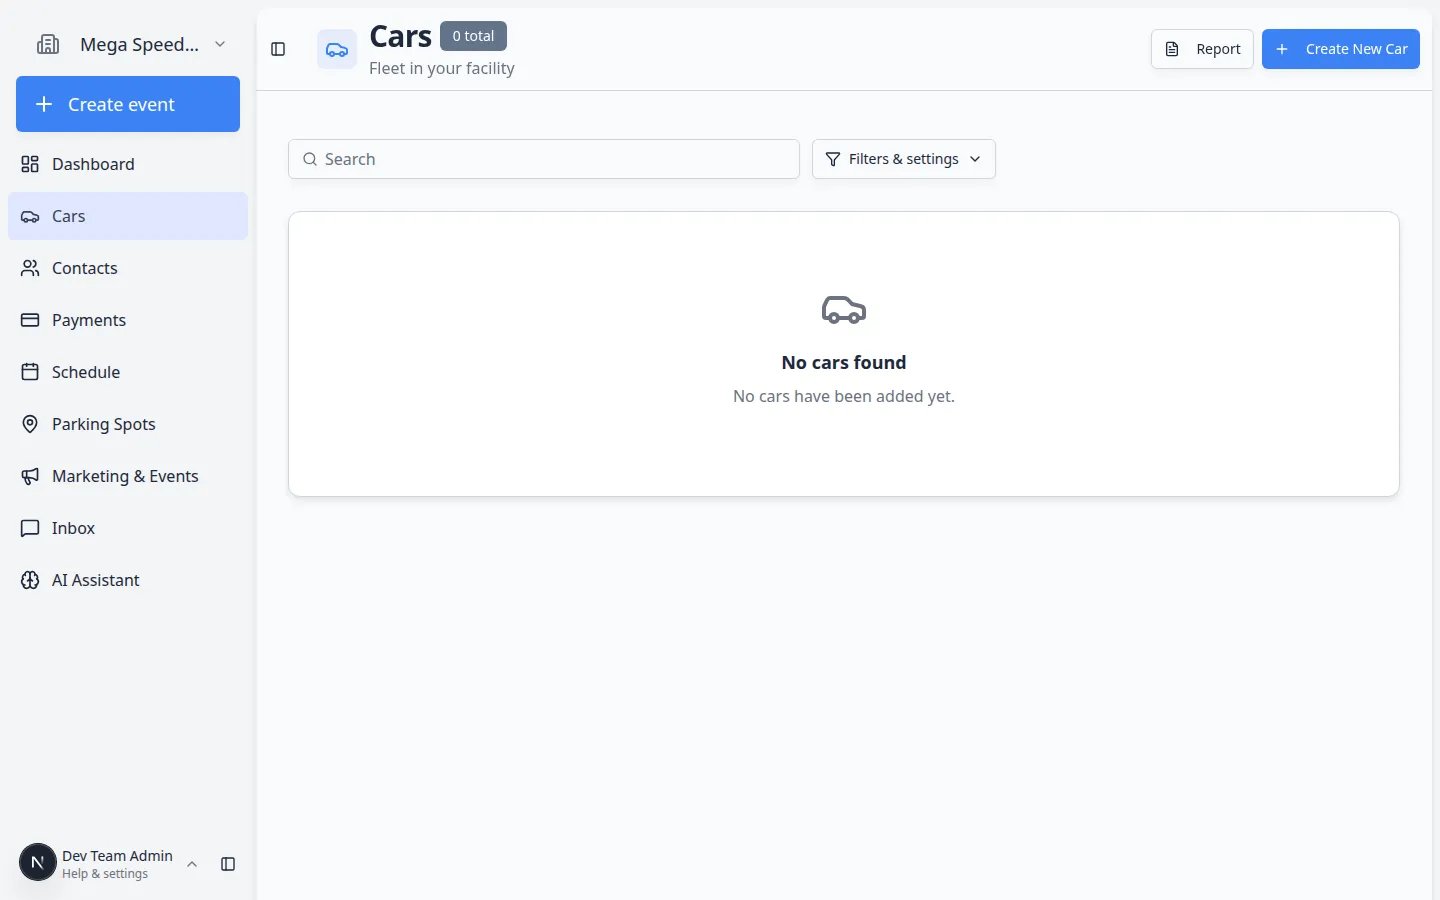 *After the customer exists, add the car from the Cars page and connect it to the owner.*
Go to [Cars](https://www.carstoragesoftware.com/dashboard/cars).
**Expected result:** You should see the vehicle list.
Use the search box at the top of [Cars](https://www.carstoragesoftware.com/dashboard/cars). Search by make, model, year, VIN, license plate, stock number, or customer name.
*After the customer exists, add the car from the Cars page and connect it to the owner.*
Go to [Cars](https://www.carstoragesoftware.com/dashboard/cars).
**Expected result:** You should see the vehicle list.
Use the search box at the top of [Cars](https://www.carstoragesoftware.com/dashboard/cars). Search by make, model, year, VIN, license plate, stock number, or customer name.
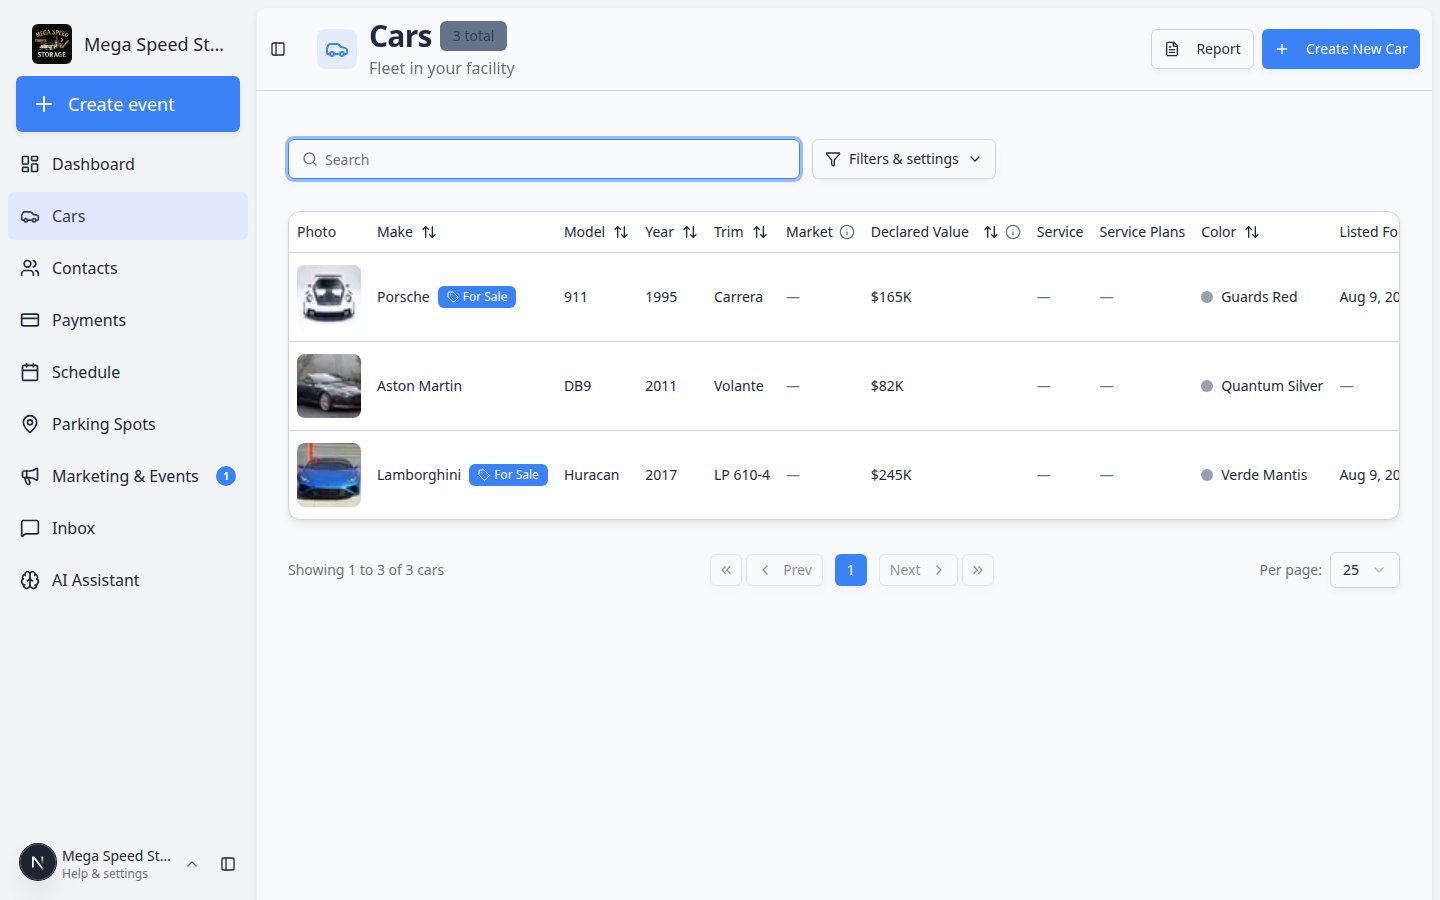 *Search before **Create New Car**. Imported or teammate-created vehicles may already be in the list.*
**Why this matters:** A car may already exist if it was imported, added during intake, or created by another teammate.
If the car is not already listed, click **Create New Car**.
**Expected result:** The app opens the car creation flow. You may see choices for how to add the vehicle (for example, manual entry or lookup tools your facility uses).
*Search before **Create New Car**. Imported or teammate-created vehicles may already be in the list.*
**Why this matters:** A car may already exist if it was imported, added during intake, or created by another teammate.
If the car is not already listed, click **Create New Car**.
**Expected result:** The app opens the car creation flow. You may see choices for how to add the vehicle (for example, manual entry or lookup tools your facility uses).
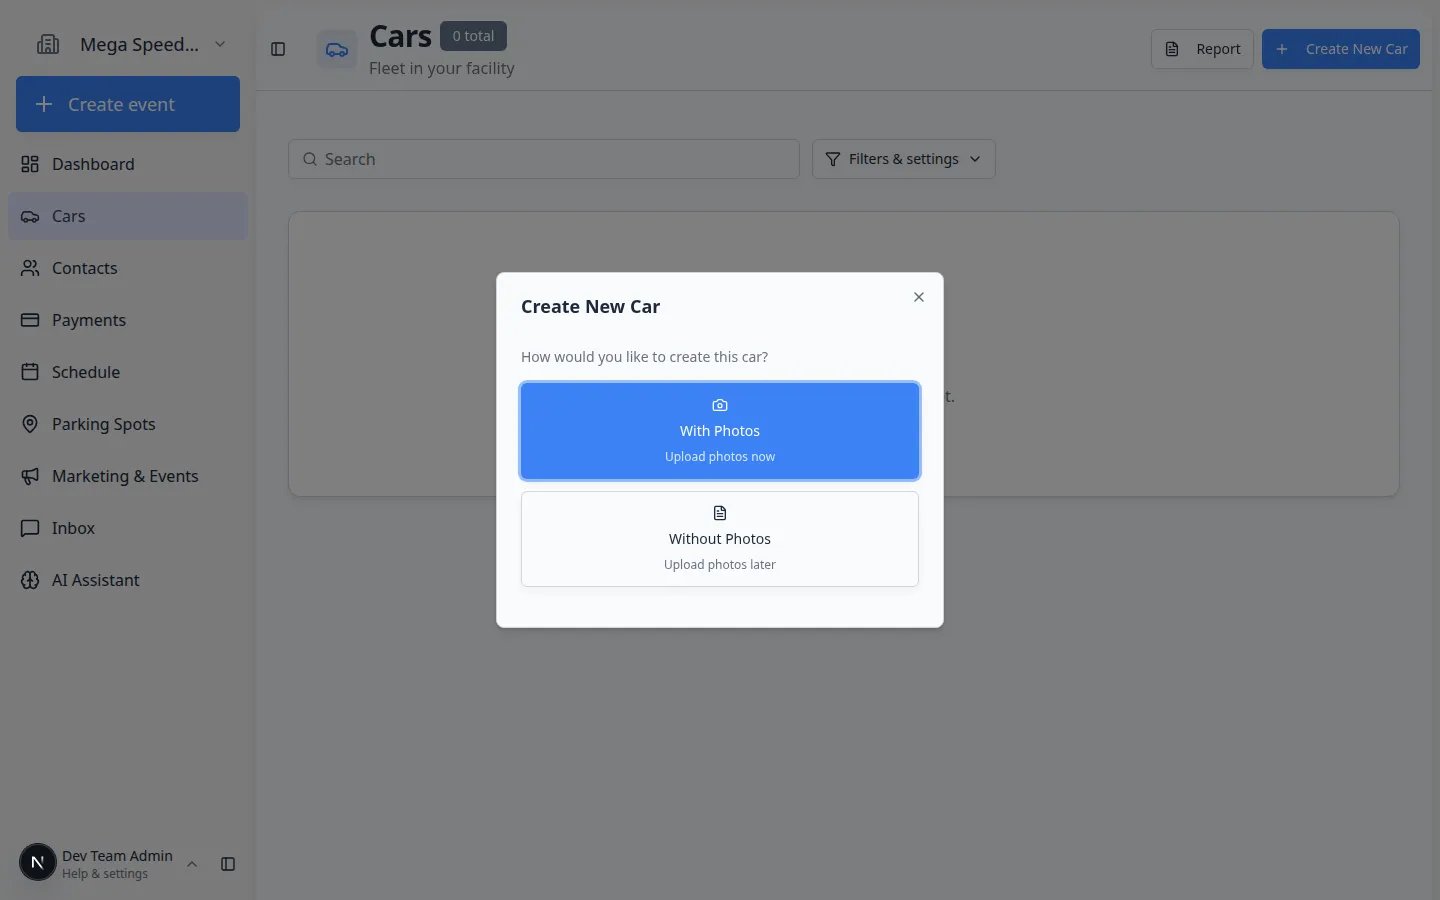 *Follow the on-screen steps to enter vehicle details and connect the car to the customer you created.*
Add the year, make, model, VIN, license plate, color, and any other details your team uses to identify the car.
If you do not know the VIN or plate yet, enter what you know and return later.
Choose the customer you created earlier as the owner or related customer.
**Expected result:** The car record and customer record are connected.
Review the details, then save.
**Expected result:** The car appears in [Cars](https://www.carstoragesoftware.com/dashboard/cars) and can be found by search.
For a field-by-field walkthrough, read [Add a car](/docs/cars/add-a-car).
## Step 4: Check your work
Go to [Contacts](https://www.carstoragesoftware.com/dashboard/contacts) and search for the customer's name.
**Expected result:** You can quickly find the customer record.
Click the customer name to open their detail page. Scroll to **Customer's Cars** (or a similar cars section) and confirm the vehicle is listed.
*Follow the on-screen steps to enter vehicle details and connect the car to the customer you created.*
Add the year, make, model, VIN, license plate, color, and any other details your team uses to identify the car.
If you do not know the VIN or plate yet, enter what you know and return later.
Choose the customer you created earlier as the owner or related customer.
**Expected result:** The car record and customer record are connected.
Review the details, then save.
**Expected result:** The car appears in [Cars](https://www.carstoragesoftware.com/dashboard/cars) and can be found by search.
For a field-by-field walkthrough, read [Add a car](/docs/cars/add-a-car).
## Step 4: Check your work
Go to [Contacts](https://www.carstoragesoftware.com/dashboard/contacts) and search for the customer's name.
**Expected result:** You can quickly find the customer record.
Click the customer name to open their detail page. Scroll to **Customer's Cars** (or a similar cars section) and confirm the vehicle is listed.
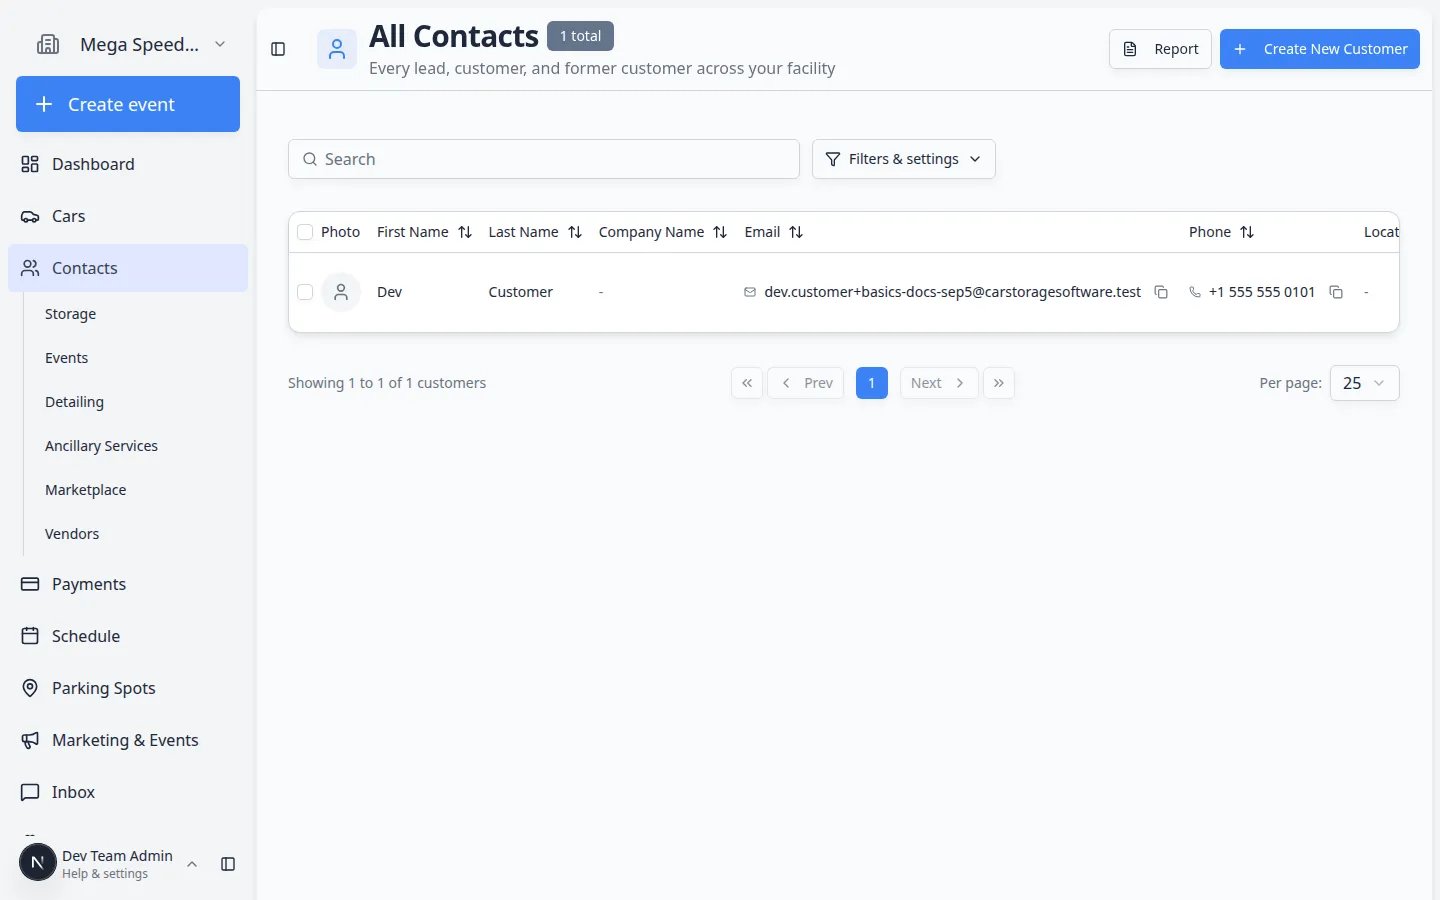 *On the customer detail page, linked cars should appear in the cars section so your team knows the connection is correct.*
**Why this matters:** This connection helps your team schedule work, collect payments, manage documents, and communicate with the right person.
Go to [Cars](https://www.carstoragesoftware.com/dashboard/cars) and search for the car by make, model, VIN, plate, or customer name.
**Expected result:** You can quickly find the car record and see the correct customer on the car page.
## Common mistakes and how to fix them
**I accidentally made a duplicate customer**
Stop adding more information to the duplicate. Use the record that has the most correct history, and ask a manager how your facility wants duplicates handled. Read [Handle duplicate or merged customer records](/docs/contacts/handle-duplicate-or-merged-customer-records).
**I do not know the VIN yet**
That is okay. Save the record with the details you know, then add the VIN when you have it. Make sure the car can still be identified by year, make, model, color, customer, or plate.
**The car belongs to a business, family, or multiple people**
Start with the main person or business your facility bills or contacts most often. Then use customer contacts, notes, or related fields to add other people as needed. Read [Manage additional contacts](/docs/contacts/manage-additional-contacts) and [Invite a customer to the portal](/docs/contacts/invite-a-customer-to-the-portal) when the customer needs portal access.
**I created the car before the customer**
Open the car record and connect it to the correct customer, or ask a manager if you are unsure which owner to choose. Going forward, add the customer first.
## Import instead of typing one by one (optional)
If your facility has a spreadsheet with many customers and cars, you may import them instead of entering each record manually.
Go to [Import Data](https://www.carstoragesoftware.com/dashboard/import).
**Expected result:** You see upload options and may be able to download a template file.
Read [Import customers and cars](/docs/contacts/import-customers-and-cars) for column names, file format, and how to fix rows that fail.
**Why this matters:** A clean import saves hours when you are moving from paper or another system.
Return to [Contacts](https://www.carstoragesoftware.com/dashboard/contacts) and [Cars](https://www.carstoragesoftware.com/dashboard/cars) and search for a few imported names to confirm the data looks right.
**Expected result:** Records appear with the correct owner links before you invite customers or send invoices.
## Troubleshooting
**Create New Customer is grayed out or missing**
Your role may not allow adding customers. Ask a facility owner to review your access in [Settings > Team](https://www.carstoragesoftware.com/dashboard/settings/team).
**I cannot find the car I just added**
Refresh [Cars](https://www.carstoragesoftware.com/dashboard/cars) and search by customer name, plate, or VIN. If filters are active, clear them from **Filters & Settings** near the top of the page.
**The customer page does not show the linked car**
Open the car record in [Cars](https://www.carstoragesoftware.com/dashboard/cars) and confirm the correct customer is selected as owner. Save again if you changed the link.
## What to do next
Once the customer and car are ready, choose the next task:
* [Move a car](/docs/cars/move-a-car) if you need to assign a parking spot or zone.
* [Start a car session](/docs/cars/start-a-car-session) if you need an intake, inspection, photo walkthrough, or service event.
* [Create an invoice](/docs/payments/create-an-invoice) if the customer needs to pay.
* [Send a contract for signature](/docs/contracts/send-a-contract-for-signature) if the customer needs to sign paperwork.
* [Create an appointment](/docs/schedule/create-an-appointment) if the customer has a visit scheduled.
* [Invite a customer to the portal](/docs/contacts/invite-a-customer-to-the-portal) when the customer should sign in online.
* [Import customers and cars](/docs/contacts/import-customers-and-cars) if you have a spreadsheet of existing records to upload.
Return to [Getting started overview](/docs/basics/overview) for the full onboarding path.
## Related topics
- [Getting started overview](/docs/basics/overview.md)
- [Use the Create event home page](/docs/basics/use-the-create-event-home.md)
- [Set up your facility profile](/docs/basics/set-up-your-facility-profile.md)
- [Getting started](/docs/getting-started.md)
- [Customize your Overview dashboard](/docs/basics/customize-your-overview.md)
This documentation is built and hosted on [Mintlify](https://mintlify.com), a developer documentation platform.
*On the customer detail page, linked cars should appear in the cars section so your team knows the connection is correct.*
**Why this matters:** This connection helps your team schedule work, collect payments, manage documents, and communicate with the right person.
Go to [Cars](https://www.carstoragesoftware.com/dashboard/cars) and search for the car by make, model, VIN, plate, or customer name.
**Expected result:** You can quickly find the car record and see the correct customer on the car page.
## Common mistakes and how to fix them
**I accidentally made a duplicate customer**
Stop adding more information to the duplicate. Use the record that has the most correct history, and ask a manager how your facility wants duplicates handled. Read [Handle duplicate or merged customer records](/docs/contacts/handle-duplicate-or-merged-customer-records).
**I do not know the VIN yet**
That is okay. Save the record with the details you know, then add the VIN when you have it. Make sure the car can still be identified by year, make, model, color, customer, or plate.
**The car belongs to a business, family, or multiple people**
Start with the main person or business your facility bills or contacts most often. Then use customer contacts, notes, or related fields to add other people as needed. Read [Manage additional contacts](/docs/contacts/manage-additional-contacts) and [Invite a customer to the portal](/docs/contacts/invite-a-customer-to-the-portal) when the customer needs portal access.
**I created the car before the customer**
Open the car record and connect it to the correct customer, or ask a manager if you are unsure which owner to choose. Going forward, add the customer first.
## Import instead of typing one by one (optional)
If your facility has a spreadsheet with many customers and cars, you may import them instead of entering each record manually.
Go to [Import Data](https://www.carstoragesoftware.com/dashboard/import).
**Expected result:** You see upload options and may be able to download a template file.
Read [Import customers and cars](/docs/contacts/import-customers-and-cars) for column names, file format, and how to fix rows that fail.
**Why this matters:** A clean import saves hours when you are moving from paper or another system.
Return to [Contacts](https://www.carstoragesoftware.com/dashboard/contacts) and [Cars](https://www.carstoragesoftware.com/dashboard/cars) and search for a few imported names to confirm the data looks right.
**Expected result:** Records appear with the correct owner links before you invite customers or send invoices.
## Troubleshooting
**Create New Customer is grayed out or missing**
Your role may not allow adding customers. Ask a facility owner to review your access in [Settings > Team](https://www.carstoragesoftware.com/dashboard/settings/team).
**I cannot find the car I just added**
Refresh [Cars](https://www.carstoragesoftware.com/dashboard/cars) and search by customer name, plate, or VIN. If filters are active, clear them from **Filters & Settings** near the top of the page.
**The customer page does not show the linked car**
Open the car record in [Cars](https://www.carstoragesoftware.com/dashboard/cars) and confirm the correct customer is selected as owner. Save again if you changed the link.
## What to do next
Once the customer and car are ready, choose the next task:
* [Move a car](/docs/cars/move-a-car) if you need to assign a parking spot or zone.
* [Start a car session](/docs/cars/start-a-car-session) if you need an intake, inspection, photo walkthrough, or service event.
* [Create an invoice](/docs/payments/create-an-invoice) if the customer needs to pay.
* [Send a contract for signature](/docs/contracts/send-a-contract-for-signature) if the customer needs to sign paperwork.
* [Create an appointment](/docs/schedule/create-an-appointment) if the customer has a visit scheduled.
* [Invite a customer to the portal](/docs/contacts/invite-a-customer-to-the-portal) when the customer should sign in online.
* [Import customers and cars](/docs/contacts/import-customers-and-cars) if you have a spreadsheet of existing records to upload.
Return to [Getting started overview](/docs/basics/overview) for the full onboarding path.
## Related topics
- [Getting started overview](/docs/basics/overview.md)
- [Use the Create event home page](/docs/basics/use-the-create-event-home.md)
- [Set up your facility profile](/docs/basics/set-up-your-facility-profile.md)
- [Getting started](/docs/getting-started.md)
- [Customize your Overview dashboard](/docs/basics/customize-your-overview.md)
This documentation is built and hosted on [Mintlify](https://mintlify.com), a developer documentation platform.