> ## Documentation Index
> Fetch the complete documentation index at: https://www.carstoragesoftware.com/docs/llms.txt
> Use this file to discover all available pages before exploring further.
# Find and filter contacts
> Search, filter, and change Contacts views so you can quickly find the right customer record.
## What you will accomplish
You will use the [All Contacts page](https://www.carstoragesoftware.com/dashboard/contacts/all) to find the right customer quickly—by name, email, phone, or company—and open their record without creating duplicates or missing someone who is filtered out.
You will also learn when to use **Table**, **Card**, or **Board** view, how to open a **customer-type page** (such as Storage or Detailing) for a shorter list, and how to narrow results with **Filters & settings**.
## When to use this guide
* A customer calls and you need their record open in one or two clicks.
* You want to see only **leads**, **active** customers, or customers from one **source**.
* Your sales team wants a **board** of customers by pipeline stage.
* You need to **send a portal invite** from the list without opening every customer page first.
**Import is on a different page**
Bulk upload from a spreadsheet happens on [Import Data](https://www.carstoragesoftware.com/dashboard/import), not on the Contacts list. See [Import customers, cars, events, and photos](/docs/contacts/import-customers-and-cars).
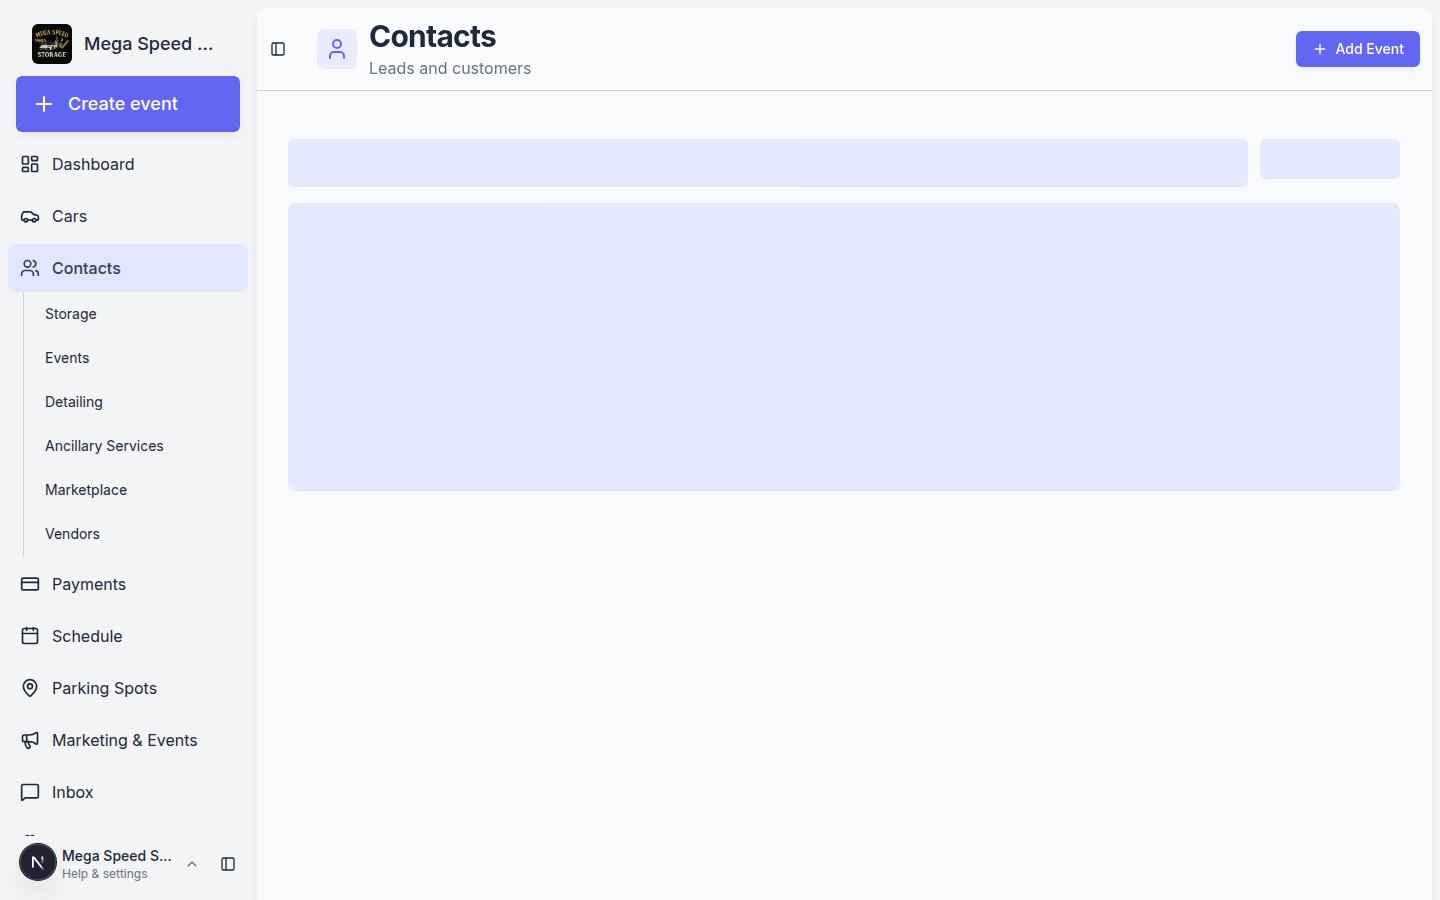 *All Contacts shows everyone. Use the sidebar links under Contacts to open a shorter list for one customer type.*
## Start on the right contacts page
Click **Contacts** in the left sidebar.
**Expected result:** You see sub-pages such as **All Contacts**, **Storage**, **Events**, **Detailing**, and **Vendors**.
Click **All Contacts** (or go to [All Contacts](https://www.carstoragesoftware.com/dashboard/contacts/all)) when you need to find one person and you are not sure which group they belong to.
**Why this matters:** **All Contacts** never hides customers based on their type. It is the safest place for phone lookups and duplicate checks.
Click **Storage**, **Detailing**, or another type when your role focuses on that group.
**Expected result:** The page title matches the type (for example **Storage**). Only customers with that **Customer Type** on their record appear.
See [Work with customer type lists](/docs/contacts/work-with-customer-type-lists) for a full walkthrough of each Contacts sidebar link.
*All Contacts shows everyone. Use the sidebar links under Contacts to open a shorter list for one customer type.*
## Start on the right contacts page
Click **Contacts** in the left sidebar.
**Expected result:** You see sub-pages such as **All Contacts**, **Storage**, **Events**, **Detailing**, and **Vendors**.
Click **All Contacts** (or go to [All Contacts](https://www.carstoragesoftware.com/dashboard/contacts/all)) when you need to find one person and you are not sure which group they belong to.
**Why this matters:** **All Contacts** never hides customers based on their type. It is the safest place for phone lookups and duplicate checks.
Click **Storage**, **Detailing**, or another type when your role focuses on that group.
**Expected result:** The page title matches the type (for example **Storage**). Only customers with that **Customer Type** on their record appear.
See [Work with customer type lists](/docs/contacts/work-with-customer-type-lists) for a full walkthrough of each Contacts sidebar link.
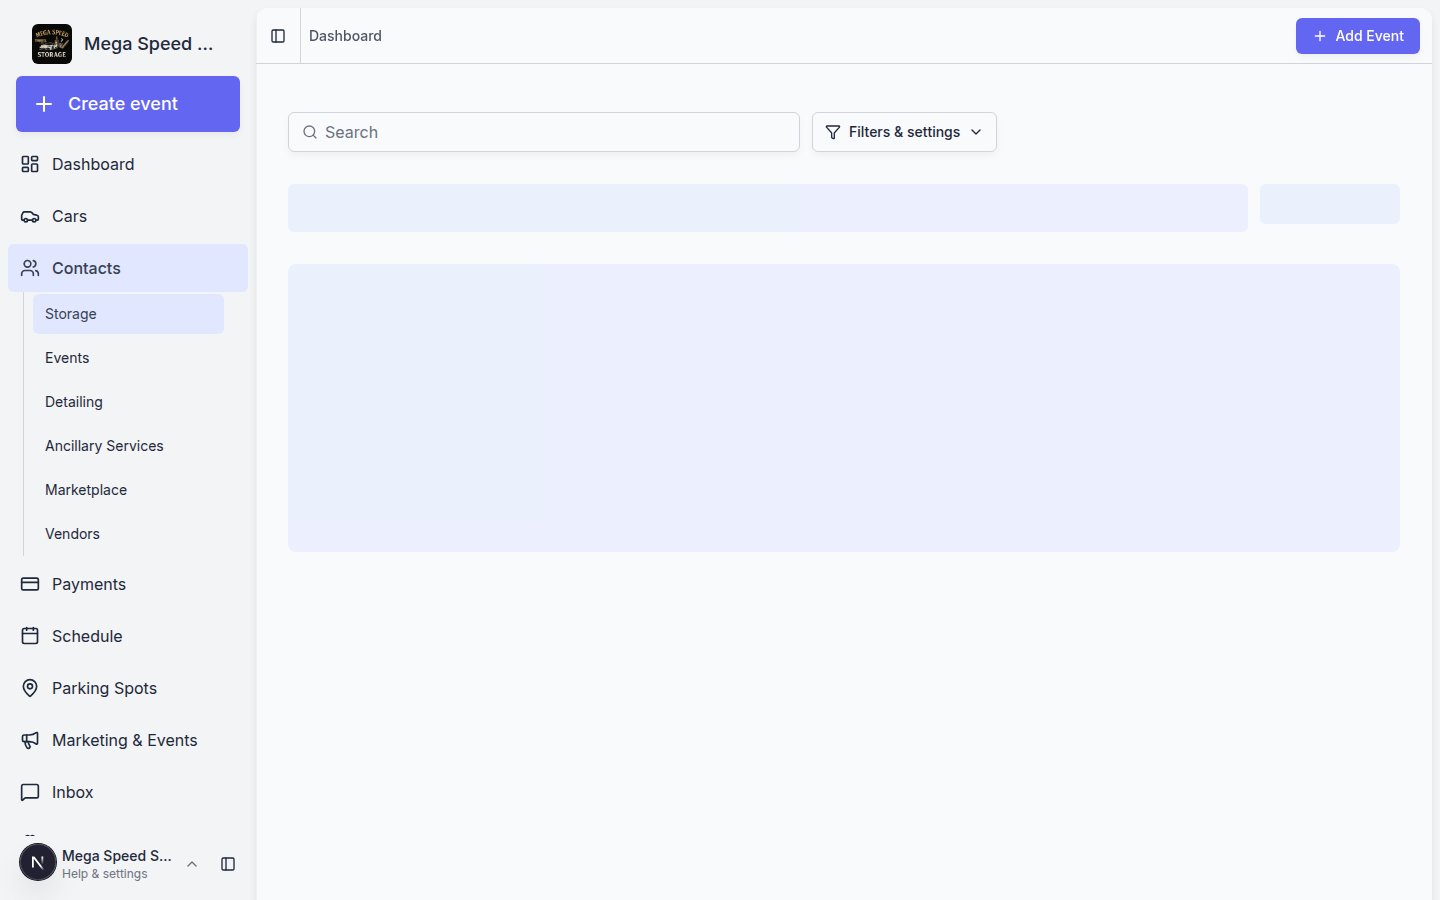 *A customer-type page such as Storage shows only customers tagged with that type. Use All Contacts when you need to search everyone.*
**A customer missing from a type page?**
Open their record and check **Customer Groups** (customer types) under **CRM Information**. Add the missing type, or search on **All Contacts** instead.
## When to use each view
| View | Best for | What you will see |
| - | - | - |
| **Table** | Daily office work and quick lookups | Rows with names, email, phone, cars, CRM stage, status, and actions |
| **Card** | Visual browsing | Customer cards with key details |
| **Board** | Sales or onboarding follow-up | Customer cards grouped by CRM stage |
## Search for a customer
Go to [All Contacts](https://www.carstoragesoftware.com/dashboard/contacts/all), or open the customer-type page your team uses most (for example [Storage contacts](https://www.carstoragesoftware.com/dashboard/contacts/storage)).
The search field is near the top of the page. It says **Search**.
Type part of the customer's name, email address, phone number, or company name.
Click anywhere on the customer **row** (in Table view), or click **View Details** on the right side of the row.
In Card or Board view, click the customer **card**.
**Expected result:** The list shortens to matching customers only. The customer detail page opens with their name at the top.
**Helpful habit**
Search before creating a new customer. This helps prevent duplicate records for the same person.
## Use row actions without opening the full record
In **Table** view, each customer row includes quick actions on the right side. These save time when you already know what you need to do.
*A customer-type page such as Storage shows only customers tagged with that type. Use All Contacts when you need to search everyone.*
**A customer missing from a type page?**
Open their record and check **Customer Groups** (customer types) under **CRM Information**. Add the missing type, or search on **All Contacts** instead.
## When to use each view
| View | Best for | What you will see |
| - | - | - |
| **Table** | Daily office work and quick lookups | Rows with names, email, phone, cars, CRM stage, status, and actions |
| **Card** | Visual browsing | Customer cards with key details |
| **Board** | Sales or onboarding follow-up | Customer cards grouped by CRM stage |
## Search for a customer
Go to [All Contacts](https://www.carstoragesoftware.com/dashboard/contacts/all), or open the customer-type page your team uses most (for example [Storage contacts](https://www.carstoragesoftware.com/dashboard/contacts/storage)).
The search field is near the top of the page. It says **Search**.
Type part of the customer's name, email address, phone number, or company name.
Click anywhere on the customer **row** (in Table view), or click **View Details** on the right side of the row.
In Card or Board view, click the customer **card**.
**Expected result:** The list shortens to matching customers only. The customer detail page opens with their name at the top.
**Helpful habit**
Search before creating a new customer. This helps prevent duplicate records for the same person.
## Use row actions without opening the full record
In **Table** view, each customer row includes quick actions on the right side. These save time when you already know what you need to do.
 *From the list, you can send a portal invite, open the customer record, or take other actions from the row without searching again.*
* **View Details** (or click the row) opens the full customer record.
* **Send Invite** or **Resend Invite** sends the portal sign-in email when the customer has an email and has not signed in yet.
* **Add to Stripe** appears when payment processing is enabled and the customer is not linked yet—see [Manage billing on a customer record](/docs/contacts/manage-billing-on-a-customer-record).
**Expected result:** You complete a common task from the list in one or two clicks instead of opening every customer page first.
## Understand key table columns
In **Table** view, these columns answer the most common front-desk questions:
| Column | What it means |
| - | - |
| **Account Status** | Portal sign-in progress: **Not signed in yet**, **Email Sent**, or **Signed In** |
| **Portal Access** | **Full** (normal portal) or **Ticket-only** (limited access)—see [Understand portal access levels](/docs/contacts/understand-portal-access-levels) |
| **In Stripe** | Whether the customer is linked for online billing (when payments are enabled) |
| **CRM Stage** | Where the customer is in your sales or onboarding pipeline |
Turn columns on or off under **Filters & settings** → **Columns**.
*From the list, you can send a portal invite, open the customer record, or take other actions from the row without searching again.*
* **View Details** (or click the row) opens the full customer record.
* **Send Invite** or **Resend Invite** sends the portal sign-in email when the customer has an email and has not signed in yet.
* **Add to Stripe** appears when payment processing is enabled and the customer is not linked yet—see [Manage billing on a customer record](/docs/contacts/manage-billing-on-a-customer-record).
**Expected result:** You complete a common task from the list in one or two clicks instead of opening every customer page first.
## Understand key table columns
In **Table** view, these columns answer the most common front-desk questions:
| Column | What it means |
| - | - |
| **Account Status** | Portal sign-in progress: **Not signed in yet**, **Email Sent**, or **Signed In** |
| **Portal Access** | **Full** (normal portal) or **Ticket-only** (limited access)—see [Understand portal access levels](/docs/contacts/understand-portal-access-levels) |
| **In Stripe** | Whether the customer is linked for online billing (when payments are enabled) |
| **CRM Stage** | Where the customer is in your sales or onboarding pipeline |
Turn columns on or off under **Filters & settings** → **Columns**.
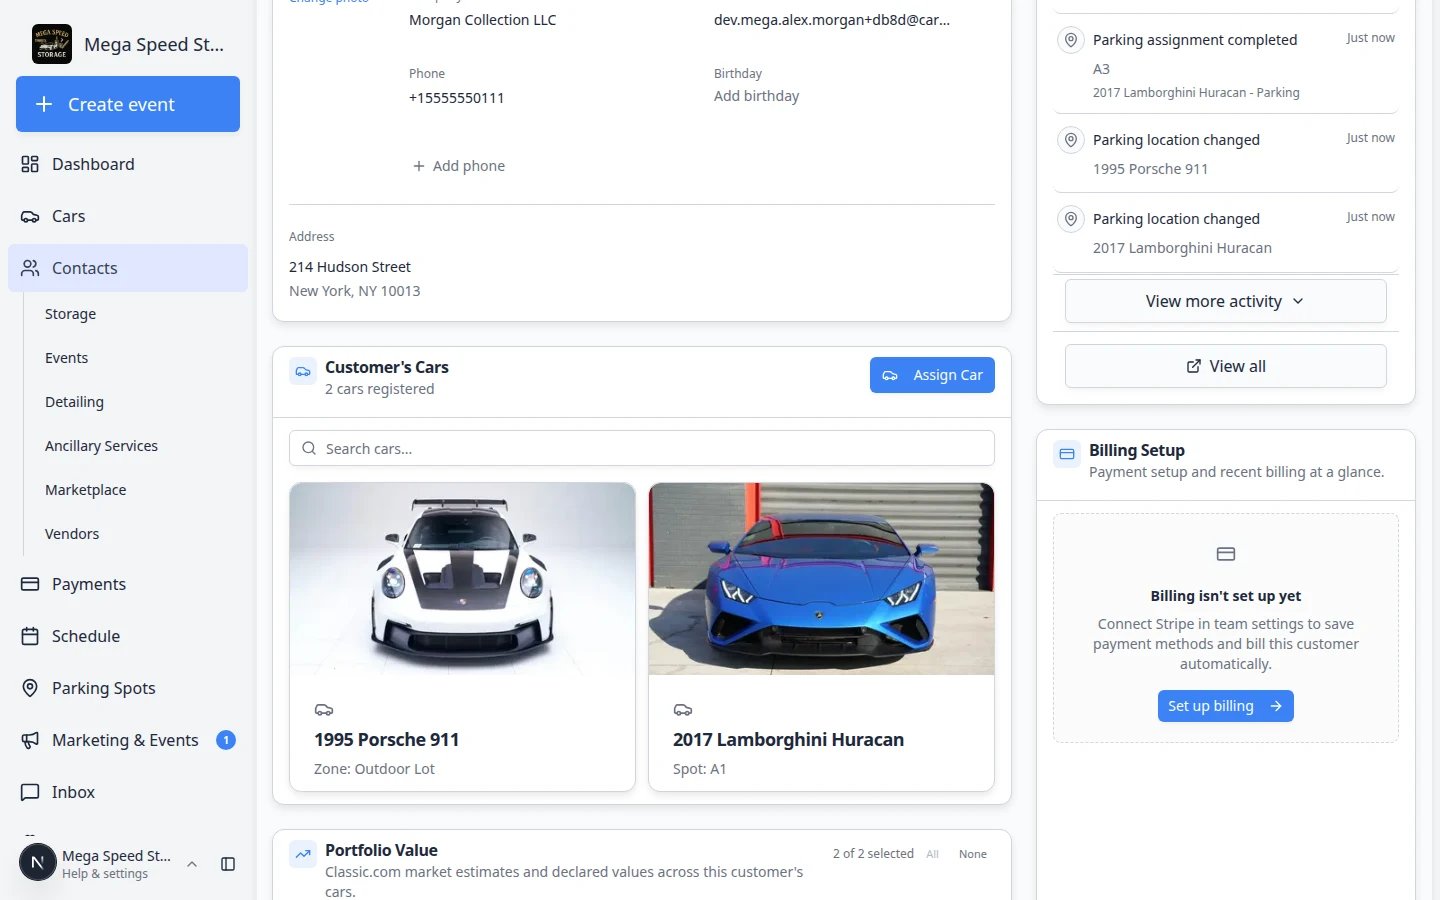 *Turn on Portal Access and Account Status when you need to see portal sign-in progress and access level without opening each customer record.*
## Sort the table
Click a column heading to sort—for example **Last Name** or **CRM Stage**. Click again to reverse the order.
**Why this matters:** Sorting by stage or account status helps you work down a call list without exporting a spreadsheet.
## Open the Customer Report
When you need every customer in one exportable table (with monthly recurring totals and payment method status), click **Report** in the top-right of [All Contacts](https://www.carstoragesoftware.com/dashboard/contacts/all).
See [Export and use the customer report](/docs/contacts/export-and-use-the-customer-report) for export steps and column definitions.
## Open Filters & settings
The **Filters & settings** button controls the view, visible columns, and filters.
*Turn on Portal Access and Account Status when you need to see portal sign-in progress and access level without opening each customer record.*
## Sort the table
Click a column heading to sort—for example **Last Name** or **CRM Stage**. Click again to reverse the order.
**Why this matters:** Sorting by stage or account status helps you work down a call list without exporting a spreadsheet.
## Open the Customer Report
When you need every customer in one exportable table (with monthly recurring totals and payment method status), click **Report** in the top-right of [All Contacts](https://www.carstoragesoftware.com/dashboard/contacts/all).
See [Export and use the customer report](/docs/contacts/export-and-use-the-customer-report) for export steps and column definitions.
## Open Filters & settings
The **Filters & settings** button controls the view, visible columns, and filters.
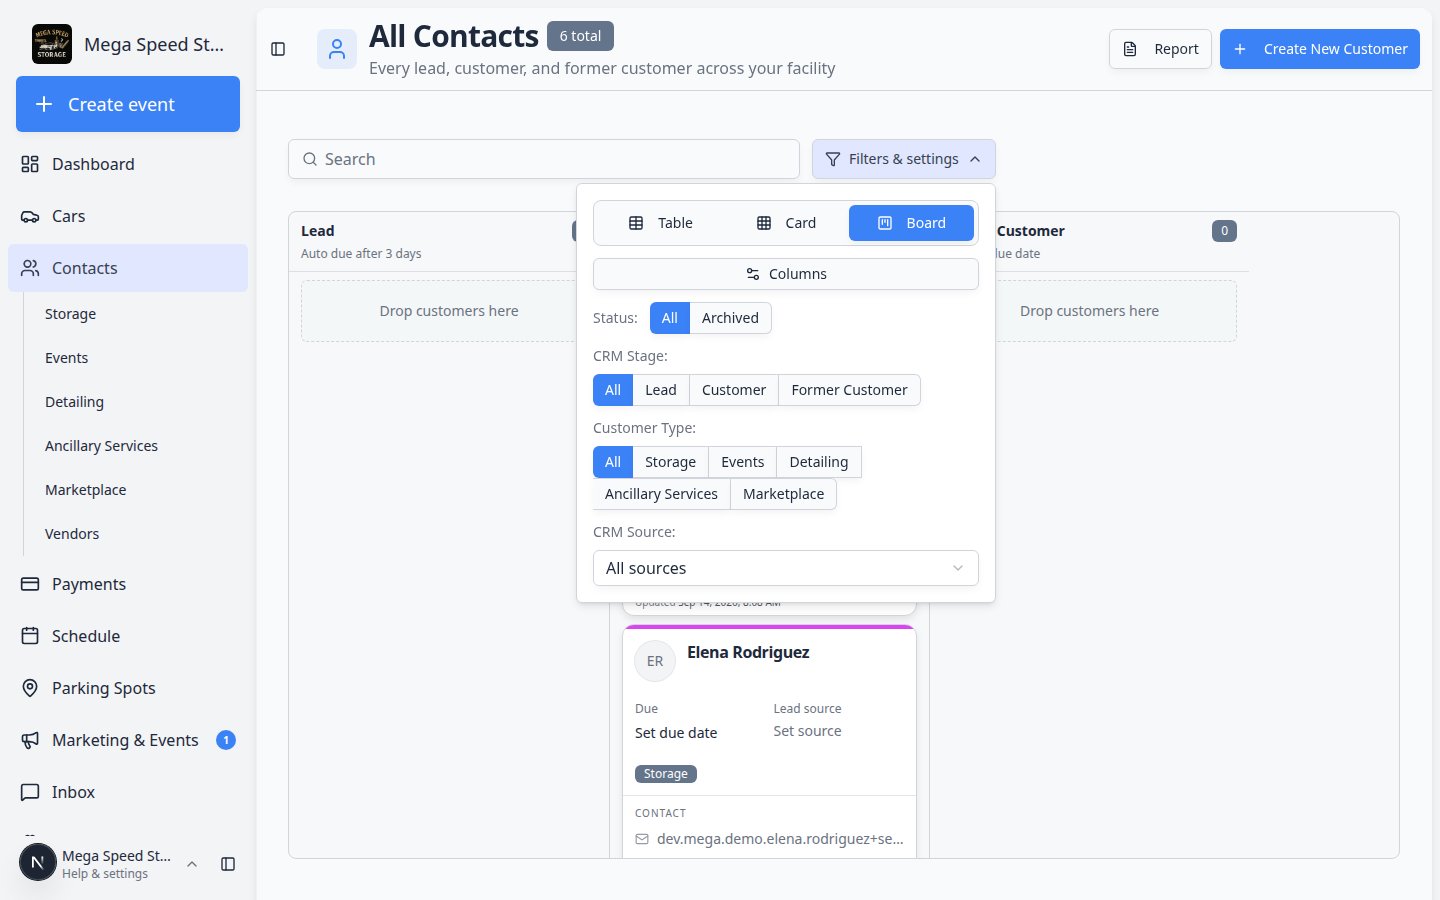 *Filters & settings is where you change the Contacts view and narrow the list.*
On [All Contacts](https://www.carstoragesoftware.com/dashboard/contacts/all), click **Filters & settings** near the top of the list.
Click **Table**, **Card**, or **Board**.
Use **Status** to show **All**, **Active**, **Inactive**, or **Deleted** customers.
**Deleted** shows records your team removed. Open one and use **Restore** when you need to bring them back—see [Handle duplicate or merged customer records](/docs/contacts/handle-duplicate-or-merged-customer-records).
Use **CRM Stage**, **Customer Type**, or **CRM Source** when you need a smaller list.
For example, you can show only new leads, only storage customers, or only customers from a referral source.
In **Table** view, click **Columns** inside **Filters & settings**. Turn on or off columns such as **City**, **Cars**, **CRM Stage**, or **Account Status**.
**Why this matters:** A shorter table is easier to read at the front desk. Add columns back when you need billing or portal status at a glance.
**Expected result:** The table updates immediately. Your choices are saved for your user account on this device.
## Use Card view for visual browsing
Card view is helpful when your team wants to scan faces, names, and key details without reading a full table row.
*Filters & settings is where you change the Contacts view and narrow the list.*
On [All Contacts](https://www.carstoragesoftware.com/dashboard/contacts/all), click **Filters & settings** near the top of the list.
Click **Table**, **Card**, or **Board**.
Use **Status** to show **All**, **Active**, **Inactive**, or **Deleted** customers.
**Deleted** shows records your team removed. Open one and use **Restore** when you need to bring them back—see [Handle duplicate or merged customer records](/docs/contacts/handle-duplicate-or-merged-customer-records).
Use **CRM Stage**, **Customer Type**, or **CRM Source** when you need a smaller list.
For example, you can show only new leads, only storage customers, or only customers from a referral source.
In **Table** view, click **Columns** inside **Filters & settings**. Turn on or off columns such as **City**, **Cars**, **CRM Stage**, or **Account Status**.
**Why this matters:** A shorter table is easier to read at the front desk. Add columns back when you need billing or portal status at a glance.
**Expected result:** The table updates immediately. Your choices are saved for your user account on this device.
## Use Card view for visual browsing
Card view is helpful when your team wants to scan faces, names, and key details without reading a full table row.
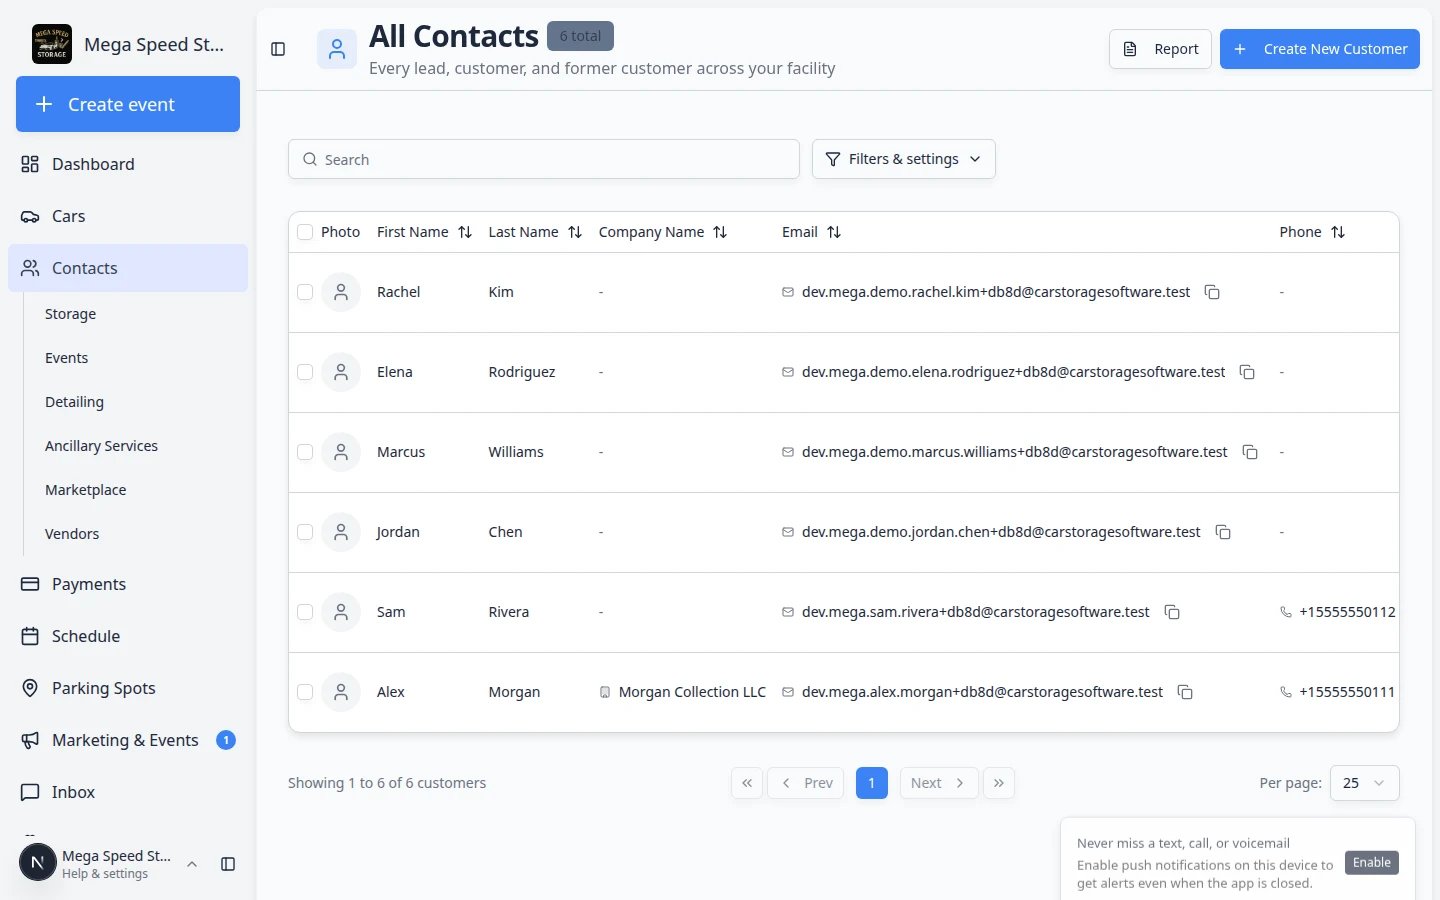 *Card view shows one customer per card, which many teams find easier for quick visual browsing.*
On the [Contacts page](https://www.carstoragesoftware.com/dashboard/contacts), click **Filters & settings**.
Click **Card**. The list changes from rows into a grid of customer cards.
Click a card or **View Details** to open the customer record.
**Expected result:** You land on the same customer detail page as you would from table view.
## Use Board view for follow-up work
Board view shows customers grouped by stage. This is helpful when your team wants to move customers through a process, such as new lead, tour scheduled, contract sent, and active storage.
*Card view shows one customer per card, which many teams find easier for quick visual browsing.*
On the [Contacts page](https://www.carstoragesoftware.com/dashboard/contacts), click **Filters & settings**.
Click **Card**. The list changes from rows into a grid of customer cards.
Click a card or **View Details** to open the customer record.
**Expected result:** You land on the same customer detail page as you would from table view.
## Use Board view for follow-up work
Board view shows customers grouped by stage. This is helpful when your team wants to move customers through a process, such as new lead, tour scheduled, contract sent, and active storage.
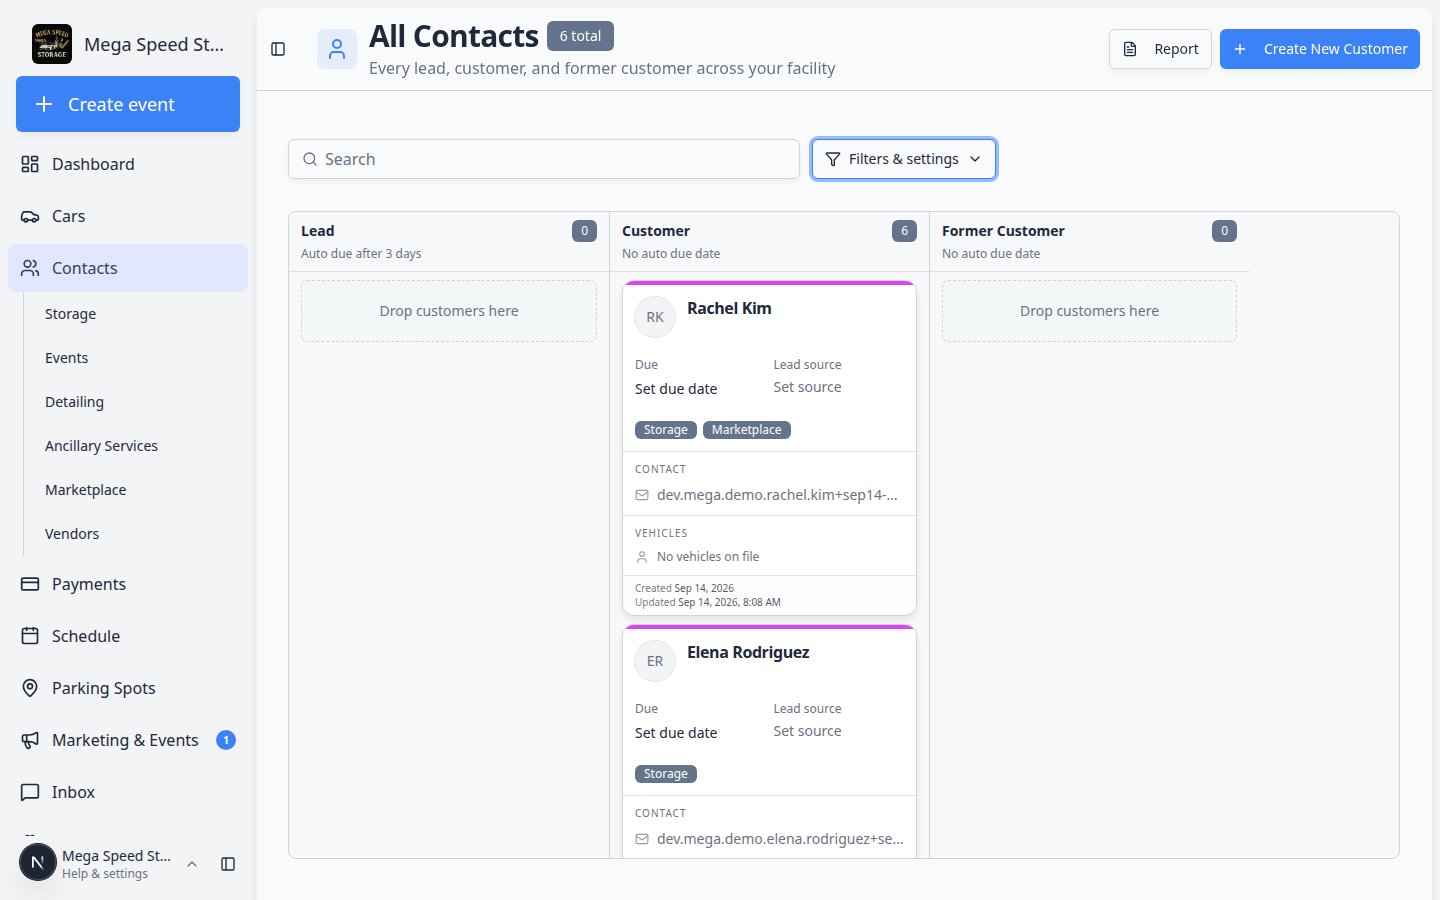 *Board view helps your team see where customers are in the pipeline.*
Click **Filters & settings**.
The list changes into columns grouped by CRM stage.
Use search or scroll through the stage columns until you find the customer.
Click and drag the customer card from one column to another (for example from **Lead** to **Customer**).
**Why this matters:** The board is a visual pipeline. Moving the card updates the customer's **CRM stage** so reports and follow-up lists stay accurate.
**Expected result:** The card appears in the new column. Open the customer record to confirm the stage changed under **CRM Information**.
**Stages depend on your settings**
Your team can change CRM stages in [Settings -> CRM](https://www.carstoragesoftware.com/dashboard/settings/crm). If a stage is missing, ask a team admin to review those settings.
## Select multiple customers and run bulk actions
When you need to update several customers at once—before a mail merge, contract campaign, or CRM cleanup—you can select rows in **Table** view and use the **Actions** menu.
Open **Filters & settings** and choose **Table** if you are not already in table view.
**Why this matters:** Row checkboxes and bulk actions only appear in **Table** view, not in **Card** or **Board** view.
Click the checkbox on the left side of each row you want to include.
To select everyone on the current page, use the checkbox in the table header row.
**Expected result:** A number badge appears on the **Actions** button showing how many customers you selected (for example **3**).
Click **Actions** in the top-right area of the list (next to **Create New Customer**).
**Expected result:** A menu opens with choices such as **Change CRM stage** and **Send contract**.
* **Change CRM stage** — move every selected customer to the same pipeline stage (for example from **Lead** to **Customer**).
* **Send contract** — start a contract send flow for the selected customers (see [Send a contract for signature](/docs/contracts/send-a-contract-for-signature)).
**Why this matters:** Bulk actions save time when your team runs the same follow-up on a filtered list—such as everyone tagged as a lead from last weekend's car show.
Choose **Clear selection** from the **Actions** menu, or click away and refresh the page.
**Expected result:** Checkboxes clear so you do not accidentally run another bulk action on the wrong people.
**Bulk actions respect your current filters**
If you filtered the list to **Lead** customers only, bulk actions apply to the customers you selected within that filtered view—not to your entire facility directory.
## Use filters without losing customers
Filters are helpful, but they can also hide records if you forget they are turned on.
* If a customer is missing, clear the search box first.
* Set **Status** to **All** if you are not sure whether the customer is active or inactive.
* Check **Deleted** only when you are trying to restore a deleted customer.
* If board view looks empty, switch back to **Table** and remove CRM filters.
*Board view helps your team see where customers are in the pipeline.*
Click **Filters & settings**.
The list changes into columns grouped by CRM stage.
Use search or scroll through the stage columns until you find the customer.
Click and drag the customer card from one column to another (for example from **Lead** to **Customer**).
**Why this matters:** The board is a visual pipeline. Moving the card updates the customer's **CRM stage** so reports and follow-up lists stay accurate.
**Expected result:** The card appears in the new column. Open the customer record to confirm the stage changed under **CRM Information**.
**Stages depend on your settings**
Your team can change CRM stages in [Settings -> CRM](https://www.carstoragesoftware.com/dashboard/settings/crm). If a stage is missing, ask a team admin to review those settings.
## Select multiple customers and run bulk actions
When you need to update several customers at once—before a mail merge, contract campaign, or CRM cleanup—you can select rows in **Table** view and use the **Actions** menu.
Open **Filters & settings** and choose **Table** if you are not already in table view.
**Why this matters:** Row checkboxes and bulk actions only appear in **Table** view, not in **Card** or **Board** view.
Click the checkbox on the left side of each row you want to include.
To select everyone on the current page, use the checkbox in the table header row.
**Expected result:** A number badge appears on the **Actions** button showing how many customers you selected (for example **3**).
Click **Actions** in the top-right area of the list (next to **Create New Customer**).
**Expected result:** A menu opens with choices such as **Change CRM stage** and **Send contract**.
* **Change CRM stage** — move every selected customer to the same pipeline stage (for example from **Lead** to **Customer**).
* **Send contract** — start a contract send flow for the selected customers (see [Send a contract for signature](/docs/contracts/send-a-contract-for-signature)).
**Why this matters:** Bulk actions save time when your team runs the same follow-up on a filtered list—such as everyone tagged as a lead from last weekend's car show.
Choose **Clear selection** from the **Actions** menu, or click away and refresh the page.
**Expected result:** Checkboxes clear so you do not accidentally run another bulk action on the wrong people.
**Bulk actions respect your current filters**
If you filtered the list to **Lead** customers only, bulk actions apply to the customers you selected within that filtered view—not to your entire facility directory.
## Use filters without losing customers
Filters are helpful, but they can also hide records if you forget they are turned on.
* If a customer is missing, clear the search box first.
* Set **Status** to **All** if you are not sure whether the customer is active or inactive.
* Check **Deleted** only when you are trying to restore a deleted customer.
* If board view looks empty, switch back to **Table** and remove CRM filters.
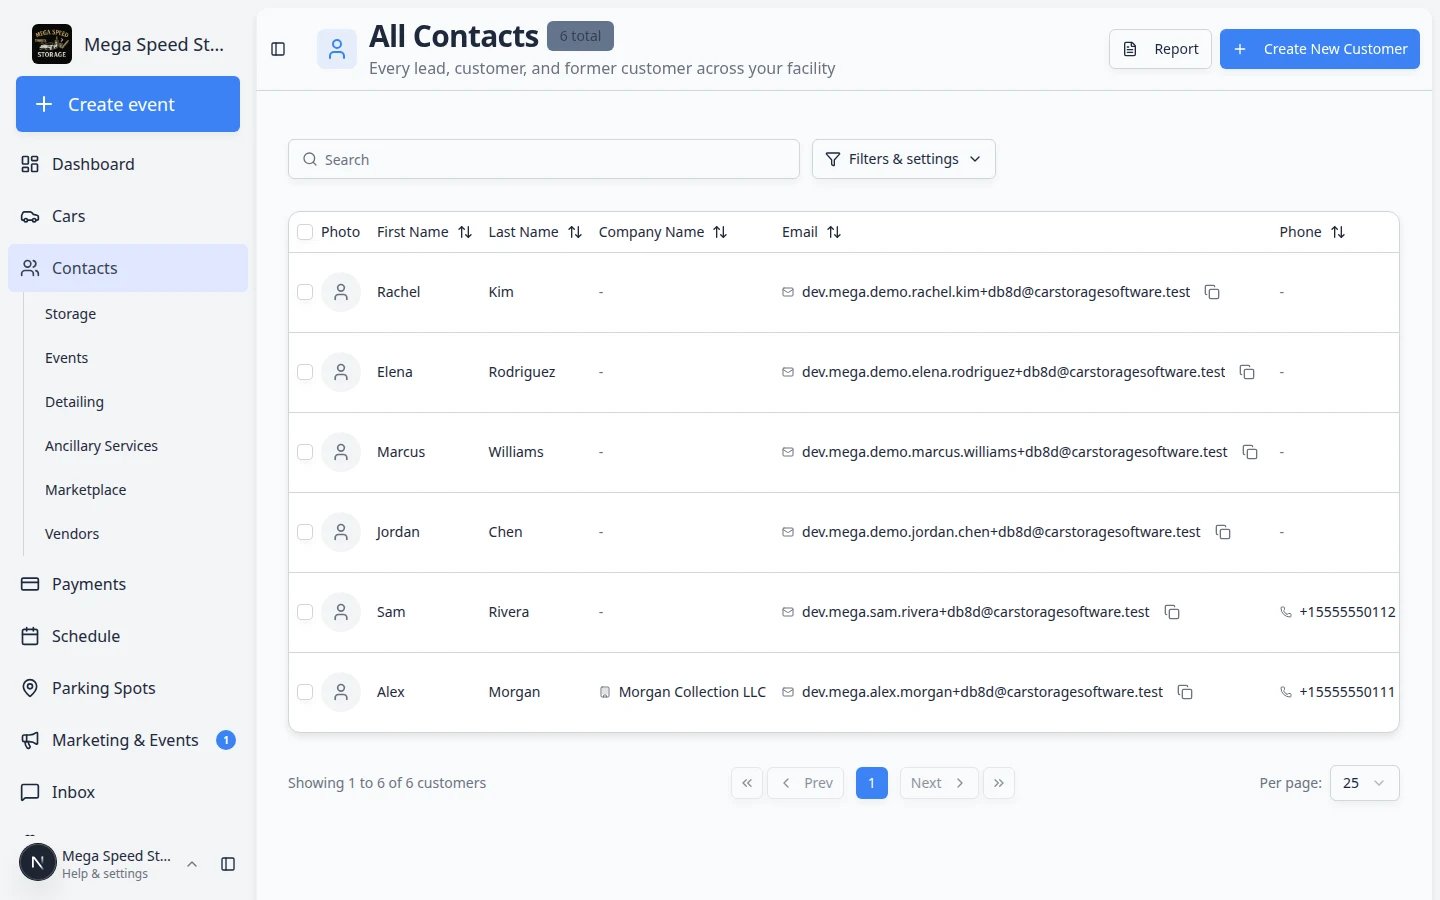 *Set Status to Deleted when you need to find a removed customer and restore their record.*
**I opened Storage but expected to see everyone**
Type pages such as **Storage** or **Detailing** only show customers with that **Customer Type** on their record. Switch to [All Contacts](https://www.carstoragesoftware.com/dashboard/contacts/all) to search your full directory.
## What happens next
After you find the customer, open the detail page to update contact information, link cars, add documents, add notes, or invite them to the customer portal.
For next steps, see:
* [Edit customer details](/docs/contacts/edit-customer-details)
* [Link cars and documents to a customer](/docs/contacts/link-cars-and-documents)
* [Invite a customer to the portal](/docs/contacts/invite-a-customer-to-the-portal)
## Troubleshooting
**I cannot find a customer I know exists**
Clear the search field, click **Filters & settings**, set **Status** to **All**, and remove CRM filters. If the customer was deleted, choose **Deleted** and restore the record if appropriate.
**The board columns are not what my team uses**
CRM stages are controlled in [Settings -> CRM](https://www.carstoragesoftware.com/dashboard/settings/crm). Ask an admin to add, rename, or reorder stages.
**I do not see a column I need**
Open **Filters & settings** and review the column controls. Some columns can be hidden to keep the table easier to read.
## Related topics
- [Contacts overview](/docs/contacts/overview.md)
- [Manage contact tags and CRM fields](/docs/contacts/manage-contact-tags.md)
- [Search your facility quickly](/docs/basics/search-your-facility-quickly.md)
- [Work with customer type lists](/docs/contacts/work-with-customer-type-lists.md)
- [Export and use the customer report](/docs/contacts/export-and-use-the-customer-report.md)
This documentation is built and hosted on [Mintlify](https://mintlify.com), a developer documentation platform.
*Set Status to Deleted when you need to find a removed customer and restore their record.*
**I opened Storage but expected to see everyone**
Type pages such as **Storage** or **Detailing** only show customers with that **Customer Type** on their record. Switch to [All Contacts](https://www.carstoragesoftware.com/dashboard/contacts/all) to search your full directory.
## What happens next
After you find the customer, open the detail page to update contact information, link cars, add documents, add notes, or invite them to the customer portal.
For next steps, see:
* [Edit customer details](/docs/contacts/edit-customer-details)
* [Link cars and documents to a customer](/docs/contacts/link-cars-and-documents)
* [Invite a customer to the portal](/docs/contacts/invite-a-customer-to-the-portal)
## Troubleshooting
**I cannot find a customer I know exists**
Clear the search field, click **Filters & settings**, set **Status** to **All**, and remove CRM filters. If the customer was deleted, choose **Deleted** and restore the record if appropriate.
**The board columns are not what my team uses**
CRM stages are controlled in [Settings -> CRM](https://www.carstoragesoftware.com/dashboard/settings/crm). Ask an admin to add, rename, or reorder stages.
**I do not see a column I need**
Open **Filters & settings** and review the column controls. Some columns can be hidden to keep the table easier to read.
## Related topics
- [Contacts overview](/docs/contacts/overview.md)
- [Manage contact tags and CRM fields](/docs/contacts/manage-contact-tags.md)
- [Search your facility quickly](/docs/basics/search-your-facility-quickly.md)
- [Work with customer type lists](/docs/contacts/work-with-customer-type-lists.md)
- [Export and use the customer report](/docs/contacts/export-and-use-the-customer-report.md)
This documentation is built and hosted on [Mintlify](https://mintlify.com), a developer documentation platform.