> ## Documentation Index
> Fetch the complete documentation index at: https://www.carstoragesoftware.com/docs/llms.txt
> Use this file to discover all available pages before exploring further.
# Invite a customer to the portal
> Send a sign-in link so the customer can access their cars, billing, documents, and schedule from the customer portal.
The customer portal gives your customers a self-service view of their relationship with your facility. Once invited, a customer can sign in to view their stored vehicles, review billing history, access documents and contracts, see upcoming events, and communicate with your team—all without calling or emailing.
## What you will accomplish
You will send a secure sign-in email so the customer can open the portal on their own. When they sign in, they see the cars, documents, billing, and events your team has already linked to their record.
Sending a portal invite is the step that connects a customer record to a live sign-in account.
**Send the invite after the record is ready**
For the best first experience, link the customer's cars and documents before you invite them. Start with [Link cars and documents to a customer](/docs/contacts/link-cars-and-documents) if those items are not ready yet.
 *Use the Contacts list to find the customer and send or resend their portal invite.*
## Before you start
* The customer record must have a valid **email address** — the invite is sent as a magic-link email to this address.
* Confirm the customer is linked to the right **cars**, **invoices**, and **documents** — whatever is linked will be visible to them in the portal.
* Review [Settings > Website & customer app](https://www.carstoragesoftware.com/dashboard/settings/website) to confirm the right customer app sections are enabled and visible.
* If your onboarding flow includes **contracts** (storage agreements, liability waivers), consider whether those should be in place before or after the invite.
* If you want an additional contact, such as an assistant or spouse, to have portal access instead of or in addition to the primary customer, add them in the Contacts section of the customer detail page first. See [Manage additional contacts](/docs/contacts/manage-additional-contacts).
## Understand Account Status before you invite
On [All Contacts](https://www.carstoragesoftware.com/dashboard/contacts/all), the **Account Status** column tells you where the customer is in the sign-in process. This is separate from **Portal Access** (Full vs Ticket-only).
| Account Status | What it means | What your team usually does |
| - | - | - |
| **Not signed in yet** | No portal invite has been sent, or the customer has not opened one | Click **Send Invite** on the row |
| **Email Sent** | An invite email was sent but the customer has not completed first sign-in | Click **Resend Invite** if they need a fresh email |
| **Signed In** | The customer has opened the portal at least once | The invite button disappears; they can request a new link from your facility login page |
**Account Status vs Portal Access**
**Account Status** tracks whether they have signed in. **Portal Access** tracks what they can see after sign-in (Full storage portal vs Ticket-only event access). Turn both columns on under **Filters & settings** → **Columns** when you are preparing a batch of invites.
## Send an invite from the Contacts list
The fastest way to invite a customer is directly from the Contacts list page using the inline action button.
Navigate to [All Contacts](https://www.carstoragesoftware.com/dashboard/contacts/all). Find the customer you want to invite in the list.
On the customer's row, look for the **Send Invite** button (or **Resend Invite** if an invite was already sent). Click it to open the invite confirmation dialog.
**Important:** This button only appears when the customer has an email address and has **not** signed in yet (**Account Status** is not **Signed In**). After first sign-in, the customer can request a new link from your facility login page.
**Send vs. Resend**
If no invite was sent before, the button says **Send Invite.** If an invite was sent but they have not signed in, it says **Resend Invite.** Both send a fresh magic-link email to the address on the record.
The dialog shows:
* The customer's name and email address where the invite will be sent.
* Whether the customer has cars assigned (helpful context if your onboarding contracts reference vehicle details).
* Whether Stripe/payment setup is connected (if your facility uses billing through the portal).
Review these details to make sure everything looks correct before sending.
A window titled **Notify the customer?** asks if you want to send the portal invite now. Choose **Yes** to send the magic-link email. Choose **No** or close the window to cancel without sending.
**Expected result:** After **Yes**, a success message confirms the invite was sent. The customer's row may show when the last invite was sent.
*Use the Contacts list to find the customer and send or resend their portal invite.*
## Before you start
* The customer record must have a valid **email address** — the invite is sent as a magic-link email to this address.
* Confirm the customer is linked to the right **cars**, **invoices**, and **documents** — whatever is linked will be visible to them in the portal.
* Review [Settings > Website & customer app](https://www.carstoragesoftware.com/dashboard/settings/website) to confirm the right customer app sections are enabled and visible.
* If your onboarding flow includes **contracts** (storage agreements, liability waivers), consider whether those should be in place before or after the invite.
* If you want an additional contact, such as an assistant or spouse, to have portal access instead of or in addition to the primary customer, add them in the Contacts section of the customer detail page first. See [Manage additional contacts](/docs/contacts/manage-additional-contacts).
## Understand Account Status before you invite
On [All Contacts](https://www.carstoragesoftware.com/dashboard/contacts/all), the **Account Status** column tells you where the customer is in the sign-in process. This is separate from **Portal Access** (Full vs Ticket-only).
| Account Status | What it means | What your team usually does |
| - | - | - |
| **Not signed in yet** | No portal invite has been sent, or the customer has not opened one | Click **Send Invite** on the row |
| **Email Sent** | An invite email was sent but the customer has not completed first sign-in | Click **Resend Invite** if they need a fresh email |
| **Signed In** | The customer has opened the portal at least once | The invite button disappears; they can request a new link from your facility login page |
**Account Status vs Portal Access**
**Account Status** tracks whether they have signed in. **Portal Access** tracks what they can see after sign-in (Full storage portal vs Ticket-only event access). Turn both columns on under **Filters & settings** → **Columns** when you are preparing a batch of invites.
## Send an invite from the Contacts list
The fastest way to invite a customer is directly from the Contacts list page using the inline action button.
Navigate to [All Contacts](https://www.carstoragesoftware.com/dashboard/contacts/all). Find the customer you want to invite in the list.
On the customer's row, look for the **Send Invite** button (or **Resend Invite** if an invite was already sent). Click it to open the invite confirmation dialog.
**Important:** This button only appears when the customer has an email address and has **not** signed in yet (**Account Status** is not **Signed In**). After first sign-in, the customer can request a new link from your facility login page.
**Send vs. Resend**
If no invite was sent before, the button says **Send Invite.** If an invite was sent but they have not signed in, it says **Resend Invite.** Both send a fresh magic-link email to the address on the record.
The dialog shows:
* The customer's name and email address where the invite will be sent.
* Whether the customer has cars assigned (helpful context if your onboarding contracts reference vehicle details).
* Whether Stripe/payment setup is connected (if your facility uses billing through the portal).
Review these details to make sure everything looks correct before sending.
A window titled **Notify the customer?** asks if you want to send the portal invite now. Choose **Yes** to send the magic-link email. Choose **No** or close the window to cancel without sending.
**Expected result:** After **Yes**, a success message confirms the invite was sent. The customer's row may show when the last invite was sent.
 *The confirmation window shows exactly which email address will receive the portal invite before you send it.*
## Understand Account Status on the customer list
After you send an invite, use the **Account Status** column on [All Contacts](https://www.carstoragesoftware.com/dashboard/contacts/all) to see whether the customer has signed in yet. This saves phone tag when someone says, "I never got access."
| Account Status | What it means | What your team should do |
| - | - | - |
| **Not signed in yet** | No invite email has been sent, or the customer has not used a link yet | Click **Send Invite** on the row |
| **Email Sent** | An invite or sign-in email was sent; the customer has not finished first sign-in | Click **Resend Invite** or ask the customer to check spam and use the newest email |
| **Signed In** | The customer completed first sign-in at least once | **Send Invite** disappears from the row; the customer can request a new link from your facility login page |
**Account Status is not the same as Portal Access**
**Account Status** tracks sign-in progress. **Portal Access** shows **Full** vs **Ticket-only** (what they can use after sign-in). Read both columns together—see [Understand portal access levels](/docs/contacts/understand-portal-access-levels).
*Use **Account Status** and **Portal Access** on the same row to answer portal questions without opening every customer record.*
## Send an invite for a sub-contact
If a customer account has additional contacts (spouse, assistant, bookkeeper, vehicle handler) who need their own portal access, you can send individual invites from the customer detail page.
Go to [All Contacts](https://www.carstoragesoftware.com/dashboard/contacts/all) and click the customer whose sub-contact needs portal access.
On the detail page, scroll down to the **Contacts** section. This lists all additional people associated with the customer account.
*The confirmation window shows exactly which email address will receive the portal invite before you send it.*
## Understand Account Status on the customer list
After you send an invite, use the **Account Status** column on [All Contacts](https://www.carstoragesoftware.com/dashboard/contacts/all) to see whether the customer has signed in yet. This saves phone tag when someone says, "I never got access."
| Account Status | What it means | What your team should do |
| - | - | - |
| **Not signed in yet** | No invite email has been sent, or the customer has not used a link yet | Click **Send Invite** on the row |
| **Email Sent** | An invite or sign-in email was sent; the customer has not finished first sign-in | Click **Resend Invite** or ask the customer to check spam and use the newest email |
| **Signed In** | The customer completed first sign-in at least once | **Send Invite** disappears from the row; the customer can request a new link from your facility login page |
**Account Status is not the same as Portal Access**
**Account Status** tracks sign-in progress. **Portal Access** shows **Full** vs **Ticket-only** (what they can use after sign-in). Read both columns together—see [Understand portal access levels](/docs/contacts/understand-portal-access-levels).
*Use **Account Status** and **Portal Access** on the same row to answer portal questions without opening every customer record.*
## Send an invite for a sub-contact
If a customer account has additional contacts (spouse, assistant, bookkeeper, vehicle handler) who need their own portal access, you can send individual invites from the customer detail page.
Go to [All Contacts](https://www.carstoragesoftware.com/dashboard/contacts/all) and click the customer whose sub-contact needs portal access.
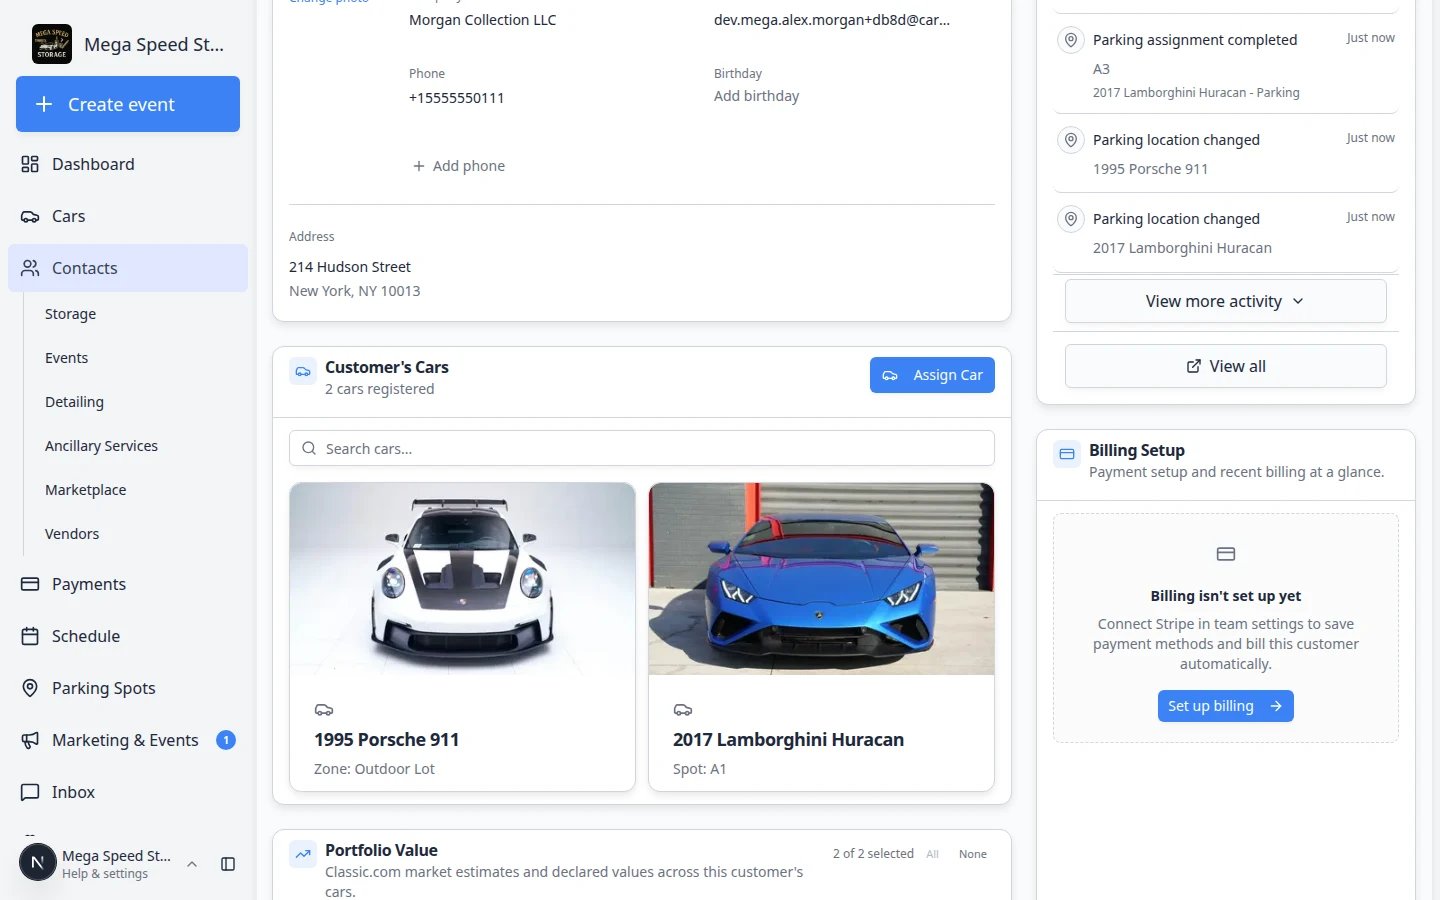
On the detail page, scroll down to the **Contacts** section. This lists all additional people associated with the customer account.
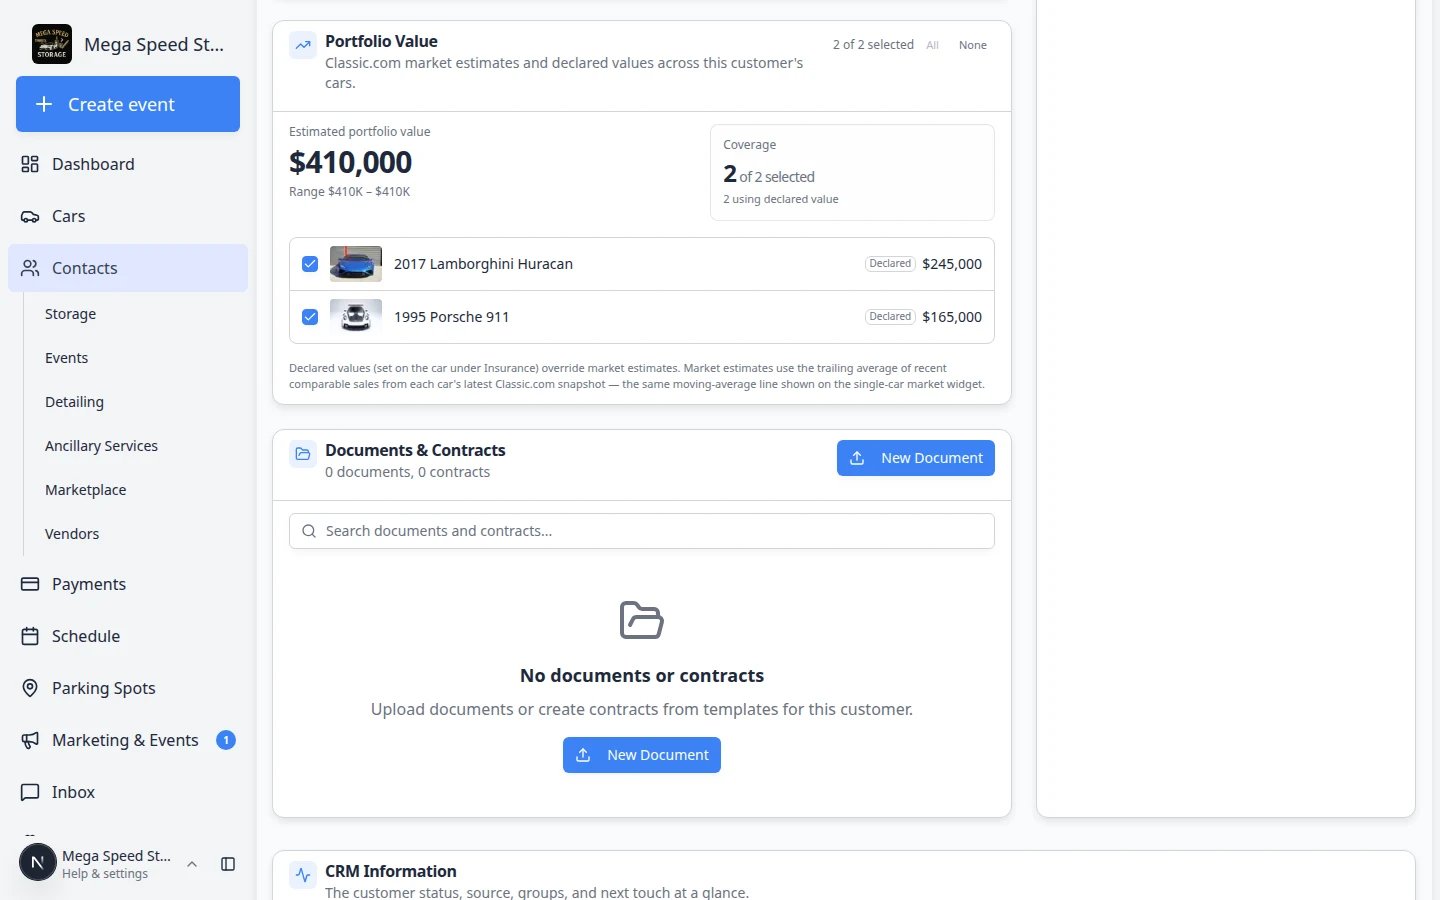 *The Contacts section lists additional people tied to the customer account, each with their own communication preferences.*
The sub-contact must have:
* A valid **email address** entered.
* **Can access customer portal (login with their email)** turned on in the contact's edit dialog.
If either is missing, edit the contact to add the email and enable portal access first.
*The Contacts section lists additional people tied to the customer account, each with their own communication preferences.*
The sub-contact must have:
* A valid **email address** entered.
* **Can access customer portal (login with their email)** turned on in the contact's edit dialog.
If either is missing, edit the contact to add the email and enable portal access first.
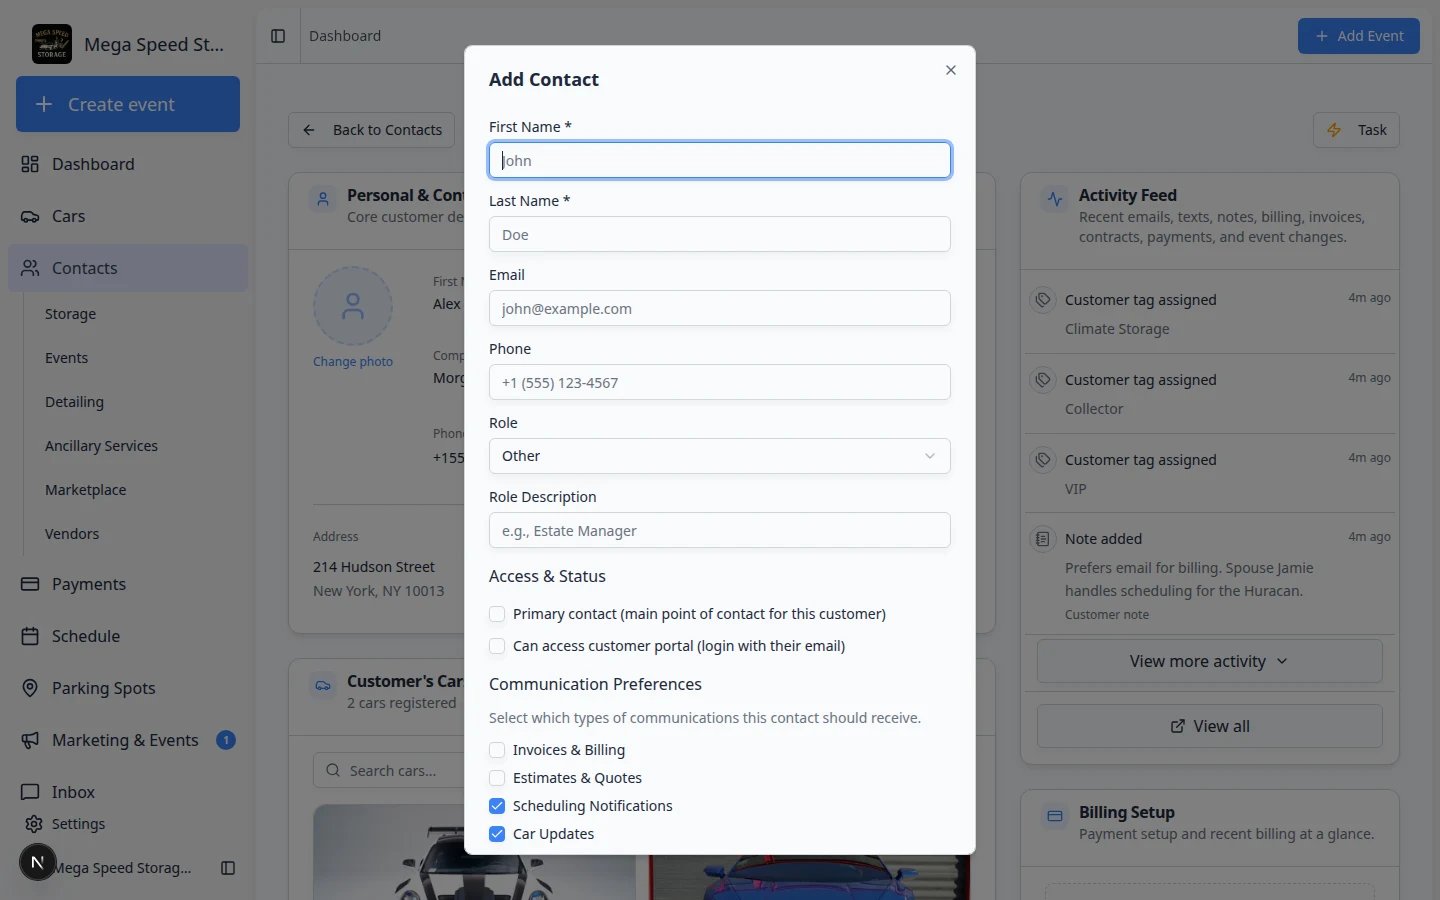 *The Add Contact dialog lets you set up a sub-contact with their own email, role, portal access, and communication preferences.*
Once the contact has an email and portal access enabled, click the **Send Invite** action on that contact's row. The system sends a magic-link email directly to the sub-contact's email address.
## What the customer receives
When you send a portal invite, the customer receives an email containing:
* A brief welcome message from your facility.
* A sign-in button that opens the portal for them. They do not need to create or remember a password.
* A link to complete any onboarding steps your team has configured (contracts, payment method, profile completion).
If the customer opens your facility's login page directly (from your website, for example), they type the email address on their customer record and request a sign-in link.
*The Add Contact dialog lets you set up a sub-contact with their own email, role, portal access, and communication preferences.*
Once the contact has an email and portal access enabled, click the **Send Invite** action on that contact's row. The system sends a magic-link email directly to the sub-contact's email address.
## What the customer receives
When you send a portal invite, the customer receives an email containing:
* A brief welcome message from your facility.
* A sign-in button that opens the portal for them. They do not need to create or remember a password.
* A link to complete any onboarding steps your team has configured (contracts, payment method, profile completion).
If the customer opens your facility's login page directly (from your website, for example), they type the email address on their customer record and request a sign-in link.
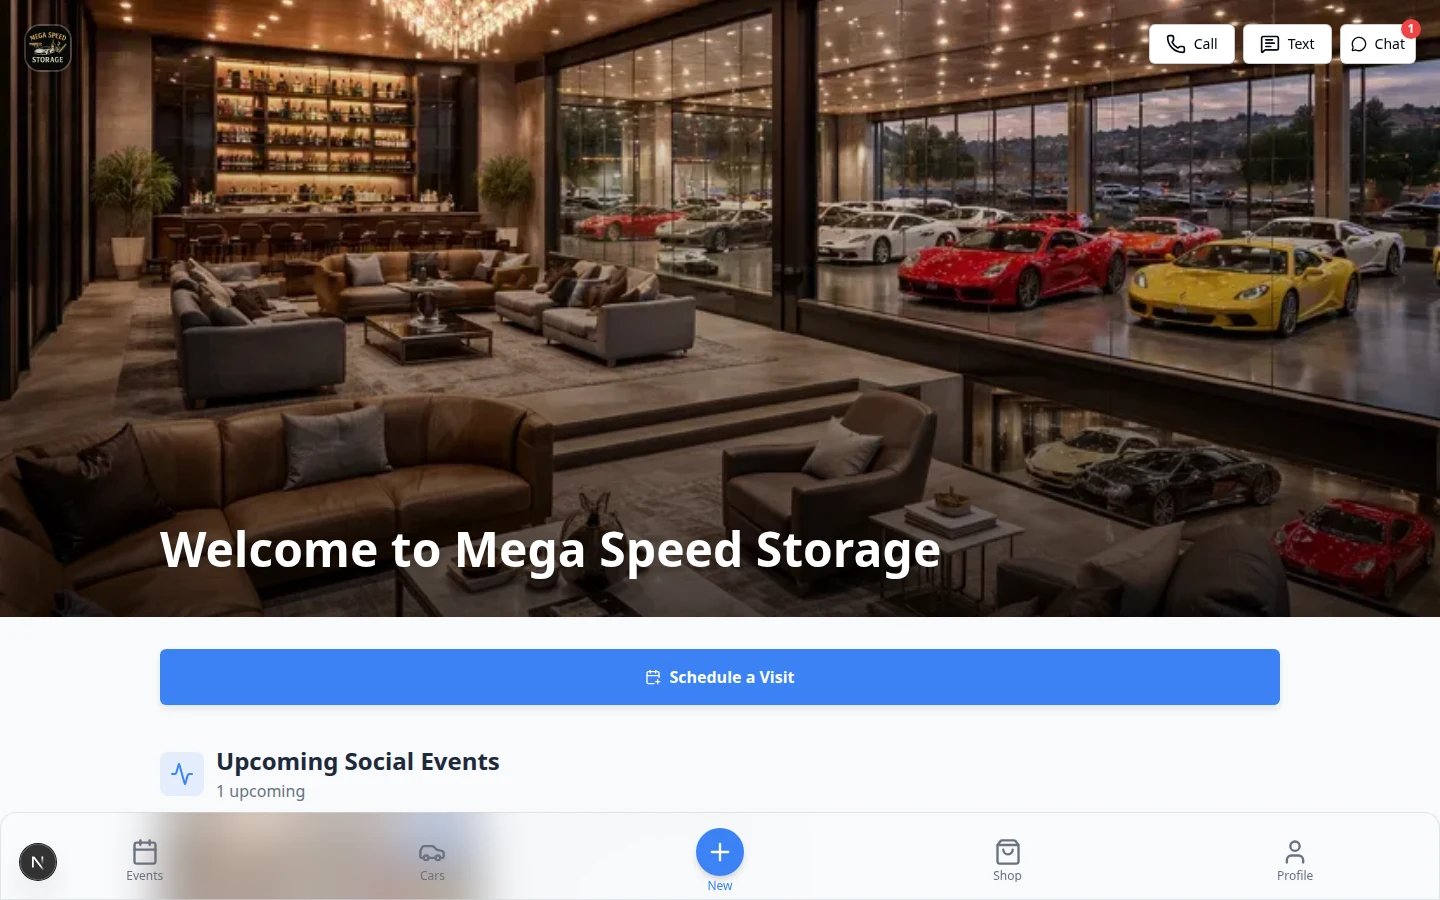 *Customers who visit your login page type the same email address that appears on their customer record.*
**Sign-in links expire**
The sign-in link in the email is valid for a limited time. If the customer does not click it before it expires, they can request a new link from the portal sign-in page by entering their email address. If they have **not** signed in yet, you can also use **Resend Invite** from [All Contacts](https://www.carstoragesoftware.com/dashboard/contacts/all).
## What the customer sees in the portal
Once signed in, the customer can access (depending on your team's portal configuration):
* **Their vehicles** — photos, status, event history, and condition reports for every car linked to their account.
* **Billing** — invoice history, outstanding balances, and payment methods (if your facility uses Stripe billing through the portal).
* **Documents** — contracts, agreements, and uploaded files shared by your team.
* **Events & Schedule** — upcoming appointments, sessions, and activity related to their cars.
* **Messages** — conversation history with your team (if inbox/messaging is enabled).
*Customers who visit your login page type the same email address that appears on their customer record.*
**Sign-in links expire**
The sign-in link in the email is valid for a limited time. If the customer does not click it before it expires, they can request a new link from the portal sign-in page by entering their email address. If they have **not** signed in yet, you can also use **Resend Invite** from [All Contacts](https://www.carstoragesoftware.com/dashboard/contacts/all).
## What the customer sees in the portal
Once signed in, the customer can access (depending on your team's portal configuration):
* **Their vehicles** — photos, status, event history, and condition reports for every car linked to their account.
* **Billing** — invoice history, outstanding balances, and payment methods (if your facility uses Stripe billing through the portal).
* **Documents** — contracts, agreements, and uploaded files shared by your team.
* **Events & Schedule** — upcoming appointments, sessions, and activity related to their cars.
* **Messages** — conversation history with your team (if inbox/messaging is enabled).
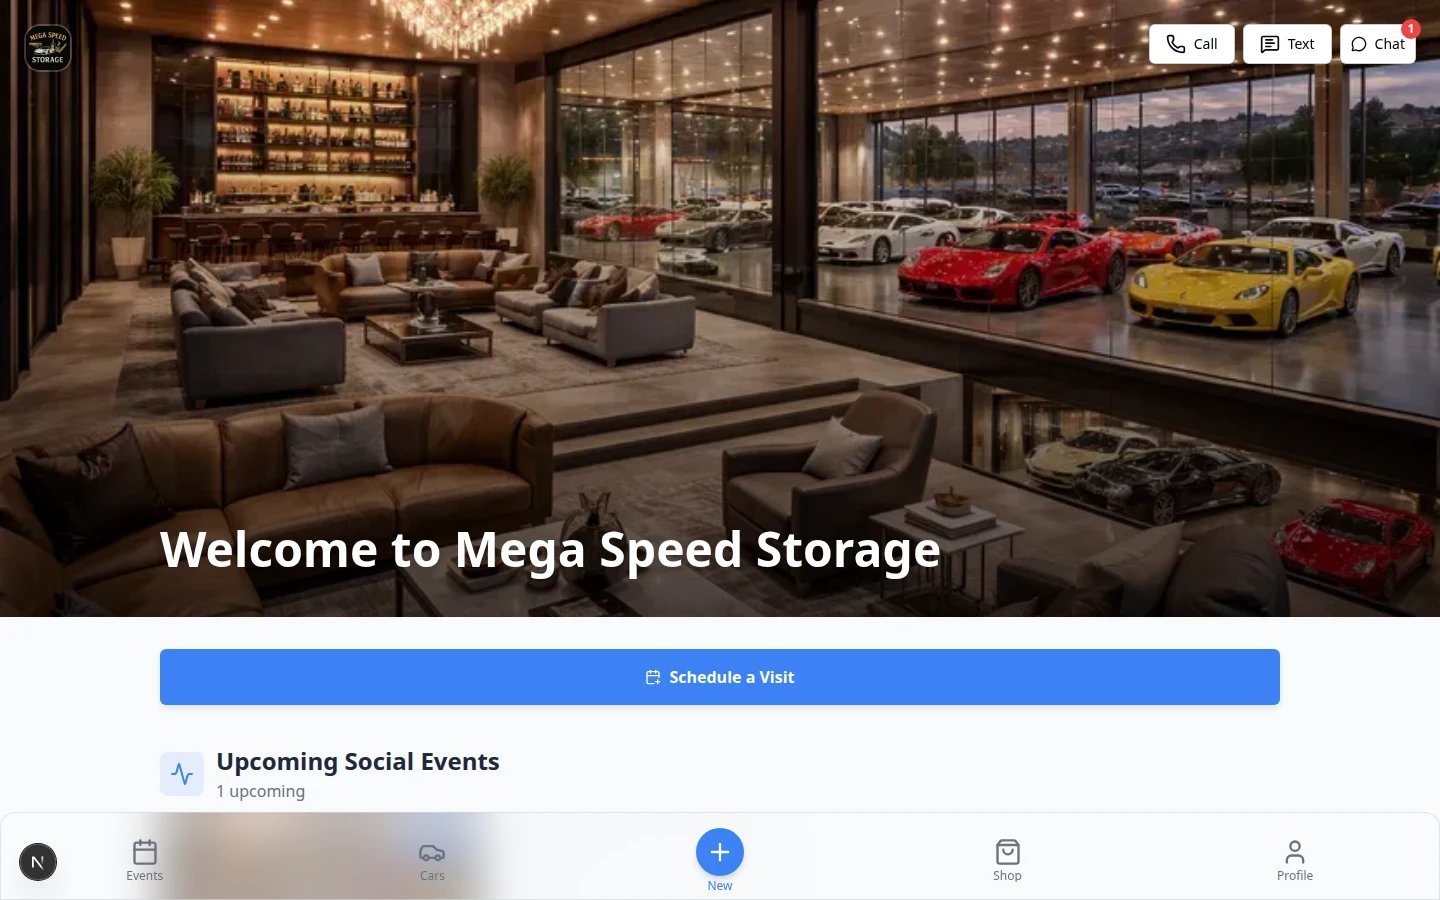 *Customers can open the Cars area to see vehicles connected to their customer record.*
If someone needs help after they receive the invite, use [Guide a customer through the portal](/docs/contacts/guide-a-customer-through-the-portal) to explain what they can see and do.
## Control who can access the portal
The main customer can receive a portal invite when their record has a valid email address and is prepared with the cars, documents, invoices, or events they should see. For assistants, spouses, bookkeepers, or other additional contacts, turn on **Can access customer portal (login with their email)** before sending that person their own invite.
*Customers can open the Cars area to see vehicles connected to their customer record.*
If someone needs help after they receive the invite, use [Guide a customer through the portal](/docs/contacts/guide-a-customer-through-the-portal) to explain what they can see and do.
## Control who can access the portal
The main customer can receive a portal invite when their record has a valid email address and is prepared with the cars, documents, invoices, or events they should see. For assistants, spouses, bookkeepers, or other additional contacts, turn on **Can access customer portal (login with their email)** before sending that person their own invite.
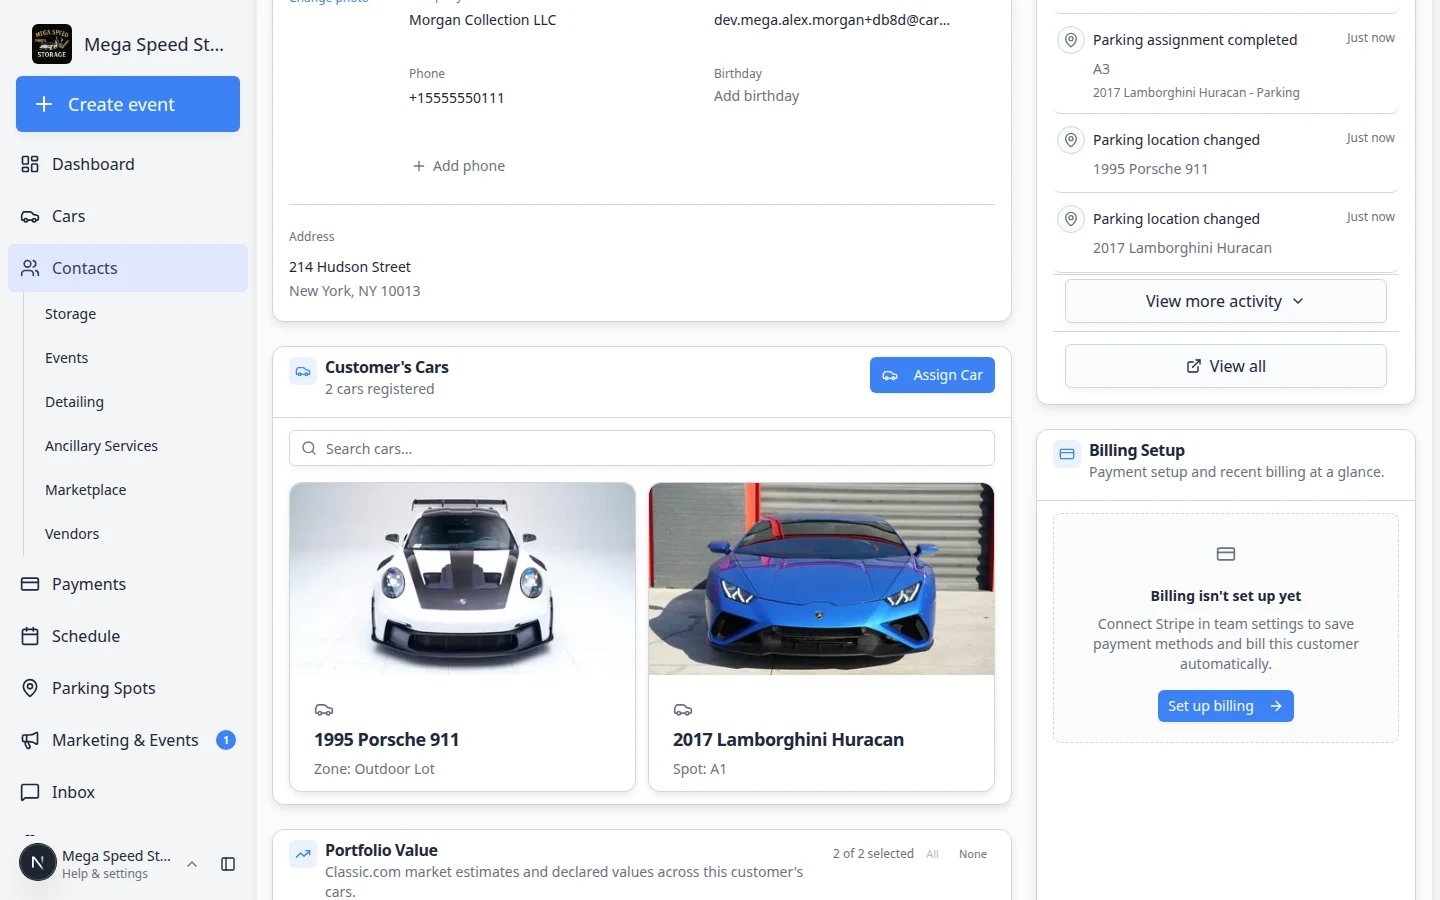 *Use the portal access checkbox for additional contacts who should sign in with their own email address.*
**Invite only when the record is ready**
Link the customer's cars, attach any documents or invoices they should see, and enable portal access for any additional contacts **before** you click **Send Invite**. A prepared record makes the first sign-in feel professional.
## Communication preferences for portal contacts
Each sub-contact can have individual **communication preferences** that control which types of notifications they receive:
* **Invoices** — billing notifications and payment receipts.
* **Estimates** — quote and estimate communications.
* **Scheduling** — appointment and event reminders.
* **Car Updates** — vehicle status changes, photo sessions, and condition reports.
* **Contracts** — document signing requests and agreement notifications.
* **Social Events** — invitations to community events and gatherings.
* **Marketing** — promotional communications and newsletters.
Set these preferences when creating or editing a sub-contact to ensure each person receives only the communications relevant to their role.
## Tips for smooth portal onboarding
A good onboarding experience builds trust and reduces support requests:
* **Add cars before inviting** — when the customer signs in for the first time and sees their vehicles already there, it feels polished and professional.
* **Prepare contracts in advance** — if your onboarding includes document signing, have the contracts ready so the customer can complete everything in one session.
* **Set up billing first** — if you use portal-based billing, link the customer's Stripe record before inviting so payment setup is seamless.
* **Tell the customer to expect the email** — a quick phone call or text saying "I'm sending you a portal invite now, check your inbox" dramatically improves open rates.
* **Check spam folders** — if a customer says they did not receive the invite, the email may have been caught by spam filters. Resend and ask them to check spam/junk.
## Troubleshooting
**The customer says they did not receive the invite**
Check that the email address on the customer record is correct and has no typos. If the address is correct, ask the customer to check their spam/junk folder. If **Account Status** is not **Signed In** yet, use **Resend Invite** on [All Contacts](https://www.carstoragesoftware.com/dashboard/contacts/all). If they already signed in once, have them use your facility login page to request a new sign-in link. If emails consistently fail to deliver, ask an admin to review communication settings.
**The customer signed in but cannot see their cars**
Cars must be explicitly linked to the customer record. Open the customer detail page, scroll to the Cars section, and assign the vehicles. Once linked, the cars appear in the customer's portal on their next page load.
**I want to limit or stop portal access**
There is no single off switch on the main customer record for **Full** portal access. For **additional contacts**, turn off **Can access customer portal** on that person's contact card. To pause the relationship, mark the customer **Inactive** in **CRM Information**. For **Ticket-only** vs **Full** access, see [Understand portal access levels](/docs/contacts/understand-portal-access-levels).
**The invite button is not showing for a sub-contact**
The sub-contact must have both a valid **email address** and **Portal access** enabled. Edit the contact to add the missing information, then the invite action will appear.
**Can multiple people have portal access for one customer account?**
Yes. The primary customer and any number of sub-contacts can each have their own portal access with individual sign-in links. Each person signs in with their own email address and sees the same cars and billing tied to the parent customer account. Use communication preferences to control what each person receives notifications about.
## What to do next
* Walk the customer through their first sign-in: [Guide a customer through the portal](/docs/contacts/guide-a-customer-through-the-portal)
* Explain **Full** vs **Ticket-only** access: [Understand portal access levels](/docs/contacts/understand-portal-access-levels)
* Review who still needs to sign in: [Export and use the customer report](/docs/contacts/export-and-use-the-customer-report)
* Set up billing before they pay online: [Manage billing on a customer record](/docs/contacts/manage-billing-on-a-customer-record)
## Related topics
- [Guide a customer through the portal](/docs/contacts/guide-a-customer-through-the-portal.md)
- [Understand portal access levels](/docs/contacts/understand-portal-access-levels.md)
- [Configure portal and website](/docs/settings/configure-portal-and-website.md)
- [Review and approve registration requests](/docs/facility-web-pages/review-and-approve-registration-requests.md)
- [Add a customer](/docs/contacts/add-a-customer.md)
This documentation is built and hosted on [Mintlify](https://mintlify.com), a developer documentation platform.
*Use the portal access checkbox for additional contacts who should sign in with their own email address.*
**Invite only when the record is ready**
Link the customer's cars, attach any documents or invoices they should see, and enable portal access for any additional contacts **before** you click **Send Invite**. A prepared record makes the first sign-in feel professional.
## Communication preferences for portal contacts
Each sub-contact can have individual **communication preferences** that control which types of notifications they receive:
* **Invoices** — billing notifications and payment receipts.
* **Estimates** — quote and estimate communications.
* **Scheduling** — appointment and event reminders.
* **Car Updates** — vehicle status changes, photo sessions, and condition reports.
* **Contracts** — document signing requests and agreement notifications.
* **Social Events** — invitations to community events and gatherings.
* **Marketing** — promotional communications and newsletters.
Set these preferences when creating or editing a sub-contact to ensure each person receives only the communications relevant to their role.
## Tips for smooth portal onboarding
A good onboarding experience builds trust and reduces support requests:
* **Add cars before inviting** — when the customer signs in for the first time and sees their vehicles already there, it feels polished and professional.
* **Prepare contracts in advance** — if your onboarding includes document signing, have the contracts ready so the customer can complete everything in one session.
* **Set up billing first** — if you use portal-based billing, link the customer's Stripe record before inviting so payment setup is seamless.
* **Tell the customer to expect the email** — a quick phone call or text saying "I'm sending you a portal invite now, check your inbox" dramatically improves open rates.
* **Check spam folders** — if a customer says they did not receive the invite, the email may have been caught by spam filters. Resend and ask them to check spam/junk.
## Troubleshooting
**The customer says they did not receive the invite**
Check that the email address on the customer record is correct and has no typos. If the address is correct, ask the customer to check their spam/junk folder. If **Account Status** is not **Signed In** yet, use **Resend Invite** on [All Contacts](https://www.carstoragesoftware.com/dashboard/contacts/all). If they already signed in once, have them use your facility login page to request a new sign-in link. If emails consistently fail to deliver, ask an admin to review communication settings.
**The customer signed in but cannot see their cars**
Cars must be explicitly linked to the customer record. Open the customer detail page, scroll to the Cars section, and assign the vehicles. Once linked, the cars appear in the customer's portal on their next page load.
**I want to limit or stop portal access**
There is no single off switch on the main customer record for **Full** portal access. For **additional contacts**, turn off **Can access customer portal** on that person's contact card. To pause the relationship, mark the customer **Inactive** in **CRM Information**. For **Ticket-only** vs **Full** access, see [Understand portal access levels](/docs/contacts/understand-portal-access-levels).
**The invite button is not showing for a sub-contact**
The sub-contact must have both a valid **email address** and **Portal access** enabled. Edit the contact to add the missing information, then the invite action will appear.
**Can multiple people have portal access for one customer account?**
Yes. The primary customer and any number of sub-contacts can each have their own portal access with individual sign-in links. Each person signs in with their own email address and sees the same cars and billing tied to the parent customer account. Use communication preferences to control what each person receives notifications about.
## What to do next
* Walk the customer through their first sign-in: [Guide a customer through the portal](/docs/contacts/guide-a-customer-through-the-portal)
* Explain **Full** vs **Ticket-only** access: [Understand portal access levels](/docs/contacts/understand-portal-access-levels)
* Review who still needs to sign in: [Export and use the customer report](/docs/contacts/export-and-use-the-customer-report)
* Set up billing before they pay online: [Manage billing on a customer record](/docs/contacts/manage-billing-on-a-customer-record)
## Related topics
- [Guide a customer through the portal](/docs/contacts/guide-a-customer-through-the-portal.md)
- [Understand portal access levels](/docs/contacts/understand-portal-access-levels.md)
- [Configure portal and website](/docs/settings/configure-portal-and-website.md)
- [Review and approve registration requests](/docs/facility-web-pages/review-and-approve-registration-requests.md)
- [Add a customer](/docs/contacts/add-a-customer.md)
This documentation is built and hosted on [Mintlify](https://mintlify.com), a developer documentation platform.