> ## Documentation Index
> Fetch the complete documentation index at: https://www.carstoragesoftware.com/docs/llms.txt
> Use this file to discover all available pages before exploring further.
# Configure document requirements
> Define the document types customers or staff should upload for facility workflows.
## What you will accomplish
You will create clear labels—such as **Insurance**, **Vehicle Registration**, and **Driver's License**—so staff and customers upload files to the right place. When someone uploads a card or registration paper, everyone sees the same category on the customer record.
## When to use this guide
Use this guide before you:
* Ask customers to upload files during portal onboarding.
* Collect files during public registration.
* Want staff to stop using vague names like "Misc file" for important paperwork.
## Before you start
* List the files your facility needs from customers.
* Decide which files are required and which are optional.
* Decide which files customers should upload themselves vs. staff-only uploads.
* Sign in as a team member who can manage Settings.
## Step 1: Open document types in settings
Open [Settings > Contracts & Documents](https://www.carstoragesoftware.com/dashboard/settings/contracts-and-documents).
Find the section **Document types for uploads** below the contract templates area.
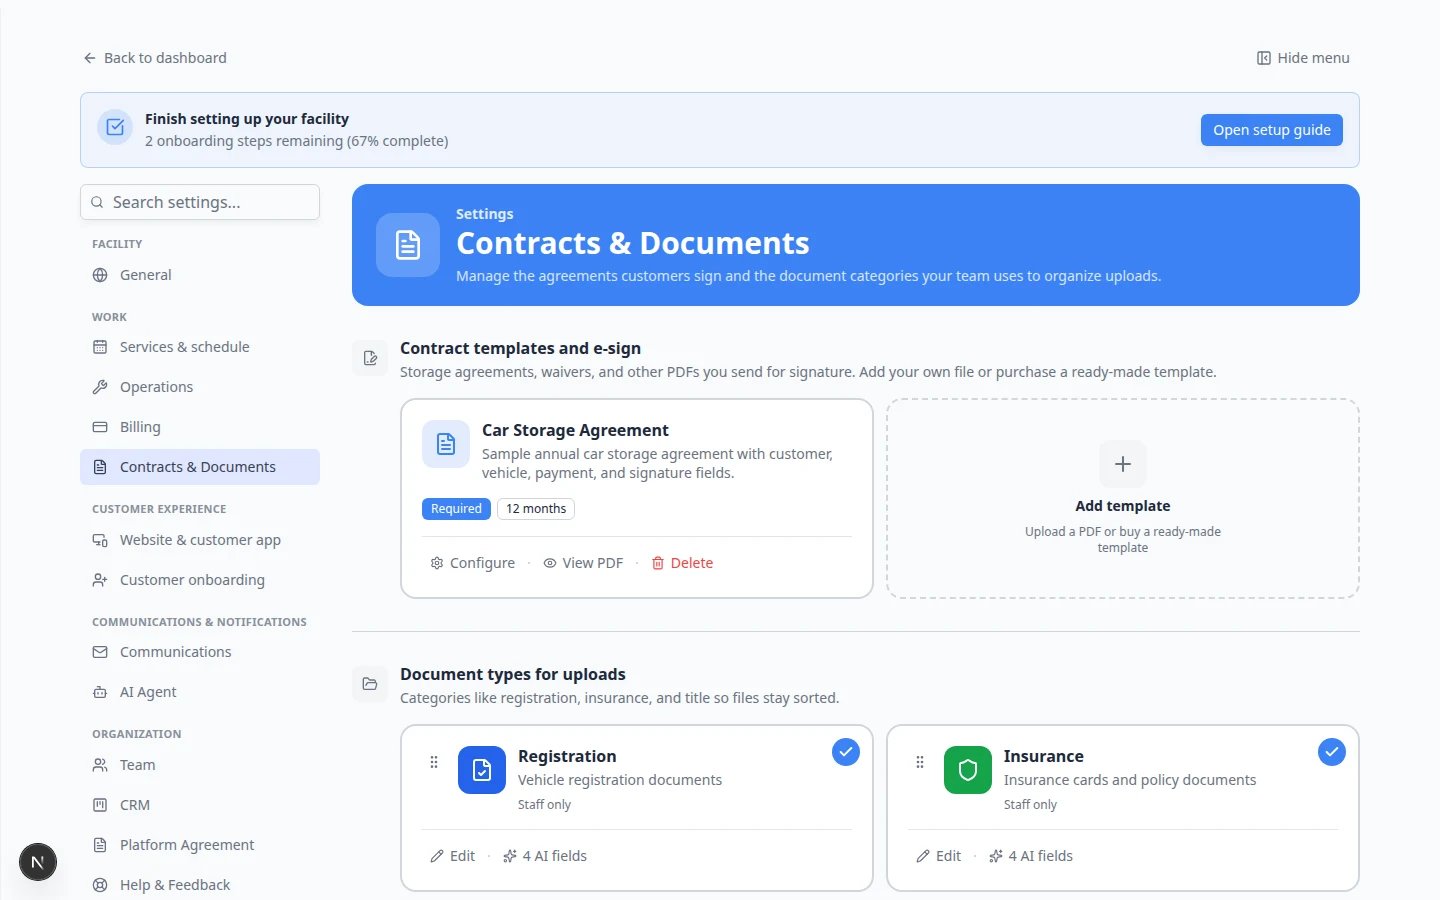 *Open [Settings > Contracts & Documents](https://www.carstoragesoftware.com/dashboard/settings/contracts-and-documents). Contract templates are at the top; upload categories are in **Document types for uploads** farther down the page.*
Scroll down until you see **Document types for uploads**. This is separate from contract templates customers sign.
*Open [Settings > Contracts & Documents](https://www.carstoragesoftware.com/dashboard/settings/contracts-and-documents). Contract templates are at the top; upload categories are in **Document types for uploads** farther down the page.*
Scroll down until you see **Document types for uploads**. This is separate from contract templates customers sign.
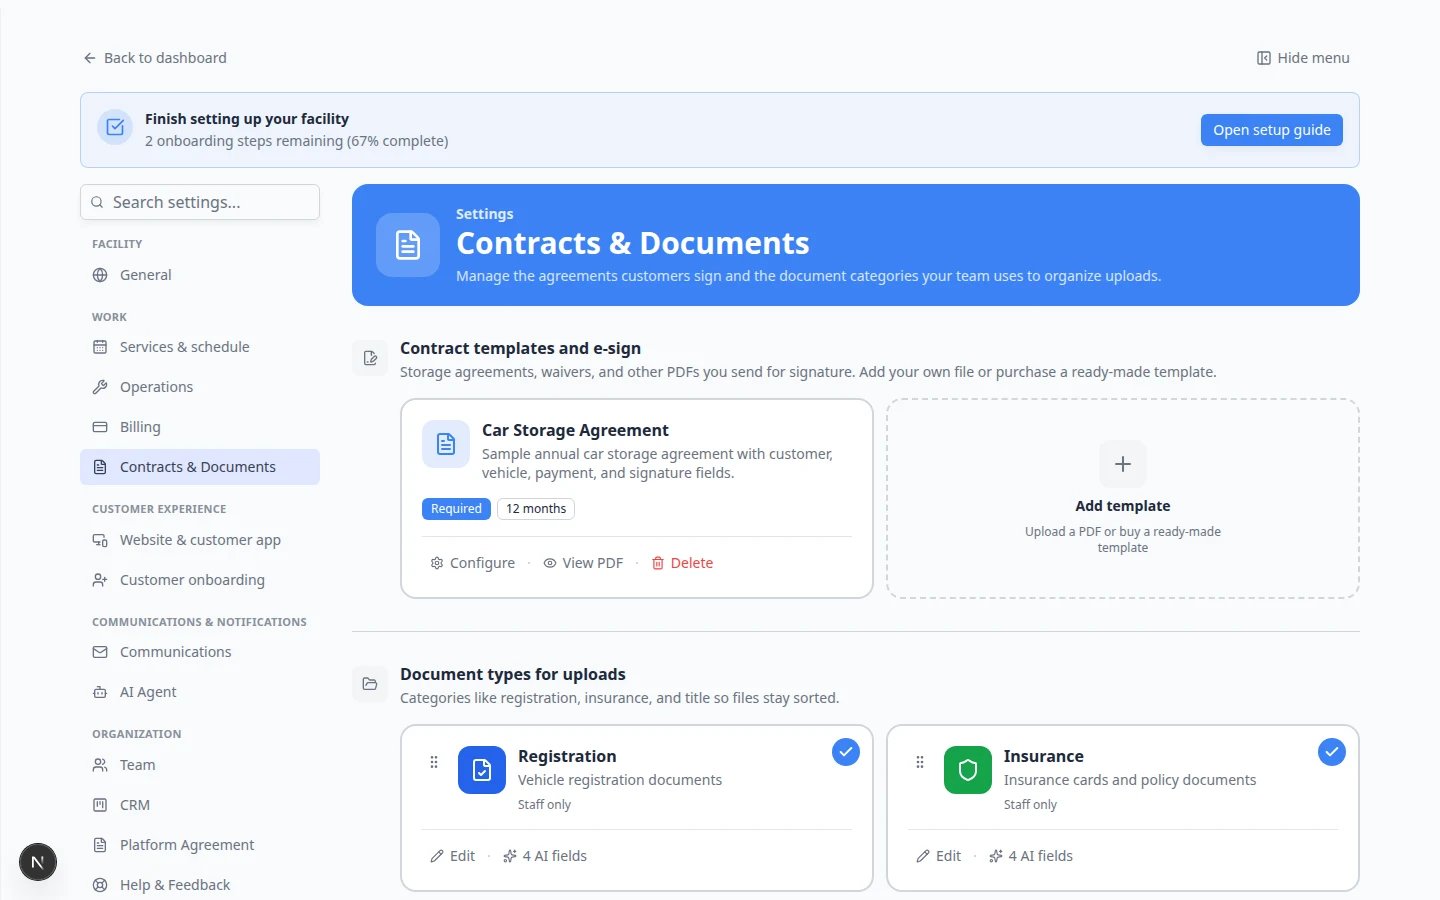 *Each row is a label your team and customers will see when uploading files. Use **Add Document Type** to create a new category.*
**Expected result:** You see the list of document types your team already uses (or an empty list if you are starting fresh).
## Step 2: Plan the types you need
Start with files your team asks for most often.
* **Insurance** — proof of vehicle insurance.
* **Registration** — registration paperwork for the stored vehicle (the default system label is **Registration**, not "Vehicle Registration").
* **Driver's License** — government ID for the account holder.
* **Title** — ownership paperwork when needed.
* **Bill of Sale** — purchase or transfer records.
* **Other** — only when nothing else fits.
**Customer Access is off by default**
New document types—and the built-in **Insurance** and **Registration** types—start with **Customer Access** turned **off**. Turn it **on** for each type customers should upload in the portal or during onboarding.
## Step 3: Create a document type
In **Document types for uploads**, click **Add document type** (below the list of existing types).
Type the name staff and customers should see, such as **Insurance** or **Vehicle Registration**.
The **Value** field is used behind the scenes. In most cases, leave it as the app suggests from the name.
Explain what should be uploaded. Example: **Current insurance card for the vehicle on file.**
Choose a simple icon and color so staff can scan a long document list quickly.
Find the switch labeled **Customer Access** (or similar wording).
Turn it **on** if customers should see or upload this type in the customer portal (**My Documents** or onboarding).
Leave it **off** for internal-only files (staff inspection notes, private accounting scans).
**Why this matters:** If Customer Access is off, customers will not see that type during portal onboarding—even if you turned on the document upload step. You can also toggle **Customer Access** later from the document types table without reopening every type.
Click **Create Document Type** or **Save Changes**.
**Expected result:** The new type appears in the document types list and can be chosen when uploading files from [Contacts](https://www.carstoragesoftware.com/dashboard/contacts) or during customer onboarding.
*Each row is a label your team and customers will see when uploading files. Use **Add Document Type** to create a new category.*
**Expected result:** You see the list of document types your team already uses (or an empty list if you are starting fresh).
## Step 2: Plan the types you need
Start with files your team asks for most often.
* **Insurance** — proof of vehicle insurance.
* **Registration** — registration paperwork for the stored vehicle (the default system label is **Registration**, not "Vehicle Registration").
* **Driver's License** — government ID for the account holder.
* **Title** — ownership paperwork when needed.
* **Bill of Sale** — purchase or transfer records.
* **Other** — only when nothing else fits.
**Customer Access is off by default**
New document types—and the built-in **Insurance** and **Registration** types—start with **Customer Access** turned **off**. Turn it **on** for each type customers should upload in the portal or during onboarding.
## Step 3: Create a document type
In **Document types for uploads**, click **Add document type** (below the list of existing types).
Type the name staff and customers should see, such as **Insurance** or **Vehicle Registration**.
The **Value** field is used behind the scenes. In most cases, leave it as the app suggests from the name.
Explain what should be uploaded. Example: **Current insurance card for the vehicle on file.**
Choose a simple icon and color so staff can scan a long document list quickly.
Find the switch labeled **Customer Access** (or similar wording).
Turn it **on** if customers should see or upload this type in the customer portal (**My Documents** or onboarding).
Leave it **off** for internal-only files (staff inspection notes, private accounting scans).
**Why this matters:** If Customer Access is off, customers will not see that type during portal onboarding—even if you turned on the document upload step. You can also toggle **Customer Access** later from the document types table without reopening every type.
Click **Create Document Type** or **Save Changes**.
**Expected result:** The new type appears in the document types list and can be chosen when uploading files from [Contacts](https://www.carstoragesoftware.com/dashboard/contacts) or during customer onboarding.
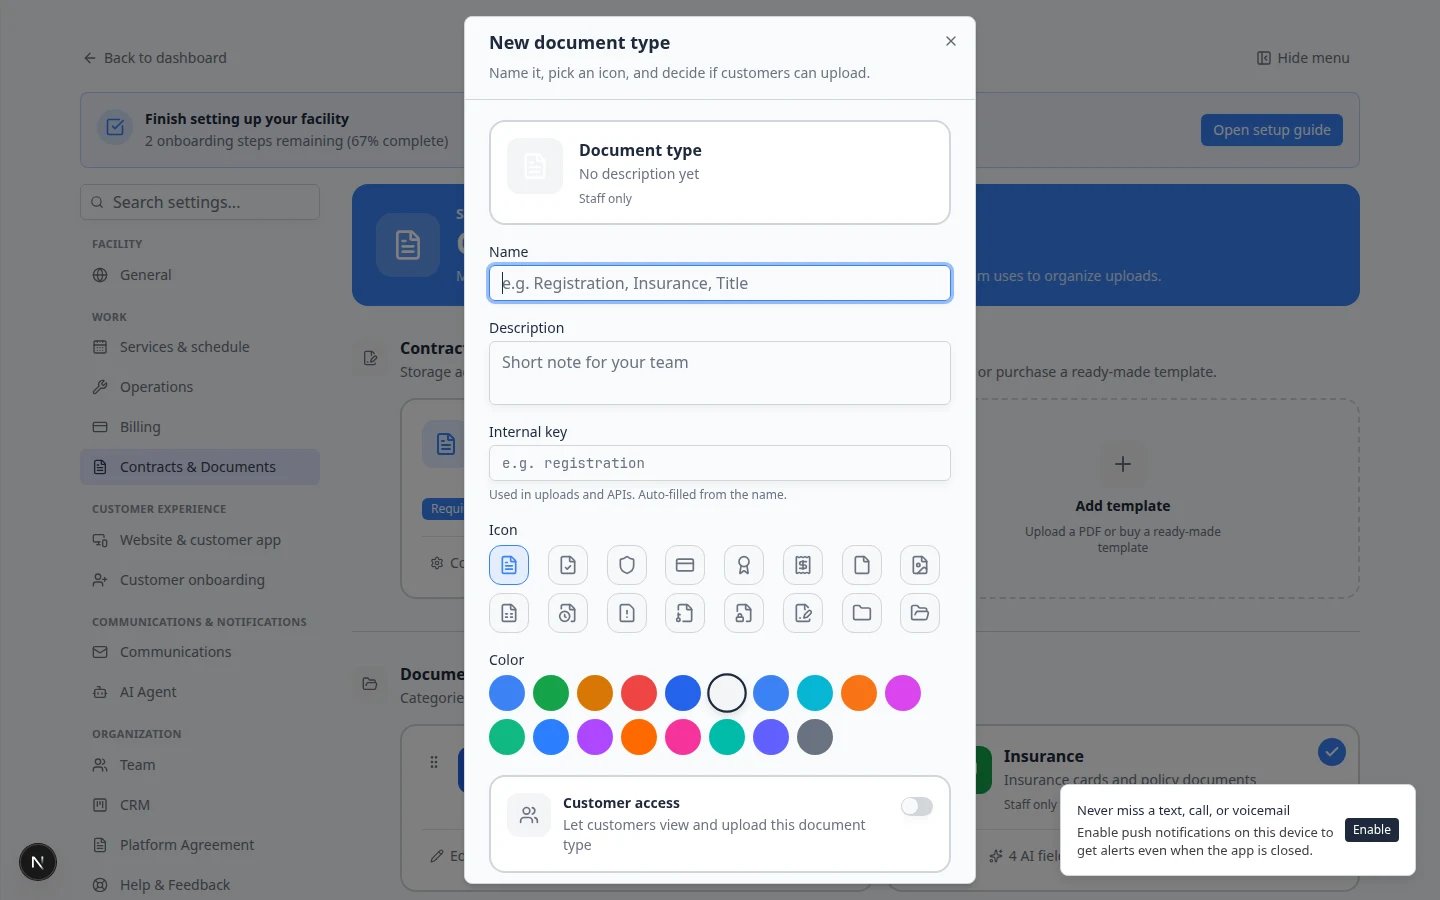 *Turn **Customer Access** on when customers should upload or see this file type in the portal. Leave it off for staff-only categories like internal inspection notes.*
**Expected result:** The new type appears in the document types list and can be chosen when uploading files.
## Step 4: Put types in a helpful order
If you have many types, drag the rows so the most common ones appear first (Insurance, Registration, and so on).
Staff and customers will see types in this order when they upload files.
**Expected result:** The list order matches how your team talks about paperwork—insurance and registration before less common types.
## When a document type should stop being used
If a label is outdated but old files still use it, do not delete the type immediately.
Edit the document type and set **Status** to inactive (or off—wording may vary).
**Why this matters:** Old uploads keep their label so history stays readable. New uploads can no longer pick that type.
If you replaced **Insurance card** with **Insurance**, mention the change at your next staff meeting so front desk picks the new name.
## Step 5: Connect types to customer onboarding (optional)
If new customers must upload files during portal setup:
Go to [Settings > Customer onboarding](https://www.carstoragesoftware.com/dashboard/settings/customer-onboarding).
Scroll to **Customer app onboarding**.
Enable the step that asks customers to upload documents.
Choose which document types are required during onboarding in **Document Upload Step Configuration**.
*Turn **Customer Access** on when customers should upload or see this file type in the portal. Leave it off for staff-only categories like internal inspection notes.*
**Expected result:** The new type appears in the document types list and can be chosen when uploading files.
## Step 4: Put types in a helpful order
If you have many types, drag the rows so the most common ones appear first (Insurance, Registration, and so on).
Staff and customers will see types in this order when they upload files.
**Expected result:** The list order matches how your team talks about paperwork—insurance and registration before less common types.
## When a document type should stop being used
If a label is outdated but old files still use it, do not delete the type immediately.
Edit the document type and set **Status** to inactive (or off—wording may vary).
**Why this matters:** Old uploads keep their label so history stays readable. New uploads can no longer pick that type.
If you replaced **Insurance card** with **Insurance**, mention the change at your next staff meeting so front desk picks the new name.
## Step 5: Connect types to customer onboarding (optional)
If new customers must upload files during portal setup:
Go to [Settings > Customer onboarding](https://www.carstoragesoftware.com/dashboard/settings/customer-onboarding).
Scroll to **Customer app onboarding**.
Enable the step that asks customers to upload documents.
Choose which document types are required during onboarding in **Document Upload Step Configuration**.
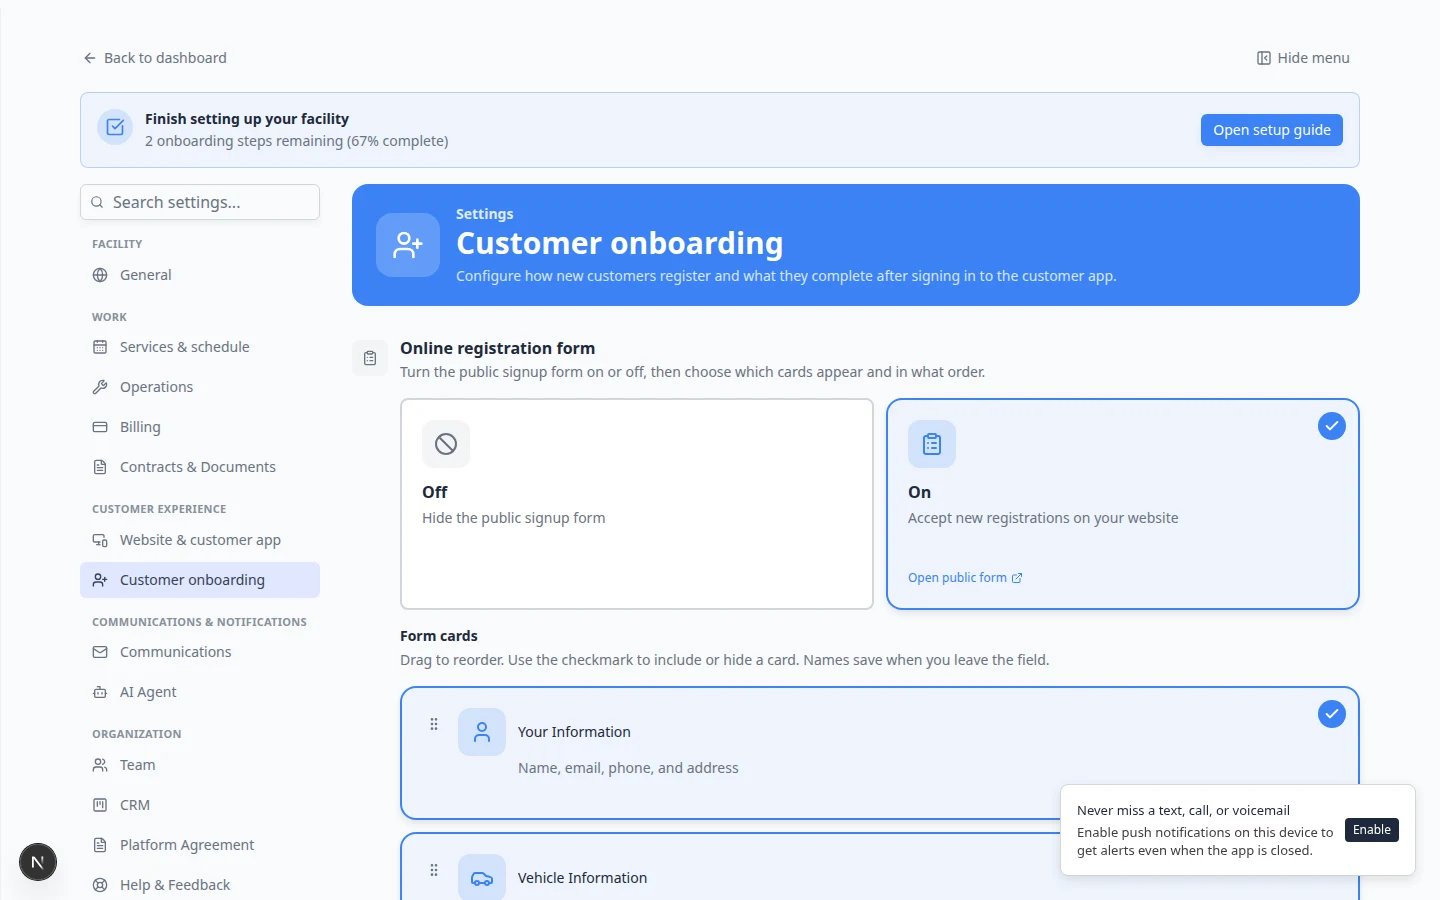 *Required types in this window must also have **Customer Access** turned on in document type settings.*
Invite a test customer and confirm the upload step shows the correct type names.
For the full onboarding flow (including contracts), see [Configure customer onboarding](/docs/settings/configure-customer-onboarding) and [Attach contracts to customer workflows](/docs/contracts/attach-contracts-to-workflows).
## Step 6: Test from a customer record
Go to [Contacts](https://www.carstoragesoftware.com/dashboard/contacts) and open a customer record.
Scroll to **Documents & Contracts**.
Click **New Document**, choose **General Document**, then pick the document type you created.
Confirm the type name appears as expected.
*Required types in this window must also have **Customer Access** turned on in document type settings.*
Invite a test customer and confirm the upload step shows the correct type names.
For the full onboarding flow (including contracts), see [Configure customer onboarding](/docs/settings/configure-customer-onboarding) and [Attach contracts to customer workflows](/docs/contracts/attach-contracts-to-workflows).
## Step 6: Test from a customer record
Go to [Contacts](https://www.carstoragesoftware.com/dashboard/contacts) and open a customer record.
Scroll to **Documents & Contracts**.
Click **New Document**, choose **General Document**, then pick the document type you created.
Confirm the type name appears as expected.
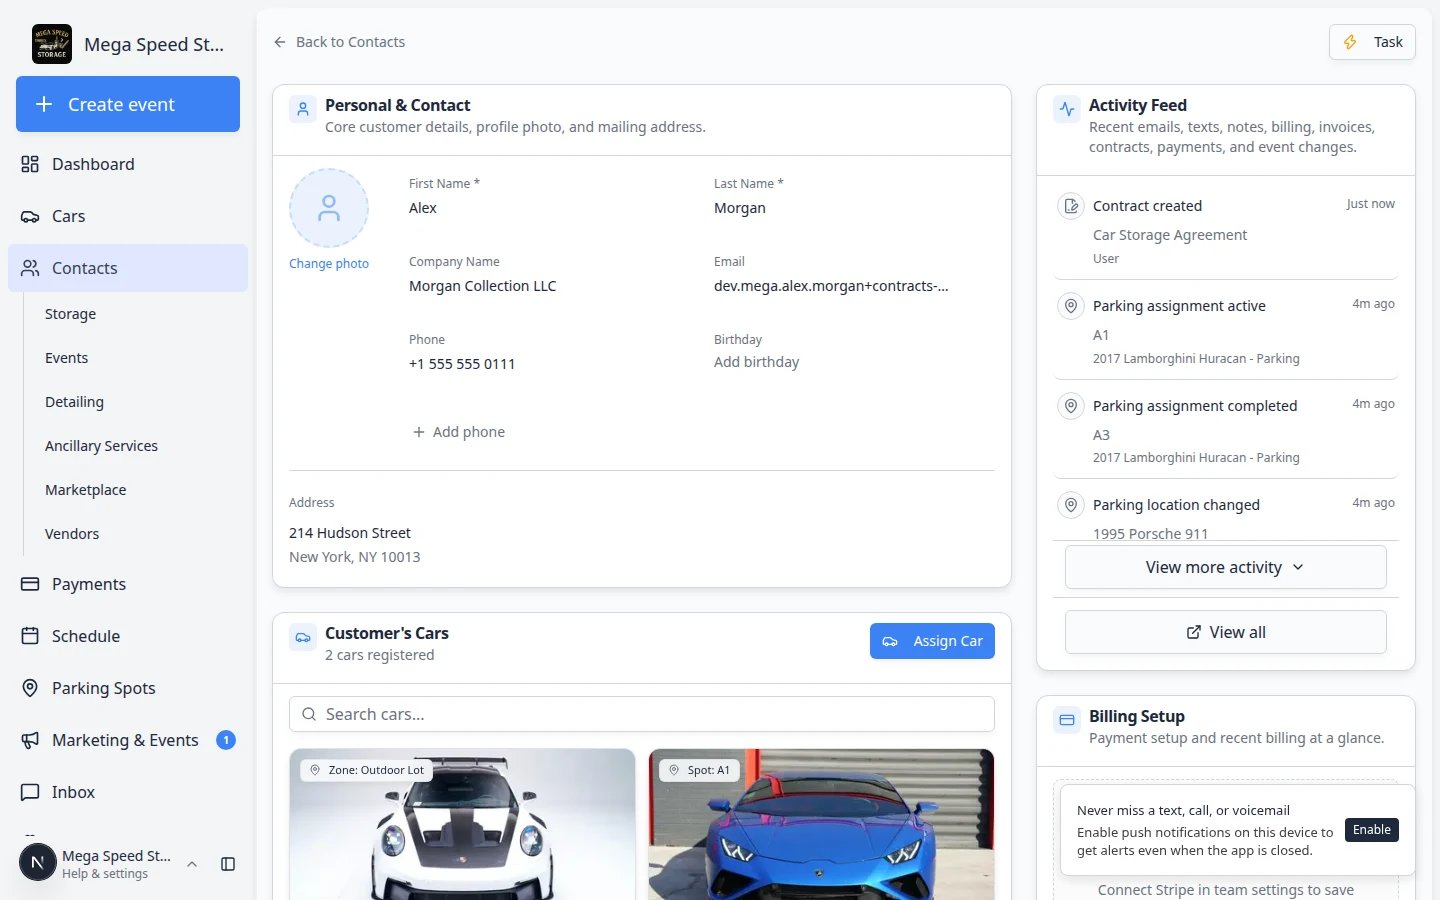 *Uploaded documents and contracts appear together on the customer record so staff can review everything in one place.*
## What success looks like
* Document types appear in [Settings > Contracts & Documents](https://www.carstoragesoftware.com/dashboard/settings/contracts-and-documents).
* Customer-facing types have **Customer Access** turned on.
* Internal-only types have **Customer Access** turned off.
* Staff can pick the correct type when uploading from a customer record.
* Customers only see upload requests that make sense for them.
## Troubleshooting
**Customers cannot see a document type**
Open [Settings > Contracts & Documents](https://www.carstoragesoftware.com/dashboard/settings/contracts-and-documents) and confirm **Customer Access** is on for that type. Also confirm **Status** is active.
**A document type is no longer needed**
Turn off **Status** instead of deleting right away. Older records stay easier to understand while new uploads stop using that type.
**The onboarding upload step is empty**
Only active document types with **Customer Access** enabled can appear for customers. Check both **Status** and **Customer Access** in [Settings > Contracts & Documents](https://www.carstoragesoftware.com/dashboard/settings/contracts-and-documents), then review the **Document Upload** step in [Configure customer onboarding](/docs/settings/configure-customer-onboarding).
**Customers upload to the wrong category**
Use simple type names (**Insurance**, not internal codes). Coach customers with [Help customers upload documents in the portal](/docs/contracts/help-customers-upload-documents-in-the-portal). Staff can re-upload under the correct type with [Upload a document for a customer](/docs/contracts/upload-a-document-for-a-customer) if needed.
## What to do next
If uploads are part of onboarding, continue with [Attach contracts to customer workflows](/docs/contracts/attach-contracts-to-workflows).
If customers should upload after onboarding, see [Help customers upload documents in the portal](/docs/contracts/help-customers-upload-documents-in-the-portal).
If you only need staff uploads, follow [Upload a document for a customer](/docs/contracts/upload-a-document-for-a-customer) for step-by-step help from the customer record.
## Related topics
- [Configure customer onboarding](/docs/settings/configure-customer-onboarding.md)
- [Upload a document for a customer](/docs/contracts/upload-a-document-for-a-customer.md)
- [Help customers upload documents in the portal](/docs/contracts/help-customers-upload-documents-in-the-portal.md)
- [Review signed contracts and document history](/docs/contracts/review-signed-contracts-and-documents.md)
- [Attach contracts to customer workflows](/docs/contracts/attach-contracts-to-workflows.md)
This documentation is built and hosted on [Mintlify](https://mintlify.com), a developer documentation platform.
*Uploaded documents and contracts appear together on the customer record so staff can review everything in one place.*
## What success looks like
* Document types appear in [Settings > Contracts & Documents](https://www.carstoragesoftware.com/dashboard/settings/contracts-and-documents).
* Customer-facing types have **Customer Access** turned on.
* Internal-only types have **Customer Access** turned off.
* Staff can pick the correct type when uploading from a customer record.
* Customers only see upload requests that make sense for them.
## Troubleshooting
**Customers cannot see a document type**
Open [Settings > Contracts & Documents](https://www.carstoragesoftware.com/dashboard/settings/contracts-and-documents) and confirm **Customer Access** is on for that type. Also confirm **Status** is active.
**A document type is no longer needed**
Turn off **Status** instead of deleting right away. Older records stay easier to understand while new uploads stop using that type.
**The onboarding upload step is empty**
Only active document types with **Customer Access** enabled can appear for customers. Check both **Status** and **Customer Access** in [Settings > Contracts & Documents](https://www.carstoragesoftware.com/dashboard/settings/contracts-and-documents), then review the **Document Upload** step in [Configure customer onboarding](/docs/settings/configure-customer-onboarding).
**Customers upload to the wrong category**
Use simple type names (**Insurance**, not internal codes). Coach customers with [Help customers upload documents in the portal](/docs/contracts/help-customers-upload-documents-in-the-portal). Staff can re-upload under the correct type with [Upload a document for a customer](/docs/contracts/upload-a-document-for-a-customer) if needed.
## What to do next
If uploads are part of onboarding, continue with [Attach contracts to customer workflows](/docs/contracts/attach-contracts-to-workflows).
If customers should upload after onboarding, see [Help customers upload documents in the portal](/docs/contracts/help-customers-upload-documents-in-the-portal).
If you only need staff uploads, follow [Upload a document for a customer](/docs/contracts/upload-a-document-for-a-customer) for step-by-step help from the customer record.
## Related topics
- [Configure customer onboarding](/docs/settings/configure-customer-onboarding.md)
- [Upload a document for a customer](/docs/contracts/upload-a-document-for-a-customer.md)
- [Help customers upload documents in the portal](/docs/contracts/help-customers-upload-documents-in-the-portal.md)
- [Review signed contracts and document history](/docs/contracts/review-signed-contracts-and-documents.md)
- [Attach contracts to customer workflows](/docs/contracts/attach-contracts-to-workflows.md)
This documentation is built and hosted on [Mintlify](https://mintlify.com), a developer documentation platform.