> ## Documentation Index
> Fetch the complete documentation index at: https://www.carstoragesoftware.com/docs/llms.txt
> Use this file to discover all available pages before exploring further.
# Set up bookable resources
> Configure facility resources such as bays, lifts, rooms, staff, and equipment for scheduled events.
## What you will accomplish
You will create a list of limited spaces, equipment, or people—then connect them to event types so [Schedule](https://www.carstoragesoftware.com/dashboard/schedule) does not double book them.
A resource can be a detail bay, wash bay, lift, conference room, trailer, photographer, specialist, or any other item your team cannot use for two appointments at once.
This guide helps you create the resource list and add individual bookable instances. After that, you attach resources to event types in [Configure scheduling and booking options](/docs/events/configure-scheduling-and-booking-options).
**Two ways to limit capacity — pick the right one**
Many facilities start with **Operations amenities** in [Manage custom statuses and amenities](/docs/settings/manage-custom-statuses-and-amenities). Those show up in booking options as **Facility amenity (optional)** and are enough when you need simple limits (for example one detail bay or one wash lane).
Use **Bookable resources** (this guide) when you need named instances with their own capacity—**Bay 1** and **Bay 2** under one **Detail Bay** resource, or a person linked to a staff account.
If you already created amenities and they appear in the booking option dropdown, you may not need bookable resources yet.
**Use resources only when capacity matters**
If your team can do unlimited appointments of a certain type at the same time, you may not need resources. Add resources when a physical space, staff member, or piece of equipment can only be used by one or a limited number of appointments at once.
## Before you start
* List the things that limit scheduling capacity, such as bays, lifts, rooms, staff, or equipment.
* Decide how many individual instances exist. Example: one resource named **Detail Bay** may have instances named **Bay 1** and **Bay 2**.
* Know whether any instance should be linked to a specific staff user.
* Decide which event types should require this resource.
* Make sure you have admin access to [Settings > Services & schedule](https://www.carstoragesoftware.com/dashboard/settings/events).
## Understand resources and instances
A **resource** is the general thing customers or staff book. Example: **Detail Bay**.
An **instance** is the specific bookable item inside that resource. Example: **Bay 1** and **Bay 2**.
If you only have one detail bay, create one resource named **Detail Bay** and one instance named **Bay 1**.
## Start with Operations amenities (most facilities)
Before you create advanced bookable resources, check whether [Settings > Operations](https://www.carstoragesoftware.com/dashboard/settings/operations#amenities) already covers your needs.
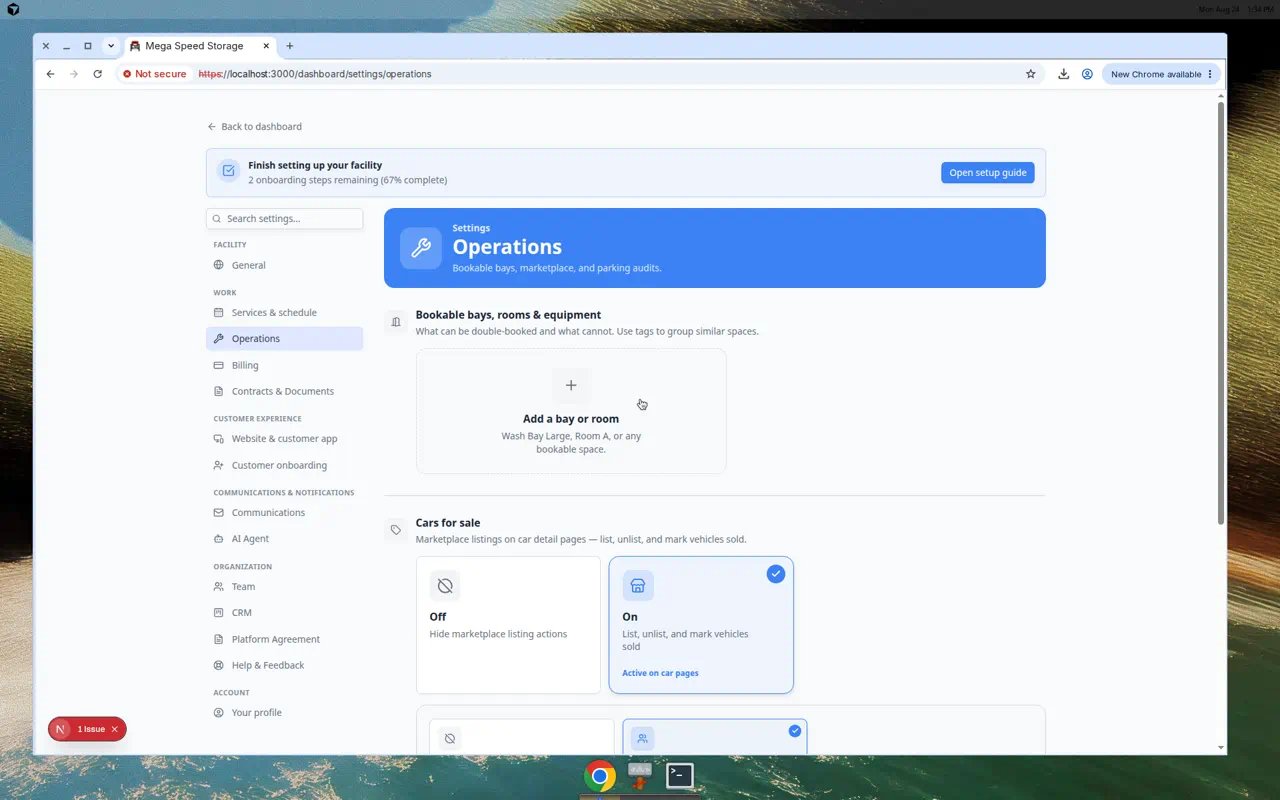 *Most facilities start here. Amenities appear in booking options as **Facility amenity (optional)**—enough for simple limits like one detail bay.*
**When to use advanced bookable resources**
Use [Settings > Bookable resources](https://www.carstoragesoftware.com/dashboard/settings/resources) when you need named instances with their own capacity—**Bay 1** and **Bay 2** under one **Detail Bay** resource, or a person linked to a staff account. Skip this guide if Operations amenities already work for you.
## Open Bookable resources
Open [Settings > Bookable resources](https://www.carstoragesoftware.com/dashboard/settings/resources) directly. This page is not in the main settings sidebar—you can bookmark it or search for "Bookable resources" in Settings.
Navigate to [Settings > Bookable resources](https://www.carstoragesoftware.com/dashboard/settings/resources).
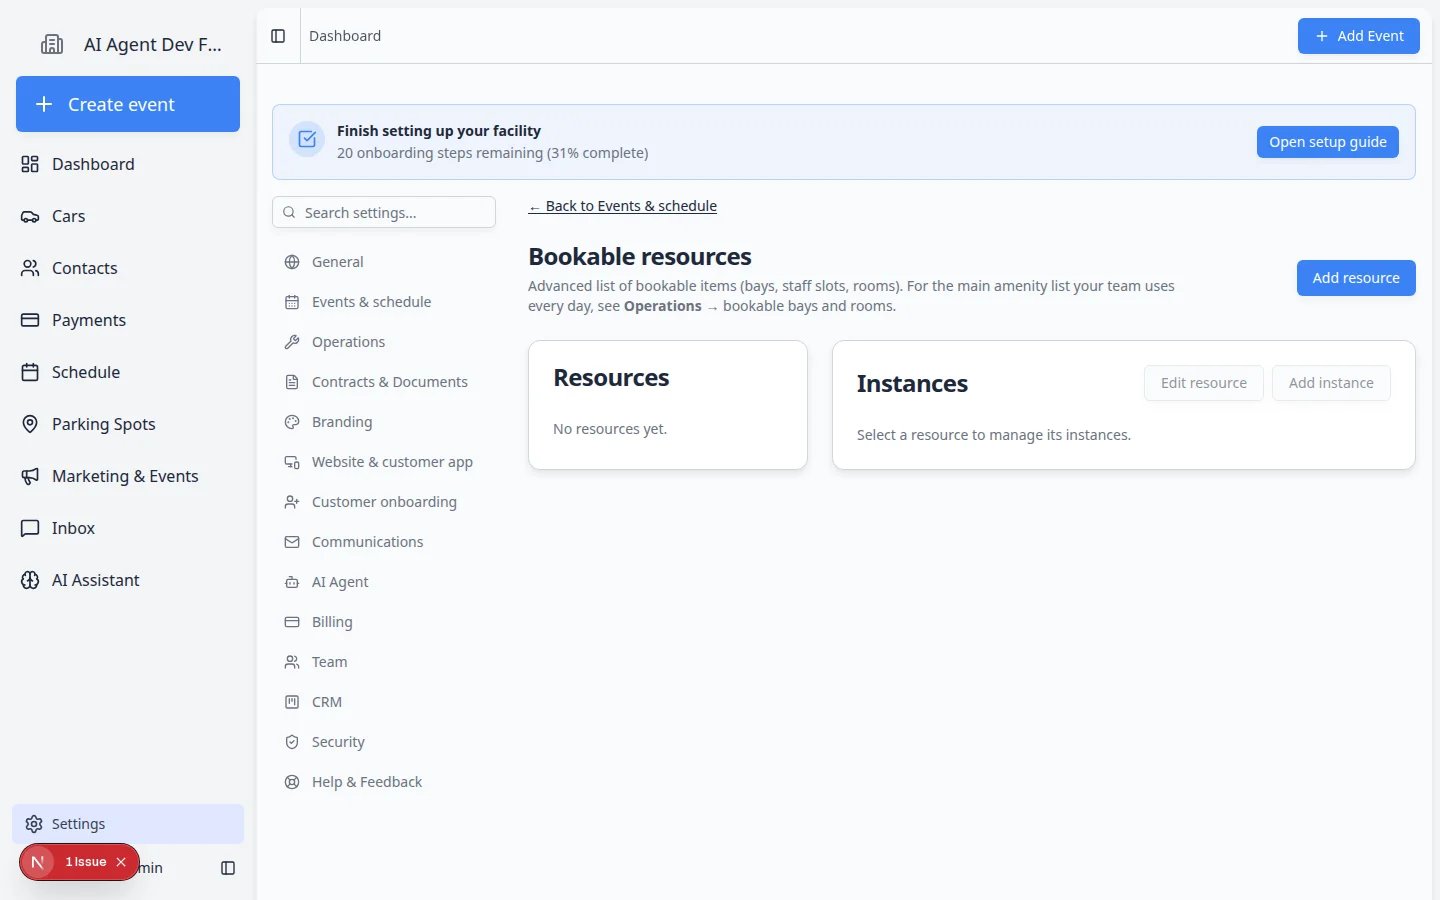
**Expected result:** You see resources on the left (for example **Detail Bay**) and **Instances** on the right (for example **Bay 1**).
*Most facilities start here. Amenities appear in booking options as **Facility amenity (optional)**—enough for simple limits like one detail bay.*
**When to use advanced bookable resources**
Use [Settings > Bookable resources](https://www.carstoragesoftware.com/dashboard/settings/resources) when you need named instances with their own capacity—**Bay 1** and **Bay 2** under one **Detail Bay** resource, or a person linked to a staff account. Skip this guide if Operations amenities already work for you.
## Open Bookable resources
Open [Settings > Bookable resources](https://www.carstoragesoftware.com/dashboard/settings/resources) directly. This page is not in the main settings sidebar—you can bookmark it or search for "Bookable resources" in Settings.
Navigate to [Settings > Bookable resources](https://www.carstoragesoftware.com/dashboard/settings/resources).
**Expected result:** You see resources on the left (for example **Detail Bay**) and **Instances** on the right (for example **Bay 1**).
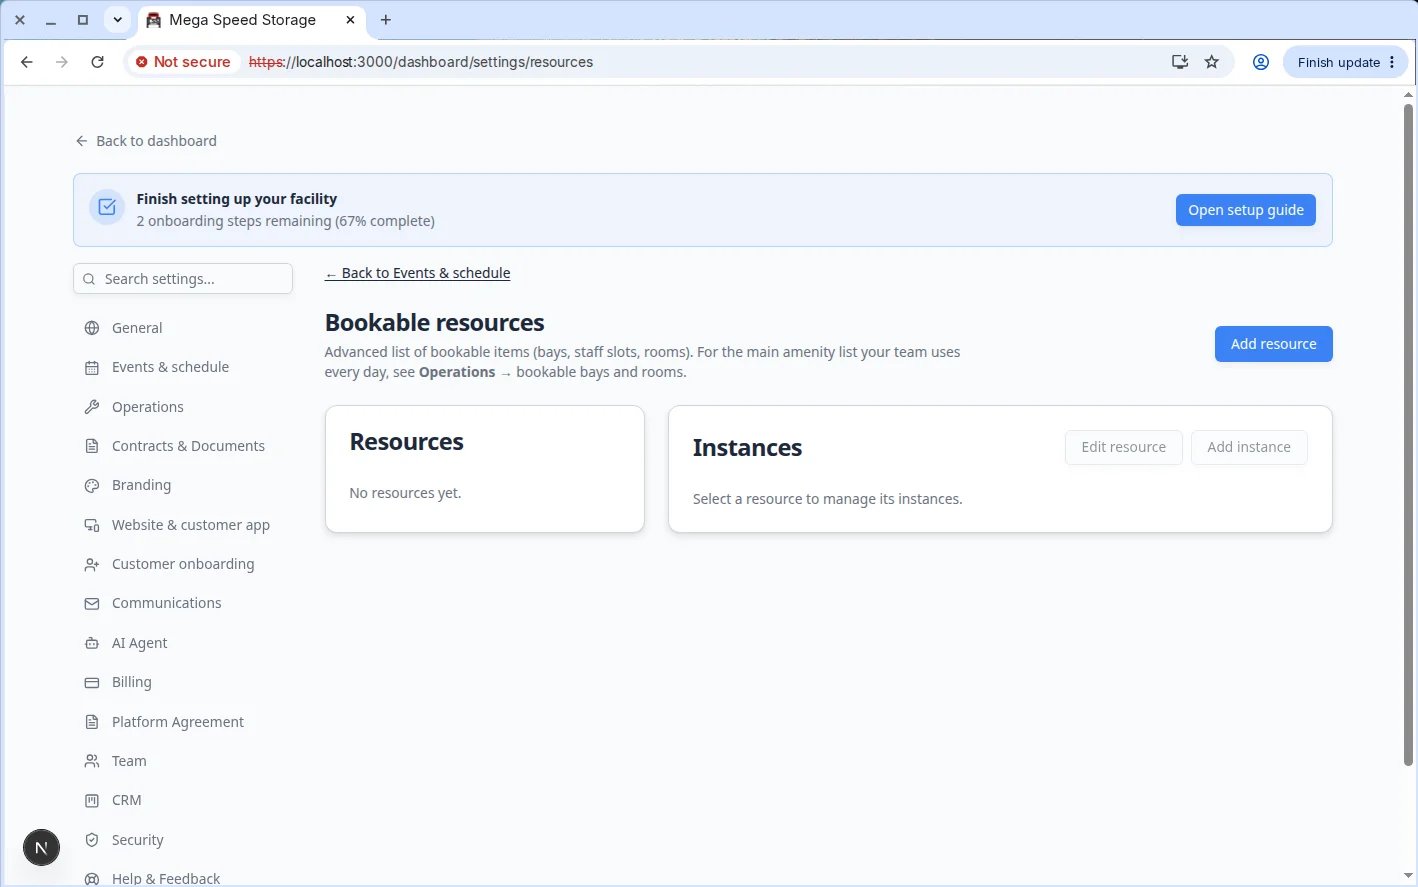 *Bookable resources list shows each resource on the left and the selected resource's instances on the right.*
## Add a resource
On the [Bookable resources page](https://www.carstoragesoftware.com/dashboard/settings/resources), click **Add resource**.
A window named **Add resource** opens.
In **Name**, type the general resource name.
Examples: **Detail Bay**, **Wash Bay**, **Lift**, **Conference Room**, **Transport Trailer**, or **Lead Technician**.
Use **Kind** to describe what type of resource it is.
If you are not sure, choose the closest option. This helps your team understand the resource later, but the name is usually what staff notice first.
Use **Description** for simple notes that help staff understand when to use the resource.
Example: "Use for customer detail appointments and inspection work."
Click **Create**. The resource is added to the list.
*Bookable resources list shows each resource on the left and the selected resource's instances on the right.*
## Add a resource
On the [Bookable resources page](https://www.carstoragesoftware.com/dashboard/settings/resources), click **Add resource**.
A window named **Add resource** opens.
In **Name**, type the general resource name.
Examples: **Detail Bay**, **Wash Bay**, **Lift**, **Conference Room**, **Transport Trailer**, or **Lead Technician**.
Use **Kind** to describe what type of resource it is.
If you are not sure, choose the closest option. This helps your team understand the resource later, but the name is usually what staff notice first.
Use **Description** for simple notes that help staff understand when to use the resource.
Example: "Use for customer detail appointments and inspection work."
Click **Create**. The resource is added to the list.
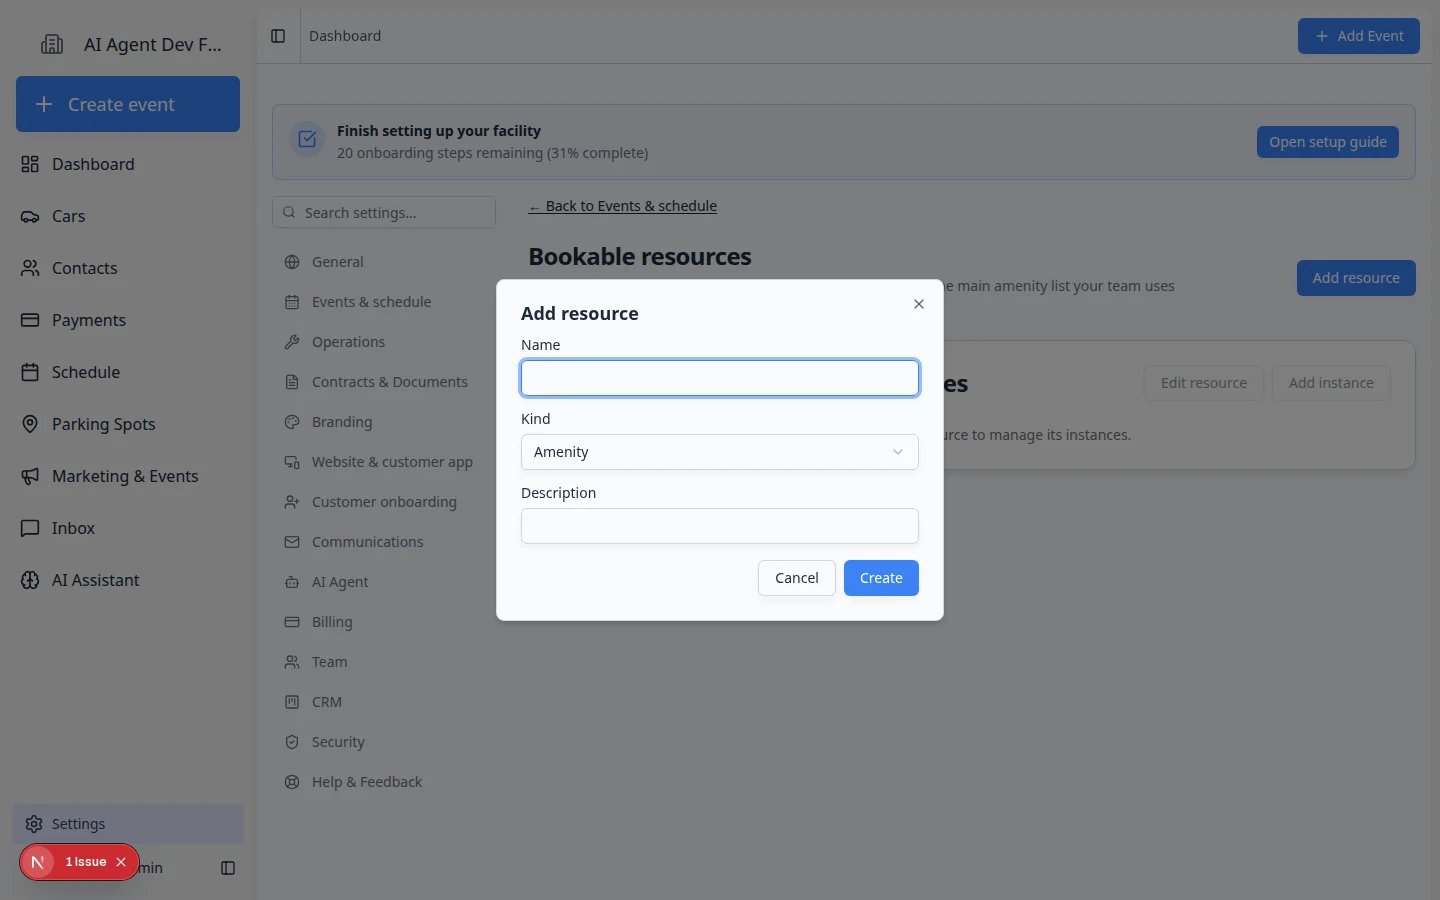 *Create the general resource first, then add one or more instances that can actually be booked.*
## Add an instance
Click the resource name in the left column.
The **Instances** panel appears on the right.
Click **Add instance**.
In **Name**, type the specific item or slot.
Examples: **Bay 1**, **Bay 2**, **Lift A**, **Conference Room**, or **Trailer 1**.
Use **Capacity** to show how many appointments can use that instance at once.
Most physical items should have capacity **1**. Use a higher number only when more than one booking can safely share the same instance.
Use **Linked user (optional)** only when the instance is a person or belongs to a specific teammate.
If the resource is a room, bay, lift, or equipment, leave this as **None** unless your process requires a specific staff owner.
Click **Create**.
**Expected result:** The instance appears in the **Instances** table on the right, with its name, capacity, and status shown.
*Create the general resource first, then add one or more instances that can actually be booked.*
## Add an instance
Click the resource name in the left column.
The **Instances** panel appears on the right.
Click **Add instance**.
In **Name**, type the specific item or slot.
Examples: **Bay 1**, **Bay 2**, **Lift A**, **Conference Room**, or **Trailer 1**.
Use **Capacity** to show how many appointments can use that instance at once.
Most physical items should have capacity **1**. Use a higher number only when more than one booking can safely share the same instance.
Use **Linked user (optional)** only when the instance is a person or belongs to a specific teammate.
If the resource is a room, bay, lift, or equipment, leave this as **None** unless your process requires a specific staff owner.
Click **Create**.
**Expected result:** The instance appears in the **Instances** table on the right, with its name, capacity, and status shown.
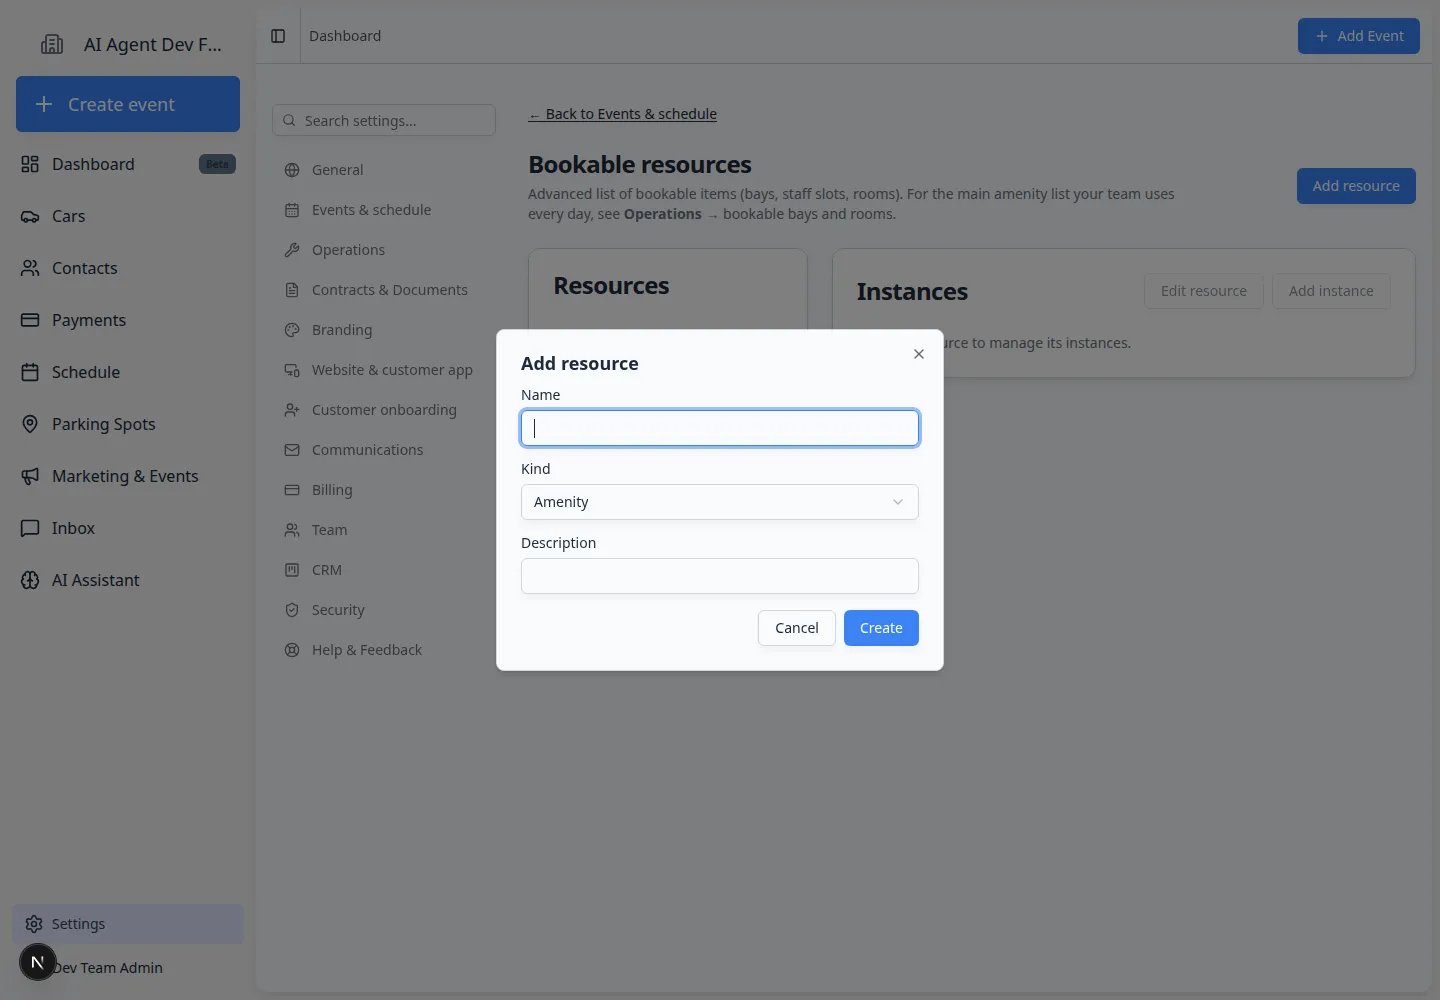 *Each instance is the bookable slot your calendar checks—such as Bay 1 or Bay 2 under one Detail Bay resource.*
 *A resource with two instances lets the calendar book Bay 1 and Bay 2 separately—helpful when your shop runs more than one lane.*
## Attach the resource to an event type
Creating the resource list is the first part. The second part is telling an event type to use that resource.
Go to [Settings > Services & schedule](https://www.carstoragesoftware.com/dashboard/settings/events).
Click **Set up** or **Advanced** on the event type that needs the resource.
Example: If detail appointments need a detail bay, open **Detail Appointment**.
Scroll to **Booking Options** on the same edit page. Click **Edit** on the option that should reserve the resource (or click **Add option** first).
**Expected result:** The **Add option** or **Edit option** window opens.
In that window, open **Facility amenity (optional)** and pick the instance this appointment should reserve—such as **Bay 1** under **Detail Bay**.
This tells the calendar to check availability before the event is booked.
**Expected result:** The amenity name appears in the dropdown before you save the option.
Click **Save Changes**, then create a test appointment from [Schedule](https://www.carstoragesoftware.com/dashboard/schedule). Confirm the appointment uses the expected resource and does not allow unavailable capacity.
If no resources exist yet, the **Bookable resources** page shows **No resources yet** until you add your first bay, lift, or room.
*A resource with two instances lets the calendar book Bay 1 and Bay 2 separately—helpful when your shop runs more than one lane.*
## Attach the resource to an event type
Creating the resource list is the first part. The second part is telling an event type to use that resource.
Go to [Settings > Services & schedule](https://www.carstoragesoftware.com/dashboard/settings/events).
Click **Set up** or **Advanced** on the event type that needs the resource.
Example: If detail appointments need a detail bay, open **Detail Appointment**.
Scroll to **Booking Options** on the same edit page. Click **Edit** on the option that should reserve the resource (or click **Add option** first).
**Expected result:** The **Add option** or **Edit option** window opens.
In that window, open **Facility amenity (optional)** and pick the instance this appointment should reserve—such as **Bay 1** under **Detail Bay**.
This tells the calendar to check availability before the event is booked.
**Expected result:** The amenity name appears in the dropdown before you save the option.
Click **Save Changes**, then create a test appointment from [Schedule](https://www.carstoragesoftware.com/dashboard/schedule). Confirm the appointment uses the expected resource and does not allow unavailable capacity.
If no resources exist yet, the **Bookable resources** page shows **No resources yet** until you add your first bay, lift, or room.
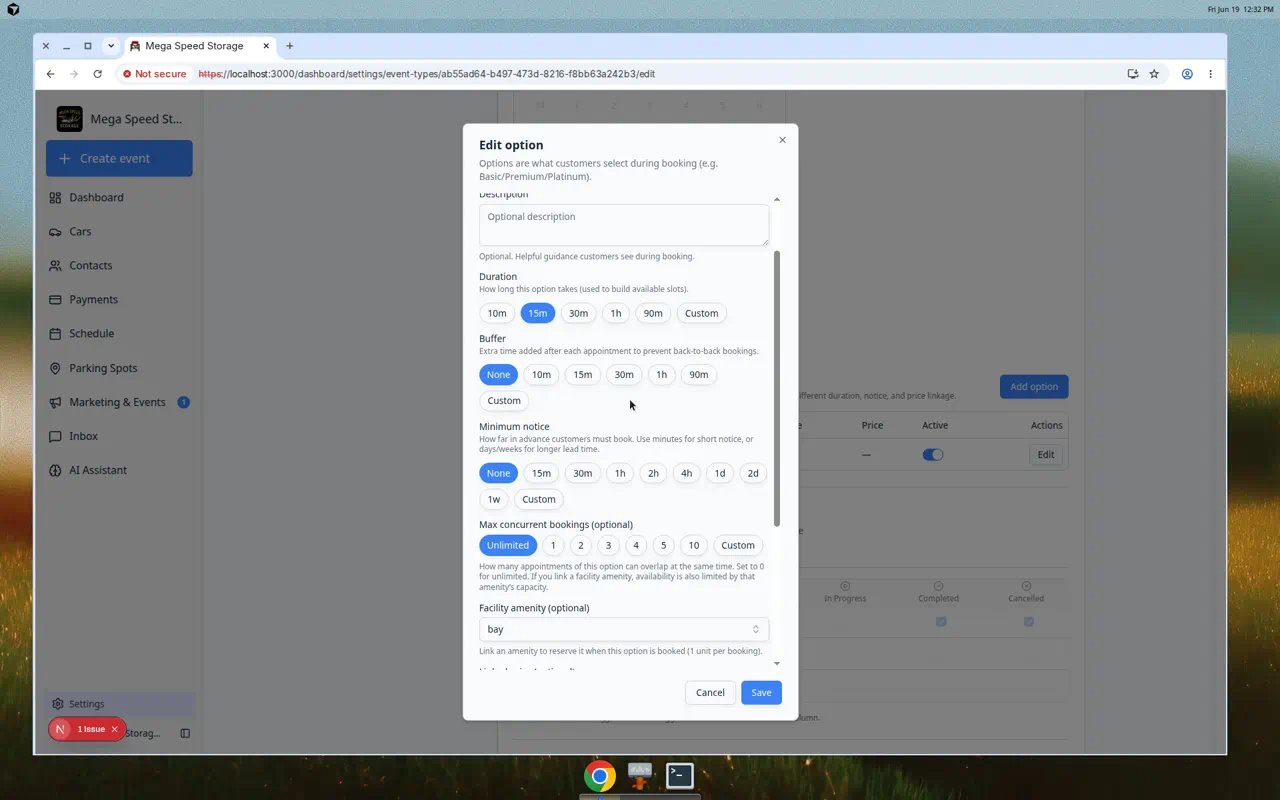 *The resource is not active until you link an instance here under **Facility amenity (optional)** on the booking option.*
**Start simple**
Many facilities begin with **Operations amenities** in [Manage custom statuses and amenities](/docs/settings/manage-custom-statuses-and-amenities) before creating named bookable resources. Add bookable resources when you need separate **Bay 1** and **Bay 2** (or similar) under one resource type.
Open [Settings > Bookable resources](https://www.carstoragesoftware.com/dashboard/settings/resources) directly, or start with [Settings > Operations](https://www.carstoragesoftware.com/dashboard/settings/operations#amenities) if you only need simple bay limits.
## What success looks like
After setup:
* The resource appears on [Settings > Bookable resources](https://www.carstoragesoftware.com/dashboard/settings/resources).
* Each resource has at least one active instance.
* The event type that needs the resource is configured to check it.
* Test appointments respect the resource's capacity.
* Staff can see which limited space, item, or person is being used.
## Common examples
**Detailing:** Resource: Detail Bay. Instances: Bay 1, Bay 2.
**Maintenance:** Resource: Lift. Instances: Lift A, Lift B.
**Customer tours:** Resource: Showroom or Conference Room. Instances: Main Showroom, Upstairs Conference Room.
**Staff-based work:** Resource: Technician. Instances: Jordan, Taylor, Casey. Link each instance to the matching team user if helpful.
## Troubleshooting
**Appointments are still double-booking**
Make sure the event type is actually using the resource. Creating a resource does not automatically attach it to every event type.
**The resource exists but cannot be selected**
Open [Settings > Bookable resources](https://www.carstoragesoftware.com/dashboard/settings/resources), select the resource, and confirm it has at least one active instance. Then return to the event type's **Booking Options**, edit the option, and look again under **Facility amenity (optional)**.
**I created a bookable resource but only see Operations amenities**
That usually means the instance is not active, or you are looking at **Booking Options** before saving the resource. Refresh the event type edit page after you create instances. If your facility uses Operations amenities instead, follow [Manage custom statuses and amenities](/docs/settings/manage-custom-statuses-and-amenities).
**I created the wrong resource**
Select the resource and click **Edit resource**. You can update the name, kind, and description. If it is not used anywhere, you can delete it.
**Capacity is confusing**
For most physical spaces and equipment, use capacity **1**. Increase capacity only when more than one appointment can use the same instance at the same time.
## What to do next
Run [Test an event setup](/docs/events/test-an-event-setup) to confirm the resource blocks double booking. If the event also needs photos, review [Configure photo rules](/docs/events/configure-photo-rules).
If stored vehicles need repeating care on a schedule, continue with [Set up service plans](/docs/events/set-up-service-plans) after your bays and lifts are configured.
## Related topics
- [Schedule overview](/docs/schedule/overview.md)
- [Events overview](/docs/events/overview.md)
- [Test an event setup](/docs/events/test-an-event-setup.md)
- [Configure photo rules](/docs/events/configure-photo-rules.md)
- [Configure event types](/docs/events/configure-event-types.md)
This documentation is built and hosted on [Mintlify](https://mintlify.com), a developer documentation platform.
*The resource is not active until you link an instance here under **Facility amenity (optional)** on the booking option.*
**Start simple**
Many facilities begin with **Operations amenities** in [Manage custom statuses and amenities](/docs/settings/manage-custom-statuses-and-amenities) before creating named bookable resources. Add bookable resources when you need separate **Bay 1** and **Bay 2** (or similar) under one resource type.
Open [Settings > Bookable resources](https://www.carstoragesoftware.com/dashboard/settings/resources) directly, or start with [Settings > Operations](https://www.carstoragesoftware.com/dashboard/settings/operations#amenities) if you only need simple bay limits.
## What success looks like
After setup:
* The resource appears on [Settings > Bookable resources](https://www.carstoragesoftware.com/dashboard/settings/resources).
* Each resource has at least one active instance.
* The event type that needs the resource is configured to check it.
* Test appointments respect the resource's capacity.
* Staff can see which limited space, item, or person is being used.
## Common examples
**Detailing:** Resource: Detail Bay. Instances: Bay 1, Bay 2.
**Maintenance:** Resource: Lift. Instances: Lift A, Lift B.
**Customer tours:** Resource: Showroom or Conference Room. Instances: Main Showroom, Upstairs Conference Room.
**Staff-based work:** Resource: Technician. Instances: Jordan, Taylor, Casey. Link each instance to the matching team user if helpful.
## Troubleshooting
**Appointments are still double-booking**
Make sure the event type is actually using the resource. Creating a resource does not automatically attach it to every event type.
**The resource exists but cannot be selected**
Open [Settings > Bookable resources](https://www.carstoragesoftware.com/dashboard/settings/resources), select the resource, and confirm it has at least one active instance. Then return to the event type's **Booking Options**, edit the option, and look again under **Facility amenity (optional)**.
**I created a bookable resource but only see Operations amenities**
That usually means the instance is not active, or you are looking at **Booking Options** before saving the resource. Refresh the event type edit page after you create instances. If your facility uses Operations amenities instead, follow [Manage custom statuses and amenities](/docs/settings/manage-custom-statuses-and-amenities).
**I created the wrong resource**
Select the resource and click **Edit resource**. You can update the name, kind, and description. If it is not used anywhere, you can delete it.
**Capacity is confusing**
For most physical spaces and equipment, use capacity **1**. Increase capacity only when more than one appointment can use the same instance at the same time.
## What to do next
Run [Test an event setup](/docs/events/test-an-event-setup) to confirm the resource blocks double booking. If the event also needs photos, review [Configure photo rules](/docs/events/configure-photo-rules).
If stored vehicles need repeating care on a schedule, continue with [Set up service plans](/docs/events/set-up-service-plans) after your bays and lifts are configured.
## Related topics
- [Schedule overview](/docs/schedule/overview.md)
- [Events overview](/docs/events/overview.md)
- [Test an event setup](/docs/events/test-an-event-setup.md)
- [Configure photo rules](/docs/events/configure-photo-rules.md)
- [Configure event types](/docs/events/configure-event-types.md)
This documentation is built and hosted on [Mintlify](https://mintlify.com), a developer documentation platform.