> ## Documentation Index
> Fetch the complete documentation index at: https://www.carstoragesoftware.com/docs/llms.txt
> Use this file to discover all available pages before exploring further.
# Set up the vendor invoice portal
> Let vendors submit invoices through a public facility link, then review those invoices in the staff dashboard.
## What you will accomplish
Outside providers will use one public link to submit invoices with an uploaded file. Your team will review those submissions in [Payments > Invoices](https://www.carstoragesoftware.com/dashboard/payments/invoices?type=vendor) without giving vendors access to the staff dashboard.
## When to use this guide
Use this guide when detailers, transport companies, mechanics, photographers, or other vendors need a simple way to send invoices to your facility.
This is **not** the same as a **customer invoice** (a bill your facility sends to a customer). Vendors use the public portal to send bills **to you**.
**Customer invoice vs vendor invoice**
**Customer invoice:** money a customer owes your facility. You create it in [Payments > Invoices](https://www.carstoragesoftware.com/dashboard/payments/invoices).
**Vendor invoice:** money your facility may owe an outside provider. The vendor submits it through the public portal in this guide.
## Before you start
* **Public Facility Pages** is turned on in [Settings > Website & customer app](https://www.carstoragesoftware.com/dashboard/settings/website).
* You know which vendors should receive the invoice link (email, contract packet, or onboarding note).
* Your team knows who reviews vendor invoices before payment.
* Your team has a simple approval rule (for example, “Invoices over \$500 need a manager”).
## Step 1: Turn on the vendor invoice portal
Go to [Settings > Website & customer app](https://www.carstoragesoftware.com/dashboard/settings/website).
**Expected result:** You see **Public website** with a live preview and **Page editor**.
Turn on **Public Facility Pages** if it is not already on. Vendors need a working public address for your facility before the invoice link will work.
If you are not sure which links are public yet, read [Choose the right public link to share](/docs/facility-web-pages/choose-the-right-public-link).
In the **Page editor**, expand **Header & page settings** (at the top of the editor—not in the draggable section list). Find **Vendor invoice portal** and turn its switch on.
**Expected result:** **Vendor invoices** appears in **Shareable links** at the top of the page.
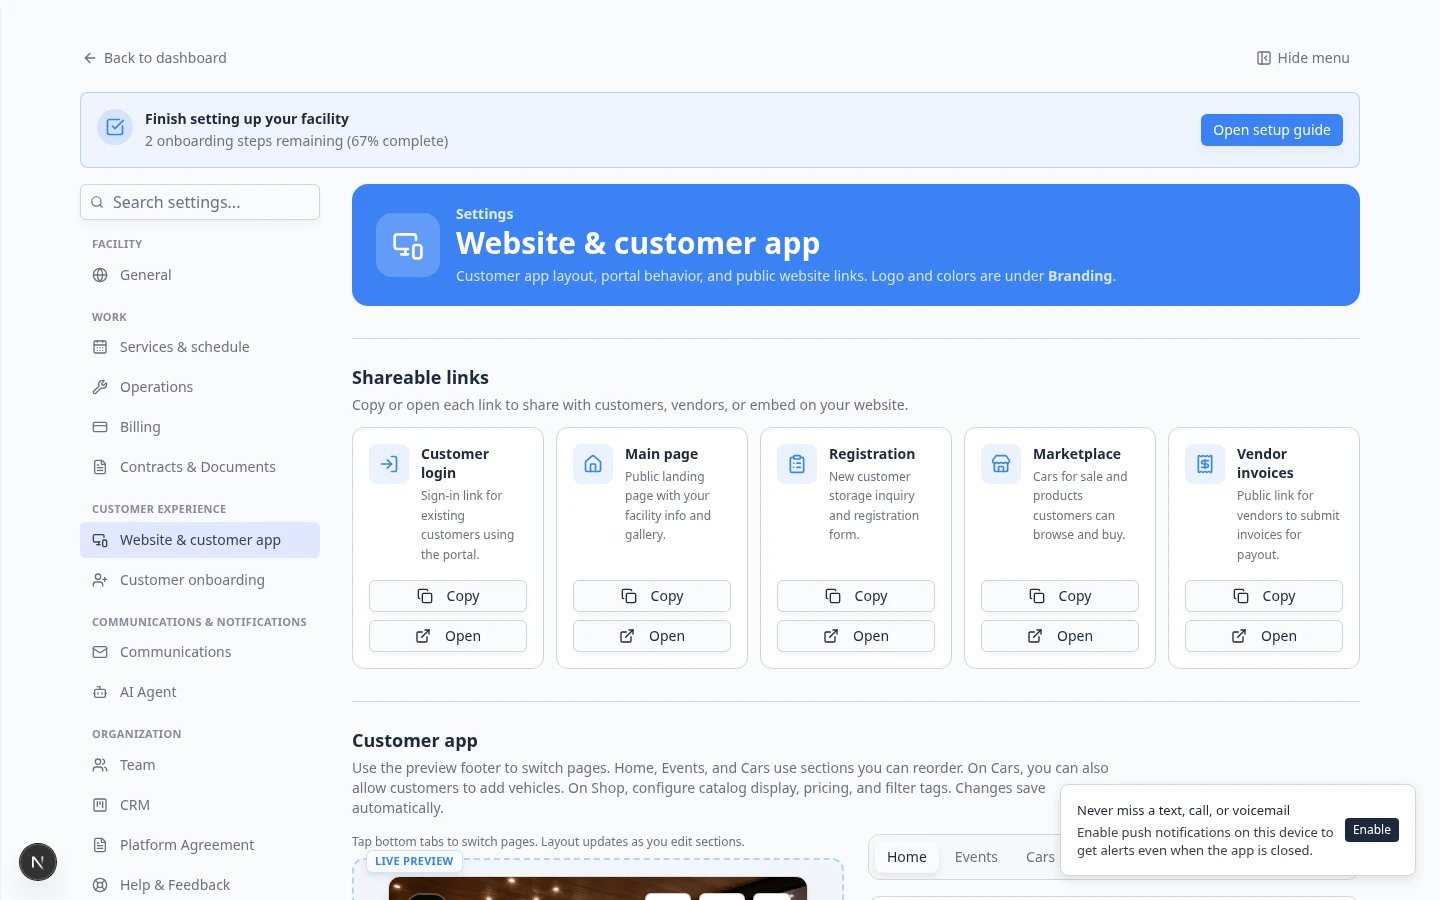 *Turn on **Vendor invoice portal** under **Header & page settings**, then copy **Vendor invoices** from **Shareable links**.*
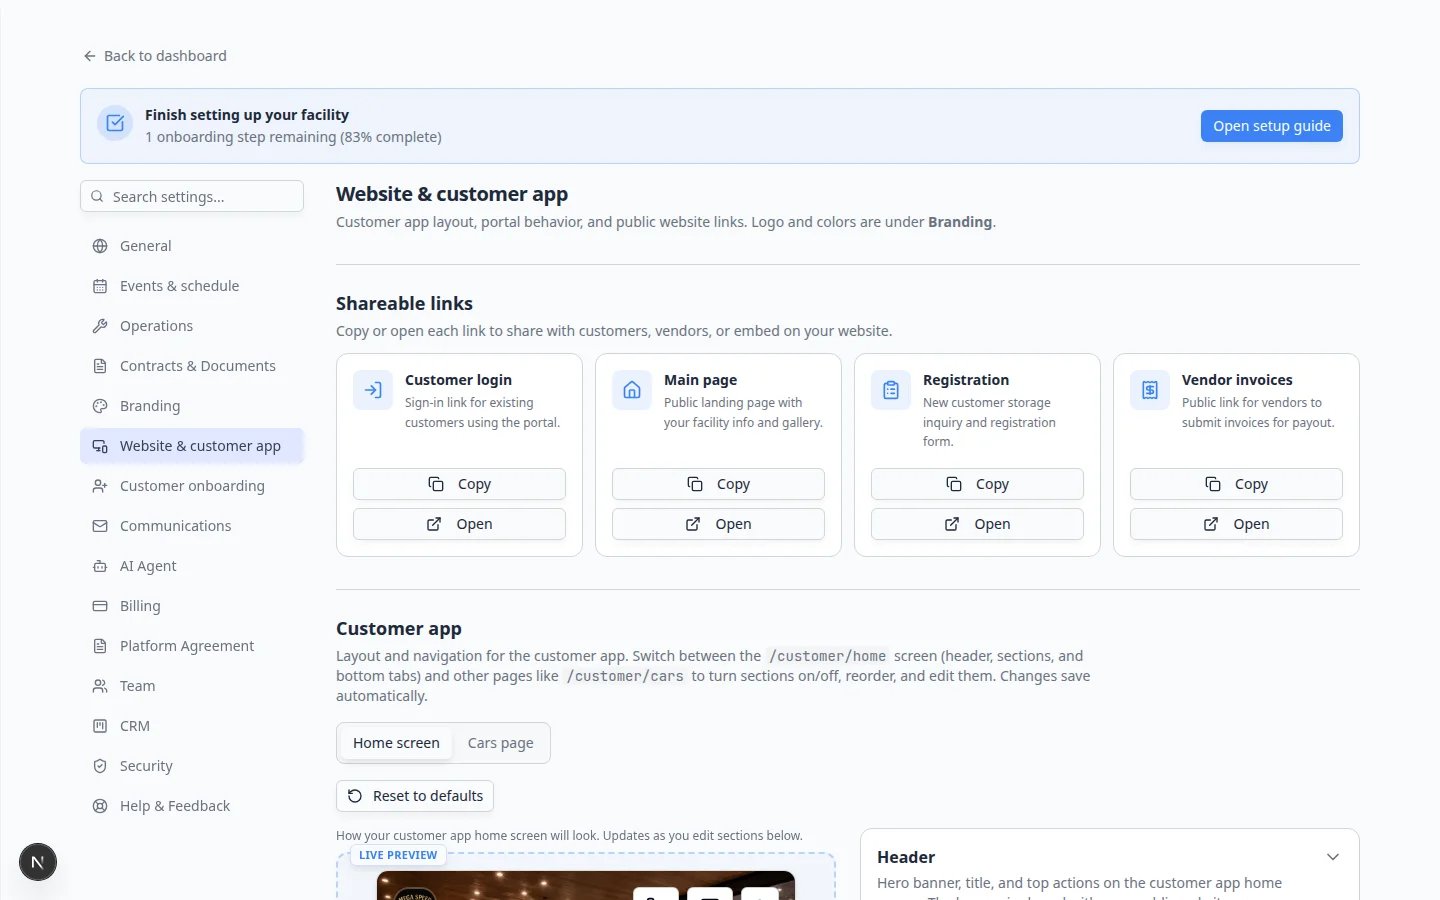 *After you turn on the portal, **Vendor invoices** appears in **Shareable links** near the top of the page. Copy that link—not a staff dashboard address.*
## Step 2: Copy and test the vendor link
Near the top of the page, find **Shareable links**. Click **Copy** on the **Vendor invoices** card.
The address usually looks like:
`/facility/your-facility-name/invoices`
**Why this matters:** Vendors should not use a staff dashboard link. They only need this public form.
Paste the link in a private browser window where you are not signed in as staff.
**Expected result:** You see a public form with your facility name—not the staff dashboard.
*After you turn on the portal, **Vendor invoices** appears in **Shareable links** near the top of the page. Copy that link—not a staff dashboard address.*
## Step 2: Copy and test the vendor link
Near the top of the page, find **Shareable links**. Click **Copy** on the **Vendor invoices** card.
The address usually looks like:
`/facility/your-facility-name/invoices`
**Why this matters:** Vendors should not use a staff dashboard link. They only need this public form.
Paste the link in a private browser window where you are not signed in as staff.
**Expected result:** You see a public form with your facility name—not the staff dashboard.
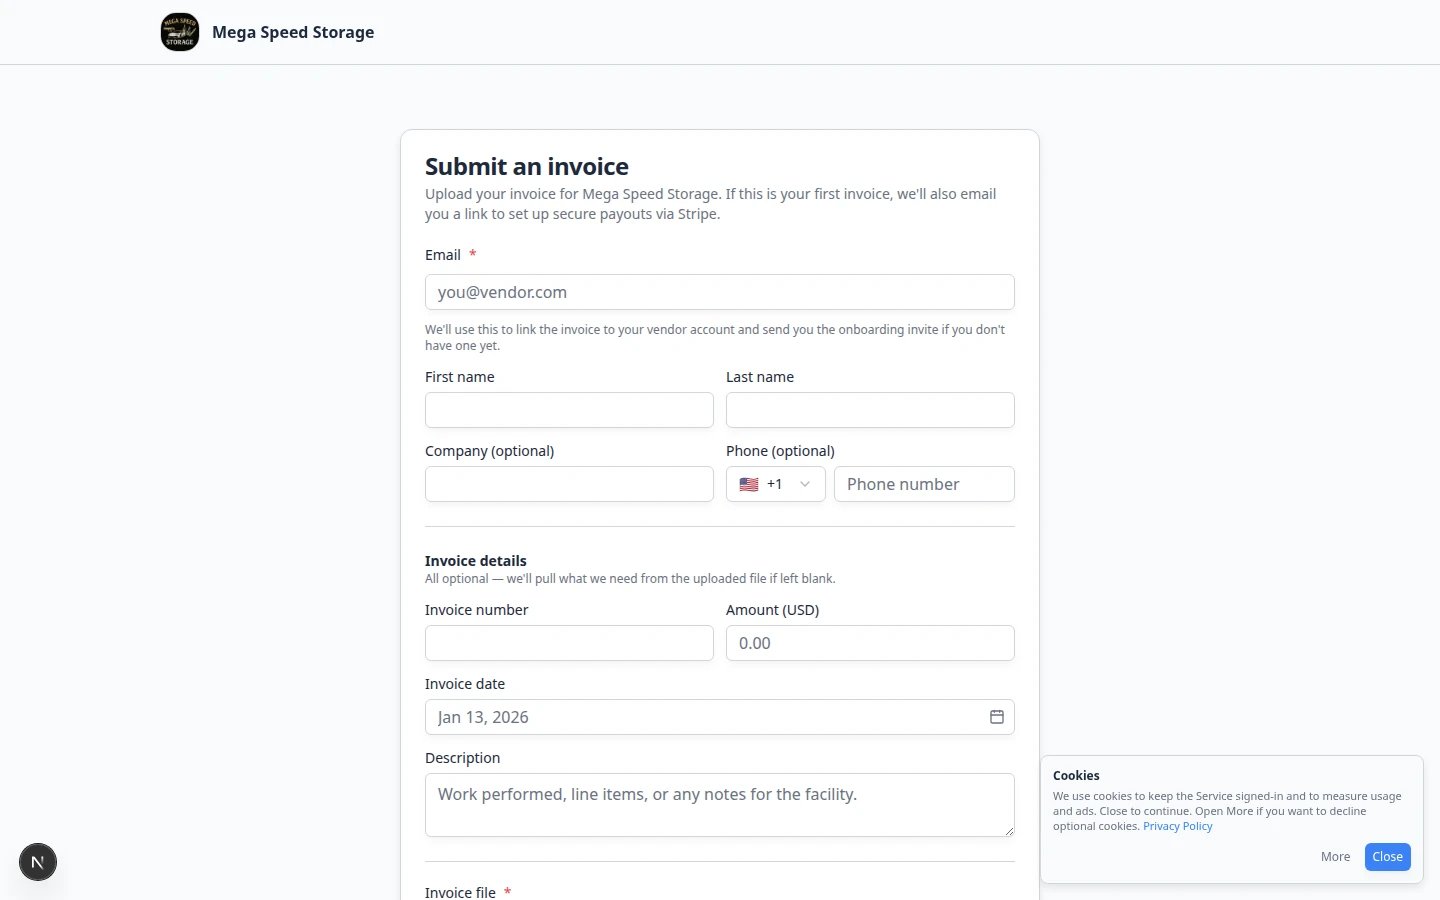 *Vendors complete this form on their own. They do not need a staff account.*
## Step 3: Review the form like a vendor
Walk through the form as if you are the vendor. The form asks for:
* **First name** and **Last name**
* **Company** (optional)
* **Phone** (optional)
* **Email** (required)
* **Invoice number**
* **Amount (USD)**
* **Invoice date**
* **Description** — short note about the work
* **Invoice file** — PDF or image upload (required, up to 25 MB)
* **Instant payout** (optional) — vendor can request faster payment with a 5% fee
*Vendors complete this form on their own. They do not need a staff account.*
## Step 3: Review the form like a vendor
Walk through the form as if you are the vendor. The form asks for:
* **First name** and **Last name**
* **Company** (optional)
* **Phone** (optional)
* **Email** (required)
* **Invoice number**
* **Amount (USD)**
* **Invoice date**
* **Description** — short note about the work
* **Invoice file** — PDF or image upload (required, up to 25 MB)
* **Instant payout** (optional) — vendor can request faster payment with a 5% fee
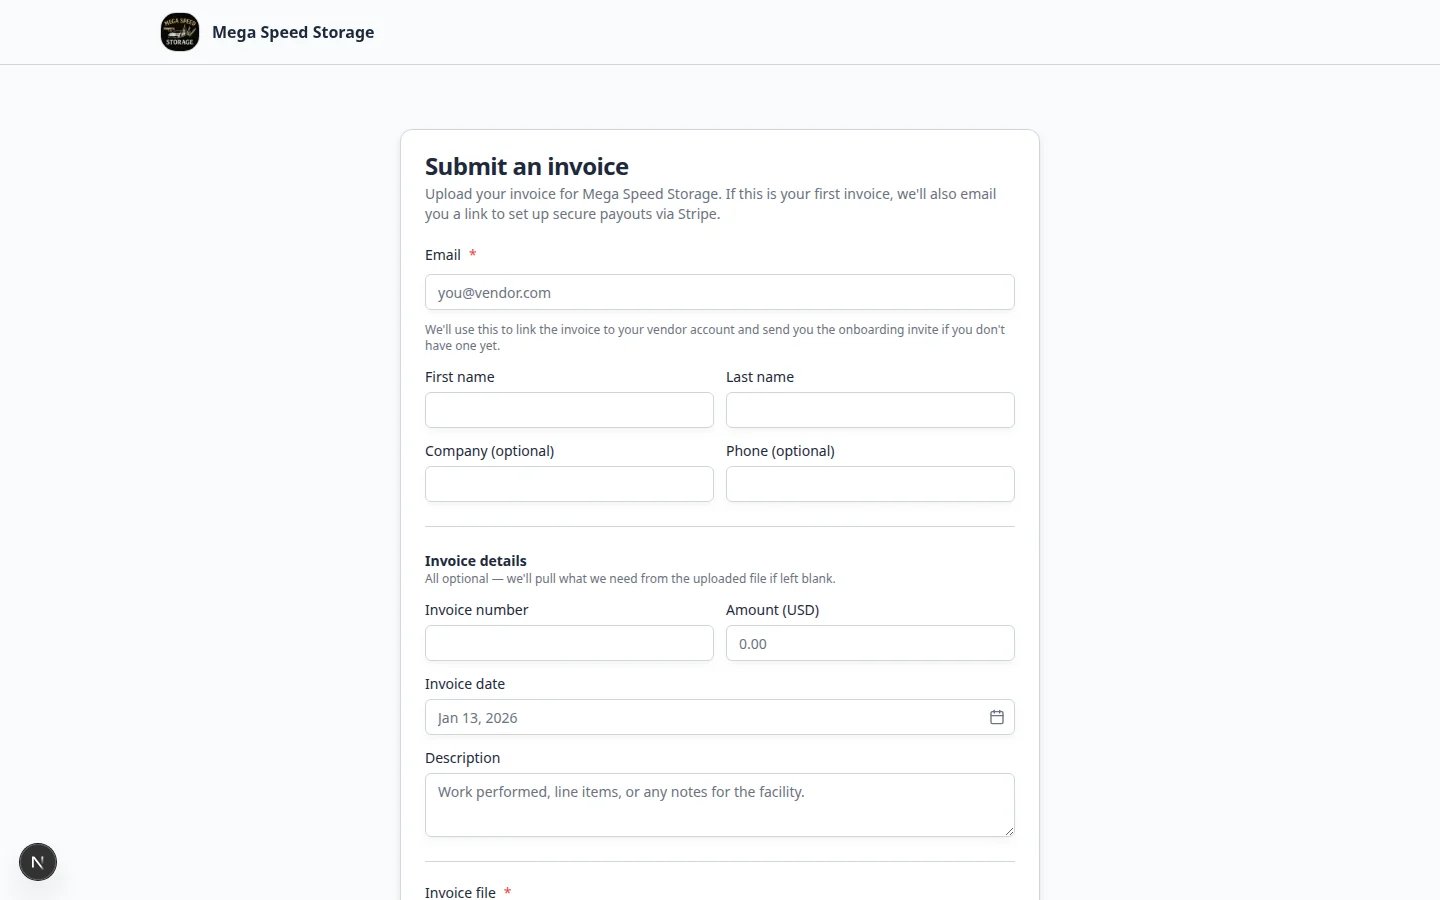 *Vendors should be able to complete every field without calling your office. Test with sample data before you email the link.*
**Ask vendors to upload the real invoice file**
The form requires an invoice file. If a vendor only types an amount without attaching their PDF or photo, your team may still need to chase the document by email.
**What happens after a vendor submits**
After the first submission, the vendor may receive an email to set up payment details through Stripe so your facility can pay them. If they choose **Instant payout**, they pay a 5% fee for faster payment—your team can explain this if vendors ask.
## Step 4: Send the link to vendors
Send the copied link with a short message. Keep it simple—vendors do not need to know how your dashboard works.
Please submit future invoices through this link: \[paste your vendor invoice link].
Include your invoice number, amount, invoice date, and attach your invoice PDF. This helps our team review and pay on time.
**Expected result:** Vendors know they should use this link every time instead of only emailing accounts payable.
## Step 5: Review submissions in Payments
After a vendor submits an invoice, your team works in the dashboard.
Go to [Payments > Invoices](https://www.carstoragesoftware.com/dashboard/payments/invoices).
Near the top of the page, click **Vendor** so the list shows vendor invoices only.
You can also open [Payments > Invoices (vendor filter)](https://www.carstoragesoftware.com/dashboard/payments/invoices?type=vendor) directly.
**Expected result:** You see vendor submissions, not customer invoices you sent.
Click the invoice to review vendor name, amount, invoice date, description, and the uploaded file.
**Expected result:** You can decide whether to approve, pay, or ask the vendor for corrections.
*Vendors should be able to complete every field without calling your office. Test with sample data before you email the link.*
**Ask vendors to upload the real invoice file**
The form requires an invoice file. If a vendor only types an amount without attaching their PDF or photo, your team may still need to chase the document by email.
**What happens after a vendor submits**
After the first submission, the vendor may receive an email to set up payment details through Stripe so your facility can pay them. If they choose **Instant payout**, they pay a 5% fee for faster payment—your team can explain this if vendors ask.
## Step 4: Send the link to vendors
Send the copied link with a short message. Keep it simple—vendors do not need to know how your dashboard works.
Please submit future invoices through this link: \[paste your vendor invoice link].
Include your invoice number, amount, invoice date, and attach your invoice PDF. This helps our team review and pay on time.
**Expected result:** Vendors know they should use this link every time instead of only emailing accounts payable.
## Step 5: Review submissions in Payments
After a vendor submits an invoice, your team works in the dashboard.
Go to [Payments > Invoices](https://www.carstoragesoftware.com/dashboard/payments/invoices).
Near the top of the page, click **Vendor** so the list shows vendor invoices only.
You can also open [Payments > Invoices (vendor filter)](https://www.carstoragesoftware.com/dashboard/payments/invoices?type=vendor) directly.
**Expected result:** You see vendor submissions, not customer invoices you sent.
Click the invoice to review vendor name, amount, invoice date, description, and the uploaded file.
**Expected result:** You can decide whether to approve, pay, or ask the vendor for corrections.
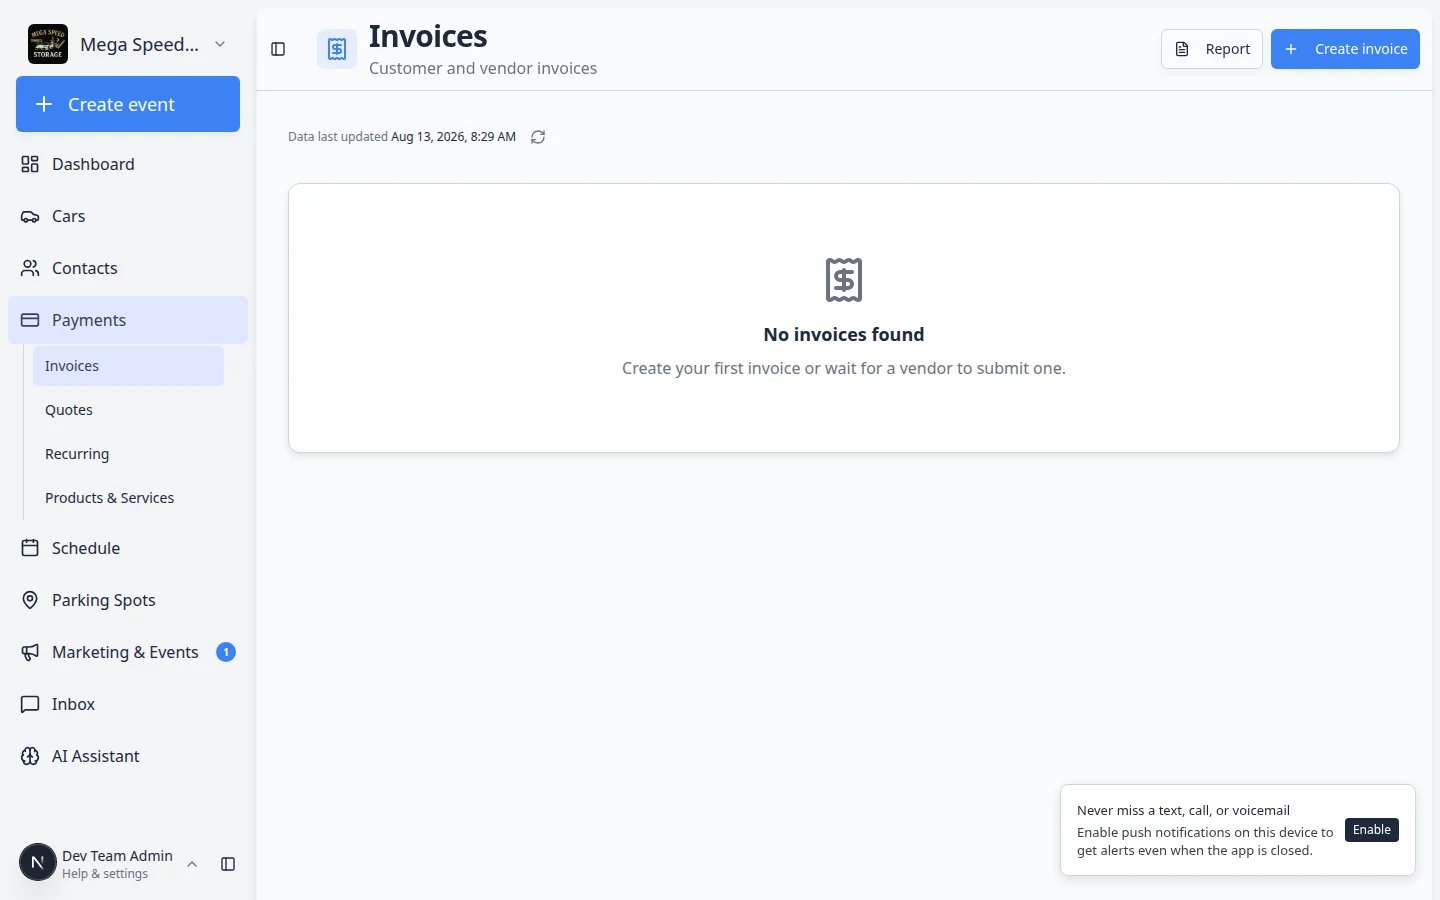 *Vendor submissions appear here. Use the Vendor tab so you do not mix them up with customer invoices.*
When you review each submission, check:
* Vendor name and email match someone you recognize
* Invoice number and amount match the uploaded file
* Invoice date fits your payment process
* The uploaded file opens and is readable
* The vendor is linked to an existing vendor record when possible ([Payments > Vendors](https://www.carstoragesoftware.com/dashboard/payments/vendors))
For the full payment workflow, follow [Review and pay vendor invoices](/docs/payments/review-and-pay-vendor-invoices).
## Step 6: Update status after your team acts
After approval or payment, update the vendor invoice record in the dashboard.
From the **Vendor** tab, click the invoice row to open its detail page.
Use the status control to mark the invoice as approved, paid, or **Rejected** if you are declining it.
**Why this matters:** Updated status prevents two people from reviewing the same invoice or paying twice.
Leave a short note when you reject an invoice or ask the vendor to resubmit.
Common statuses your team may see:
* Submitted — just arrived from the portal
* Under review — someone is checking the file
* Approved — ready for payment
* Paid — payment completed
* Rejected — sent back or declined with a note
## What success looks like
* **Vendor invoice portal** is on only when your team is ready to monitor submissions.
* Each vendor has one clear link and simple instructions.
* Submissions appear on the **Vendor** tab in [Payments > Invoices](https://www.carstoragesoftware.com/dashboard/payments/invoices?type=vendor).
* Staff open the uploaded file before approving payment.
* Invoice status is updated so everyone sees what happened.
## Troubleshooting
**The vendor link shows not found**
Open [Settings > Website & customer app](https://www.carstoragesoftware.com/dashboard/settings/website). Confirm **Public Facility Pages** is on, your **Facility slug** is saved, and **Vendor invoice portal** is on under **Header & page settings** in the Page editor. Copy **Vendor invoices** from **Shareable links**.
**Upload failed for the vendor**
Ask the vendor to try a PDF or clear photo under 25 MB. If needed, accept the invoice by email once while you troubleshoot, then ask them to use the portal next time.
**The invoice is under the wrong vendor**
Open the submission and check the name and email before paying. Update or merge vendor records in [Payments > Vendors](https://www.carstoragesoftware.com/dashboard/payments/vendors) when the same company used two different names.
**Nobody knows who should approve**
Write a one-line rule before you share the link—for example, “Facilities manager approves all vendor invoices over \$500.” Add it to your vendor onboarding email.
## What to do next
* [Manage vendors](/docs/payments/manage-vendors) so vendor records stay organized
* [Review and pay vendor invoices](/docs/payments/review-and-pay-vendor-invoices) for the full staff workflow
* [Choose the right public link to share](/docs/facility-web-pages/choose-the-right-public-link) when you send links to other audiences
## Related topics
- [Review and pay vendor invoices](/docs/payments/review-and-pay-vendor-invoices.md)
- [Manage vendors](/docs/payments/manage-vendors.md)
- [Work with vendor contacts](/docs/contacts/work-with-vendor-contacts.md)
- [Go live checklist for public pages](/docs/facility-web-pages/go-live-checklist-for-public-pages.md)
- [Choose the right public link to share](/docs/facility-web-pages/choose-the-right-public-link.md)
This documentation is built and hosted on [Mintlify](https://mintlify.com), a developer documentation platform.
*Vendor submissions appear here. Use the Vendor tab so you do not mix them up with customer invoices.*
When you review each submission, check:
* Vendor name and email match someone you recognize
* Invoice number and amount match the uploaded file
* Invoice date fits your payment process
* The uploaded file opens and is readable
* The vendor is linked to an existing vendor record when possible ([Payments > Vendors](https://www.carstoragesoftware.com/dashboard/payments/vendors))
For the full payment workflow, follow [Review and pay vendor invoices](/docs/payments/review-and-pay-vendor-invoices).
## Step 6: Update status after your team acts
After approval or payment, update the vendor invoice record in the dashboard.
From the **Vendor** tab, click the invoice row to open its detail page.
Use the status control to mark the invoice as approved, paid, or **Rejected** if you are declining it.
**Why this matters:** Updated status prevents two people from reviewing the same invoice or paying twice.
Leave a short note when you reject an invoice or ask the vendor to resubmit.
Common statuses your team may see:
* Submitted — just arrived from the portal
* Under review — someone is checking the file
* Approved — ready for payment
* Paid — payment completed
* Rejected — sent back or declined with a note
## What success looks like
* **Vendor invoice portal** is on only when your team is ready to monitor submissions.
* Each vendor has one clear link and simple instructions.
* Submissions appear on the **Vendor** tab in [Payments > Invoices](https://www.carstoragesoftware.com/dashboard/payments/invoices?type=vendor).
* Staff open the uploaded file before approving payment.
* Invoice status is updated so everyone sees what happened.
## Troubleshooting
**The vendor link shows not found**
Open [Settings > Website & customer app](https://www.carstoragesoftware.com/dashboard/settings/website). Confirm **Public Facility Pages** is on, your **Facility slug** is saved, and **Vendor invoice portal** is on under **Header & page settings** in the Page editor. Copy **Vendor invoices** from **Shareable links**.
**Upload failed for the vendor**
Ask the vendor to try a PDF or clear photo under 25 MB. If needed, accept the invoice by email once while you troubleshoot, then ask them to use the portal next time.
**The invoice is under the wrong vendor**
Open the submission and check the name and email before paying. Update or merge vendor records in [Payments > Vendors](https://www.carstoragesoftware.com/dashboard/payments/vendors) when the same company used two different names.
**Nobody knows who should approve**
Write a one-line rule before you share the link—for example, “Facilities manager approves all vendor invoices over \$500.” Add it to your vendor onboarding email.
## What to do next
* [Manage vendors](/docs/payments/manage-vendors) so vendor records stay organized
* [Review and pay vendor invoices](/docs/payments/review-and-pay-vendor-invoices) for the full staff workflow
* [Choose the right public link to share](/docs/facility-web-pages/choose-the-right-public-link) when you send links to other audiences
## Related topics
- [Review and pay vendor invoices](/docs/payments/review-and-pay-vendor-invoices.md)
- [Manage vendors](/docs/payments/manage-vendors.md)
- [Work with vendor contacts](/docs/contacts/work-with-vendor-contacts.md)
- [Go live checklist for public pages](/docs/facility-web-pages/go-live-checklist-for-public-pages.md)
- [Choose the right public link to share](/docs/facility-web-pages/choose-the-right-public-link.md)
This documentation is built and hosted on [Mintlify](https://mintlify.com), a developer documentation platform.