> ## Documentation Index
> Fetch the complete documentation index at: https://www.carstoragesoftware.com/docs/llms.txt
> Use this file to discover all available pages before exploring further.
# Manage community channels
> Create customer community channels for announcements, event updates, and customer discussion.
## What you will accomplish
You will create a **community channel**—a shared space in the customer portal where customers read announcements or join discussions. When you finish, customers who use the portal can open the channel from their community area.
Channels are a **home base** for ongoing updates. They are not the same as a one-time email—use a [campaign](/docs/marketing-events/create-a-campaign) when you need to push a message out, and use a channel when customers should be able to come back and read posts later.
## When to use community channels
* Facility-wide announcements (hours, weather closures, policy updates).
* Event reminders after you create a [social event](/docs/marketing-events/create-a-social-event).
* Member discussion for car clubs or interest groups.
* A permanent place to paste links customers should bookmark (open house RSVP, storage tips).
**Community vs campaign**
A **campaign** sends a message out to customers. A **community channel** is a place customers visit in the portal to read ongoing posts. Use both when you want an email blast plus a permanent home for updates.
## Before you start
* Decide the channel purpose (announcements only, event updates, or open discussion).
* Confirm the customer portal community feature is on in [Settings > Website & customer app](https://www.carstoragesoftware.com/dashboard/settings/website) (customer app home sections).
* Decide whether customers may post, or only staff.
* Prepare a one-sentence description customers will understand.
## Step 1: Open Community
Go to [Marketing & Events](https://www.carstoragesoftware.com/dashboard/marketing).
Click the **Community** tab near the top of the page. You can also open [Marketing & Events > Community](https://www.carstoragesoftware.com/dashboard/marketing/community) directly.
**Expected result:** You see the **Community Channels** list.
Each card shows the channel name, description, member count, and message count.
You may also see small badges on a channel card:
* **NEW** (or a number) — unread messages your team has not opened yet.
* **DEFAULT** — new portal customers are added to this channel automatically.
**Why this matters:** You may already have an **Announcements** or **Event Announcements** channel—edit it instead of creating a duplicate.
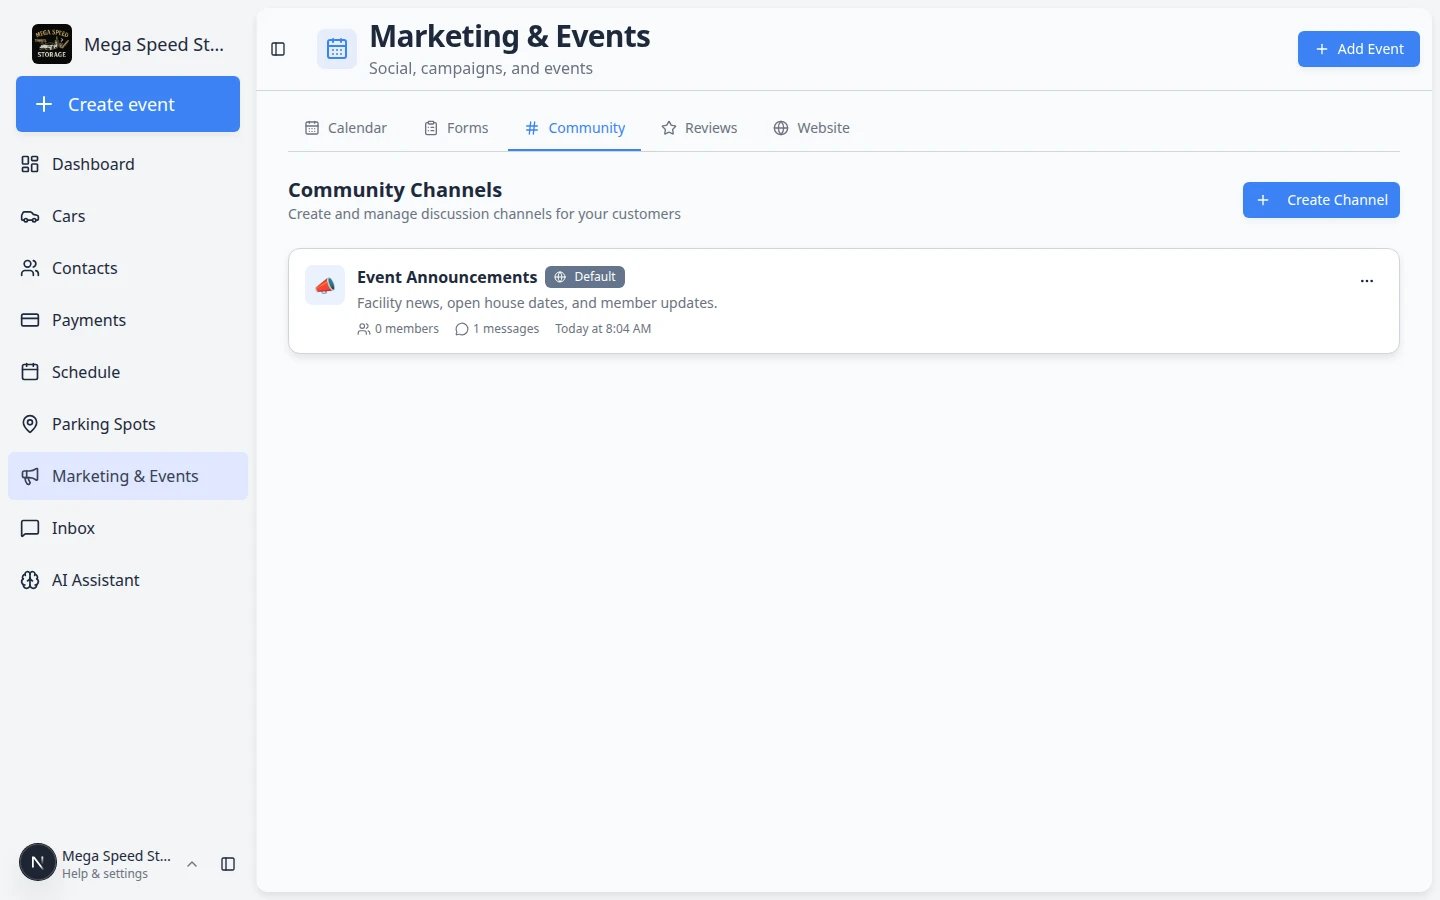 *Each card is one channel. Badges show unread messages (NEW) and auto-join channels (DEFAULT). Click a card to open the conversation.*
## Step 2: Create a channel
Click **Create Channel** in the top-right area.
Type a short name customers will understand. Examples: **Announcements**, **Event Updates**, **Member Discussion**.
**Expected result:** The name is friendly enough that a customer knows what belongs in the channel.
Explain what belongs in this channel. Example: "Important facility updates and event reminders."
Pick one emoji so the channel is easy to spot in the portal list.
Turn on **Default Channel** if every new customer should join automatically—good for facility-wide announcements.
**Why this matters:** New portal users see default channels without extra setup.
Turn on **Read-only** if only staff should post. Leave it off if customers may reply.
**Why this matters:** Announcement channels stay calm when only staff can post. Discussion channels need read-only turned off.
Click **Create Channel** to save.
**Expected result:** The new channel appears in the list.
*Each card is one channel. Badges show unread messages (NEW) and auto-join channels (DEFAULT). Click a card to open the conversation.*
## Step 2: Create a channel
Click **Create Channel** in the top-right area.
Type a short name customers will understand. Examples: **Announcements**, **Event Updates**, **Member Discussion**.
**Expected result:** The name is friendly enough that a customer knows what belongs in the channel.
Explain what belongs in this channel. Example: "Important facility updates and event reminders."
Pick one emoji so the channel is easy to spot in the portal list.
Turn on **Default Channel** if every new customer should join automatically—good for facility-wide announcements.
**Why this matters:** New portal users see default channels without extra setup.
Turn on **Read-only** if only staff should post. Leave it off if customers may reply.
**Why this matters:** Announcement channels stay calm when only staff can post. Discussion channels need read-only turned off.
Click **Create Channel** to save.
**Expected result:** The new channel appears in the list.
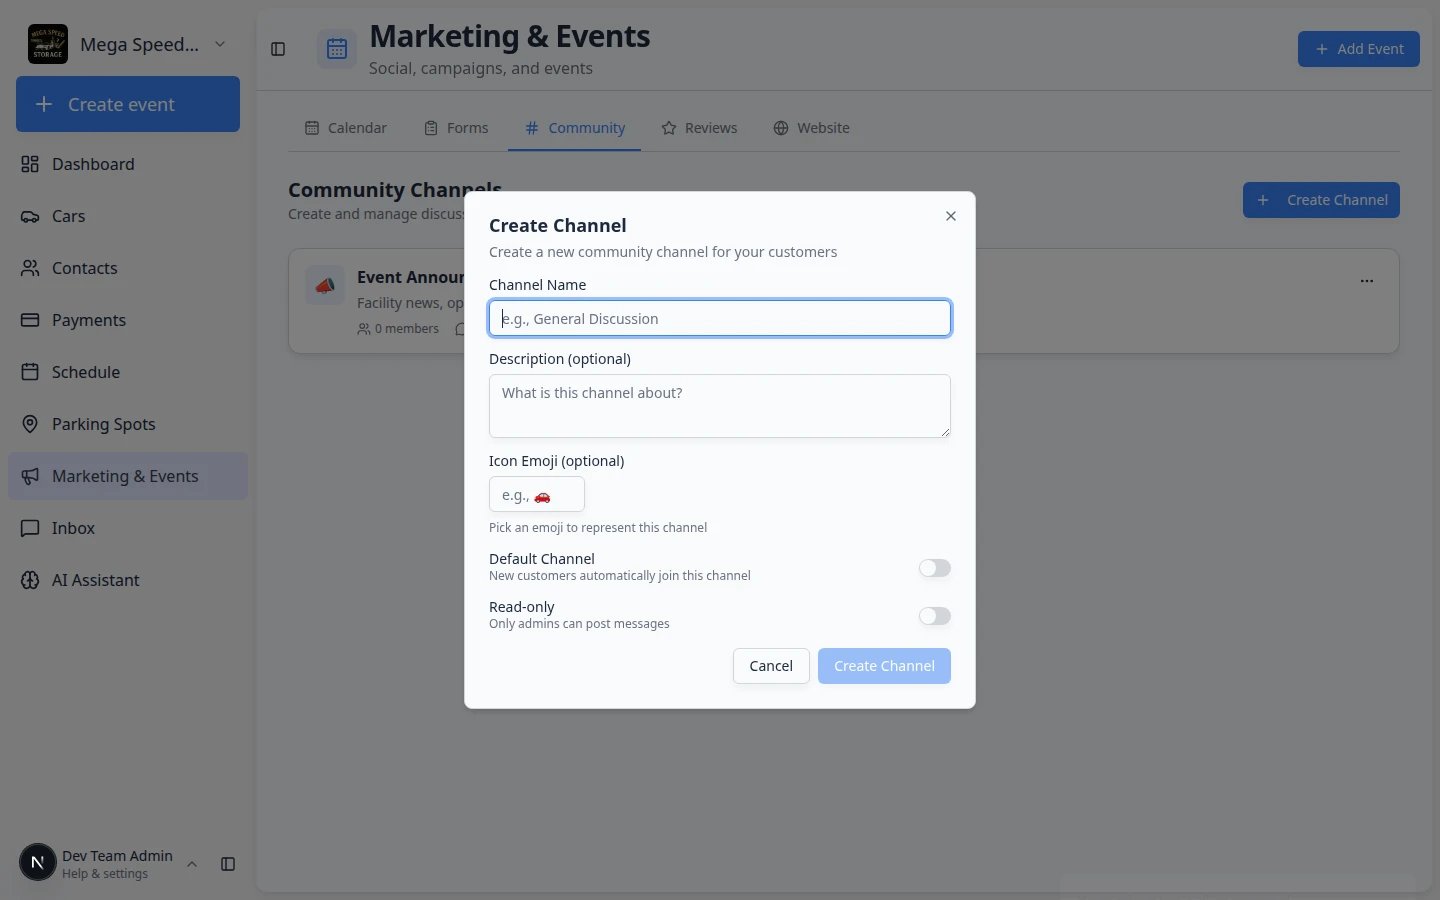 *Use Read-only for staff-only news. Use Default Channel when all customers should see the channel.*
## Step 3: Post and maintain the channel
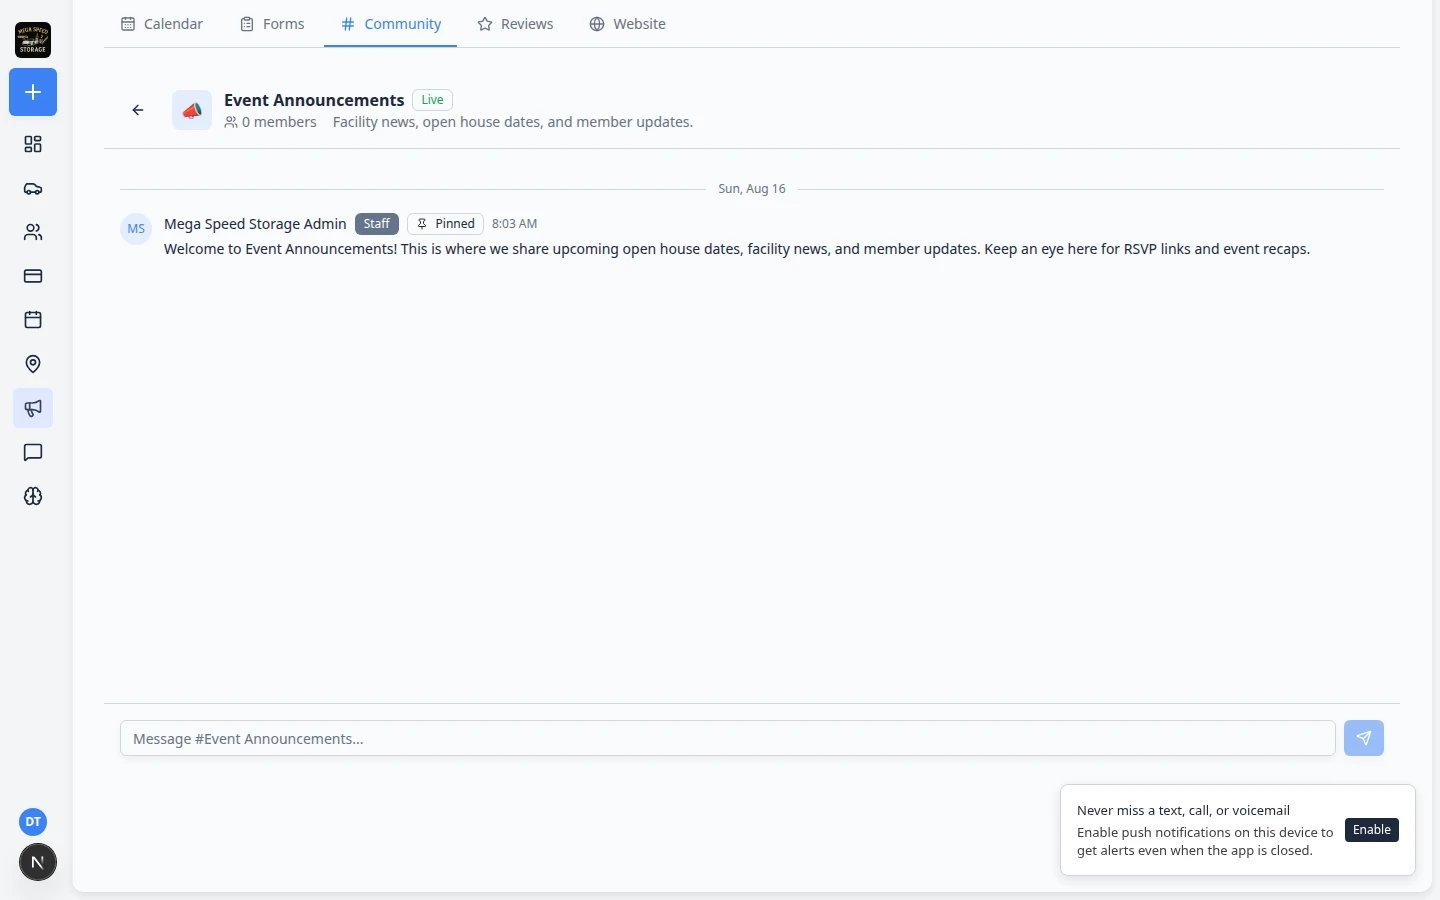
Click the channel card (for example **Event Announcements**) to open the message thread.
**Expected result:** You see the channel name at the top and a message box at the bottom where staff can post.
Add a first post that sets expectations.
Example: "Welcome to Event Announcements. We post facility updates and open house dates here."
**Why this matters:** The first post tells customers what to expect and encourages them to check back.
When a post must stay at the top (holiday hours, weather closure), open the message thread and use **Pin** on that post if your facility uses pinned messages.
**Why this matters:** New customers who join the channel later still see the most important update first.
A number badge on a channel means unread messages. Check channels regularly so customer questions are not missed.
**Why this matters:** Customers may ask a question in an open discussion channel. Unread badges help your team respond before the question sits for days.
On the [Community Channels](https://www.carstoragesoftware.com/dashboard/marketing/community) list, find the channel card (for example **Event Announcements**). Click the three-dot menu (**⋯**) on the **right edge** of the card—do not click the card title, or you will open the message thread instead.
*Use Read-only for staff-only news. Use Default Channel when all customers should see the channel.*
## Step 3: Post and maintain the channel
Click the channel card (for example **Event Announcements**) to open the message thread.
**Expected result:** You see the channel name at the top and a message box at the bottom where staff can post.
Add a first post that sets expectations.
Example: "Welcome to Event Announcements. We post facility updates and open house dates here."
**Why this matters:** The first post tells customers what to expect and encourages them to check back.
When a post must stay at the top (holiday hours, weather closure), open the message thread and use **Pin** on that post if your facility uses pinned messages.
**Why this matters:** New customers who join the channel later still see the most important update first.
A number badge on a channel means unread messages. Check channels regularly so customer questions are not missed.
**Why this matters:** Customers may ask a question in an open discussion channel. Unread badges help your team respond before the question sits for days.
On the [Community Channels](https://www.carstoragesoftware.com/dashboard/marketing/community) list, find the channel card (for example **Event Announcements**). Click the three-dot menu (**⋯**) on the **right edge** of the card—do not click the card title, or you will open the message thread instead.
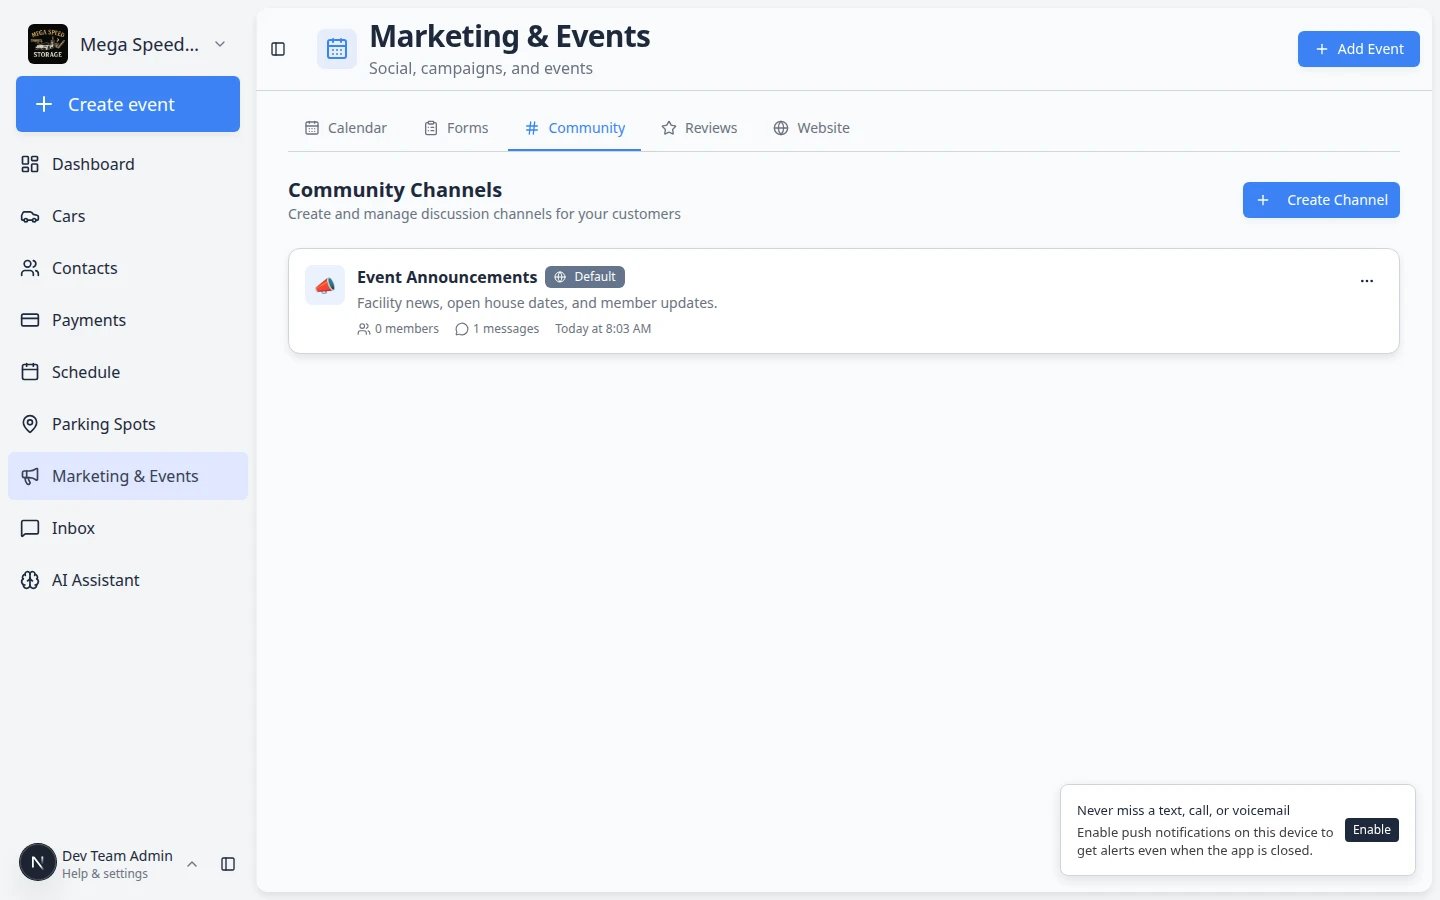 *The **⋯** menu is on the right edge of each channel card. Click it to edit or delete without opening the message thread.*
In the menu, choose **Edit**.
**Expected result:** A window opens with the same fields you used when creating the channel: name, description, emoji, **Default Channel**, and **Read-only**. Change what you need, then save.
*The **⋯** menu is on the right edge of each channel card. Click it to edit or delete without opening the message thread.*
In the menu, choose **Edit**.
**Expected result:** A window opens with the same fields you used when creating the channel: name, description, emoji, **Default Channel**, and **Read-only**. Change what you need, then save.
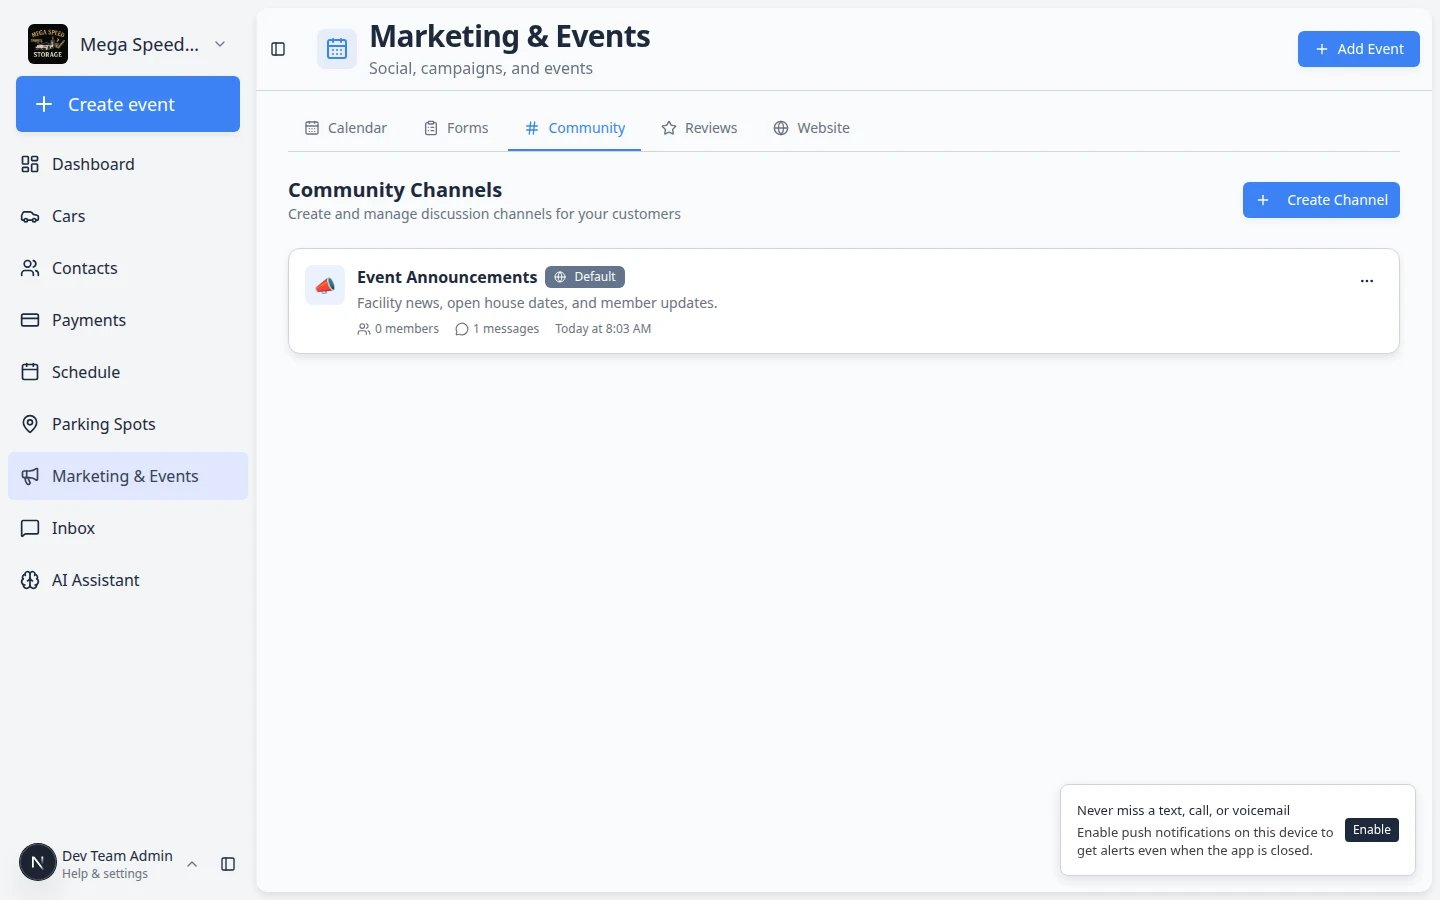 *The edit window looks like **Create Channel**, but your existing text is already filled in.*
From the same three-dot menu (**⋯**), choose **Delete** only when you are sure customers no longer need that space. The app will ask you to confirm.
**Why this matters:** Deleting removes the channel from the portal. Prefer **Read-only** if you want to stop new posts but keep old announcements visible.
*The edit window looks like **Create Channel**, but your existing text is already filled in.*
From the same three-dot menu (**⋯**), choose **Delete** only when you are sure customers no longer need that space. The app will ask you to confirm.
**Why this matters:** Deleting removes the channel from the portal. Prefer **Read-only** if you want to stop new posts but keep old announcements visible.
 *The three-dot menu is on the right edge of each channel card. Choose Edit to change read-only or default settings.*
**Finding the three-dot menu**
The **⋯** button is on the **right edge** of each channel card. If you click the card title or description instead, you will open the message thread—not the edit menu.
*The three-dot menu is on the right edge of each channel card. Choose Edit to change read-only or default settings.*
**Finding the three-dot menu**
The **⋯** button is on the **right edge** of each channel card. If you click the card title or description instead, you will open the message thread—not the edit menu.
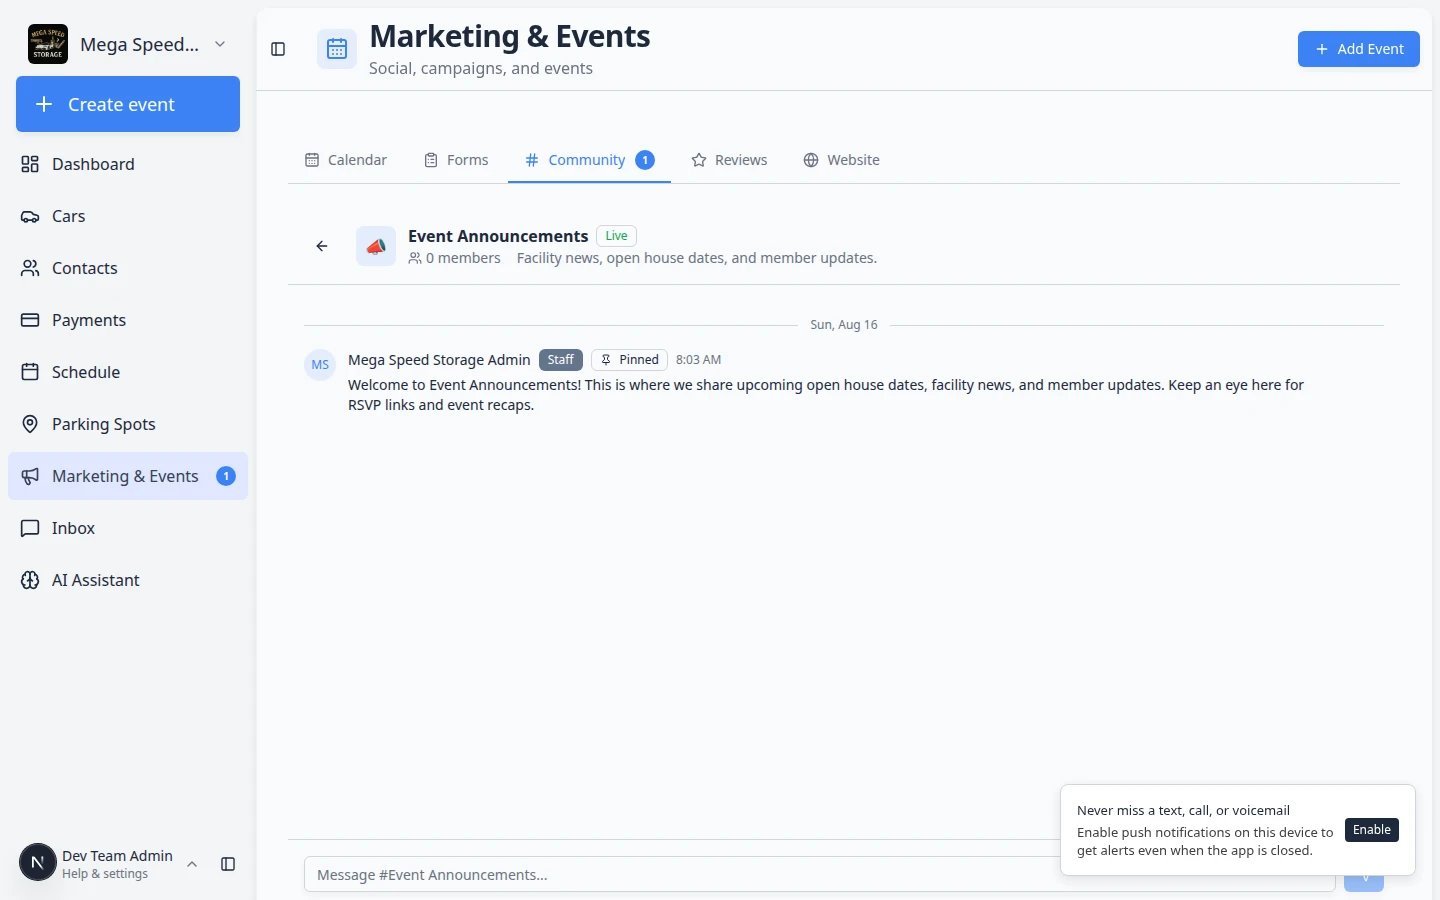 *Open a channel card to read posts and add updates customers will see in their portal.*
## What customers see
Customers do not use the staff dashboard. After they sign in to the customer portal, they open **Community** (wording may vary slightly by facility) and see the channels your team created.
Open [Settings > Website & customer app](https://www.carstoragesoftware.com/dashboard/settings/website) and make sure the **Community** section is enabled on the customer app home screen.
**Why this matters:** If Community is hidden in settings, customers will not see your channels even though staff can post here.
Ask a teammate to open a customer portal login, or use a test customer account. Open **Community** in the portal and confirm the channel name and welcome post appear.
**Expected result:** Customers see the same channel name and posts your team created on the staff **Community** tab.
**Staff posts, customer reads**
In a **read-only** channel, customers can read staff posts but cannot reply. In an open channel, customers can reply—assign someone to monitor unread badges on the staff **Community Channels** list.
**Expected result:** Customers see the channel in their portal community area and can read posts (and reply when the channel is not read-only).
## What success looks like
* At least one channel exists with a clear name customers understand (for example **Event Announcements**).
* A welcome post explains what customers will find in the channel.
* Staff check unread badges regularly so customer questions do not sit for days.
* Announcement channels use **Read-only**; discussion channels allow customer replies when you want conversation.
* A test customer login shows the same channel and posts in the portal **Community** area.
## Common mistakes to avoid
* Do not create five announcement channels—one clear **Announcements** channel is easier for customers.
* Do not leave read-only off on a channel meant only for staff news.
* Do not forget to post after creating a channel—an empty channel confuses customers.
**Community Feature Disabled banner**
If you see **Community Feature Disabled** at the top of the Community tab, community is turned off in settings. Click **Website & customer app settings** in the banner (or open [Settings > Website & customer app](https://www.carstoragesoftware.com/dashboard/settings/website#community)) and turn on the **Community** section for the customer app.
## Troubleshooting
**Customers cannot see community channels**
Open [Settings > Website & customer app](https://www.carstoragesoftware.com/dashboard/settings/website) and confirm the community section is enabled on the customer app home screen.
**Customers are posting in an announcement channel**
Edit the channel and turn on **Read-only** so only staff can post.
**New customers are not joining the channel**
Edit the channel and turn on **Default Channel** if every new customer should join automatically.
**I do not see the Community tab**
Your account may need marketing access. Ask a facility owner to review your role in [Settings > Team](https://www.carstoragesoftware.com/dashboard/settings/team).
## What to do next
Promote an event by creating it with [Create a social event](/docs/marketing-events/create-a-social-event), then paste the **Share** link into your channel.
For a broader email blast, use [Create a campaign](/docs/marketing-events/create-a-campaign).
## Related topics
- [Configure portal and website](/docs/settings/configure-portal-and-website.md)
- [Marketing & Events overview](/docs/marketing-events/overview.md)
- [Create a campaign](/docs/marketing-events/create-a-campaign.md)
- [Create and share a custom form](/docs/marketing-events/create-and-share-a-custom-form.md)
- [Create a social event](/docs/marketing-events/create-a-social-event.md)
This documentation is built and hosted on [Mintlify](https://mintlify.com), a developer documentation platform.
*Open a channel card to read posts and add updates customers will see in their portal.*
## What customers see
Customers do not use the staff dashboard. After they sign in to the customer portal, they open **Community** (wording may vary slightly by facility) and see the channels your team created.
Open [Settings > Website & customer app](https://www.carstoragesoftware.com/dashboard/settings/website) and make sure the **Community** section is enabled on the customer app home screen.
**Why this matters:** If Community is hidden in settings, customers will not see your channels even though staff can post here.
Ask a teammate to open a customer portal login, or use a test customer account. Open **Community** in the portal and confirm the channel name and welcome post appear.
**Expected result:** Customers see the same channel name and posts your team created on the staff **Community** tab.
**Staff posts, customer reads**
In a **read-only** channel, customers can read staff posts but cannot reply. In an open channel, customers can reply—assign someone to monitor unread badges on the staff **Community Channels** list.
**Expected result:** Customers see the channel in their portal community area and can read posts (and reply when the channel is not read-only).
## What success looks like
* At least one channel exists with a clear name customers understand (for example **Event Announcements**).
* A welcome post explains what customers will find in the channel.
* Staff check unread badges regularly so customer questions do not sit for days.
* Announcement channels use **Read-only**; discussion channels allow customer replies when you want conversation.
* A test customer login shows the same channel and posts in the portal **Community** area.
## Common mistakes to avoid
* Do not create five announcement channels—one clear **Announcements** channel is easier for customers.
* Do not leave read-only off on a channel meant only for staff news.
* Do not forget to post after creating a channel—an empty channel confuses customers.
**Community Feature Disabled banner**
If you see **Community Feature Disabled** at the top of the Community tab, community is turned off in settings. Click **Website & customer app settings** in the banner (or open [Settings > Website & customer app](https://www.carstoragesoftware.com/dashboard/settings/website#community)) and turn on the **Community** section for the customer app.
## Troubleshooting
**Customers cannot see community channels**
Open [Settings > Website & customer app](https://www.carstoragesoftware.com/dashboard/settings/website) and confirm the community section is enabled on the customer app home screen.
**Customers are posting in an announcement channel**
Edit the channel and turn on **Read-only** so only staff can post.
**New customers are not joining the channel**
Edit the channel and turn on **Default Channel** if every new customer should join automatically.
**I do not see the Community tab**
Your account may need marketing access. Ask a facility owner to review your role in [Settings > Team](https://www.carstoragesoftware.com/dashboard/settings/team).
## What to do next
Promote an event by creating it with [Create a social event](/docs/marketing-events/create-a-social-event), then paste the **Share** link into your channel.
For a broader email blast, use [Create a campaign](/docs/marketing-events/create-a-campaign).
## Related topics
- [Configure portal and website](/docs/settings/configure-portal-and-website.md)
- [Marketing & Events overview](/docs/marketing-events/overview.md)
- [Create a campaign](/docs/marketing-events/create-a-campaign.md)
- [Create and share a custom form](/docs/marketing-events/create-and-share-a-custom-form.md)
- [Create a social event](/docs/marketing-events/create-a-social-event.md)
This documentation is built and hosted on [Mintlify](https://mintlify.com), a developer documentation platform.