> ## Documentation Index
> Fetch the complete documentation index at: https://www.carstoragesoftware.com/docs/llms.txt
> Use this file to discover all available pages before exploring further.
# Set up printable QR codes
> Create stable short-link QR codes for customer login, vehicle records, or front-desk handouts—and change the destination later without reprinting.
Use this guide when your facility wants **printed QR codes** at the front desk, on a car windshield card, or on a showroom poster—and you need the link to stay the same even if you update where it goes later.
## What you will accomplish
* Open [Settings > QR codes](https://www.carstoragesoftware.com/dashboard/settings/qr-codes) (when your account includes this feature).
* Create a QR code linked to a **customer**, **vehicle**, or **unlinked** destination you assign later.
* Customize colors and an optional center logo so the code matches your facility branding.
* Download a **ZIP of PNGs** or a **printable PDF** for labels and posters.
* Test-scan a code with your phone before you print hundreds of copies.
**QR codes vs customer login links**
A **customer login link** (from [Settings > Website & customer app](https://www.carstoragesoftware.com/dashboard/settings/website)) sends everyone to the same sign-in page.
A **QR code** can point to one customer, one vehicle, or a page you change later—while the printed image stays the same. Use QR codes when each card or poster needs its own destination.
**When QR codes is not in your sidebar:** The feature must be enabled for your facility. Until then, use shareable links from [Configure portal and website](/docs/settings/configure-portal-and-website). Your Car Storage Software contact can turn on QR codes when you are ready.
## Before you start
* You should be signed in as a team **admin** or someone with permission to edit dashboard settings.
* Confirm **QR codes** appears in your [Settings](https://www.carstoragesoftware.com/dashboard/settings) sidebar. If you do not see it, ask your Car Storage Software contact to enable QR codes for your facility.
* Finish [Set up facility branding](/docs/settings/set-up-facility-branding) so optional center logos look correct.
* For vehicle or customer codes, create the record first in [Cars](https://www.carstoragesoftware.com/dashboard/cars) or [Contacts](https://www.carstoragesoftware.com/dashboard/contacts).
## Open QR code settings
From the [Dashboard](https://www.carstoragesoftware.com/dashboard), click **Settings** in the left sidebar.
In the settings category list, click **QR codes**.
Direct link: [Settings > QR codes](https://www.carstoragesoftware.com/dashboard/settings/qr-codes).
**Expected result:** The page title is **QR codes** with a short description about printable short-link codes.
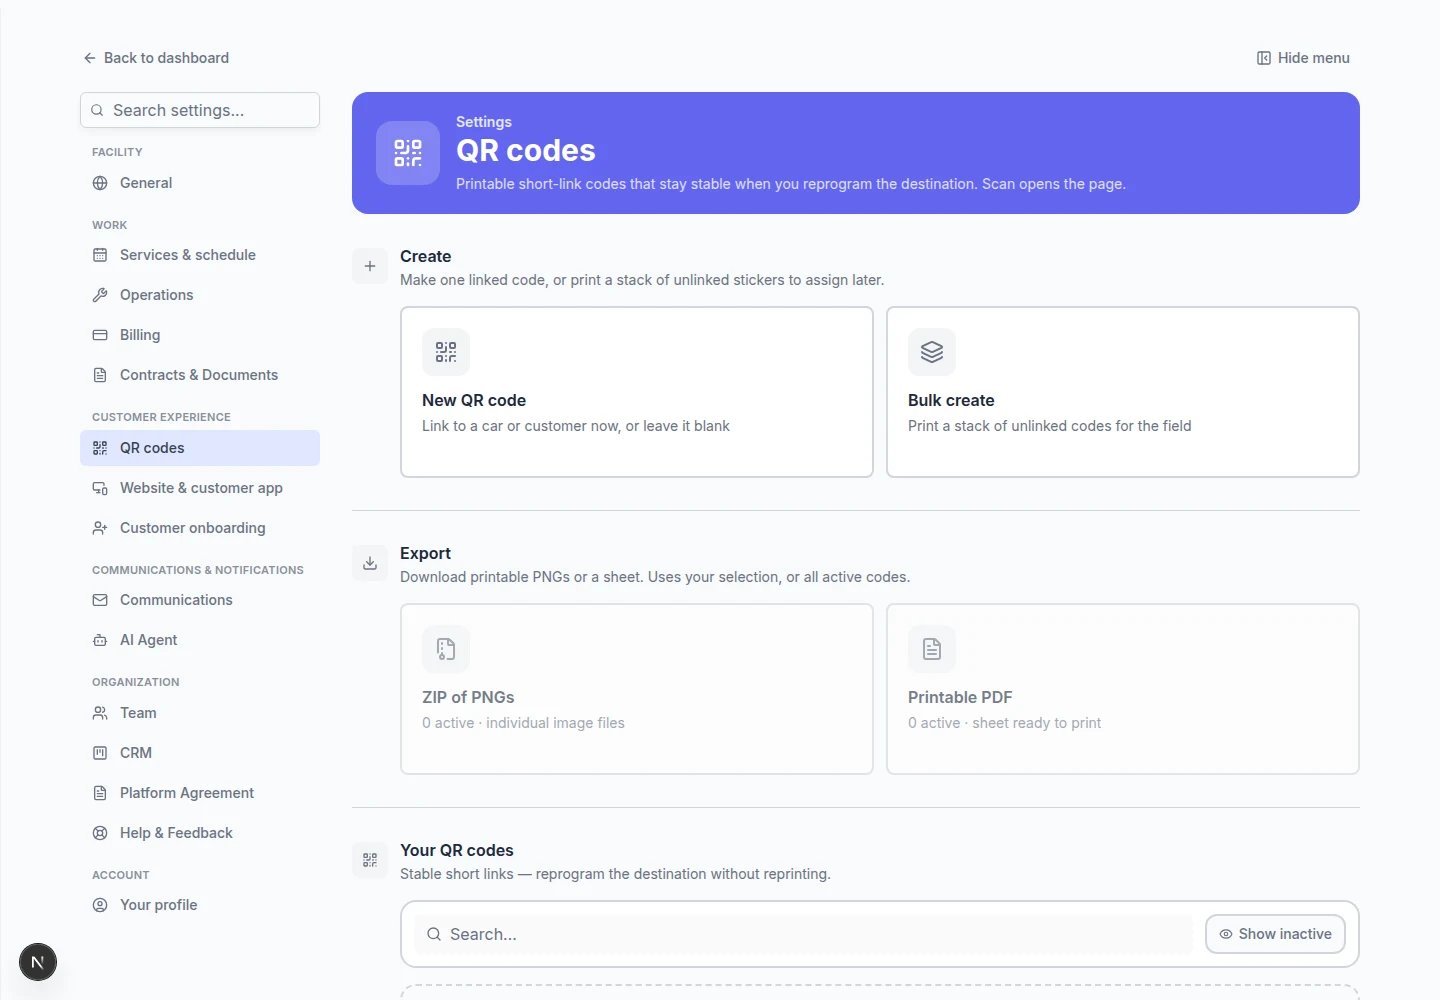 *[Settings > QR codes](https://www.carstoragesoftware.com/dashboard/settings/qr-codes) is where you create codes, export print files, and manage destinations.*
## Create one QR code
In the **Create** section, click **New QR code**.
**Expected result:** A window titled **New QR code** opens.
Pick one of three link types:
* **Car** — opens a specific vehicle record (good for windshield cards or keys).
* **Customer** — opens a customer profile or portal path for that owner.
* **Unlinked** — creates a code you assign later (good when you print labels before intake).
**Why this matters:** Choosing the right type up front saves reprinting. You can change where an unlinked code points without changing the printed image.
If you chose **Car** or **Customer**, use the search box to find the correct record.
Read the year, make, model, and plate (or customer name) carefully before you continue.
*[Settings > QR codes](https://www.carstoragesoftware.com/dashboard/settings/qr-codes) is where you create codes, export print files, and manage destinations.*
## Create one QR code
In the **Create** section, click **New QR code**.
**Expected result:** A window titled **New QR code** opens.
Pick one of three link types:
* **Car** — opens a specific vehicle record (good for windshield cards or keys).
* **Customer** — opens a customer profile or portal path for that owner.
* **Unlinked** — creates a code you assign later (good when you print labels before intake).
**Why this matters:** Choosing the right type up front saves reprinting. You can change where an unlinked code points without changing the printed image.
If you chose **Car** or **Customer**, use the search box to find the correct record.
Read the year, make, model, and plate (or customer name) carefully before you continue.
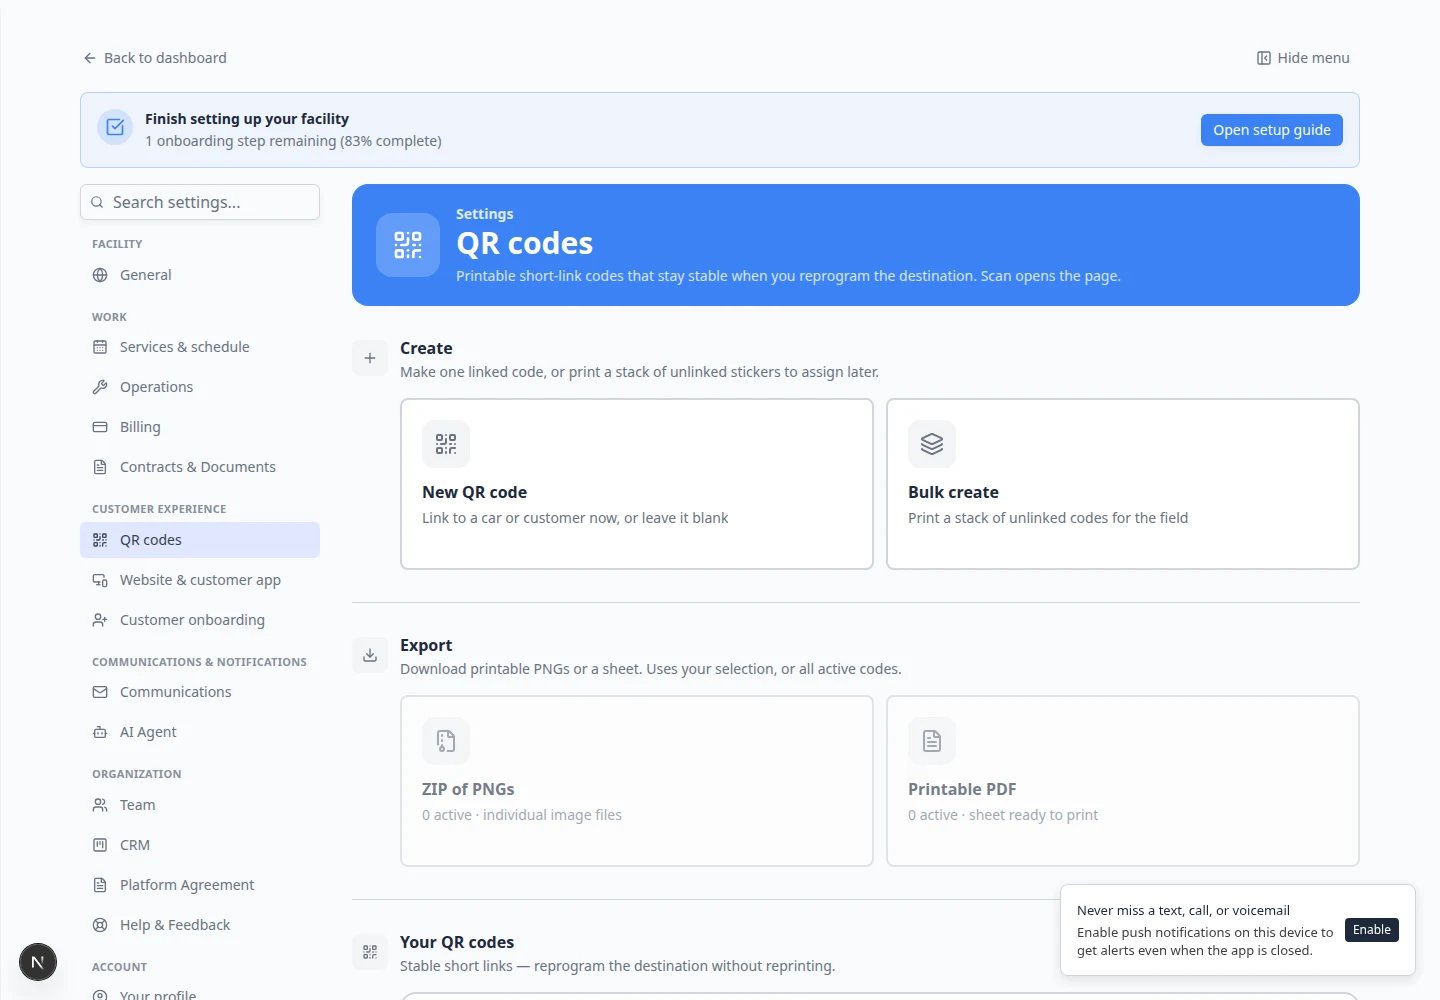 *When you pick **Car**, search for the exact vehicle before you click **Create**—windshield cards are hard to reprint.*
Change **QR color**, **background color**, or add a **center logo** so the code matches your shop's look.
Dark QR on a light background scans best under fluorescent shop lighting.
Click **Create** at the bottom of the window.
**Expected result:** The new code appears in **Your QR codes** with a preview image and short URL.
*When you pick **Car**, search for the exact vehicle before you click **Create**—windshield cards are hard to reprint.*
Change **QR color**, **background color**, or add a **center logo** so the code matches your shop's look.
Dark QR on a light background scans best under fluorescent shop lighting.
Click **Create** at the bottom of the window.
**Expected result:** The new code appears in **Your QR codes** with a preview image and short URL.
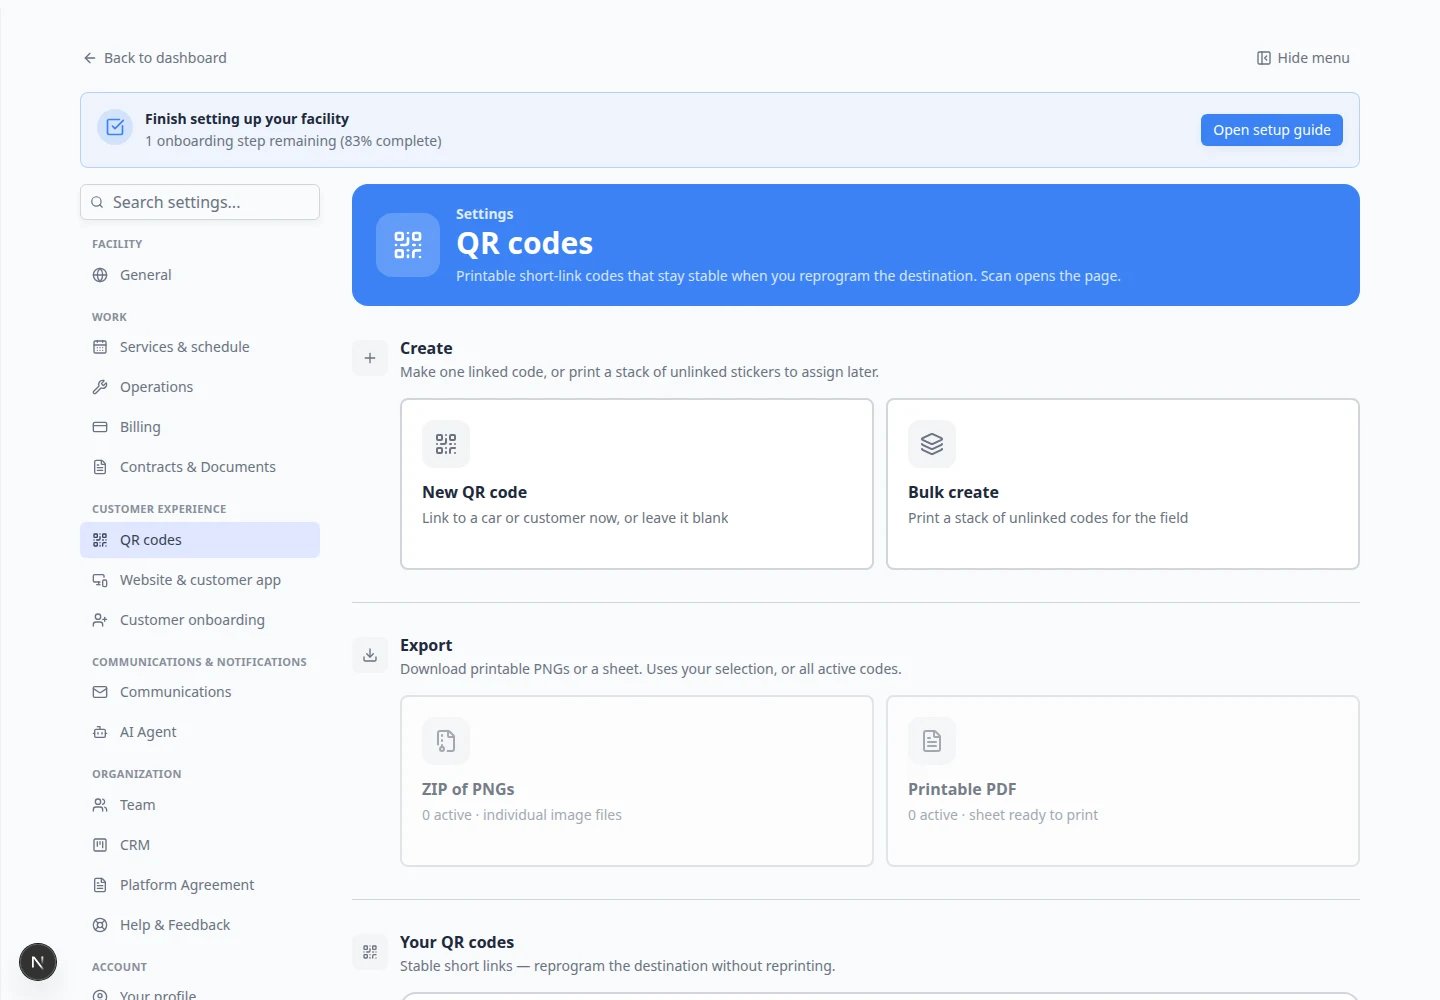 *Pick **Car**, **Customer**, or **Unlinked**, then customize colors before you click **Create**.*
## Create many codes at once
Use **Bulk create** when you need QR labels for every car on a new row or every customer in a mailing list.
In the **Create** section, click **Bulk create**.
**Expected result:** A window opens where you can select many cars or customers at once.
Follow the prompts to select multiple records. The app creates one code per record.
**Why this matters:** Bulk create saves hours when you label an entire new row of stored vehicles before a busy intake weekend.
Scroll **Your QR codes** and spot-check a few rows before you export for printing.
**Expected result:** Each vehicle or customer has its own code and short URL.
*Pick **Car**, **Customer**, or **Unlinked**, then customize colors before you click **Create**.*
## Create many codes at once
Use **Bulk create** when you need QR labels for every car on a new row or every customer in a mailing list.
In the **Create** section, click **Bulk create**.
**Expected result:** A window opens where you can select many cars or customers at once.
Follow the prompts to select multiple records. The app creates one code per record.
**Why this matters:** Bulk create saves hours when you label an entire new row of stored vehicles before a busy intake weekend.
Scroll **Your QR codes** and spot-check a few rows before you export for printing.
**Expected result:** Each vehicle or customer has its own code and short URL.
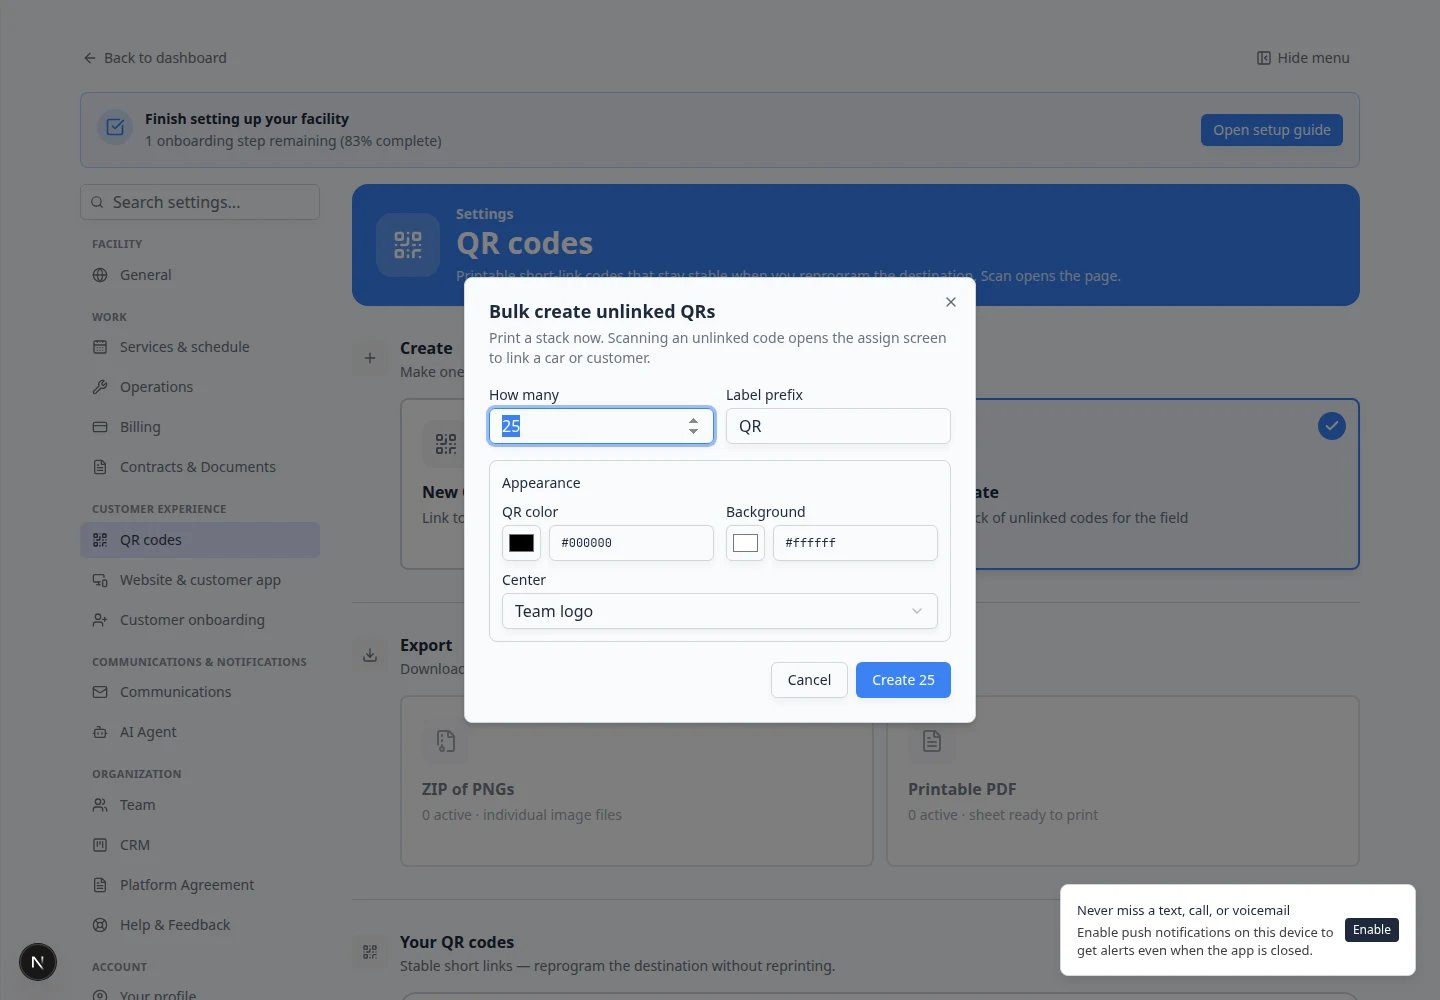 ***Bulk create** is for label runs—one printed code per car or customer, all created in a single step.*
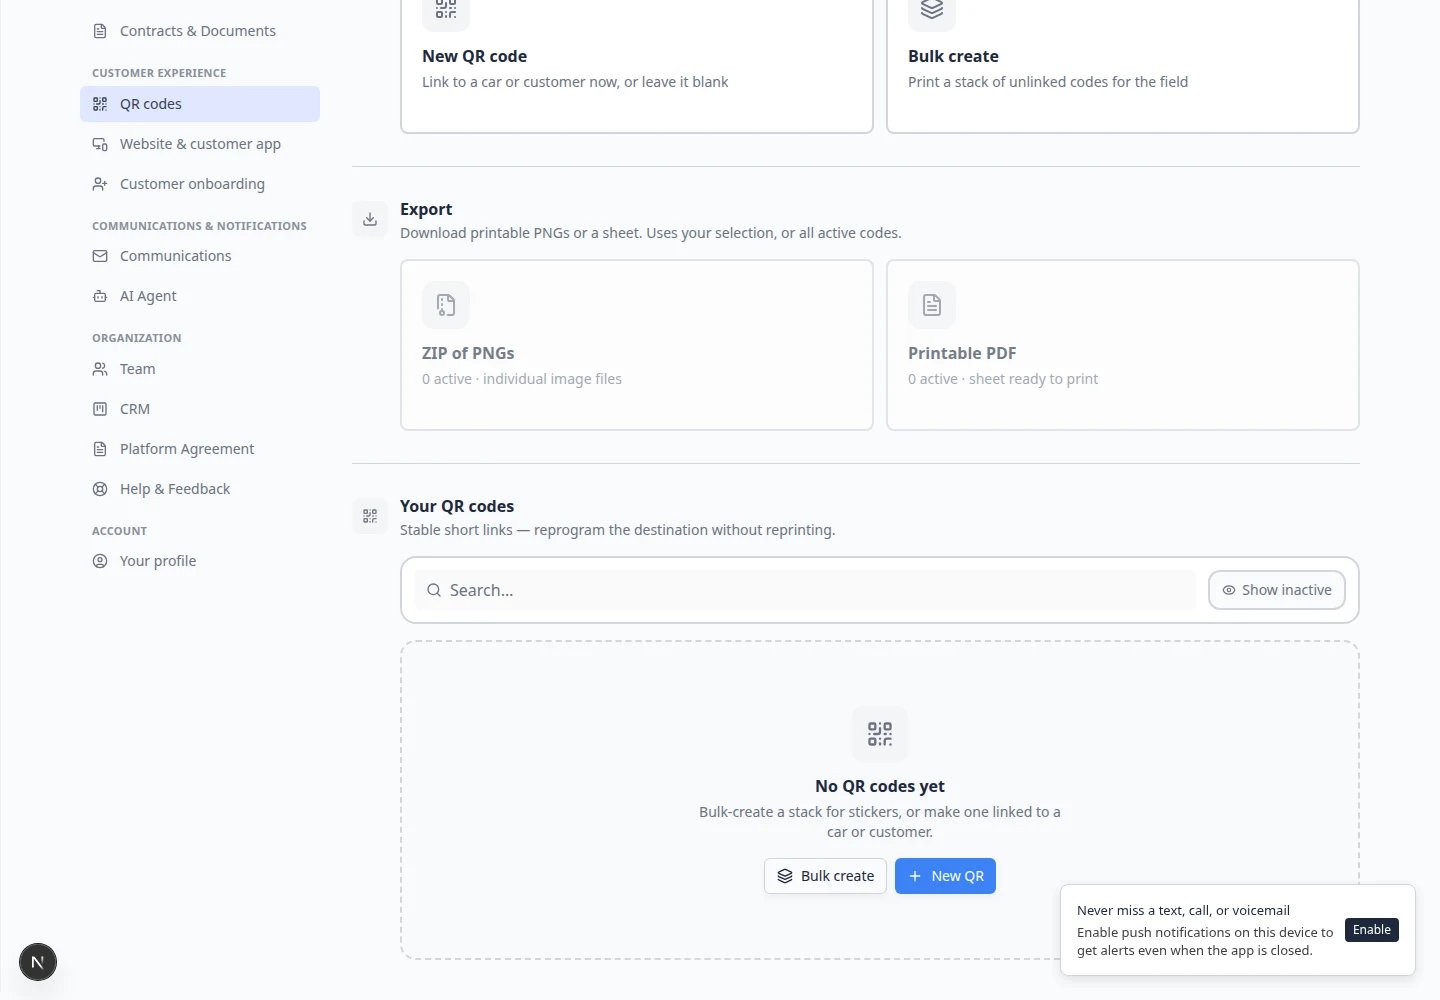 *After you create codes, **Your QR codes** lists every printable code. Search here before you export or edit a destination.*
## Export for printing
On [Settings > QR codes](https://www.carstoragesoftware.com/dashboard/settings/qr-codes), find **Export**.
* **ZIP of PNGs** — one image file per code. Use this for custom label software or a print shop template.
* **Printable PDF** — a ready-to-print US Letter sheet. Pick a QR size (**1 in**, **2 in**, **4 in**, or **6 in**); codes are packed to that true size. Print at **100%** (turn off “fit to page”).
**Why this matters:** PNGs give designers flexibility. PDFs are faster when you need ten identical cards today.
Open one exported PNG on your monitor or print a single test label. Scan it with your phone camera.
**Expected result:** The phone opens the correct customer or vehicle page—not an error screen.
*After you create codes, **Your QR codes** lists every printable code. Search here before you export or edit a destination.*
## Export for printing
On [Settings > QR codes](https://www.carstoragesoftware.com/dashboard/settings/qr-codes), find **Export**.
* **ZIP of PNGs** — one image file per code. Use this for custom label software or a print shop template.
* **Printable PDF** — a ready-to-print US Letter sheet. Pick a QR size (**1 in**, **2 in**, **4 in**, or **6 in**); codes are packed to that true size. Print at **100%** (turn off “fit to page”).
**Why this matters:** PNGs give designers flexibility. PDFs are faster when you need ten identical cards today.
Open one exported PNG on your monitor or print a single test label. Scan it with your phone camera.
**Expected result:** The phone opens the correct customer or vehicle page—not an error screen.
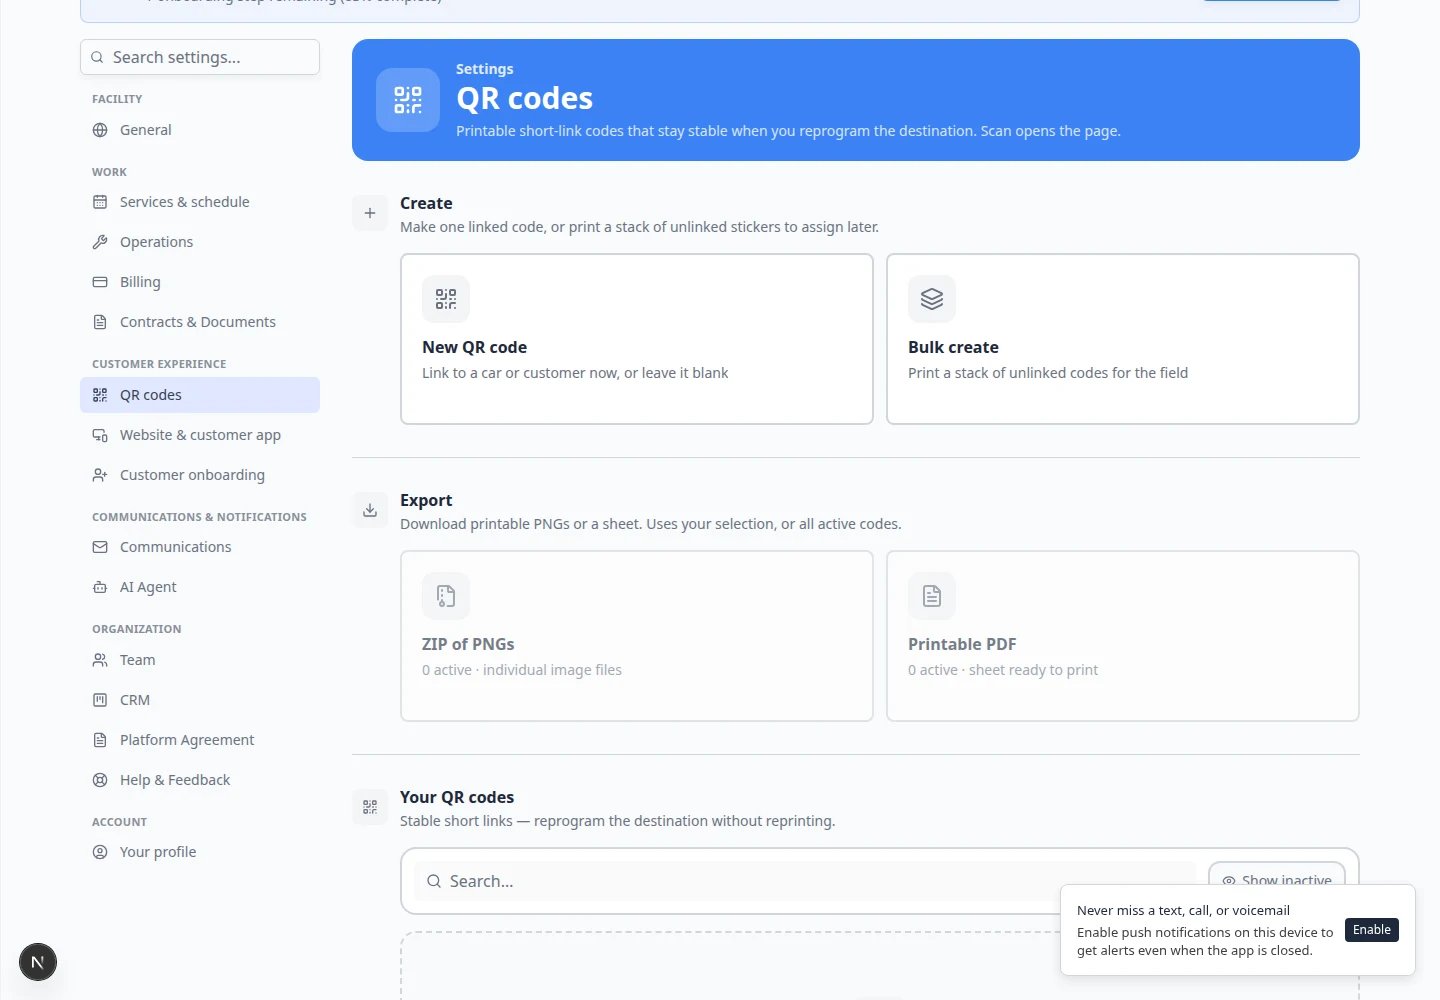 *Use **ZIP of PNGs** for a print shop template, or **Printable PDF** when you need front-desk handouts today.*
## Change where a code goes (without reprinting)
QR codes use a **short link** that stays stable. You can update the destination in the app when a car sells or a customer moves units.
Use the search box or scroll the table on [Settings > QR codes](https://www.carstoragesoftware.com/dashboard/settings/qr-codes).
Click **Edit** or the link action on that row (wording may vary by screen size).
Pick the new destination and save.
**Expected result:** The same printed sticker now opens the updated record. You do not need a new QR image.
**Deactivate old codes**
When a vehicle leaves permanently, turn the code **Inactive** instead of deleting it. Inactive codes stop working but keep history for your records.
## Common uses at car storage facilities
**Front desk customer login** — Unlinked code on a tabletop tent; destination points to your [customer login link](/docs/facility-web-pages/share-customer-login-links).
**Windshield intake card** — Car code on a laminated tag so porters open the right record from the lot.
**Showroom poster** — Unlinked or customer code for an event RSVP or registration page from [Facility Web Pages](/docs/facility-web-pages/overview).
**Keys and valet tags** — Car code tied to the vehicle so anyone scanning sees location and owner contact rules your team configured.
## Troubleshooting
**I do not see QR codes in Settings**
This feature must be turned on for your facility. Contact your Car Storage Software representative or facility owner. Until it is enabled, use **Shareable links** on [Settings > Website & customer app](https://www.carstoragesoftware.com/dashboard/settings/website) instead.
**My phone will not scan the code**
Increase contrast (dark QR on white background), print at least 1 inch (2.5 cm) square, and avoid glossy paper that reflects overhead lights. Test in the same lighting as your storage bay.
**The code opens the wrong vehicle**
Open the row in **Your QR codes** and confirm the linked car or customer. Edit the destination before you hand the printed card to a customer.
## What to do next
* Copy public customer links from [Configure portal and website](/docs/settings/configure-portal-and-website).
* Print a facility QR for events with [Create a social event](/docs/marketing-events/create-a-social-event) (event-specific QR codes live on the marketing event page).
* Return to [Settings overview](/docs/settings/overview) for your full setup checklist.
## Related topics
- [Browse the Integrations catalog](/docs/settings/browse-the-integrations-catalog.md)
- [Export your facility data](/docs/settings/export-your-facility-data.md)
- [Configure portal and website](/docs/settings/configure-portal-and-website.md)
- [Settings overview](/docs/settings/overview.md)
- [Check in social event attendees](/docs/marketing-events/check-in-social-event-attendees.md)
This documentation is built and hosted on [Mintlify](https://mintlify.com), a developer documentation platform.
*Use **ZIP of PNGs** for a print shop template, or **Printable PDF** when you need front-desk handouts today.*
## Change where a code goes (without reprinting)
QR codes use a **short link** that stays stable. You can update the destination in the app when a car sells or a customer moves units.
Use the search box or scroll the table on [Settings > QR codes](https://www.carstoragesoftware.com/dashboard/settings/qr-codes).
Click **Edit** or the link action on that row (wording may vary by screen size).
Pick the new destination and save.
**Expected result:** The same printed sticker now opens the updated record. You do not need a new QR image.
**Deactivate old codes**
When a vehicle leaves permanently, turn the code **Inactive** instead of deleting it. Inactive codes stop working but keep history for your records.
## Common uses at car storage facilities
**Front desk customer login** — Unlinked code on a tabletop tent; destination points to your [customer login link](/docs/facility-web-pages/share-customer-login-links).
**Windshield intake card** — Car code on a laminated tag so porters open the right record from the lot.
**Showroom poster** — Unlinked or customer code for an event RSVP or registration page from [Facility Web Pages](/docs/facility-web-pages/overview).
**Keys and valet tags** — Car code tied to the vehicle so anyone scanning sees location and owner contact rules your team configured.
## Troubleshooting
**I do not see QR codes in Settings**
This feature must be turned on for your facility. Contact your Car Storage Software representative or facility owner. Until it is enabled, use **Shareable links** on [Settings > Website & customer app](https://www.carstoragesoftware.com/dashboard/settings/website) instead.
**My phone will not scan the code**
Increase contrast (dark QR on white background), print at least 1 inch (2.5 cm) square, and avoid glossy paper that reflects overhead lights. Test in the same lighting as your storage bay.
**The code opens the wrong vehicle**
Open the row in **Your QR codes** and confirm the linked car or customer. Edit the destination before you hand the printed card to a customer.
## What to do next
* Copy public customer links from [Configure portal and website](/docs/settings/configure-portal-and-website).
* Print a facility QR for events with [Create a social event](/docs/marketing-events/create-a-social-event) (event-specific QR codes live on the marketing event page).
* Return to [Settings overview](/docs/settings/overview) for your full setup checklist.
## Related topics
- [Browse the Integrations catalog](/docs/settings/browse-the-integrations-catalog.md)
- [Export your facility data](/docs/settings/export-your-facility-data.md)
- [Configure portal and website](/docs/settings/configure-portal-and-website.md)
- [Settings overview](/docs/settings/overview.md)
- [Check in social event attendees](/docs/marketing-events/check-in-social-event-attendees.md)
This documentation is built and hosted on [Mintlify](https://mintlify.com), a developer documentation platform.