

What you will accomplish
You will describe real facility work in one message—such as a new customer, a vehicle, and a drop-off time—and let the AI Assistant prepare proposal cards for you to check before anything is saved. When you finish this guide, you will know how to:- Write one clear message that covers several related tasks.
- Wait for the assistant to show draft cards instead of saving records immediately.
- Review each card before you select Confirm All.
- Fix spelling, times, or vehicle details on the cards themselves.
When to use this guide
Use this guide when:- A customer calls or emails with several details at once.
- You want to save time typing the same information into Contacts, Cars, and Schedule.
- You are comfortable reviewing drafts before they become live records.
Lookups are differentIf you only need to find an existing customer or car, use Ask about schedule, parking, and records instead. This guide is for creating or scheduling new work.
Before you start
- Collect the facts first: customer name, phone or email, vehicle year/make/model, date and time, and parking spot if known.
- Check whether the customer or car already exists in Contacts or Cars.
- Know your facility’s appointment types (drop-off, pickup, service) from Settings > Events & schedule.
- Read Review AI proposals so you know what to check on each card.
Step 1: Start a new chat
1
Open AI Assistant
Go to AI Assistant from the dashboard sidebar.Why this matters: Each new customer or job should start in a fresh thread so the assistant does not mix up names from an earlier conversation.
2
Click New Chat
In the left sidebar, click New Chat.Expected result: You return to the start screen with the microphone and suggested questions.
3
Choose Type instead
On the start screen, type in the Type a message… box at the bottom. In an active chat, tap the keyboard icon if you are in voice mode.Why this matters: Typed messages are easier to proofread before you send them.
Step 2: Write one combined message
Good messages include who, what vehicle, and what should happen next. Example you can adapt:Create a new customer named Jordan Lee with email jordan.lee@example.com and phone 555-010-2000. Add a 2020 Ford Mustang in red. Book a vehicle drop-off tomorrow at 2pm. Do not confirm yet.
1
Type or paste your message
Enter the full request in the text box at the bottom of the screen.
2
Press Enter or tap the send arrow
Send the message when it reads correctly.Expected result: The assistant shows Thinking… while it prepares draft cards. This may take a few seconds.
Step 3: Wait for proposal cards
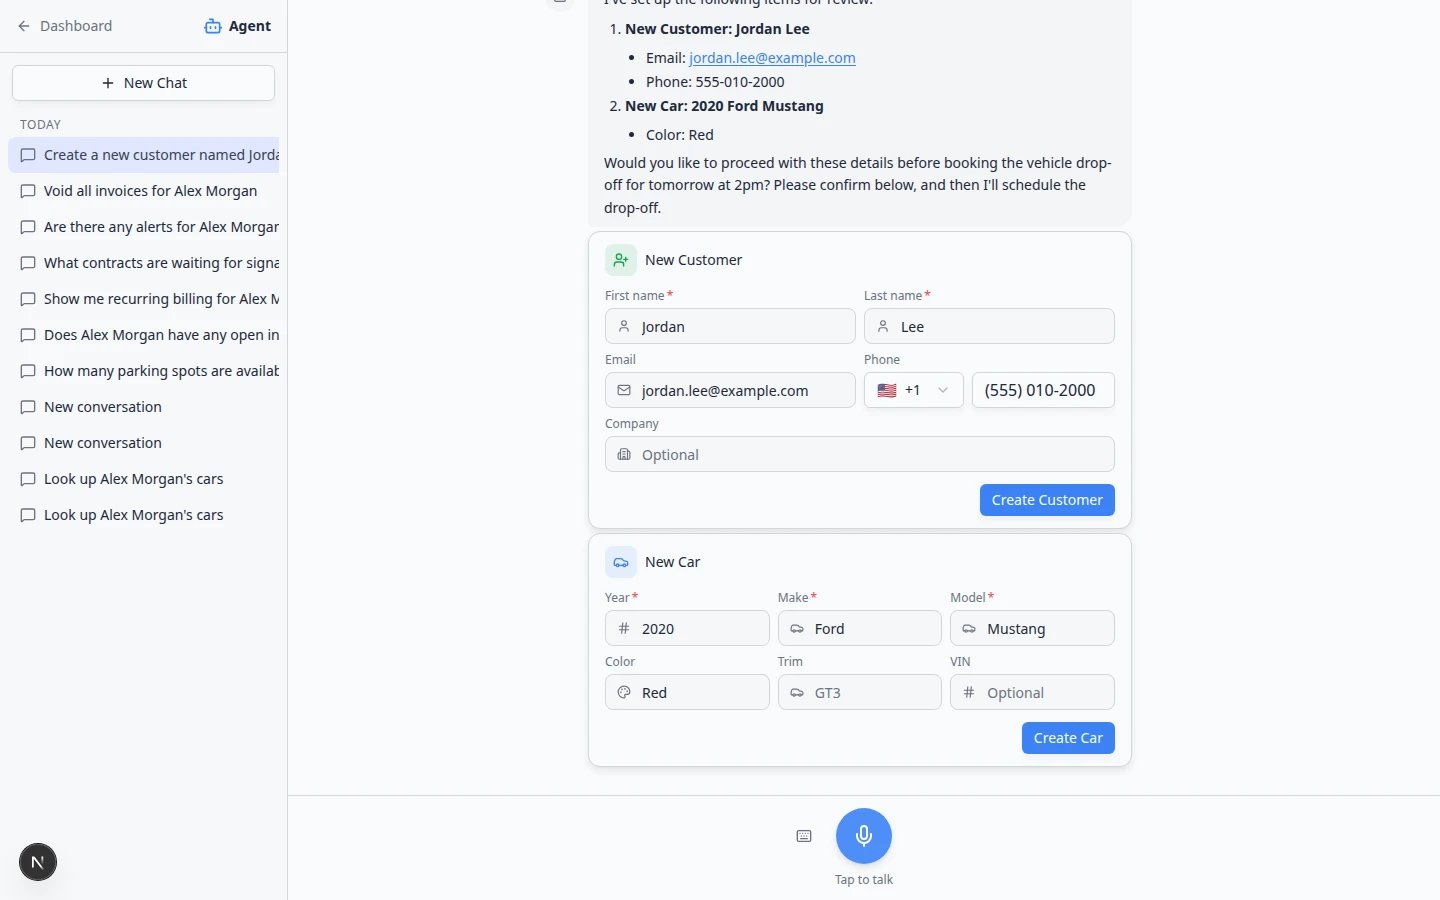
The assistant does not save records right away. Instead, it shows one or more white proposal cards in the chat. You may see cards such as:- New Customer — name, email, phone, and company.
- New Car for [customer name] — year, make, model, color, trim, and VIN.
- Appointment, Drop-off, or Pickup — date, time, customer, and vehicle.
- Move car or Event — when your request includes parking or custom event work.
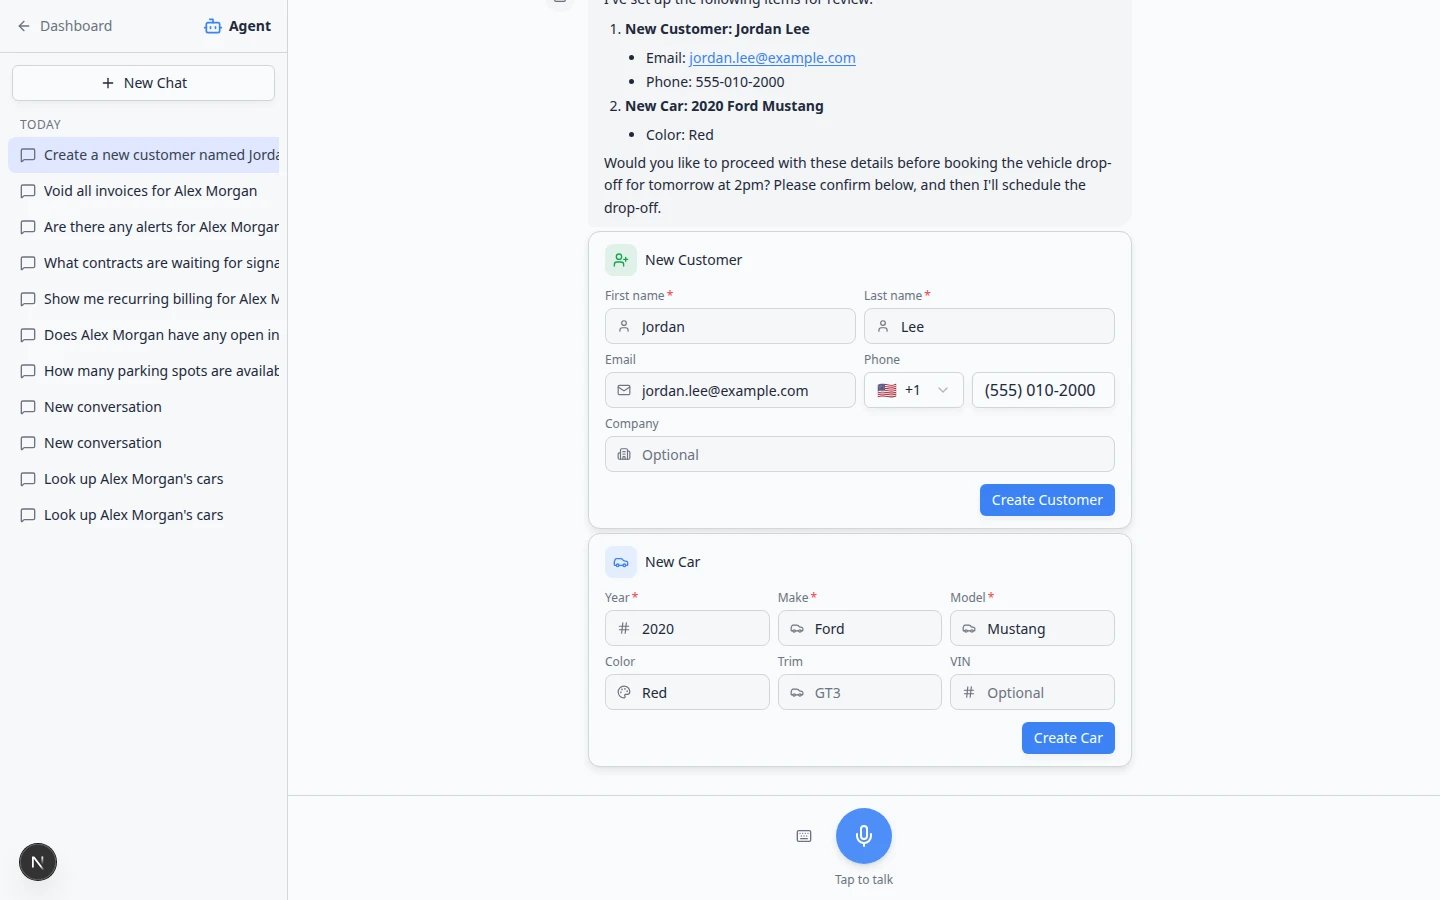
Appointment card may arrive lastA multi-part request often shows New Customer and New Car cards first. The drop-off or appointment card can appear a moment later. Wait until every card is visible—or ask in the same chat: Also book the drop-off appointment.The screenshot below shows a summary that lists three actions (customer, car, and drop-off) even when only two cards are visible at first. Scroll the chat and wait a few more seconds before you confirm.
Step 4: Fix details on the cards
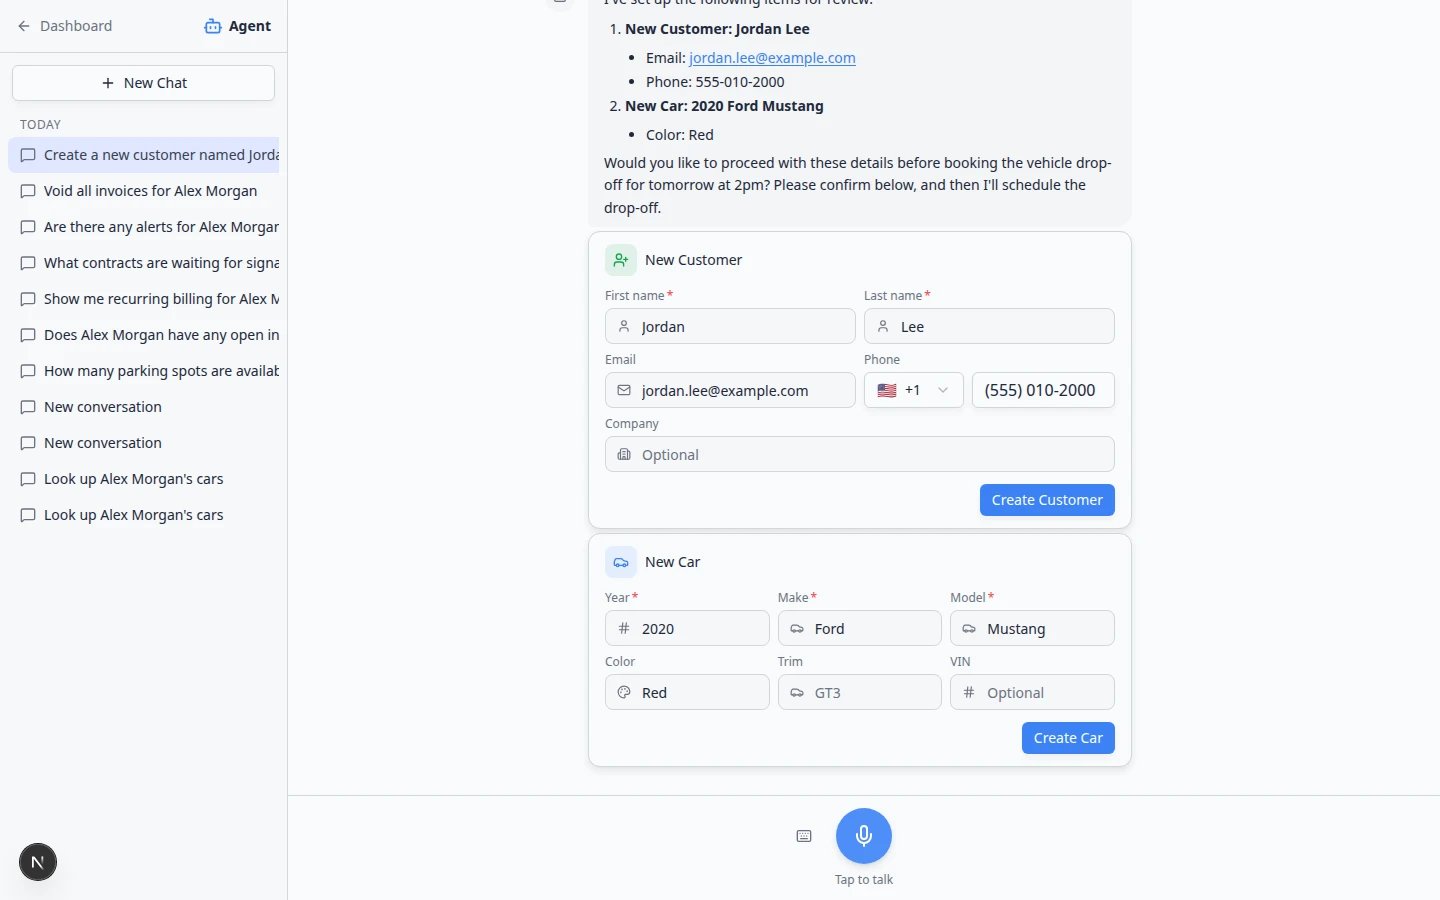
Click inside any field to correct spelling, color, phone number, or vehicle trim before you confirm.1
Read the summary above the cards
The assistant usually explains what it understood. Compare that summary to the customer’s request.
2
Edit fields on the cards
Click inside a field to fix spelling, time, or color before you confirm.Why this matters: Fixing a card now is much faster than cleaning up duplicate or wrong records later.
3
Follow the review checklist
Use the full checklist in Review AI proposals.
Step 5: Confirm only when everything is correct
1
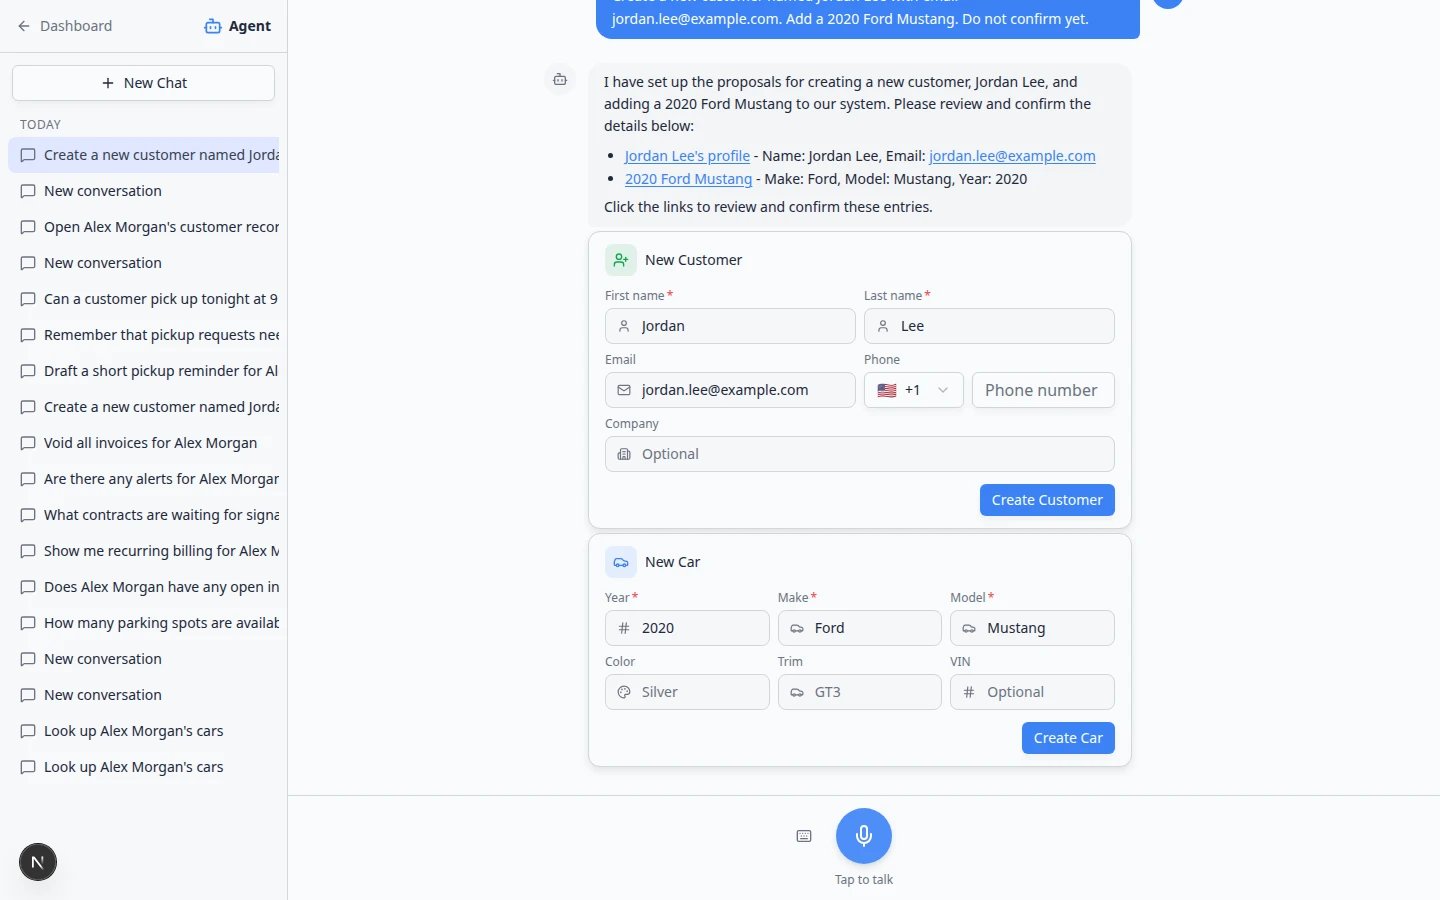
Select Confirm All
Click Confirm All only when every card matches your notes.Expected result: New or updated records appear in the dashboard.
2
Verify in the dashboard
3
Assign parking when the car arrives
If the vehicle is on site today, continue with Assign a parking spot so Parking Spots stays accurate.
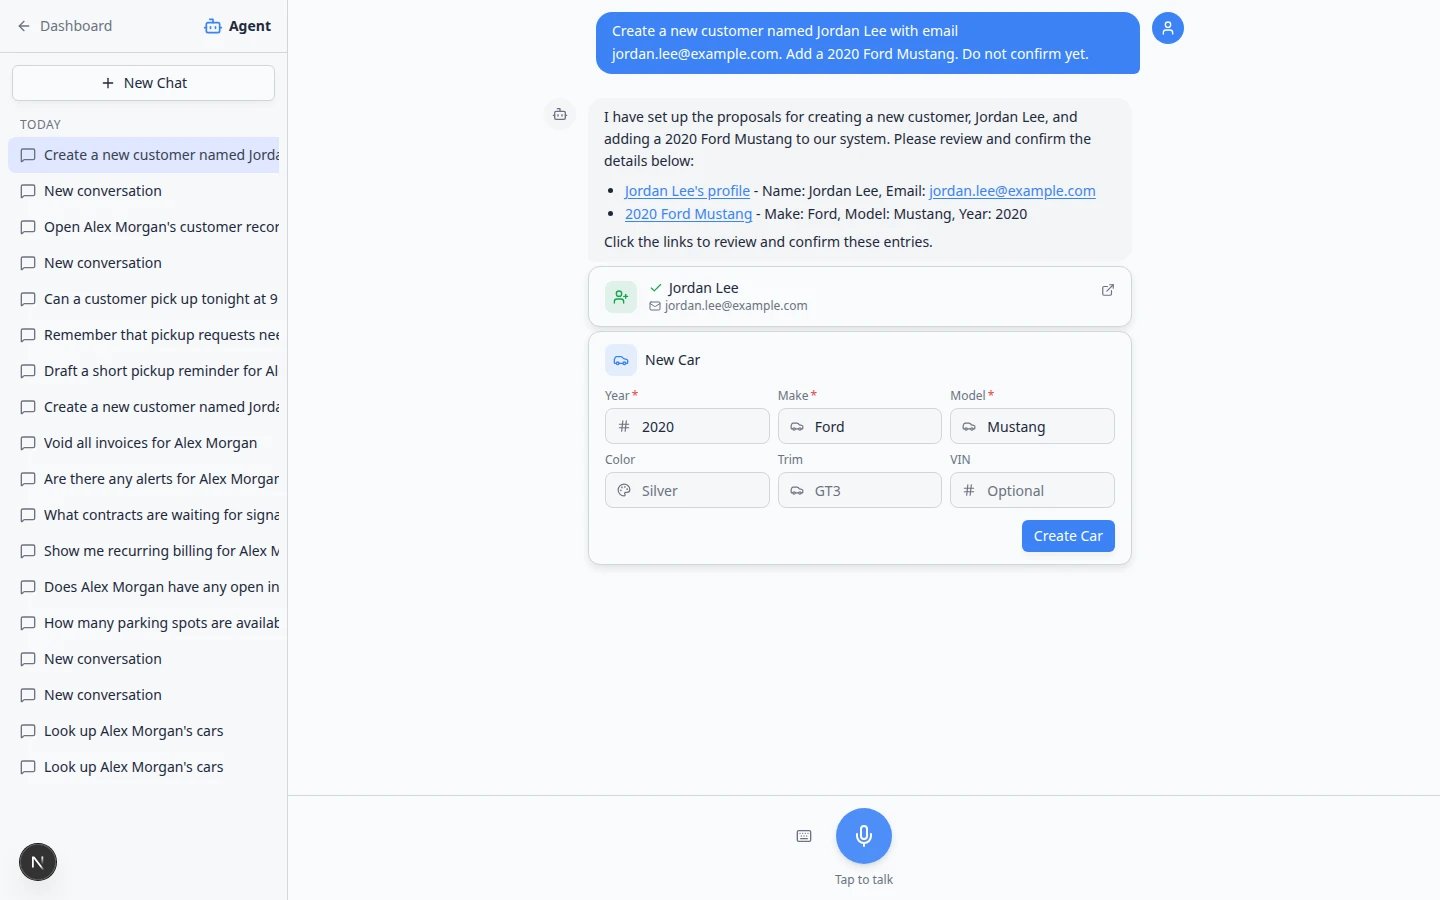
One card vs several cardsIf the assistant shows only one card with its own save button, review that card carefully and save it before you ask for the next step. When several cards appear together, Confirm All saves the whole group at once.
When the customer or car already exists
Do not ask the assistant to create a second record with the same name. Instead, say something like:Book a vehicle drop-off for Alex Morgan’s 1995 Porsche 911 tomorrow at 2pm.Or update existing details:
Update Alex Morgan’s phone number to 610-555-0199.Why this matters: Duplicate customers make billing, messaging, and parking assignments confusing. Update cards change live records—review them the same way as new customer cards.
Other work you can prepare
You can ask the assistant to propose (not instantly save) many common tasks, including:- Drop-off or pickup for a stored vehicle
- Move a car to a parking spot
- Photo session or custom event on a vehicle
- Internal notes tied to a customer or car
If you are not ready to confirm
1
Leave the chat open
You can return later from the chat list (see Manage your assistant chats).
2
Start over with New Chat
If the proposals are wrong, open New Chat and send a clearer message with full names, VIN, or exact date and time.
3
Enter records manually
You can always use Add a customer, Add a car, and Create an appointment without the assistant.
Troubleshooting
The assistant keeps saying Thinking…
Wait up to a minute on slow connections. If nothing changes, refresh the page, open New Chat, and send a shorter message with fewer tasks.Confirm All is disabled
A required field may be empty on one of the cards. Look for missing first name, last name, vehicle year, make, or model. Fields marked with a red asterisk (*) must be filled in.The appointment time is wrong
Edit the field on the card if you can. Otherwise start New Chat and say the date in full words. Check your facility time zone in Settings > General.I see “Failed” on a card
That usually means a step ran before an earlier step finished (for example, a car before the customer exists). Start New Chat and send the full request again in one message. You can also create the customer first, then ask for the car and appointment in a follow-up message. Why this happens: Cars and appointments need a customer record ID. Sending one complete sentence—or confirming the customer card first—helps every card appear correctly.The assistant created a customer I did not want
Open the customer in Contacts and correct records according to your facility process. Prevention is easier—always review cards before confirming.I only see one card but expected three
Send a follow-up in the same chat: “Also add the car and drop-off appointment.” Or start New Chat with one complete sentence that lists every part of the job.A speech recognition error appears
You can ignore it if you are typing instead of speaking. Click Type instead and continue with the keyboard. See Use the AI Assistant for microphone tips.What to do next
- Review AI proposals for a step-by-step confirmation checklist.
- Ask about schedule, parking, and records for quick lookups without creating new data.
- Assign a parking spot when the vehicle arrives on site.
- Create an appointment if you prefer to schedule directly on the calendar.