

What you will accomplish
You will create the spot names, lifts, and zones your team uses every day, arrange them on the floor plan, and save a map that matches the real building.When to use this guide
Use this guide when you are setting up a new facility map or adding more spaces to an existing map. When you finish, your team will be able to open Parking Spots, see the facility layout, and assign cars to the right places.Before you start
- You should have permission to open Settings > Floor Plan.
- Know the spot names your staff uses in the facility, such as A1, B12, Lift 2, or Outdoor 4.
- Decide whether you need exact spots, larger zones, or both.
- If your facility has stacked lifts, know how many cars each lift position can hold.
Open the Floor Plan Editor
Open the floor plan editor
Confirm you are on Floor Plan Editor
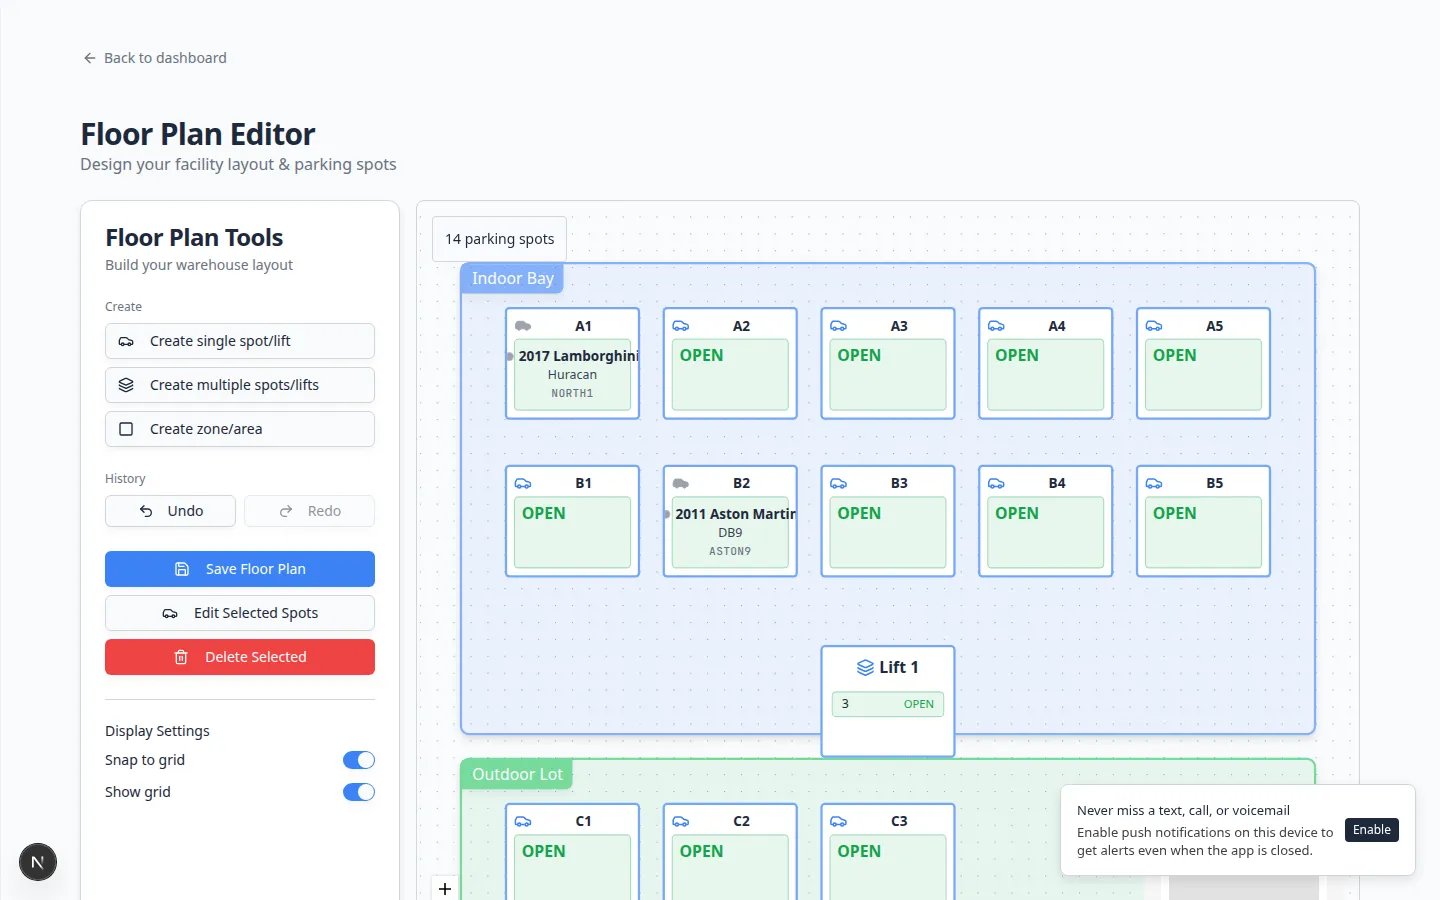
Create one spot or lift
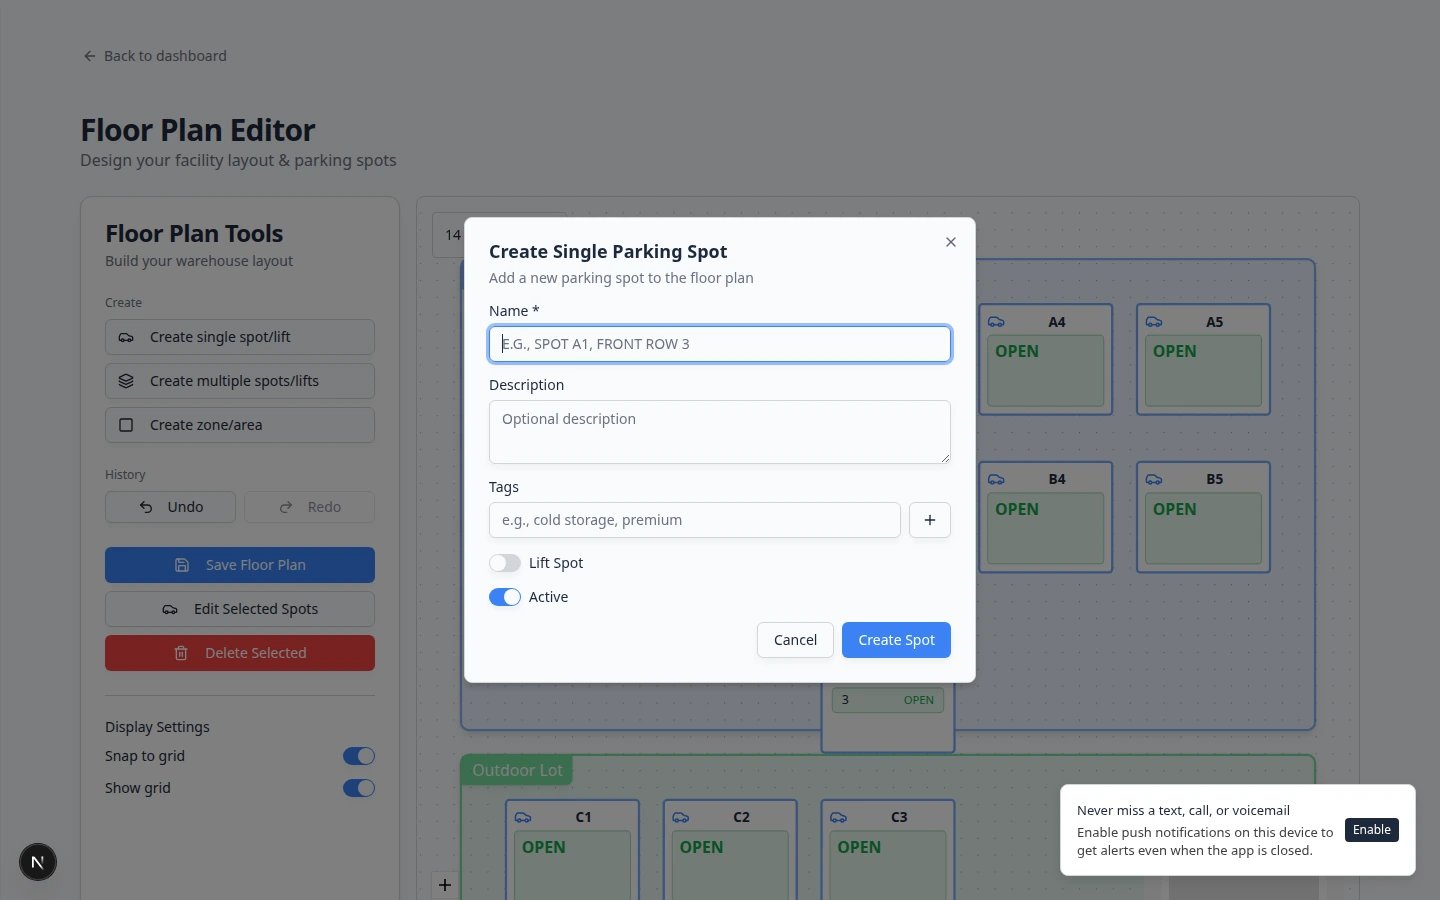
Use this option when you only need to add one new space or one lift position.Click Single spot or lift
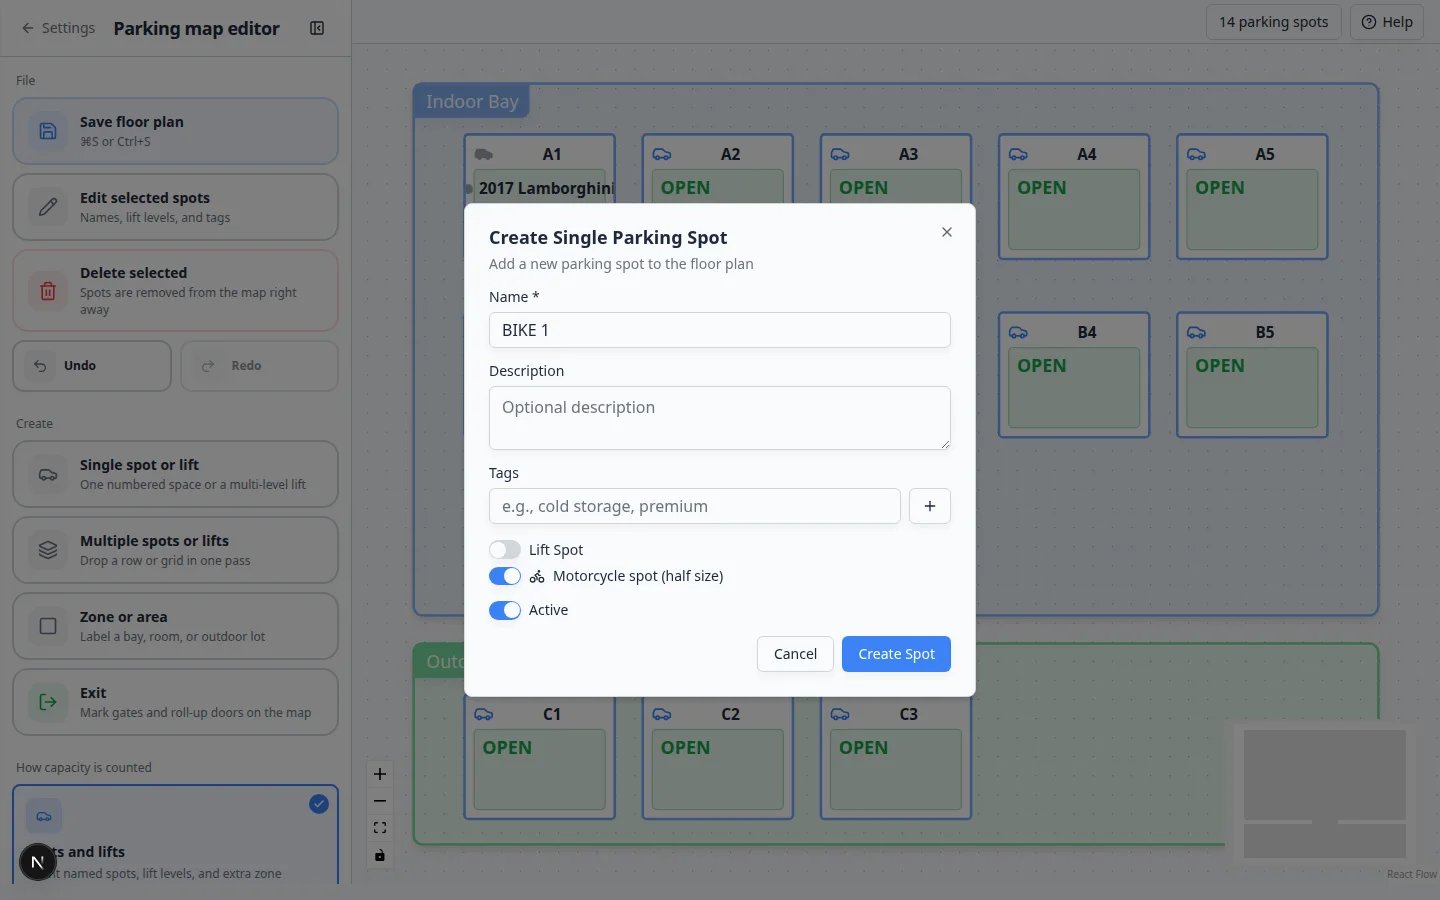
Enter the spot name
Add an optional description
Add optional tags
Turn on Lift Spot only if this is a stacked lift
- Per-lift numbers (L1, L2, …) creates names like LIFT-1-L1, LIFT-1-L2 (shown as levels 1, 2)
- Letters (A, B, C, D) creates names like LIFT-1-LA, LIFT-1-LB (shown as levels A, B)
- Sequential pairs (1/2, 3/4, …) names each platform with consecutive numbers across all lifts. With 2 spots per lift and start 1, the first lift is 1 (ground) and 2 (top), the next is 3/4, and so on.
- Bottom → top puts the first label (1 / A) on the ground level
- Top → bottom puts the first label on the highest level
Turn on Motorcycle spot only for bikes and scooters
Leave Active turned on
Click Create Spot
Create many spots at once
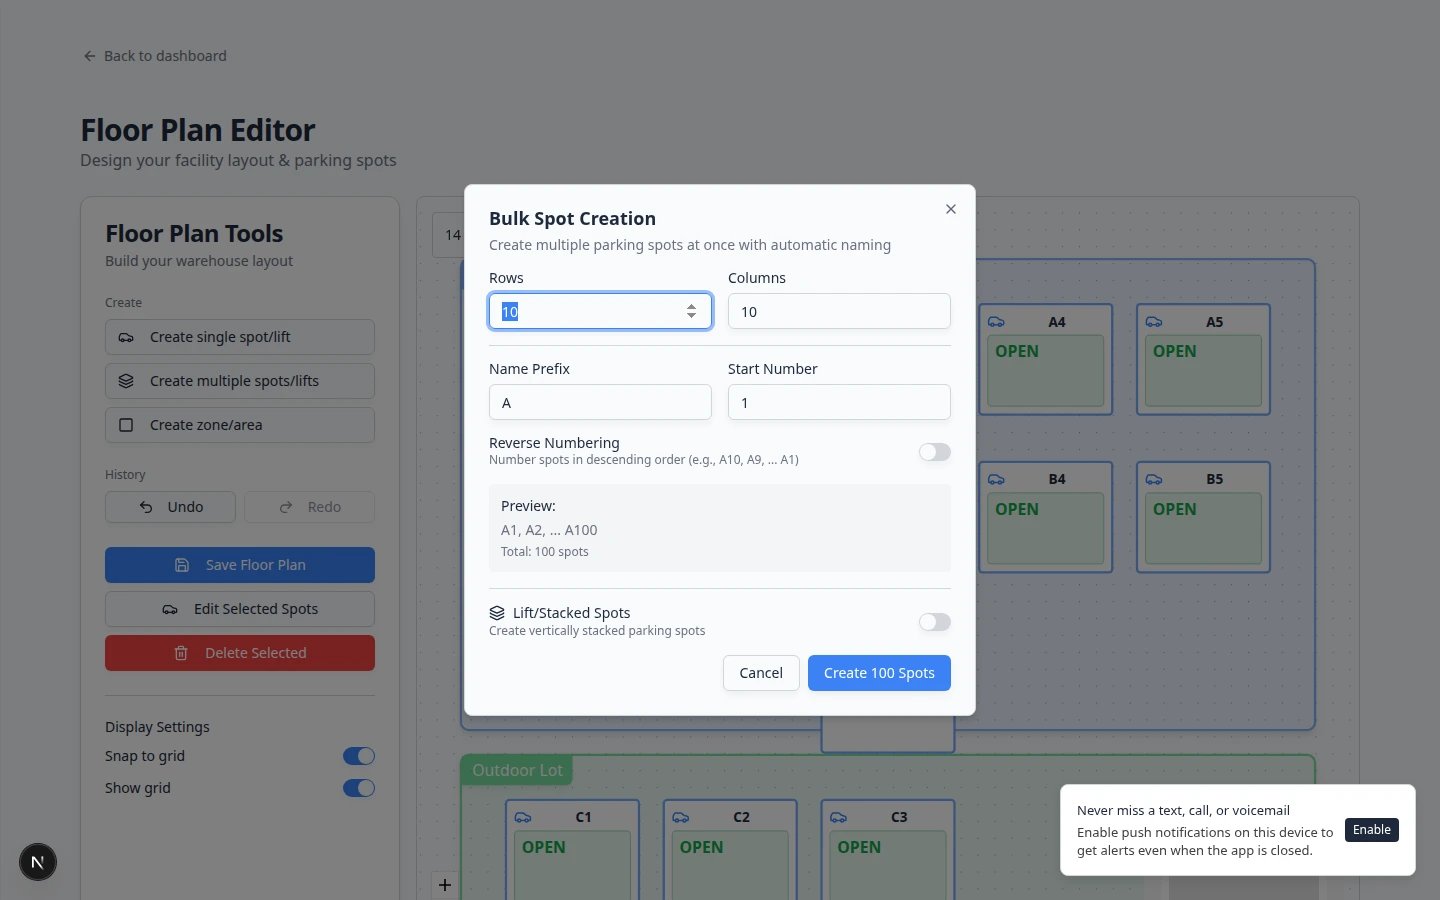
Use this option when you are setting up a row, section, or whole facility.Click Multiple spots or lifts
Enter Rows and Columns
Enter Name Prefix and Start Number
Review the Preview
Use Lift/Stacked Spots only when needed
- Letters (A, B, C, D) creates names like A1-LA, A1-LB (shown as A, B on the map)
- Per-lift numbers creates names like A1-L1, A1-L2
- Sequential pairs (1/2, 3/4, …) is for facilities that number every platform in order (ground 1, top 2, next lift 3/4, through 100). Set Start Number to the first number and Spots Per Lift Position to 2.
Click Create Spots
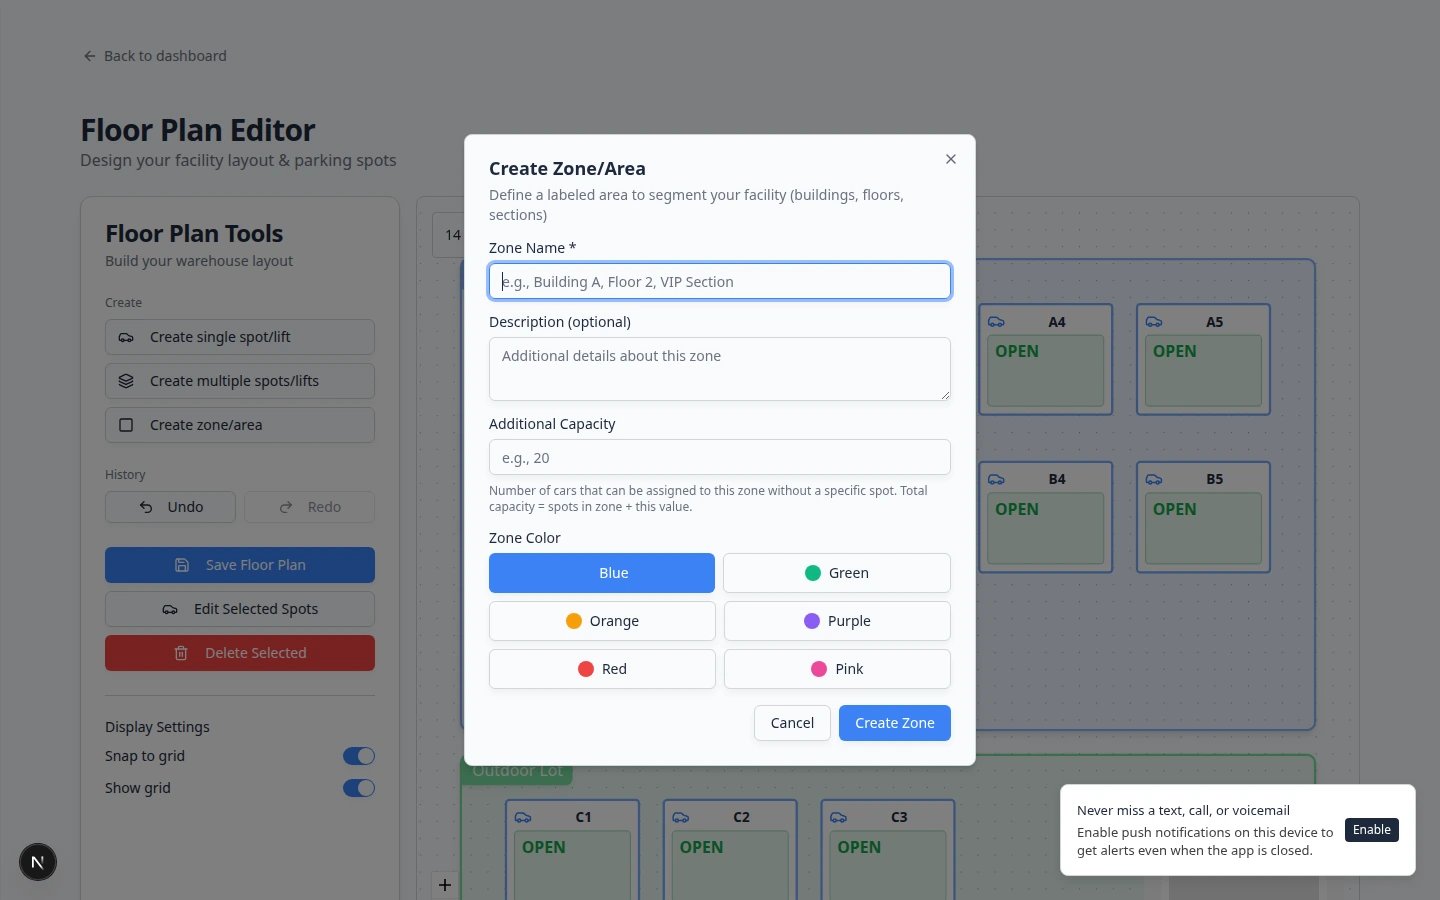
Create a zone or area
Zones are helpful for flexible spaces where cars can be parked without an exact numbered spot. Examples:- Outdoor Lot
- Service Area
- Main Storage
- Waiting for Pickup
- Detail Bay Area
Click Zone or area
Enter Zone Name
Add a description if helpful
Set Additional Capacity if cars can park in the zone without exact spots
Pick a color
Click Create Zone
Arrange the map
After spots or zones appear, arrange them so the map looks like the real facility.Drag spots into place
Select more than one spot when you need alignment
Use Rotate Selected for angled rows
Fix overlapping spots with layer buttons
Click Save Floor Plan
Test the new layout before the team uses it
After you save the floor plan, open Parking Spots and check the layout like a staff member would.Save, then open Parking Spots
Confirm Map view shows your spots
Try Table view
Search one spot name
Ask floor staff for a quick check
- Search for a few spot names to confirm they are easy to find.
- Switch between Map and Table views to make sure the spot names look clear in both places.
- Assign one test car or reservation only if your team is comfortable removing or correcting it afterward.
Edit an existing spot
Open Settings > Floor Plan
Click the spot on the map
Click Edit Selected Spots
Save your changes
Troubleshooting
What to do next
- Assign cars as they arrive using Assign a parking spot.
- Teach staff to search the map with Find parking spots and available spaces.
- Hold spaces for upcoming arrivals with Reserve a parking spot.
- If cars park in flexible areas, share Work with zones on the map with floor staff.
- After cars are parked, teach Run a parking audit so the map stays honest.