What you will accomplish

You will choose which emails, texts, and reminders customers receive when an event is scheduled, changed, started, completed, or cancelled. Clear messages reduce phone calls, missed appointments, and confusion. They also help customers feel confident that their booking is confirmed and your team is prepared. This guide explains two related settings:
  • Team defaults on Settings > Communications decide which messages and reminders new event types inherit.
  • Event overrides on each event type let one service send different messages than the rest of your shop.
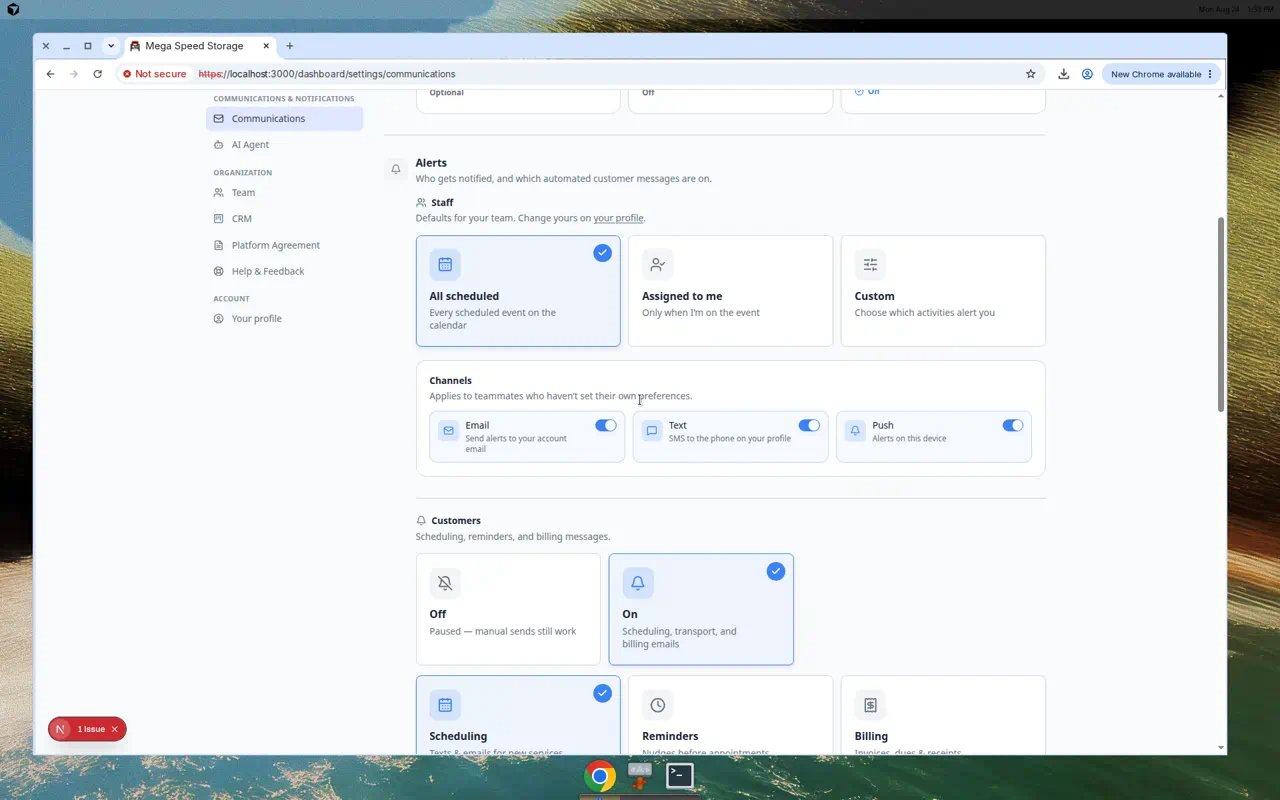
Where to find team defaultsOpen Settings > Communications, scroll to Alerts, choose Customers, then open Scheduling (texts and emails for new services) or Reminders (nudges before appointments). Turn on Automated customer messages first—without it, the Scheduling and Reminders panels stay hidden.
Set up texting and email firstCustomer Email and SMS messages only work after your facility finishes Configure communications. If a channel is grayed out or unavailable, complete that setup before turning the channel on here.

Before you start

  • Make sure the event type already exists. If not, start with Configure event types.
  • Decide whether the event should use your team defaults or its own custom settings.
  • Confirm your team has email or text messaging set up in Settings > Communications if you plan to send those messages.
  • Think about what customers truly need. Too many messages can feel noisy.
If you are unsure where to begin, use these team defaults first. You can always turn more channels on later.
  • Scheduled → Email on — customers get a confirmation when an appointment is booked.
  • Rescheduled → Email on — customers know when the time changes.
  • Cancelled → Email on — customers are not left wondering.
  • In Progress and Completed off for customer-facing events unless you have a specific reason (many facilities keep these staff-only).
  • SMS off until Configure communications is finished.
  • One default reminder: Email — 1 day before the appointment.
What customers actually receiveMessages use your facility name and the appointment details from the event (date, time, service name, and vehicle when applicable). The exact wording comes from your team’s message templates in Services & schedule settings. After you send a test appointment, check the customer’s inbox or phone to confirm it reads clearly.
Bookings that need staff approval firstIf an event type uses Require Approval (Configure event types), customers may not receive a final Scheduled confirmation until your team approves the request. Turn on Scheduled → Email anyway so customers get a message once the appointment is confirmed.

Understand team defaults and event overrides

Team defaults are the starting message settings for new event types. Event overrides are custom settings for one specific event type.
Example:Your team may want all events to send an email when they are scheduled. That belongs in the team default.But you may want Vehicle Pickup to send an extra reminder one day before the appointment. That can be set on the Vehicle Pickup event type.

Review default texts and emails for new services

Team defaults live on the Communications page—not on Services & schedule.
1

Open Communications settings

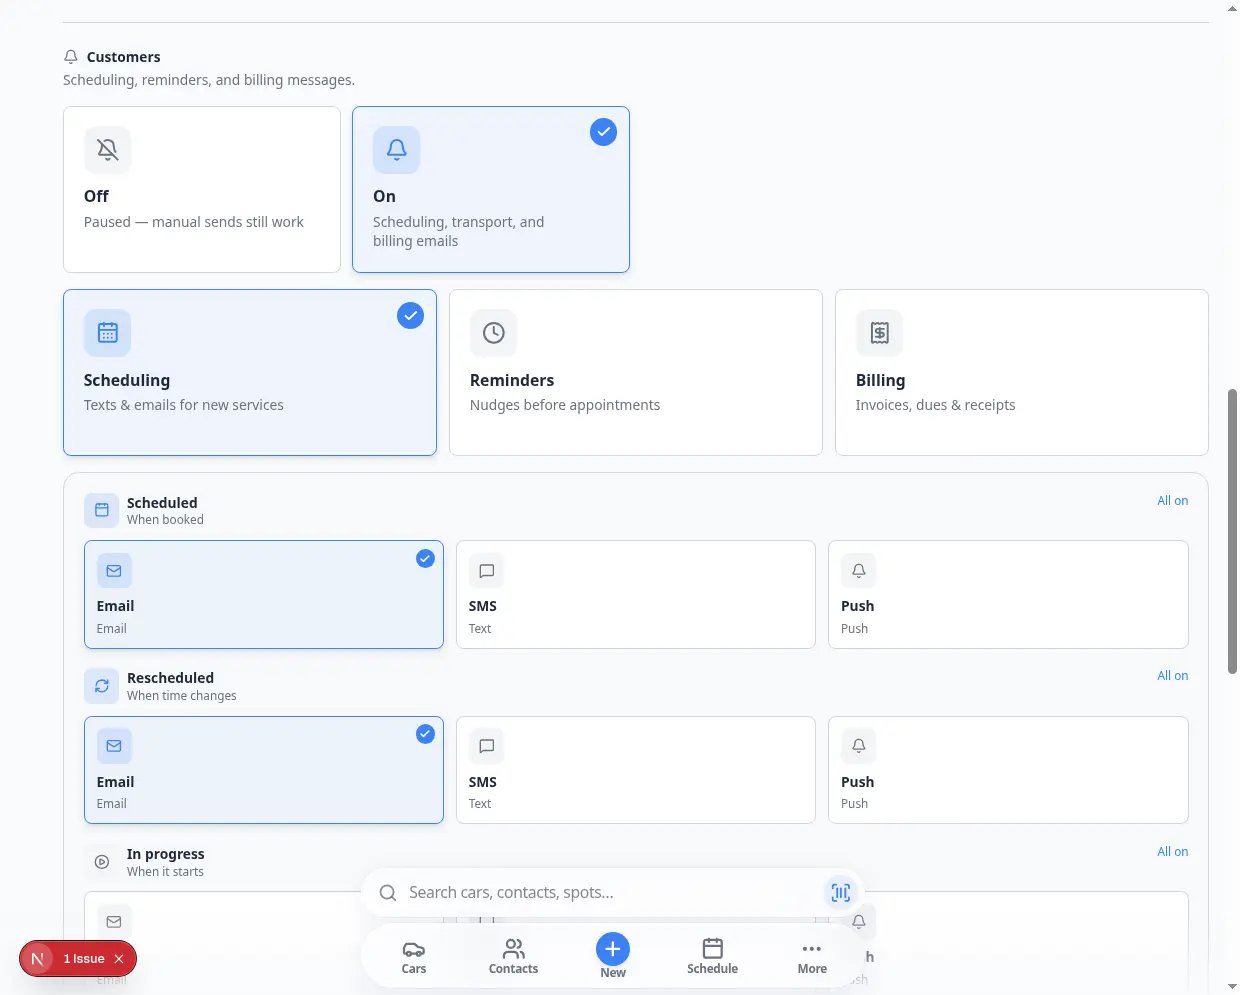
Go to Settings > Communications.Scroll to Alerts and click Customers.Expected result: You see choice cards for Scheduling, Reminders, and Billing.
2

Turn on Automated customer messages

If Automated customer messages is off, turn it on first.Why this matters: Scheduling and Reminders settings stay hidden until automated messages are enabled for your facility.
3

Open Scheduling

Click the Scheduling card (texts and emails for new services).Expected result: A matrix shows triggers such as Scheduled, Rescheduled, In Progress, Completed, and Cancelled with Email, SMS, and Push channels.
4

Review each row and channel

Turn on only the messages your facility wants for new event types.Expected result: You know which messages new event types will send by default. Turn off channels you do not want (for example SMS until texting is set up).
5

Use row or column headers to toggle many boxes at once
Click a channel name (Email, SMS, or Push) or a trigger name (Scheduled, Rescheduled, and so on) in the table header.Expected result: Every checkbox in that row or column turns on or off together. This is faster than clicking each box when you are setting up many channels at once.
Communications settings Scheduling panel showing a matrix of event triggers and Email SMS Push notification channels
The Scheduling panel shows which messages new event types send by default. Turn on Email for Scheduled and Rescheduled first—add SMS only after texting is set up.
Communications settings showing Customer alerts with Scheduling and Reminders choice cards
Team notification defaults live under Settings > Communications → Alerts → Customers → Scheduling.

Set default reminders before appointments

Default reminders are the reminder times new event types use unless you override them later.
1

Open Communications settings

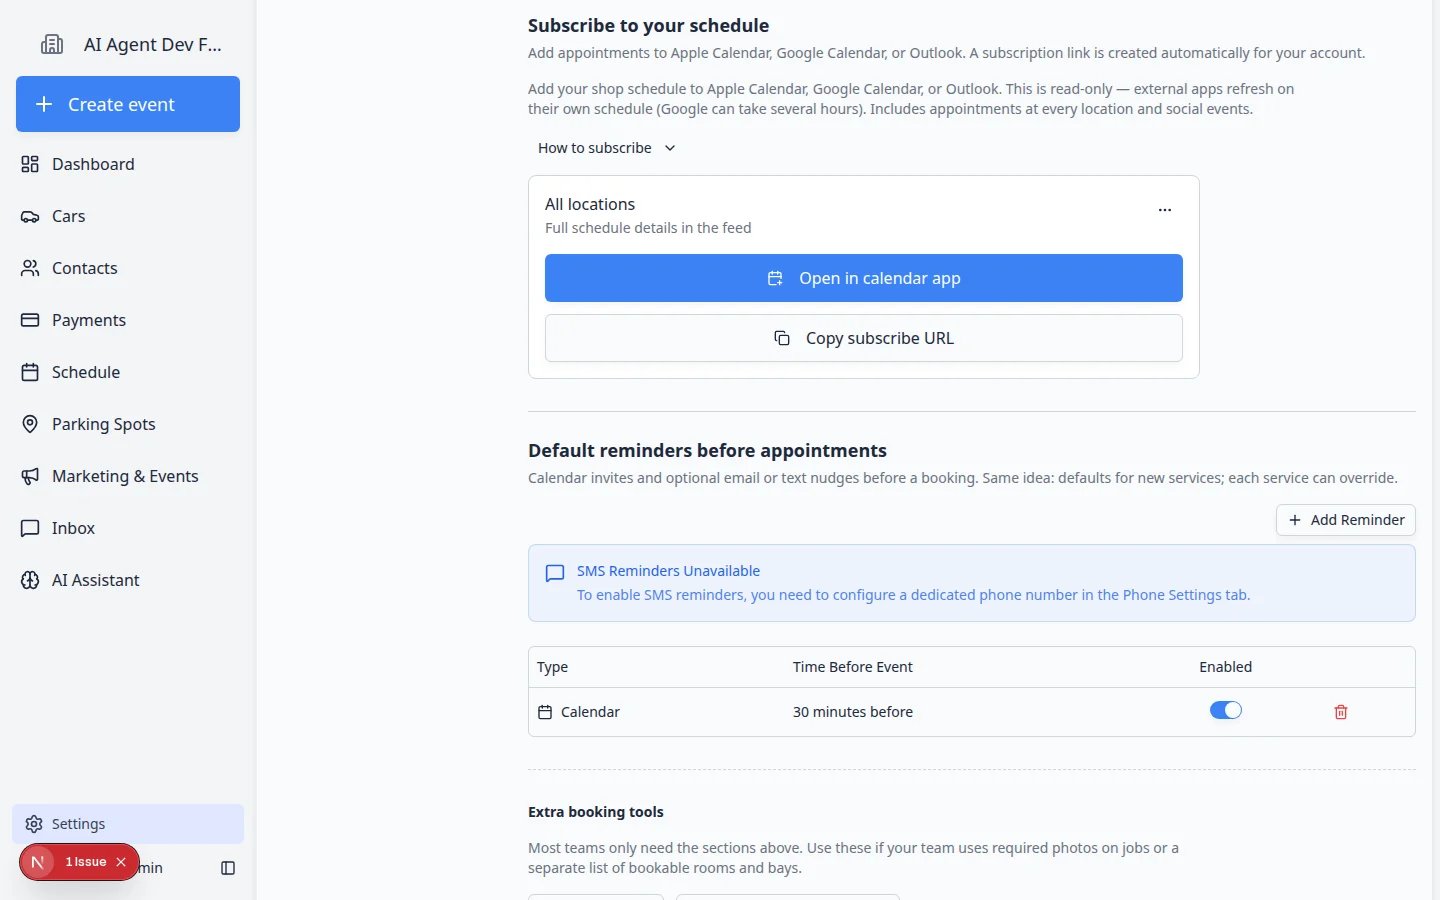
Go to Settings > Communications.Under Alerts, click Customers, then click the Reminders card (nudges before appointments).
2

Review existing reminders

Look at the reminder type and timing.Example: an email reminder 1 day before the event.
3

Click Add Reminder if you need another reminder

Add another reminder only when it helps the customer or your team.Common choices are 1 day before and 1 hour before.
4

Read the SMS banner if reminders show unavailable

If you see SMS Reminders Unavailable, your facility still needs a phone number in Settings > Communications before text reminders can send.Expected result: After phone setup, return here and add an SMS reminder row. Until then, use Email or Calendar reminders.
5

Remove reminders that create noise

If customers receive too many messages, remove the reminders that are not helpful.Expected result: New event types inherit reminder timing that matches how your facility actually operates (for example one email 1 day before the appointment).
Reminders panel on Communications settings showing reminder cards and timing options
Default reminders control when new event types remind customers before an appointment. Open Communications → Alerts → Customers → Reminders.
SMS Reminders Unavailable bannerIf your facility has not finished phone setup, the reminders section shows SMS Reminders Unavailable and a button to open phone settings. Email and calendar reminders still work. Finish Configure communications before you turn on SMS reminders.

Customize messages for one event type

Use this when one event type needs different message behavior than your team default.
1

Open the event type

Go to Settings > Services & schedule, find the event type card, and click Set up or Advanced.
2

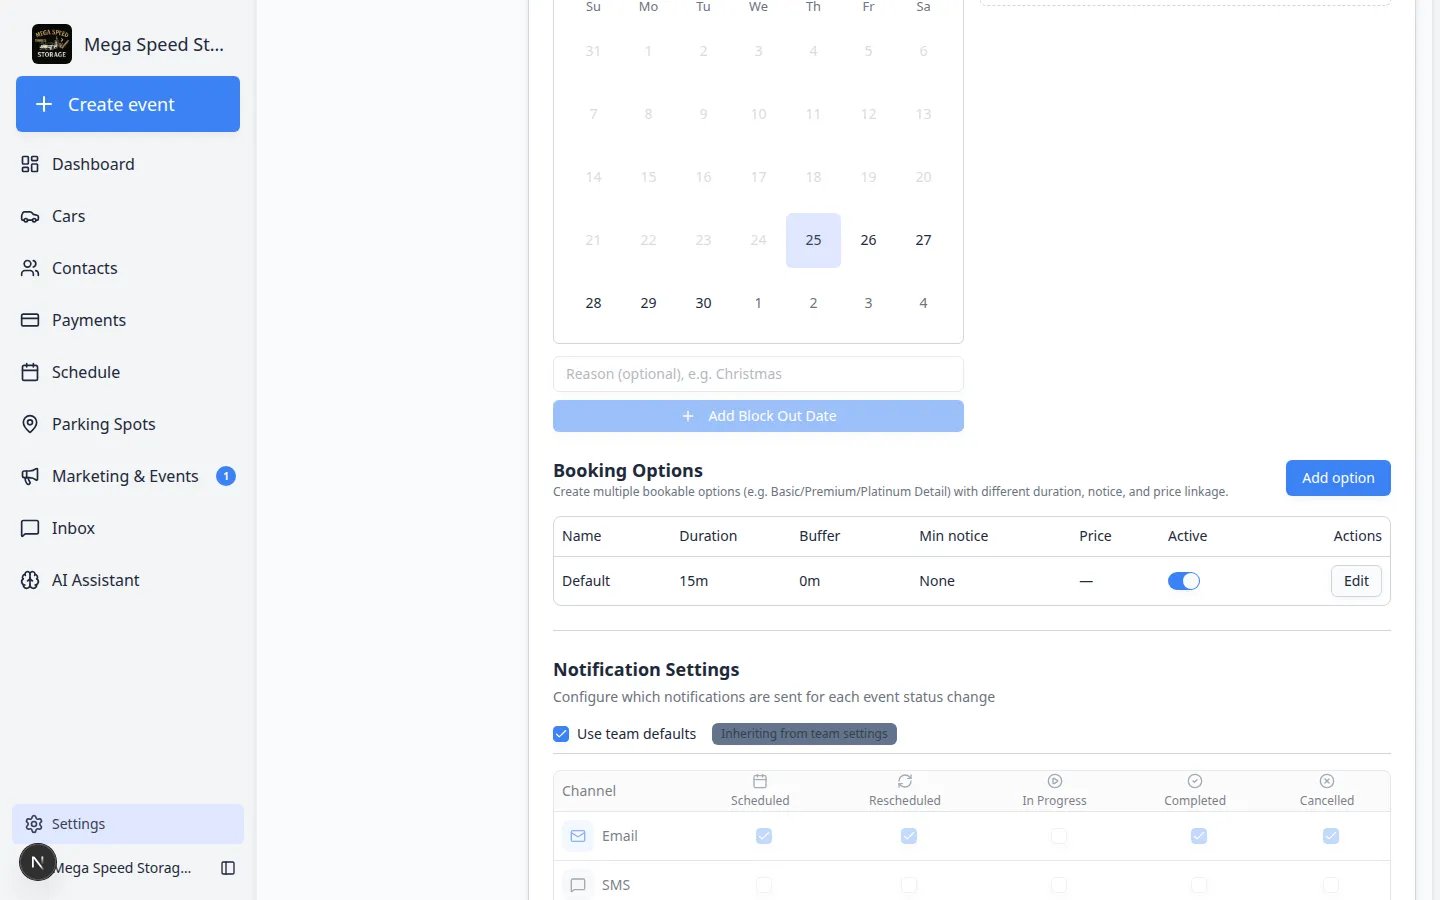
Scroll to Notification Settings

Find Notification Settings.
3

Choose whether to use team defaults

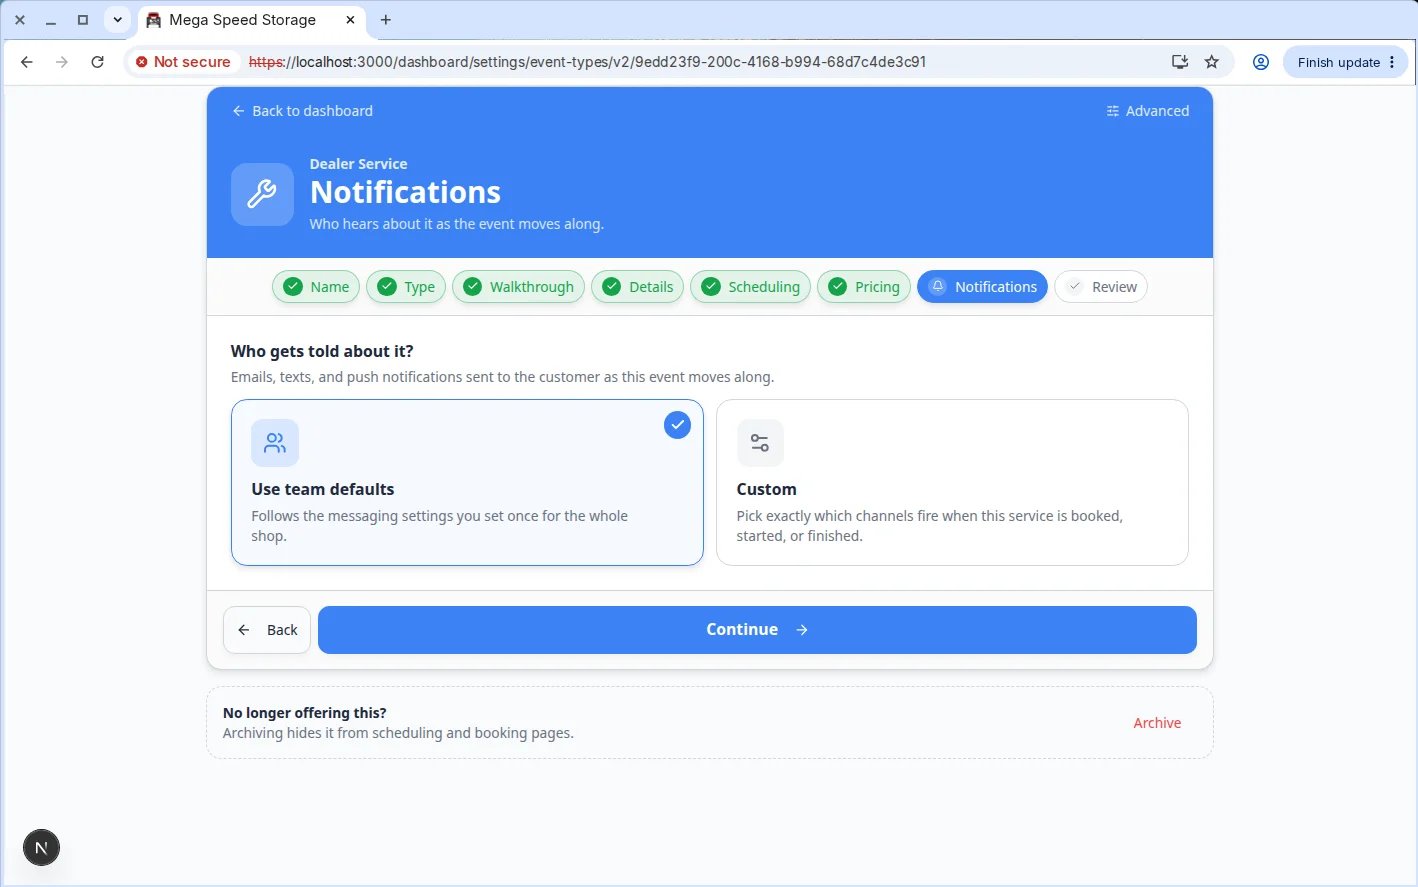
If Use team defaults is on, the event type follows your team default settings.Turn it off only when this event type needs its own message rules.
4

Choose the events that should send messages

Review the rows:
  • Scheduled - when the appointment is booked.
  • Rescheduled - when the appointment time changes.
  • In Progress - when the event starts.
  • Completed - when the event finishes.
  • Cancelled - when the event is cancelled.
5

Choose the message channels

Turn on only the channels your team wants to use for this event type.If text messaging is not set up, keep SMS off until your team finishes setup.
Edit Event Type page showing Notification Settings with Use team defaults and rows for scheduled, rescheduled, in progress, completed, and cancelled
Notification Settings let one event type use team defaults or its own customer message rules.

Customize reminders for one event type

1

Scroll to Reminder Settings

On the same event type edit page, find Reminder Settings.
2

Use team defaults unless this event needs different timing

Keep Use team defaults on when the regular reminder timing works.Turn it off when this event needs more or fewer reminders.
3

Click Add Reminder if needed

Choose the reminder type and timing.Good examples are Email - 1 day before or Email - 1 hour before.
4

Save the event type

Wait for Saved near the top of the page. The editor saves automatically as you work.
Edit Event Type page showing Reminder Settings with Use team defaults, reminder type, time before event, and enabled controls
Reminder Settings control when customers are reminded before this specific event type.

Message choices that work well

  • Send a confirmation when customers book an appointment.
  • Send a reschedule notice when the appointment time changes.
  • Use one reminder the day before for appointments customers must attend.
  • Use a second reminder closer to the appointment only when missed appointments are common.
  • Keep internal-only events quieter so customers do not receive messages they do not need.

Test that messages and reminders work

After you save notification and reminder settings, run a short test so you are not surprised on a real customer appointment.
1

Turn off live customer channels if needed

If you are testing with a real customer’s email or phone, temporarily turn off Email and SMS on the event type—or use a test customer record with your own contact details.Why this matters: A saved test appointment can send real messages when channels are on.
2

Create a test appointment

Follow Test an event setup and book at least two days in the future if you are testing a 1 day before reminder.Expected result: A confirmation email or text arrives when Scheduled notifications are enabled.
3

Check the customer's contact record

Open the customer in Contacts and confirm Email and Phone are correct.Why this matters: Messages only go to contact details saved on that record—wrong email is the most common reason customers say they never received a reminder.
4

Review activity after the test

Open the customer record and scroll to Activity Feed, or check Inbox for outbound messages.Expected result: You see a line showing the confirmation or reminder was sent, with a timestamp you can share with the customer if they ask.Why this matters: If nothing appears in Activity or Inbox, the message may not have sent—double-check the customer’s email or phone on their Contacts record before you turn notifications on for real customers.
Customer contact record showing Activity Feed with outbound email and notification entries
After a test appointment, check the customer’s Activity Feed to confirm a Scheduled confirmation or reminder was sent.

What success looks like

After setup:
  • Customers receive the messages your team expects.
  • Reminder timing gives customers enough notice to arrive or respond.
  • Event types that should be quiet do not send unnecessary messages.
  • Staff understand whether an event type uses team defaults or custom settings.

Troubleshooting

Text messages are unavailableText messages require communications setup. Go to Settings > Communications or ask an admin to confirm your texting setup.
Customer has no email or phone on fileOpen the customer record in Contacts and confirm Email and Phone are correct. Messages and reminders only go to contact details saved on that record.
A customer did not get a reminderCheck that the reminder is enabled, the customer has the right contact information, and the event was scheduled far enough ahead of the reminder time. For example, a one-day reminder cannot send if the event is created only two hours before it starts.
Customers are getting too many messagesReview both team defaults and event-specific settings. A reminder can come from the team default if the event type is using Use team defaults.
I changed the team default, but one event did not changeOpen that event type and check whether it is using its own notification or reminder settings. Event-specific overrides do not automatically follow team defaults.

What to do next

After messages and reminders are set, use Test an event setup to create a test appointment and confirm the customer experience.