

What you will accomplish
You will save a file on the correct customer record with the right label—such as Insurance or Vehicle Registration—so your team can find it later without searching email or shared folders. This guide is for staff uploads from the customer record. When customers upload files themselves in the portal, they use the same document types you set up in Configure document requirements.When to use this guide
- A customer emails a photo of an insurance card and you need it on their record today.
- Someone drops off registration paperwork at the front desk.
- You are finishing onboarding and the customer cannot use the portal yet.
- You need a scanned copy on file before approving storage or releasing a vehicle.
Before you start
- The customer exists in Contacts. Search first—do not create a duplicate record.
- You know which document type fits the file (create types first if needed—see Configure document requirements).
- You have the file on your computer or phone. Supported formats include PDF, Word, Excel, text, CSV, and common image types. Files can be up to 50 MB.
- If the file is for one vehicle, know which car on the customer record it belongs to.
Open the customer record
- In the left sidebar, click Contacts, or go to Contacts.
- Search by name, email, phone, or company.
- Click the correct customer to open their page.
Find Documents & Contracts
Scroll down until you see the card titled Documents & Contracts. This section holds uploaded files and signed agreements in one place. Near the top you may see a count such as 0 documents, 0 contracts or 1 document, 1 contract after you add files. You can use the search box (Search documents and contracts…) when the list grows long.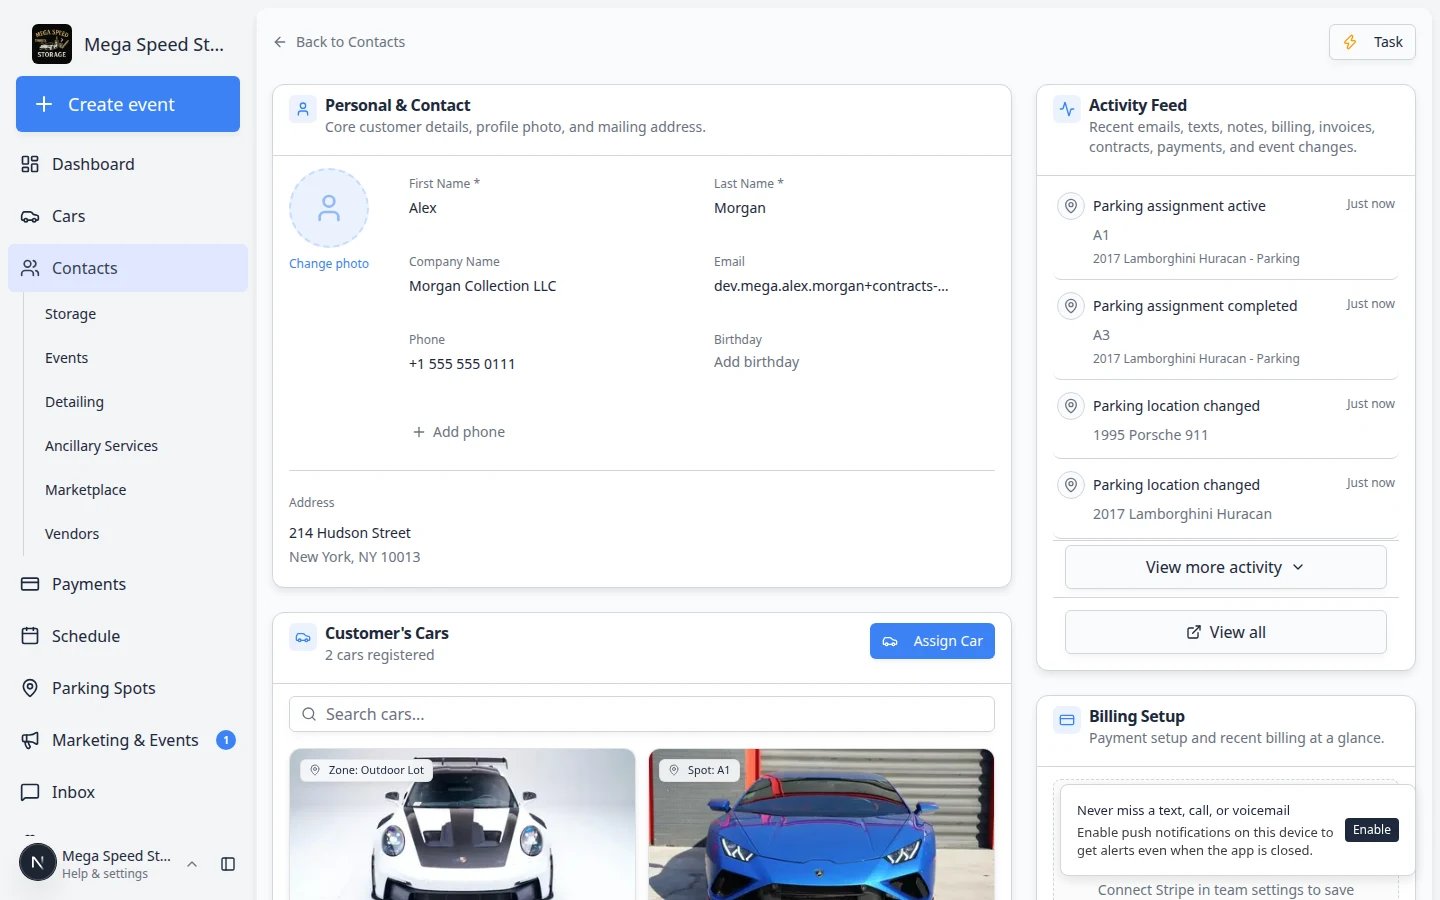
Start the upload
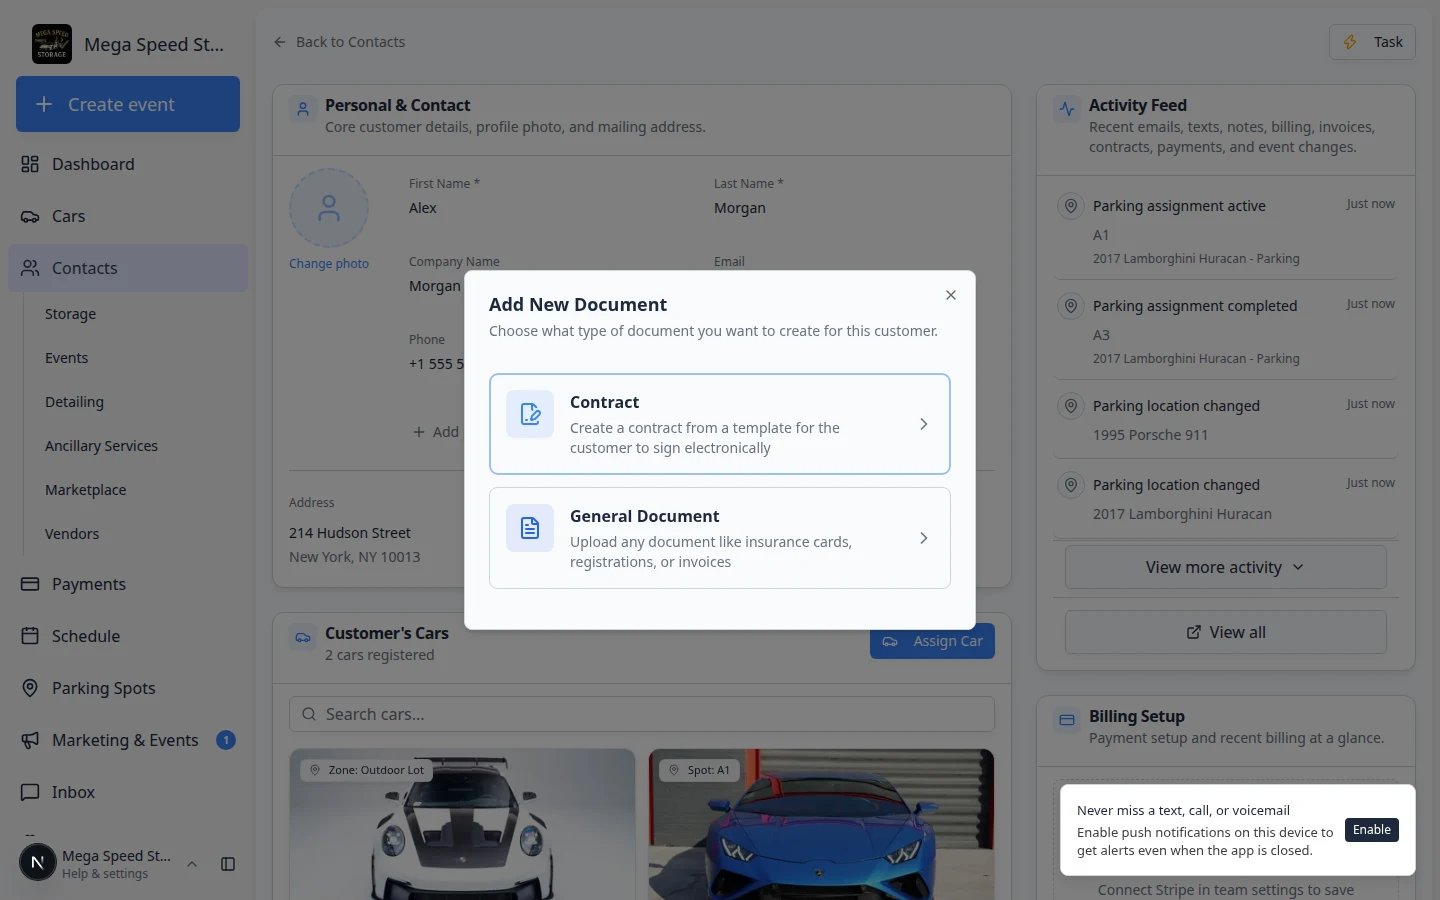
You can start an upload in two ways: Option A — Click New Document- Click New Document in the top-right of the Documents & Contracts card (or in the empty-state area).
- In the Add New Document window, click General Document—the option for files like insurance cards and registration.
- Save the file on your computer (for example from an email attachment).
- Drag the file onto the Add document tile in the Documents & Contracts grid.
Choose a document type
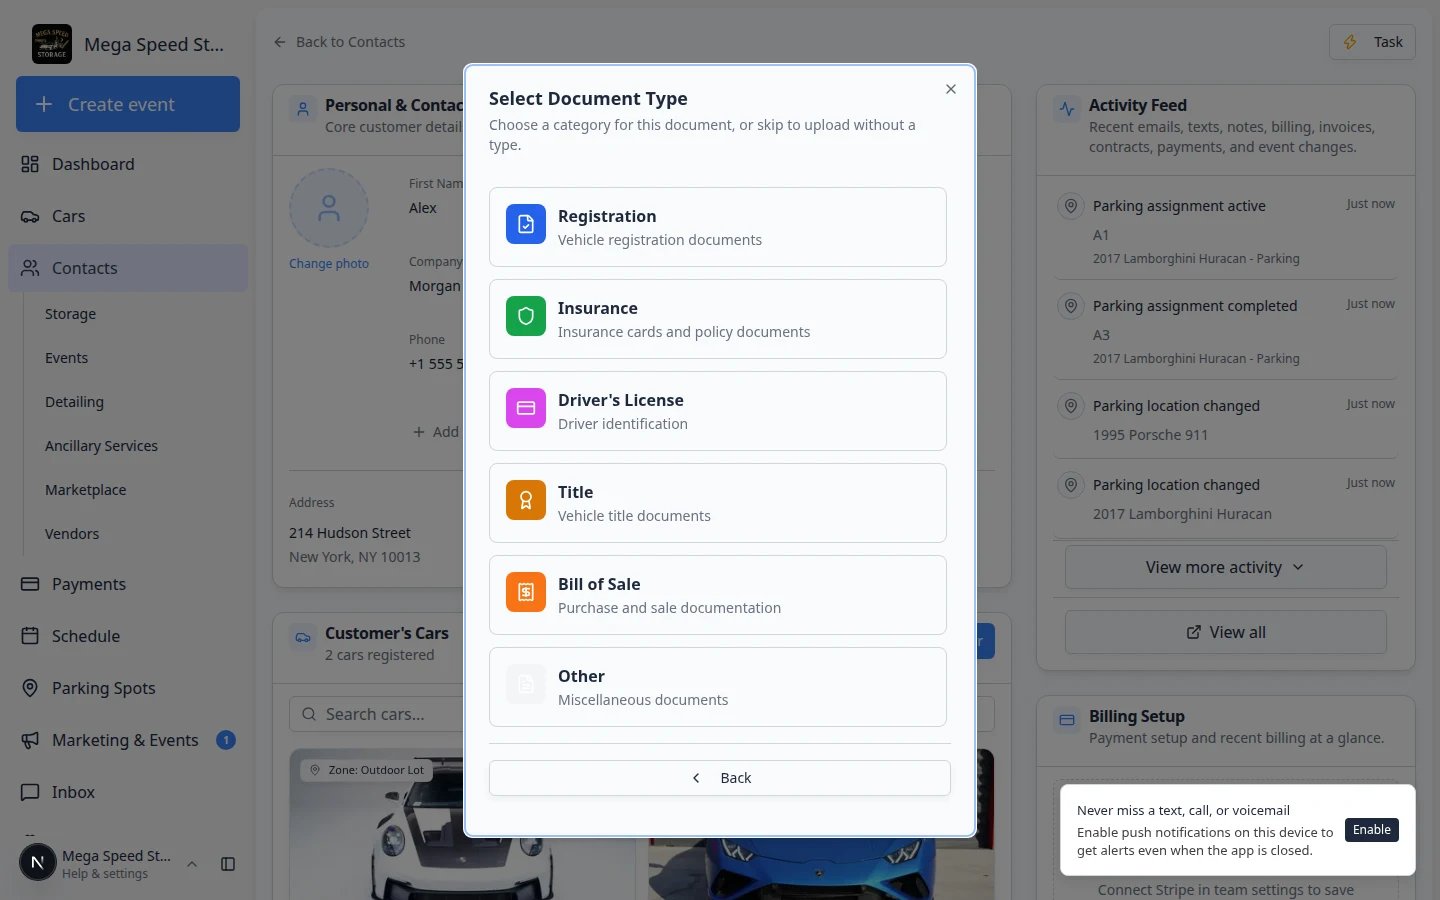
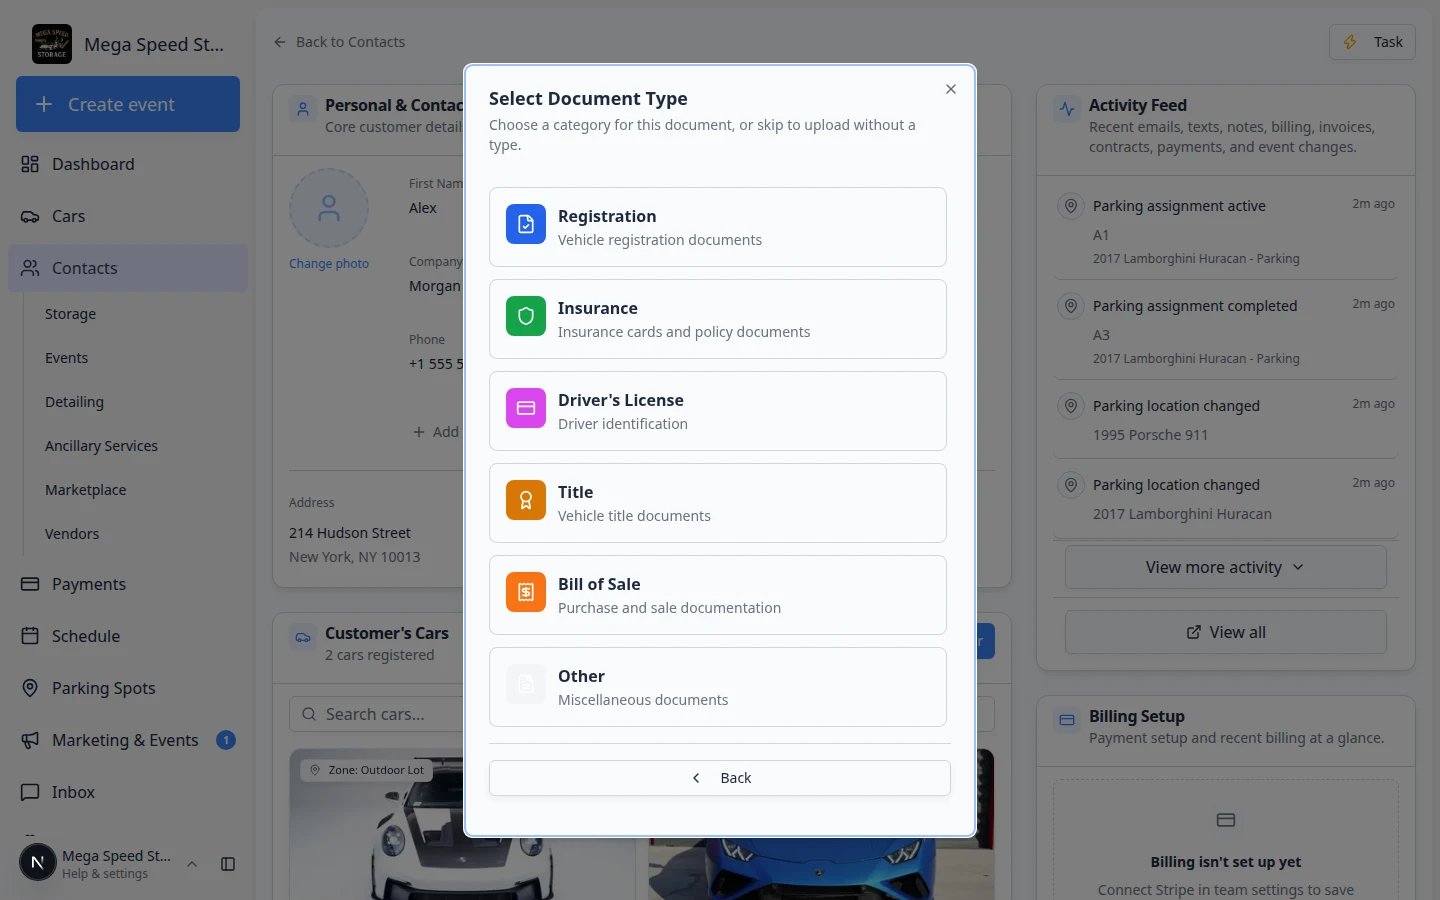
The Select Document Type window asks how your team should label this file.1
Pick the matching category
Click the type that fits the file—for example Insurance for an insurance card photo or Registration for a registration document.Why this matters: Clear labels help your team find files during renewals, audits, and move-out checks.
2
Use Skip only when you must upload first
Choose Skip - No Type only when you need the file saved immediately and will fix the label later.Expected result: The Upload Document form opens.
3
Go back if you chose the wrong path
Click Back at the bottom if you meant to send a contract instead of upload a file.
Fill in the Upload Document form
1
Confirm the file
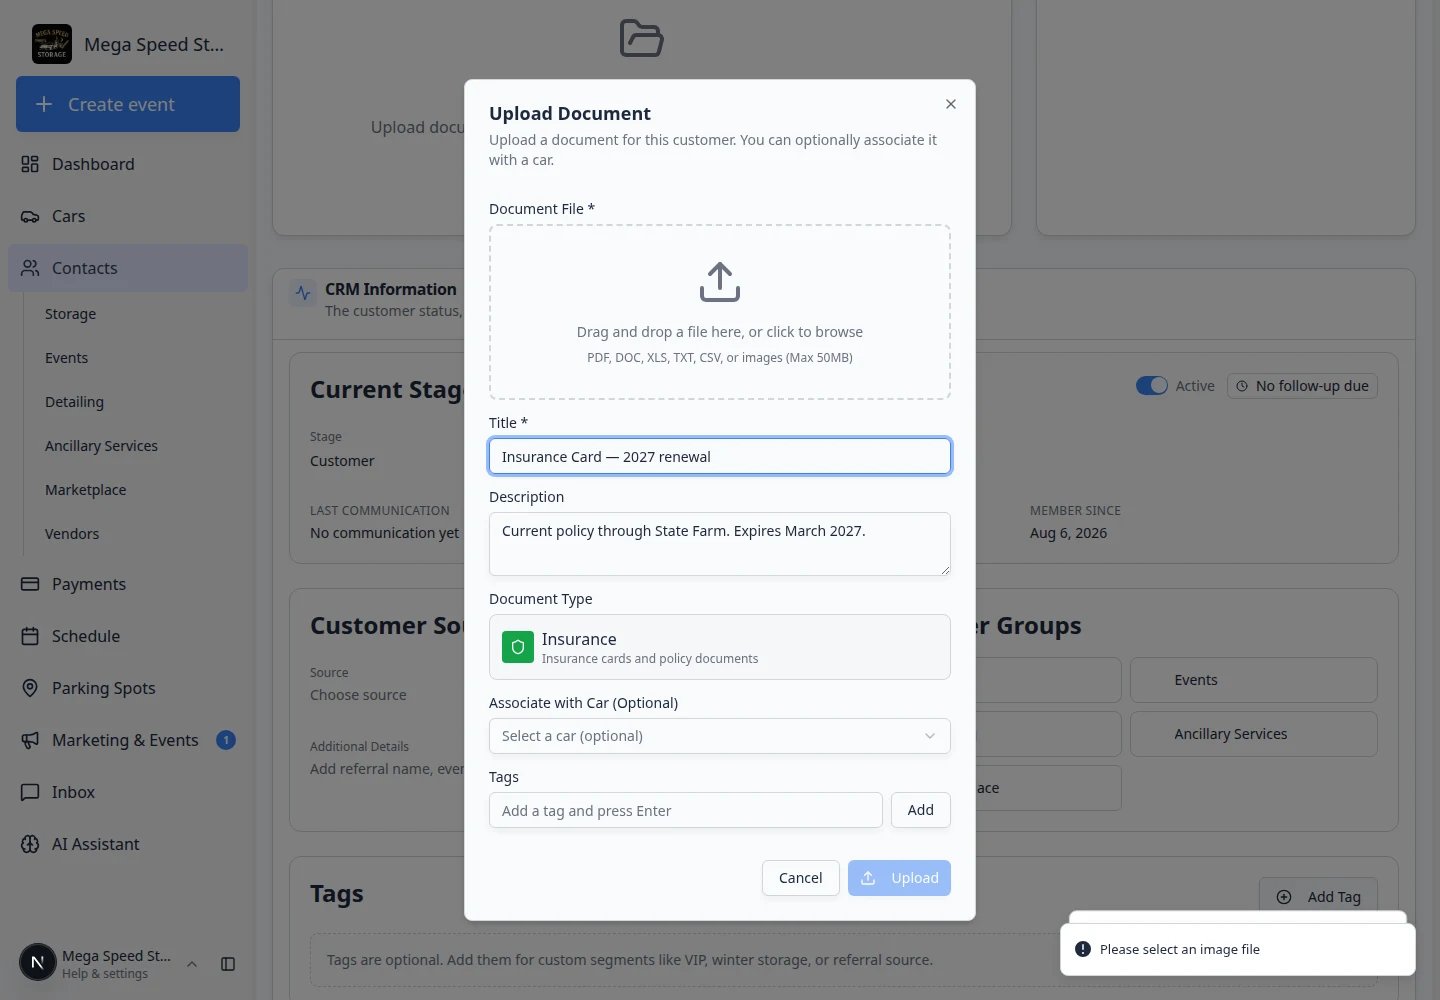
Under Document File, check that the correct file name appears. If not, click the upload area (Drag and drop a file here, or click to browse) and choose the file again.
2
Add a clear title (required)
In Title, type a short name your team will recognize. Examples: Insurance Card — 2027 renewal or NY registration — Porsche 911.Why this matters: The title appears on the document card in Documents & Contracts and in search results.
3
Add a description (optional)
Use Description for notes such as Expires March 2027 or Covers both stored vehicles.
4
Confirm document type
Document Type should show the category you picked (for example Insurance). You can change it here if needed.
5
Link a vehicle (optional)
If the file applies to one car, open Associate with Car (Optional) and select the correct vehicle.Expected result: The file is tied to that car on the customer record.
6
Add tags (optional)
Some teams use Tags to group renewals or audits. Type a short tag and press Enter, or click Add.
7
Click Upload
Review the file, title, type, and vehicle link. Click Upload.Expected result: The window closes and a new card appears in Documents & Contracts.
Drag and drop (faster for front desk)
If a customer emails a PDF and you already saved it to your computer, you can skip several clicks:1
Open the customer record
Go to Contacts and open the correct customer.
2
Find the Add document tile
In Documents & Contracts, look for a dashed tile labeled Add document (or similar wording in the grid).
3
Drop the file onto the tile
Drag the file from your desktop or downloads folder onto Add document.Expected result: The Add New Document window opens with the file already attached. Continue with General Document and the document type.
Open a file after upload (staff check)
After you save, you can confirm the upload looks correct:1
Click the document card
In Documents & Contracts, click the new upload card.
2
Preview the file
Use Open full view or Download in the preview window to make sure the image is readable and shows the right document (not a blank photo or wrong page).Why this matters: A blurry insurance photo may not count for your records. Catch problems while the customer is still on the phone.
What success looks like
- The file appears on the customer record under Documents & Contracts.
- The document type label is correct (Insurance, Registration, and so on).
- The linked vehicle is correct when the file applies to one car.
- Another team member can open or download the file from the same customer page without asking you for a copy.
Open, download, or remove a file later
1
Find the document card
Scroll to Documents & Contracts on the customer record. Use the search box if needed.
2
Click the card
Click the document card to open a preview window.Expected result: You can view the file and use actions such as Download or Delete (wording may vary).
3
Delete only when appropriate
Use Delete when the file was uploaded to the wrong customer or is a duplicate. Ask a manager first if you are unsure—deleted files may not be recoverable.
Common mistakes to avoid
Troubleshooting
What to do next
- To collect a signed agreement, use Send a contract for signature.
- To confirm what is already on file, use Review signed contracts and document history.
- To require uploads during portal setup, see Attach contracts to customer workflows.