

What you will accomplish
After following this guide, the car’s record, the Cars list, and the Parking Spots map will all show the same location. Expected outcome: Anyone on your team can answer “where is this car?” without walking the lot first.When to move a car on the record
- A vehicle was physically moved to a new spot or zone in your building.
- You are preparing a car for customer pickup and need to clear its spot for the next vehicle.
- An intake or service session ended and the car was placed in a new location.
Before you start
- Know which car you are moving.
- Know the destination parking spot or zone. If you are not sure which spots are available, check the Parking Spots page first.
- If the move is part of a scheduled event (intake, delivery, service), consider starting the move from that event’s workflow instead of doing it separately.
Move a car from the detail page
This is the most common way to move a car. You start from the vehicle’s detail page and use the parking button at the top of the banner.1
Open the car record
Go to the Cars page and click View on the vehicle you want to move.Expected result: You see the correct vehicle title (year, make, model) before changing parking.
2
Click the location button in the banner
At the top of the car detail page, look in the upper-right area of the photo banner for the parking button.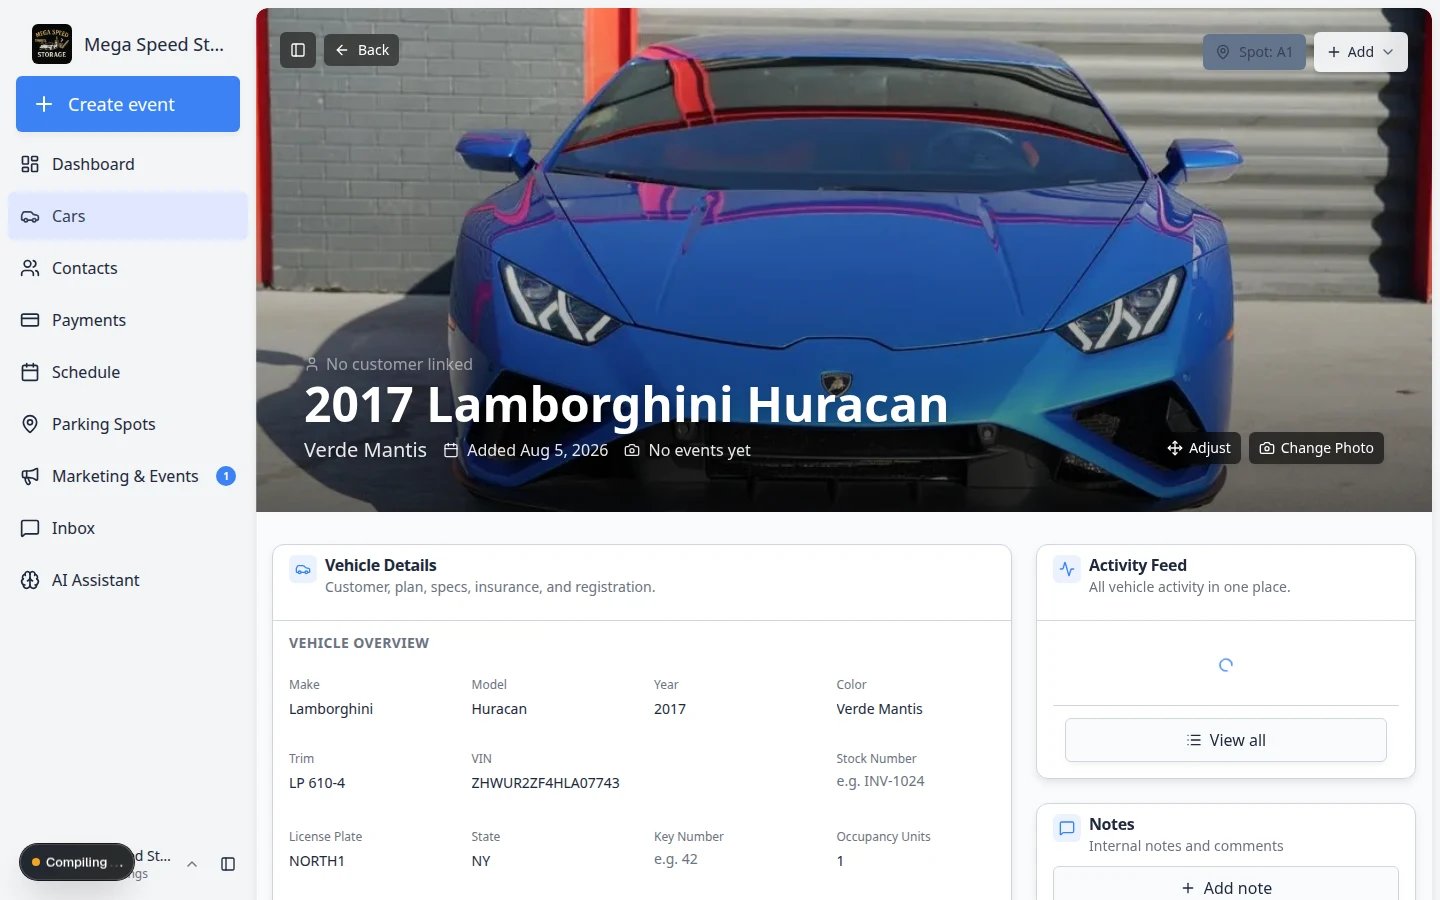
- If the car has no spot yet, the button says Assign location.
- If the car is already parked, the button shows Zone: or Spot: followed by the name on larger screens (for example Zone: Outdoor Lot or Spot: A1). On phones, you may see only the location name without the Zone: or Spot: label—but the meaning is the same.
- If the car is at an outside vendor, the button may show At vendor: and the vendor name.
3
Select the new parking spot or zone
In the Parking Location window, use the Location field to search for and select the destination.You can pick: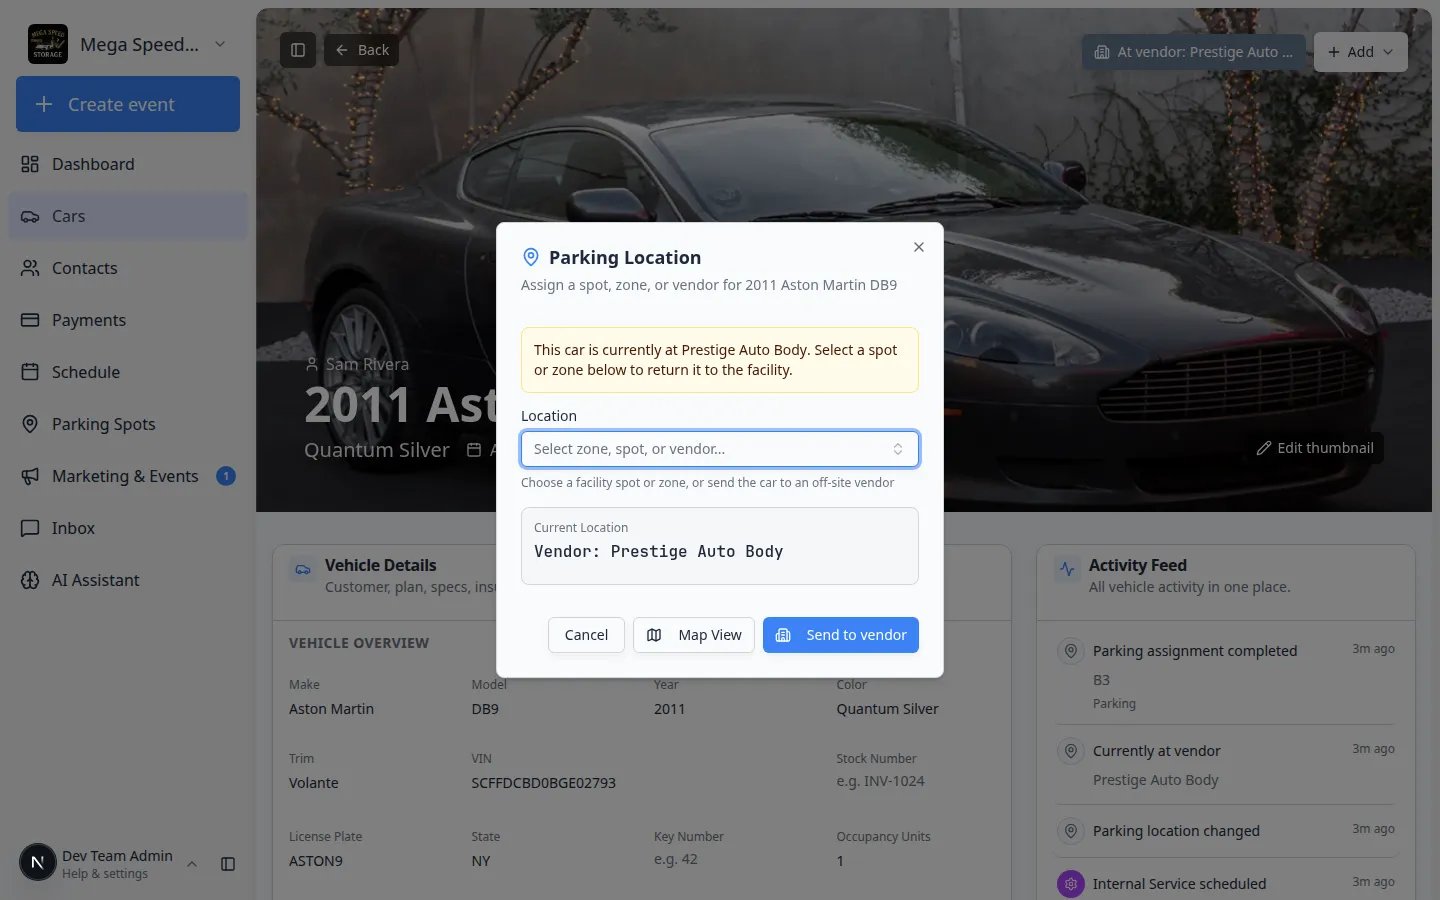
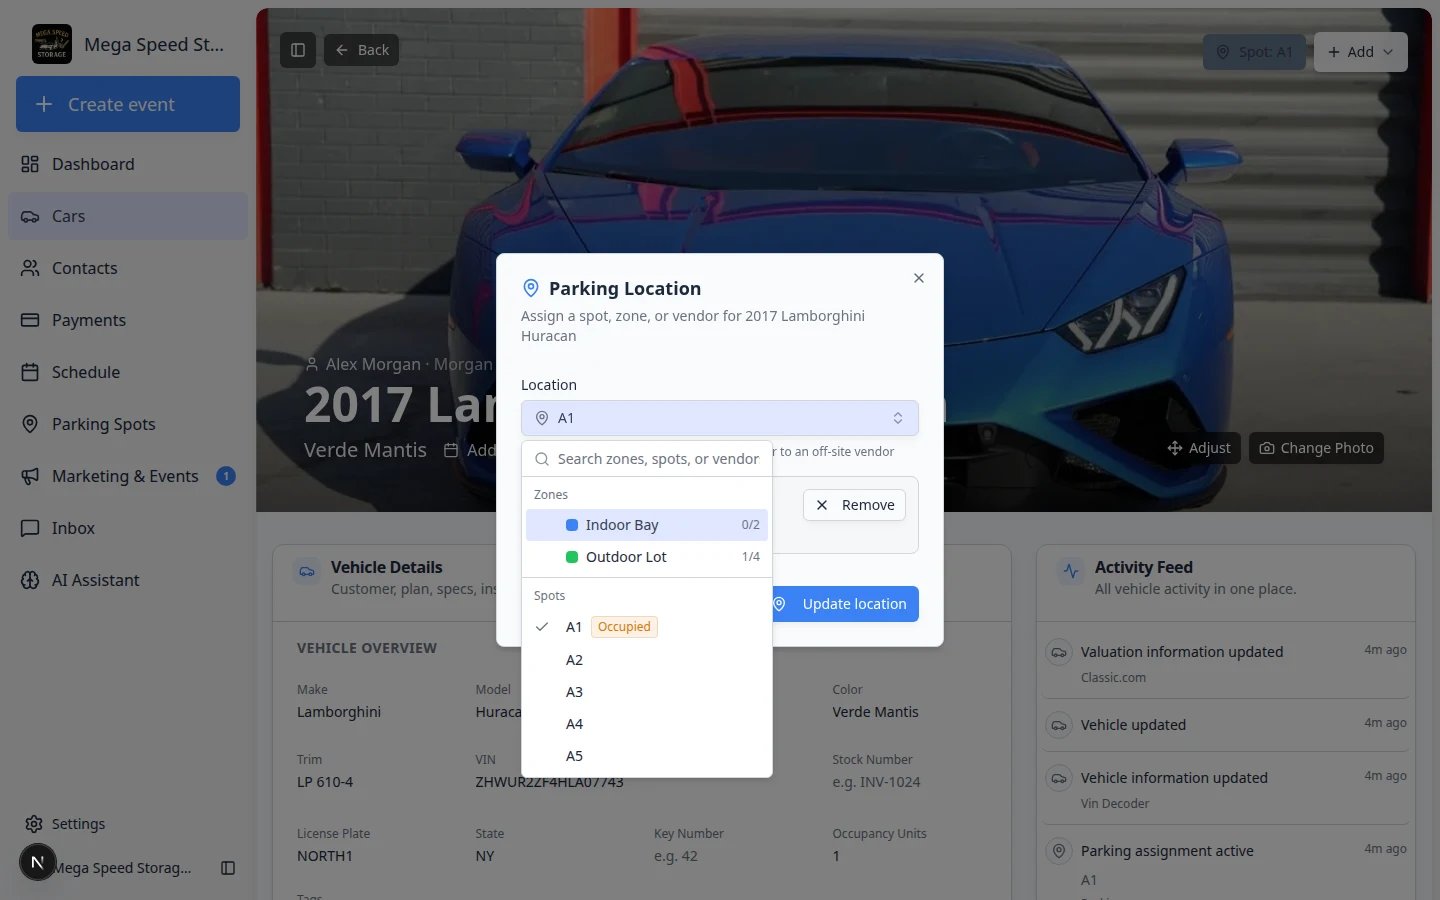
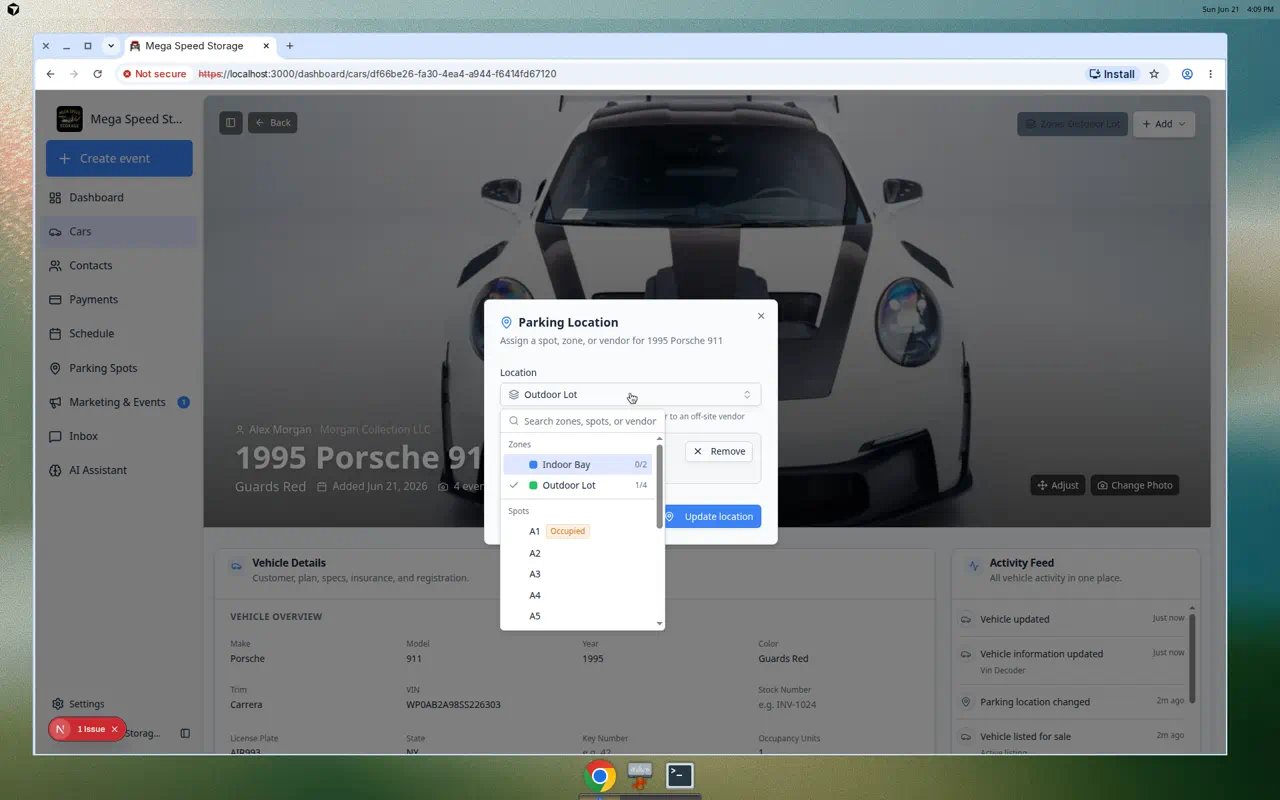
- Specific spot — an exact numbered spot (for example A1, Bay 3)
- Zone — a flexible area (for example Outdoor Lot, Service Bay Area)
- Vendor — an off-site shop or transport partner when the car leaves your building
- Zone (for example Outdoor Lot or Indoor Bay) — use when vehicles move around inside a general area and you do not need an exact numbered position. Good for service bays and overflow lots.
- Spot (for example A1 or Bay 3) — use when your facility tracks the exact parking position. Good for long-term storage where every space has a number.
4
Click Update location or Send to vendor
Click Update location when the car stays in your facility. If you picked a vendor, the button changes to Send to vendor—click that instead.Expected result: The banner button updates to the new spot, zone, or vendor name right away.
5
Verify the updated location
After the move, confirm the banner button now shows the new spot or zone name. The change also appears in:
- The Cars list table under the Parking Spot or Location column
- The Parking Spots map and list views
- The car’s Activity Feed as a recorded move event Expected result: The banner button, Cars list, and parking map all show the same new location. If any screen still shows the old spot, refresh the page and check again.
Move a car from the Parking Spots map
When you are already looking at the Parking Spots map, you can assign or move a car without opening the car record first.1
Open Parking Spots
Click Parking Spots in the left sidebar, or go to Parking Spots.Expected result: You see the facility map (or table) with Available, Reserved, and Occupied counts near the map legend.
2
Click the spot on the map
Click an open spot or a spot that already has a car. A window opens with spot details and actions such as Move Car Here or Assign Car.Why this matters: Porters often start from the map when they are walking the floor. This path saves a search through the Cars list.
3
Choose the car and confirm
Search for the vehicle, then confirm the move. The map and the car record update together.Expected result: The spot shows the car name on the map, and the car’s banner button shows the same spot when you open its record.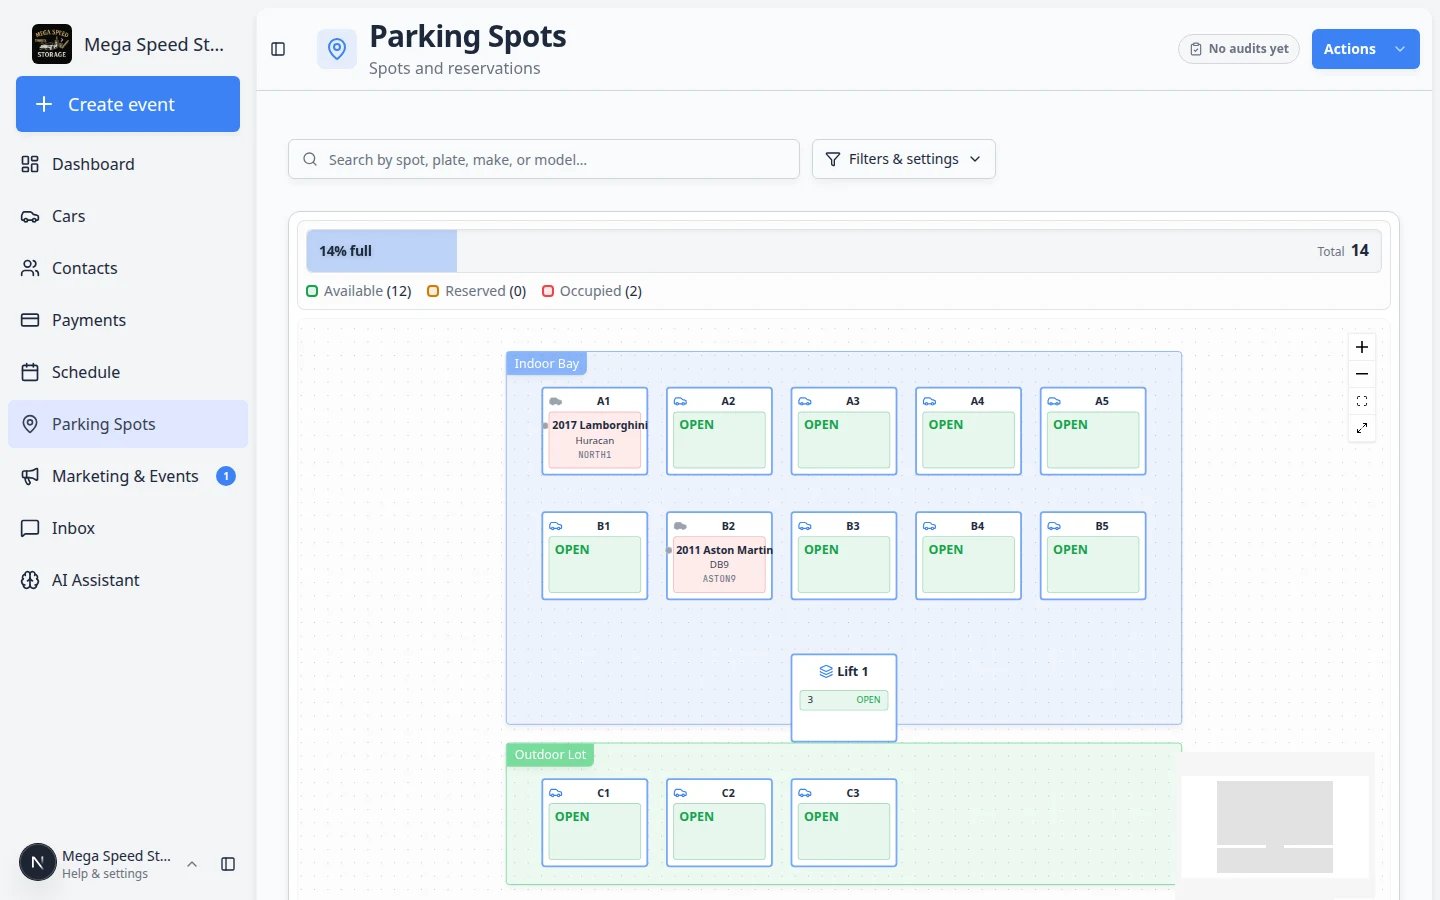
Use Map View when you want to see the floor plan first
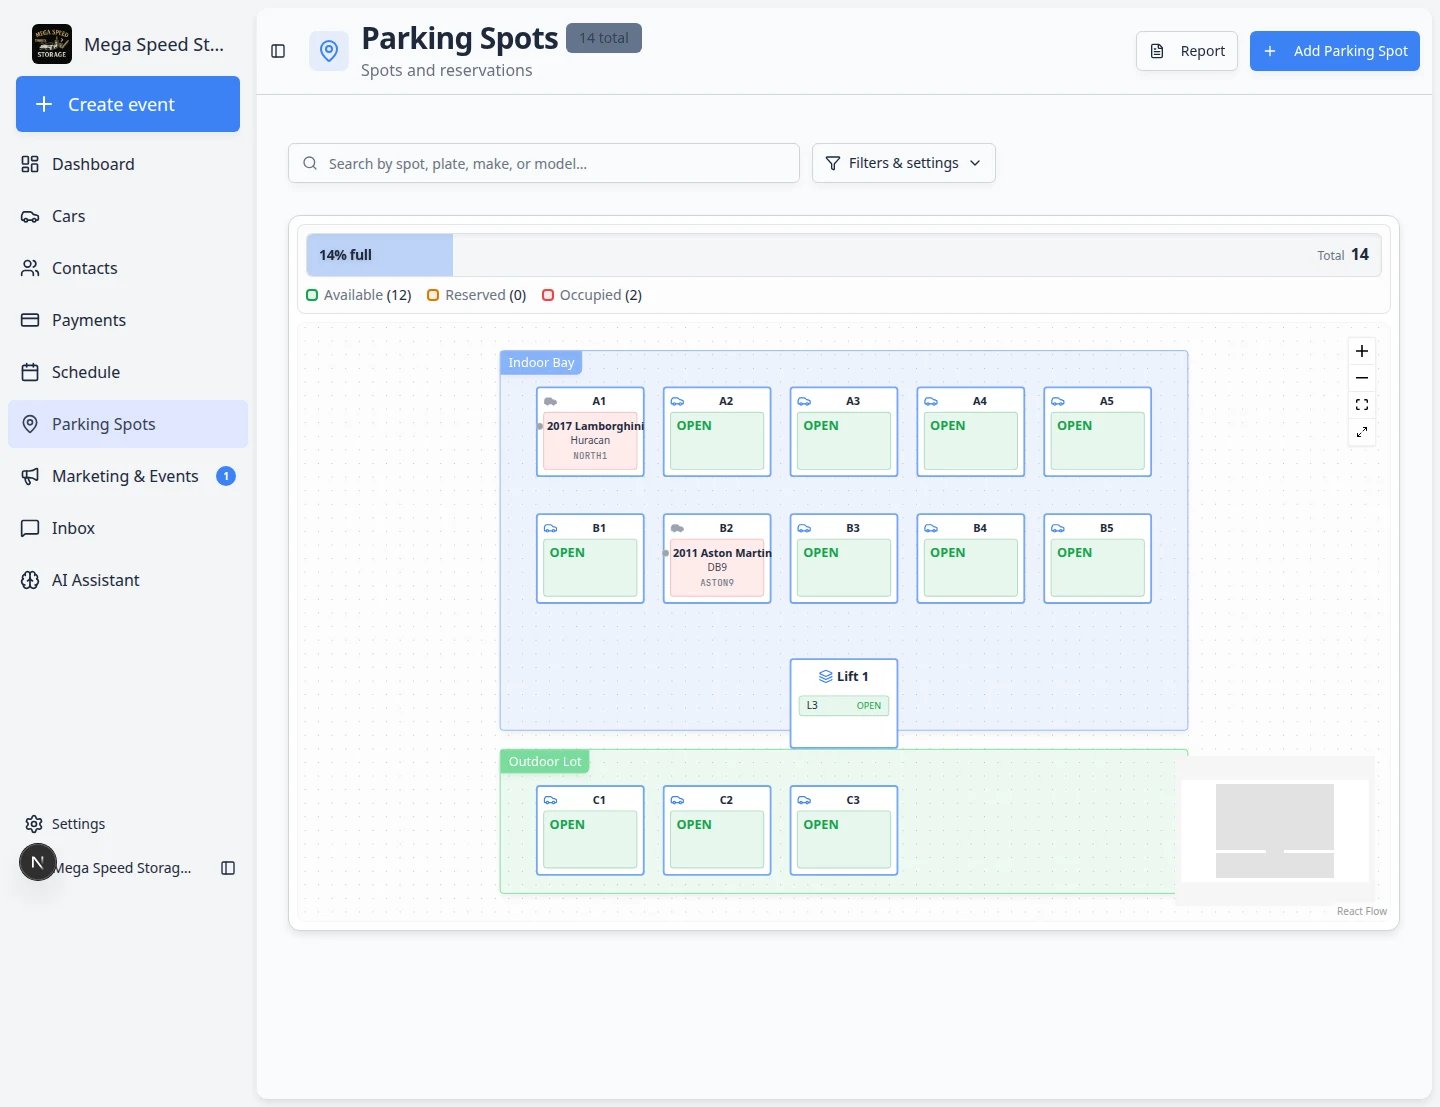
If you are not sure which spots are open, use Map View from the Parking Location window. This opens your facility map on the Parking Spots page with the car you are moving already highlighted.1
Open the Parking Location window
On the car detail page, click Assign location or the current Zone: / Spot: button.
2
Click Map View
In the Parking Location window, click Map View.Expected result: Your browser opens the Parking Spots map. The car you started from stays highlighted so you can compare open spaces visually.
3
Pick a destination on the map or in the list
Look for an open spot or zone that matches where you are moving the vehicle in the building. You can click a spot on the map or use the list on that page.
4
Return to the car and save the move
Go back to the car detail page, open Parking Location again if needed, choose the spot or zone in Location, then click Update location.Expected outcome: The map, the Cars list, and the car banner all show the same location.
Move a car that is at a vendor
When a vehicle leaves your building for paint, mechanical work, or transport, the parking button can show At vendor: and the vendor’s name instead of a spot on your map.1
Open the car record
Go to Cars and open the vehicle.
2
Click the At vendor button
Click At vendor: on the banner (or open Parking Location the same way you would for a spot change).Expected result: The Parking Location window opens. You can pick a different vendor, return the car to a facility spot, or remove the assignment when the vehicle comes back.
3
Save the new location
Choose the correct vendor, spot, or zone, then click Update location.Why this matters: Your team knows the car is not in the building—even when it no longer occupies a numbered spot on your floor plan.
Remove a car from its spot
Use this when the vehicle is leaving your building and should no longer take up a spot on the map—for example after customer pickup, transport out, or a sale.1
Open the Parking Location window
On the car detail page, click the Zone: or Spot: button (or Assign location if no spot is set).
2
Click Remove in Current Location
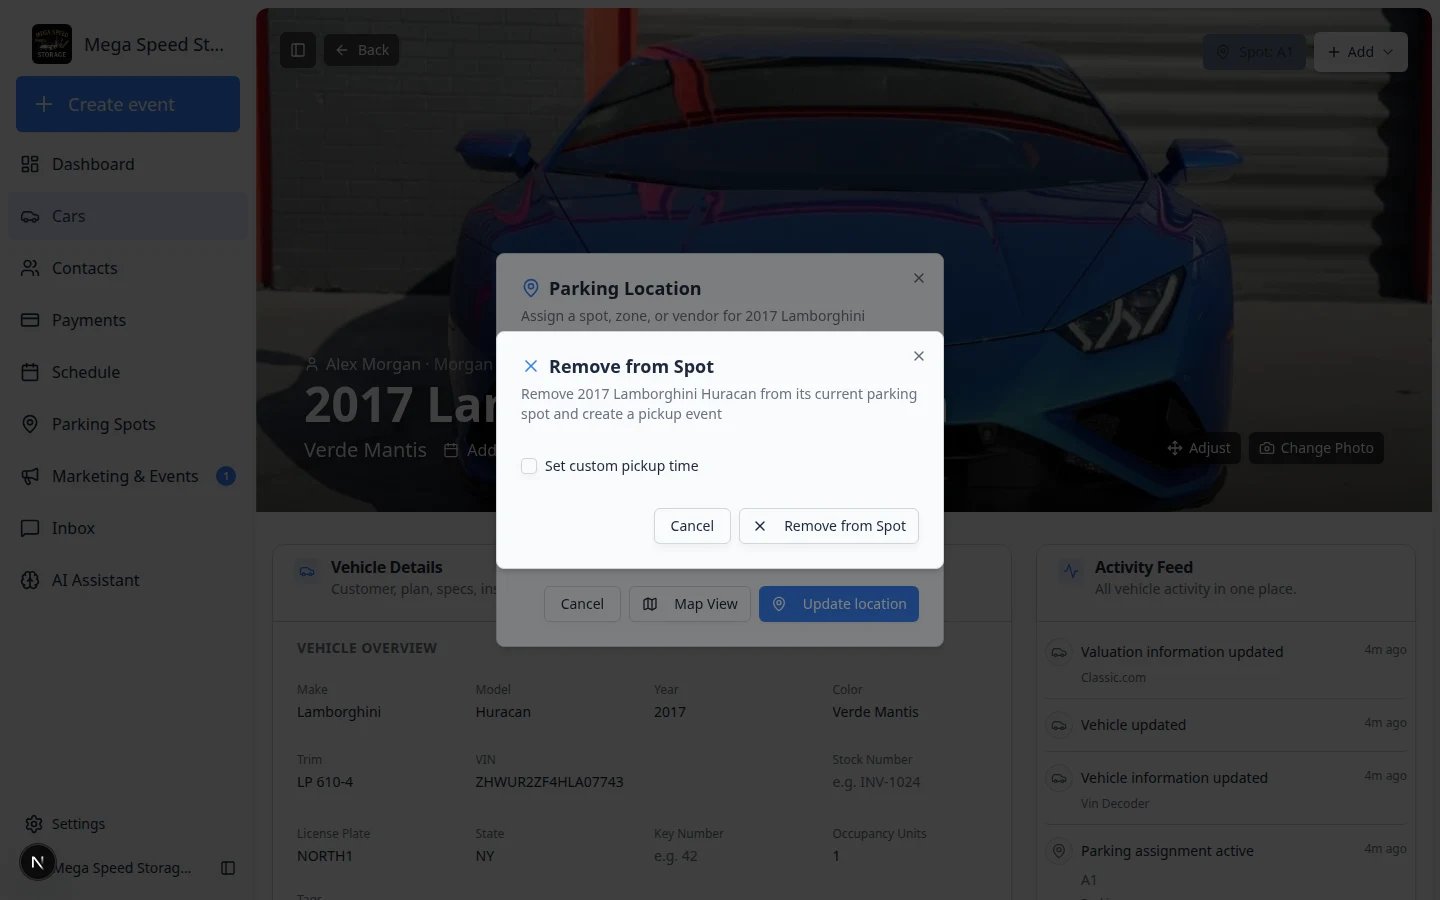
In the Parking Location window, find the Current Location box. Click the Remove button on the right side of that box.Why this matters: Removing the spot frees the space on your map for the next vehicle. The car record itself stays in Cars for history, billing, and photos.
3
Confirm removal
A second window titled Remove from Spot opens. Read the message carefully. Your facility may also create a pickup event on the car’s timeline when you remove it from a spot.Set a pickup time if your team uses that field, then click Remove from Spot.Expected outcome: The banner no longer shows a spot name, the Parking Spots map shows that space as open, and the Activity Feed may show a pickup-related event.
Tips for keeping the floor plan accurate
A parking map is only useful when it reflects reality. Build these habits into your team’s workflow:
- Move the record when you move the car — not later, not tomorrow. Do it as part of the physical move so the map never drifts.
- Use zones for flexible areas — if vehicles shift within a region frequently, assign them to a zone instead of an exact spot so your team does not need to update the record after every small shuffle.
- Check the Parking Spots page regularly — the parking report shows occupancy, duration, and any spots that appear double-assigned.
- Tie moves to events — when a move is part of a scheduled intake, delivery, or service event, the event workflow can prompt for a parking assignment automatically.
What success looks like
After a move is saved correctly:- The banner button on the car detail page shows the new Zone: or Spot: name right away.
- The Cars list Parking Spot or Location column matches the banner.
- The Parking Spots map shows the car in the new location—and the old spot is free if the car left it.
- The car’s Activity Feed includes a parking move entry with a timestamp your team can reference later.
- Anyone on your team can answer “where is this car?” from the record without walking the lot first.
Common mistakes to avoid
- Do not move the car physically and forget to update the record. The map is only useful when it matches reality.
- Do not pick a spot when a zone is enough. If cars shuffle often inside one area, a zone saves your team from updating the record after every small move.
- Do not confuse zone and spot. A zone is a region (Outdoor Lot). A spot is one numbered position (A1). The banner label tells you which type you saved.
- Do not delete the car record when it leaves your building. Use Remove in the Parking Location window to free the spot—the car history, photos, and billing stay on file.
- Do not use the Add menu for parking changes. Parking is always updated from the Zone: / Spot: / Assign location button on the banner—not from Create event or Quick photo.
Troubleshooting
Send a car to an outside vendor
When a vehicle is at a body shop, detailer, or partner—not on your floor map—use a vendor location instead of a numbered spot. See Send a car to a vendor location for full steps. The parking dialog shows Send to vendor when you pick a vendor from the Location field.What to do next
- After the car is parked, run intake or inspection with Start a car session.
- If insurance or plate details still need updates, use View and edit vehicle details.
- To see every car on the map at once, open Parking Spots or read Find parking spots and available spaces.