

What you will accomplish
You will create products and services—reusable billing items your team can add to invoices, quotes, recurring plans, and customer checkout pages without retyping the same charge every time. Good products use plain names customers understand, such as Monthly Climate Controlled Storage or Premium Detail Service.When to set up products first
Set up products before your team sends many invoices or recurring charges. This is one of the best first steps when you turn on Payments for your facility. Products and services are reusable billing items. They save time because your team does not need to type the same charge details over and over. Use Products & Services to create items such as:- Monthly storage
- Premium detailing
- Transport service
- Club membership
- Event registration
- Battery tender service
- Marketplace add-ons
Before you start
- Know the name customers should see on invoices, quotes, and emails.
- Decide if the item is Recurring or One-time.
- For one-time items, know whether the customer should pay immediately or on a statement (if your team uses statement billing). Recurring items always bill through Stripe.
- Know the default quantity and unit label, such as cars, months, services, or memberships.
- Ask a manager whether this item should be visible in checkout, the customer portal, or marketplace pages.
Open Products and Services
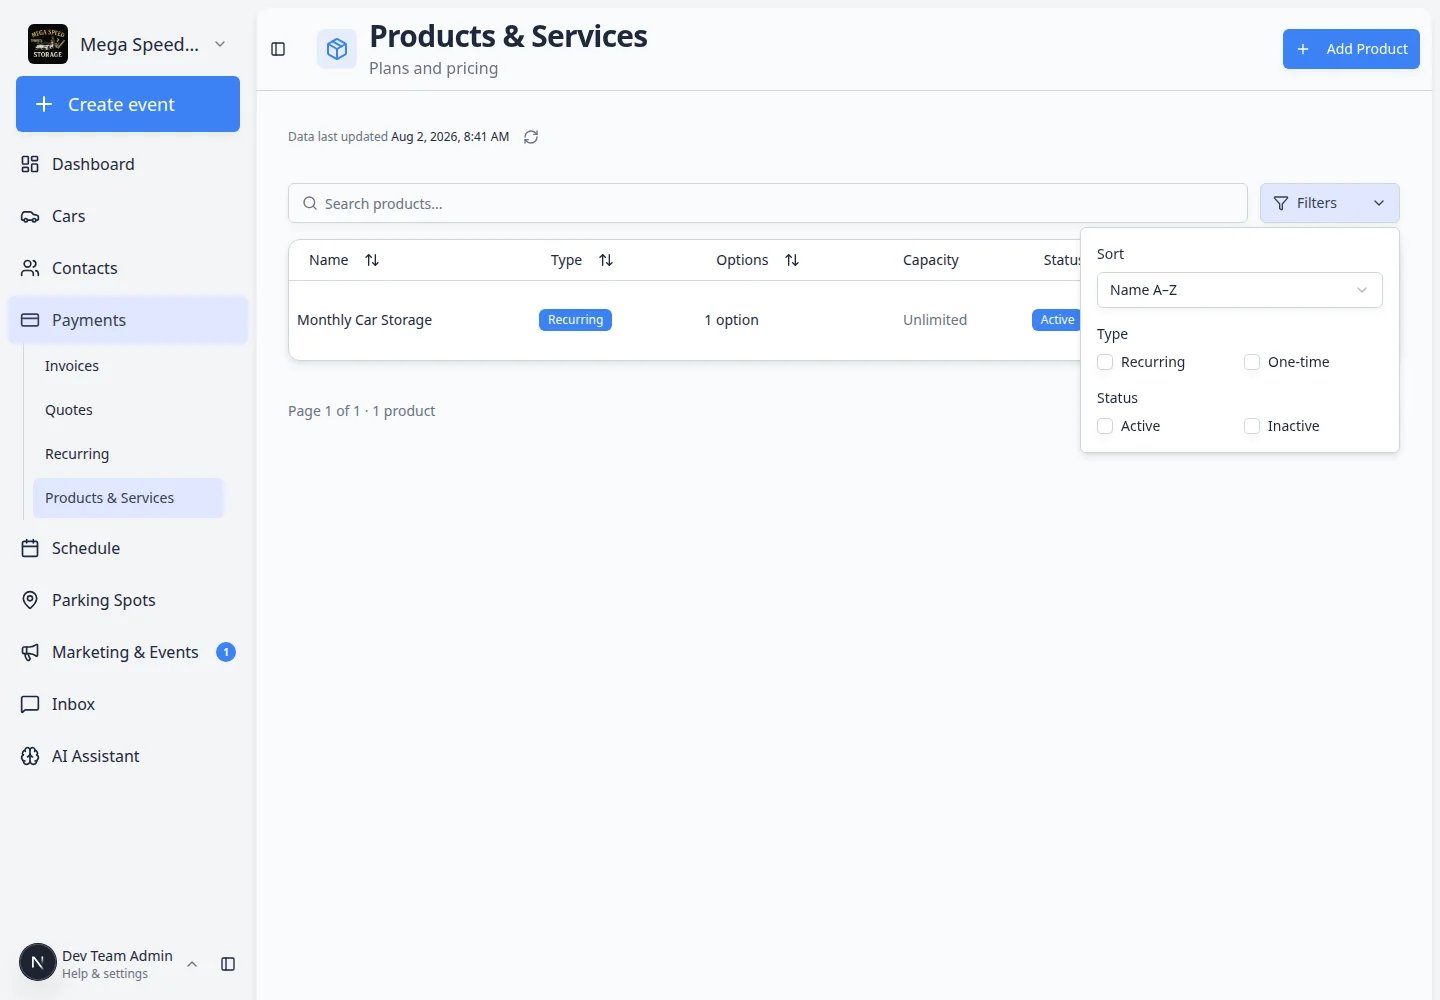
Go to Payments > Products. The page title is Products & Services. This page shows each product, whether it is recurring or one-time, the price, status, Capacity (when your facility limits how many can be sold), and available options.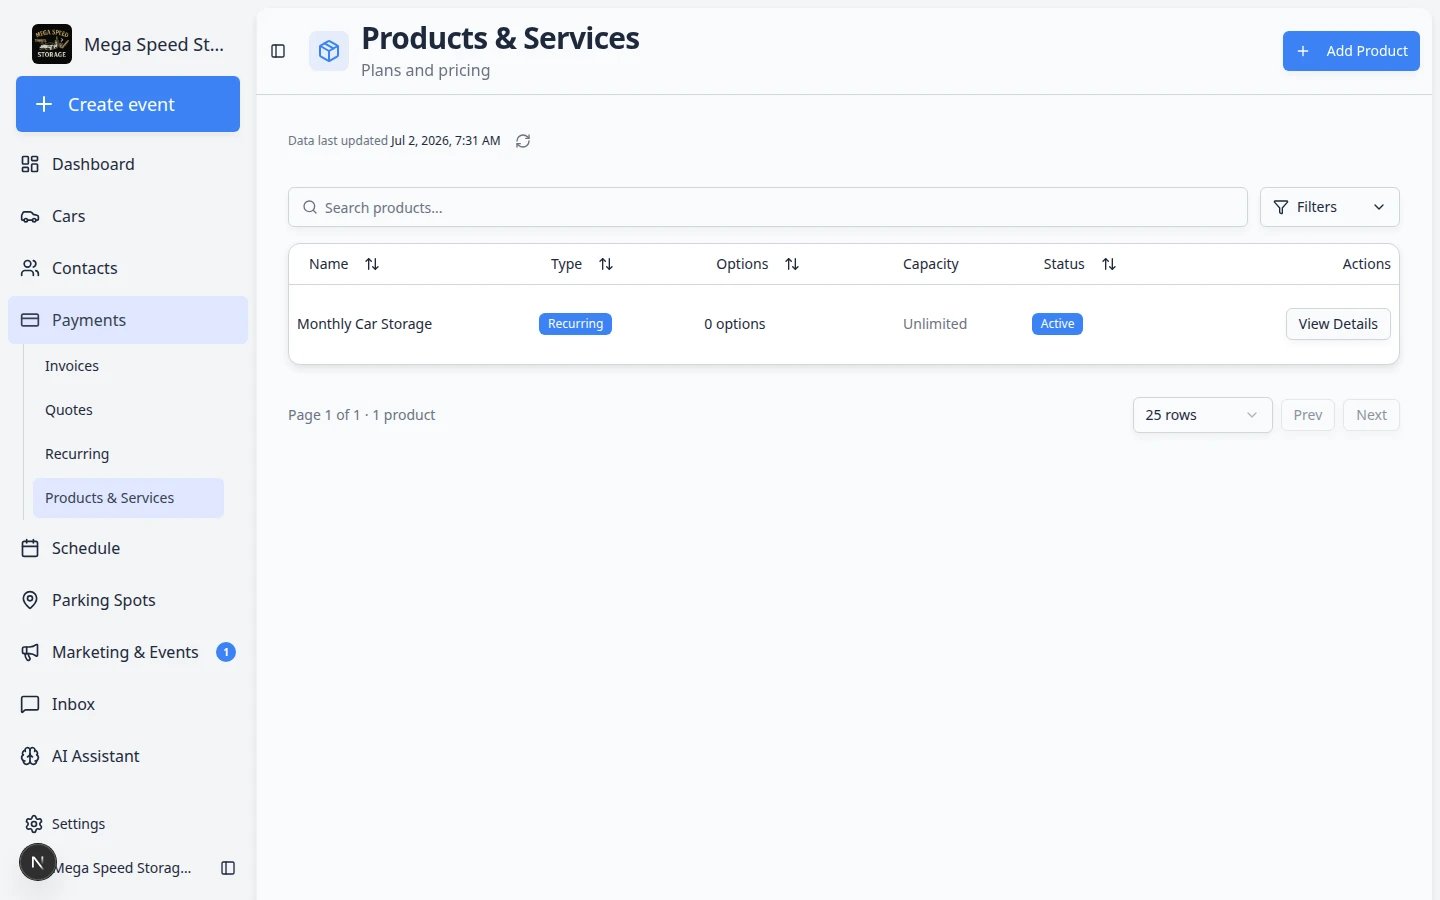
Create a product or service
1
Click Add Product
In the top-right area of the Products page, click Add Product.Expected result: A window titled Create New Product opens.
2
Enter the product name
Type a short, clear name. This name may appear on invoices, quotes, emails, and customer pages.Good examples: Monthly Climate Controlled Storage, Premium Detail Service, or Collectors Club Membership.
3
Add a description if customers need more detail
Use the description to explain what is included. Keep it simple and specific.
4
Choose the customer type
Select the customer type that best matches this product, such as Storage, Events, Detailing, Ancillary Services, or Marketplace.This helps your team group customers and understand what they buy.
5
Choose Recurring or One-time
Select Recurring for charges that repeat on a schedule, such as monthly storage or membership dues.Select One-time for charges that happen once, such as a detail service, repair, or transport job.
6
Choose how to charge
For one-time products, select Immediate to charge when the item is added to an invoice, or Statement if your facility uses statement billing (charges roll up onto a monthly statement). See Settings > Billing.For recurring products, billing always runs through Stripe subscriptions (Immediate). Statement billing is not available for recurring plans—stack multiple products on one Stripe subscription instead.Expected result: New invoices and recurring plans follow the timing your facility chose.
7
Set quantity details
Confirm the default quantity and unit label. For example, monthly storage may use a quantity of 1 and a unit label of cars.
8
Create the product
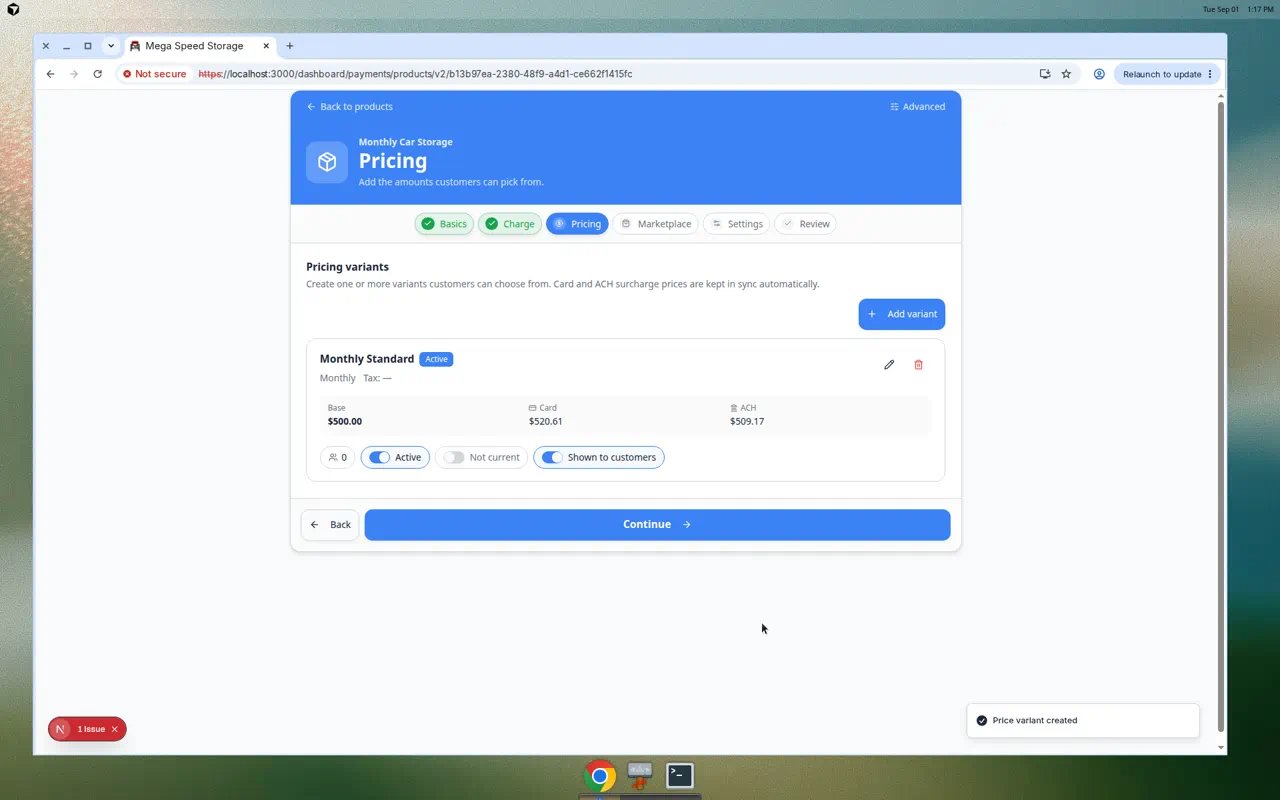
Click the create button. The system creates the product container, then takes you to the product detail page where you can add or review pricing options.
Review prices on the product detail page
After you create a product, the app opens the product detail page. This is where you add pricing variants—the actual dollar amounts customers pay.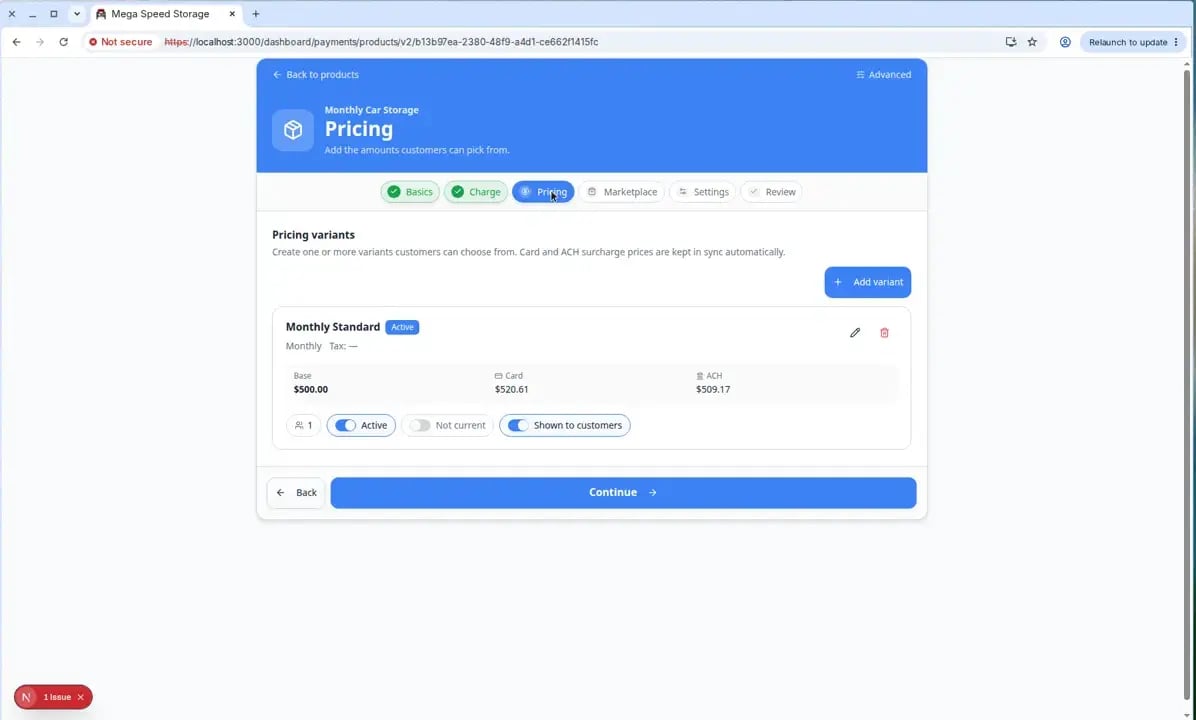
1
Open the product from the list
On Products & Services, click the product name.Expected result: You see Product Details near the top and Pricing Variants farther down the page.
2
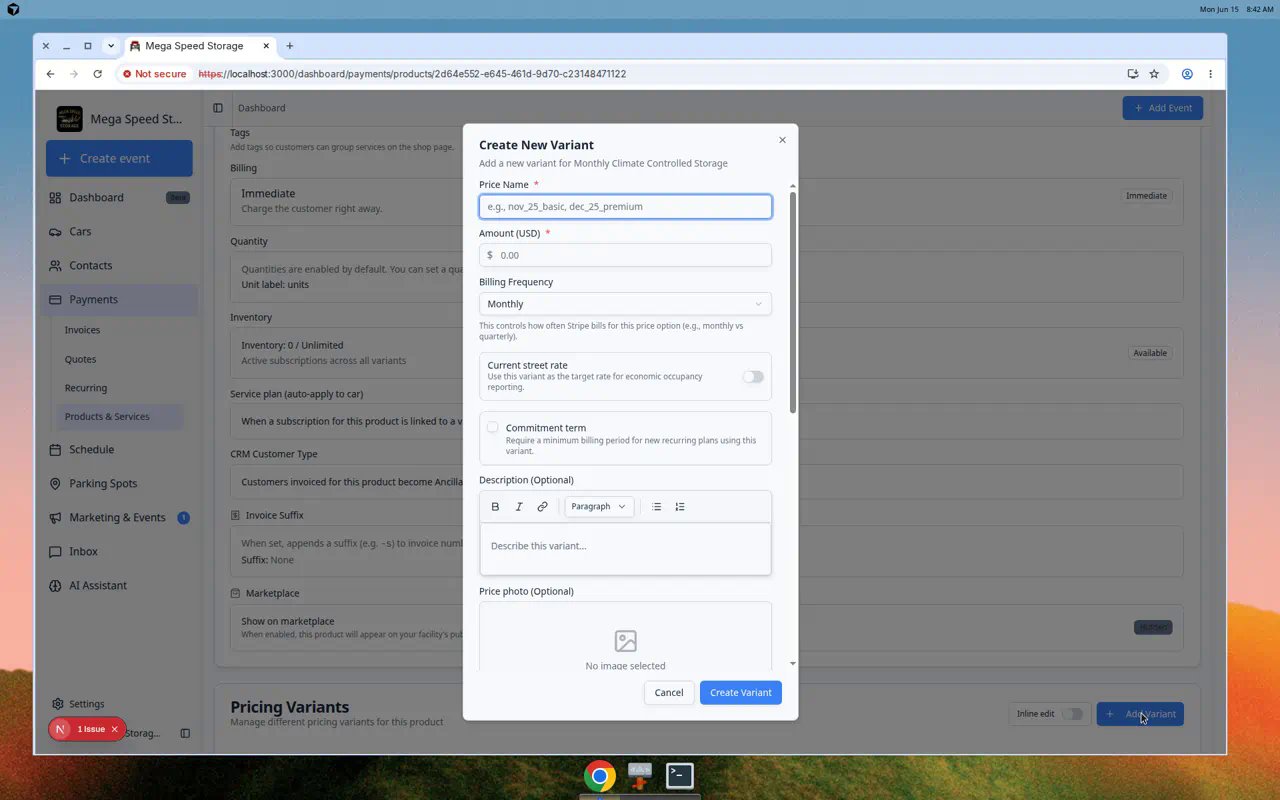
Click Add Variant
In Pricing Variants, click Add Variant.Expected result: A window opens where you enter the price name, amount, and billing frequency (for recurring products).
1
Name the price option
Use a short internal name staff will recognize, such as monthly_standard or annual_prepay.Customers usually see the product name on invoices—the variant name helps your team pick the right option.
2
Enter the amount
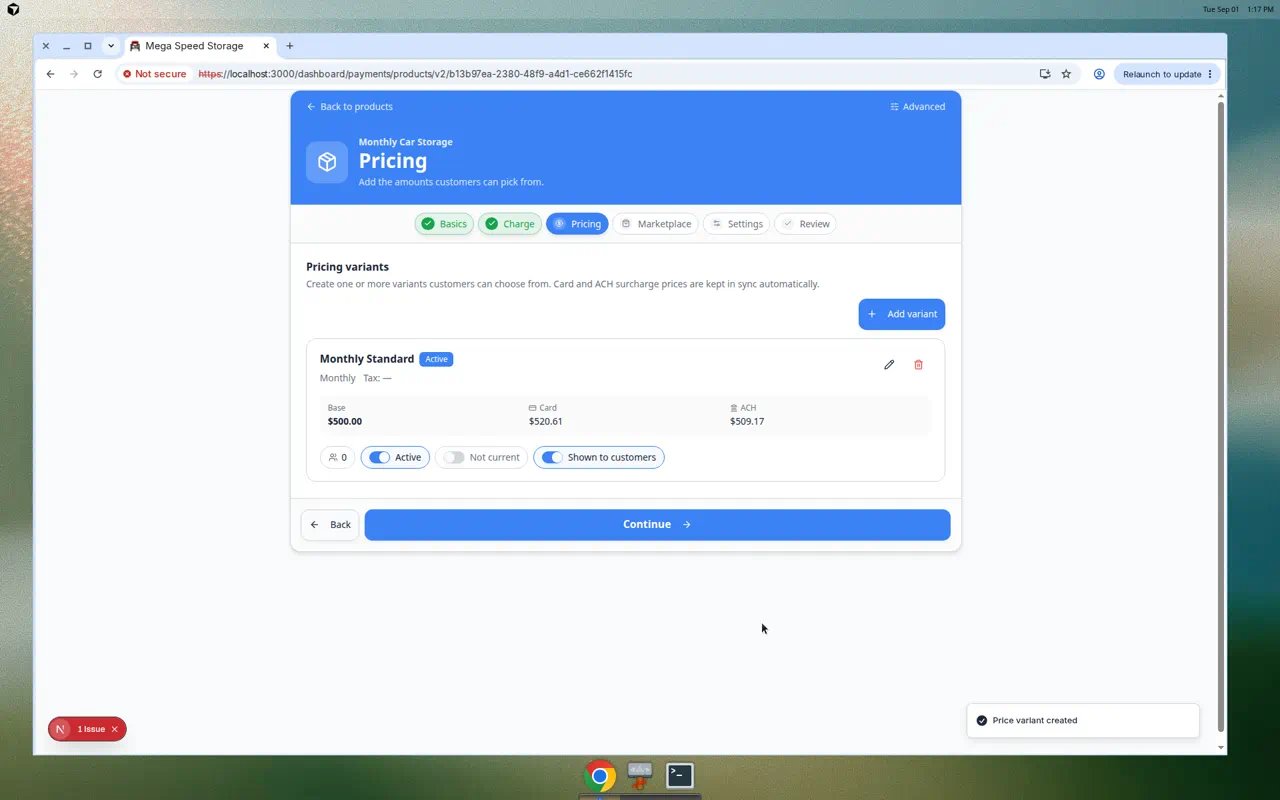
Type the price in dollars. Example: 500.00 for five hundred dollars per billing period.Why this matters: This is the base amount before any processing fees your facility passes through to customers.
3
Choose billing frequency (recurring products)
For recurring products, pick how often the customer is charged—Monthly, Quarterly, Annual, or another interval your team uses.Expected result: The variant appears in the Pricing Variants table with the amount and interval.
4
Save the variant
Click Save or Create in the window.Expected result: The new row appears under Pricing Variants. You can now use this product on invoices, quotes, and recurring plans.
5
Confirm the product is active
Make sure the product status is Active before your team uses it on new charges.Expected result: The product appears when creating invoices, quotes, or recurring plans.
Filter and sort the product list
When your facility has many products, use the toolbar above the table to find the right item quickly.1
Open Filters
On Products & Services, click Filters (or the filter icon) near the search box.Expected result: A panel opens with Type (Recurring / One-time) and Status (Active / Inactive) checkboxes.
2
Narrow the list
Turn on only the types or statuses you need—for example Recurring and Active when you are setting up monthly storage plans.Why this matters: Hiding inactive products keeps new staff from picking old prices by mistake.
3
Sort columns
Click column headers such as Name, Type, Options, or Status to sort the table.Expected result: Products appear in a helpful order (for example alphabetical by name).
Understand the Capacity column
Some products can sell out—for example event tickets, limited club memberships, or storage slots with a fixed count.When Capacity shows a fraction such as 12 / 20, your facility has sold 12 of 20 available spots for that product.When Capacity is blank or shows a dash, the product does not use inventory limits.If a product is at capacity, new customers may see a waitlist or “sold out” message on checkout pages—depending on how your facility configured the product.
Capacity is not parking spotsCapacity on a product limits how many times that billing item can be sold. It is separate from Parking Spots on your floor plan. A storage product might have capacity 50 even when you have 60 physical spots—those are different settings.
Recurring vs one-time
Choose Recurring when the customer should be billed again on a schedule.Examples: monthly storage, annual membership, quarterly concierge plan.Choose One-time when the customer should be charged once.Examples: detail service, transport, repair, event ticket, inspection.
Immediate vs Statement (plain English)
Immediate — The charge bills when your team creates or finalizes the invoice, or when Stripe recurring billing runs. Most facilities use this for storage and membership plans.Statement — For one-time products only. The charge waits and groups with other charges on a monthly statement. Use this only when your owner or bookkeeper confirmed statement billing in Settings > Billing. Recurring plans always use Stripe (Immediate); add multiple line items on one subscription when a customer needs several recurring products on one bill.
What success looks like
After you create a product or service:- The item appears on the Products & Services page.
- Your team can add it to invoices and quotes.
- If it is recurring, your team can use it when creating recurring plans.
- The product detail page lets you manage price options and other settings.
Naming tips
- Use names customers can understand without asking your team.
- Include the time period when it matters, such as monthly or annual.
- Avoid internal abbreviations like “MCS” unless customers also know what they mean.
- Keep similar products named consistently, such as “Monthly Storage - Standard” and “Monthly Storage - Premium.”