

Campaigns are planned messagesA campaign is one scheduled outreach. Use Inbox when you are talking with one customer back and forth. Use a campaign when many customers should get the same clear update.
What you will accomplish
- Pick the right message type (email, text, push, or social).
- Create a campaign with a name your team understands.
- Optionally set a send date and time on the calendar.
- Land on the campaign page ready to write the customer-facing message and choose who receives it.
When to use a campaign
- Many customers need the same update (open house invite, storage reminder, holiday hours).
- You are promoting a service, product, or facility news to a group.
- You want the send date visible on the team calendar so two big messages do not land on the same day.
Before you start
- Know the goal in plain language (example: “Invite storage customers to our June open house”).
- Decide who should receive the message. Review tags or customer types in Contacts if you are unsure.
- Have a rough idea of the words customers will see. Short and friendly works best.
- For SMS Message, confirm texting is set up in Settings > Communications.
- For Social Media Post, confirm your social connection is ready in Settings > Communications.
Step 1: Open Marketing & Events
1
Open Marketing & Events
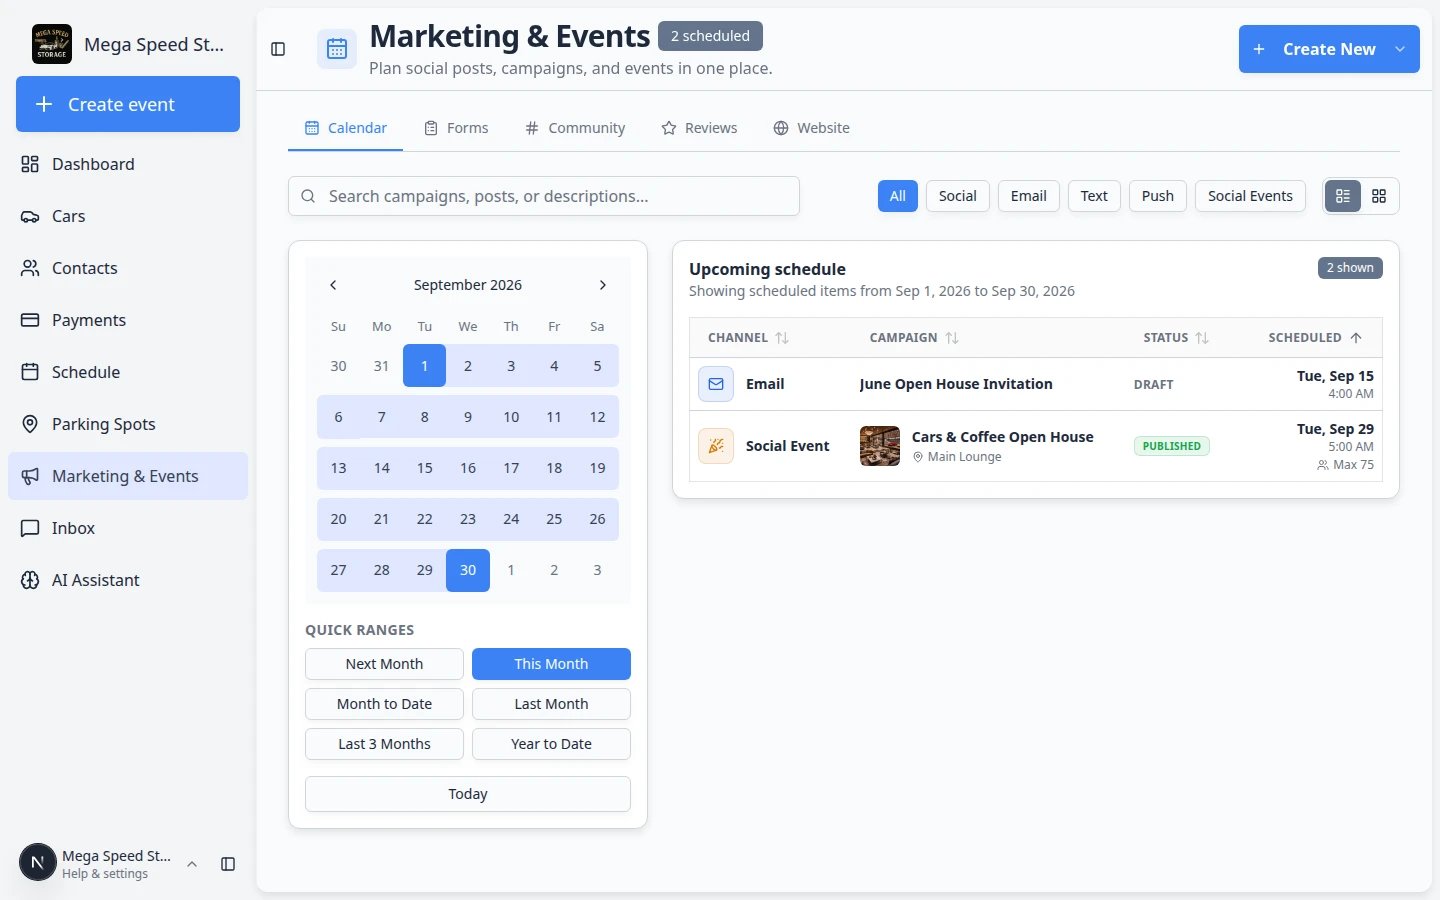
From the dashboard sidebar, click Marketing & Events. You can also open Marketing & Events directly.Why this matters: All planned emails, texts, pushes, social posts, and linked events show on one calendar so your team can see what is already scheduled.
2
Stay on the Calendar tab
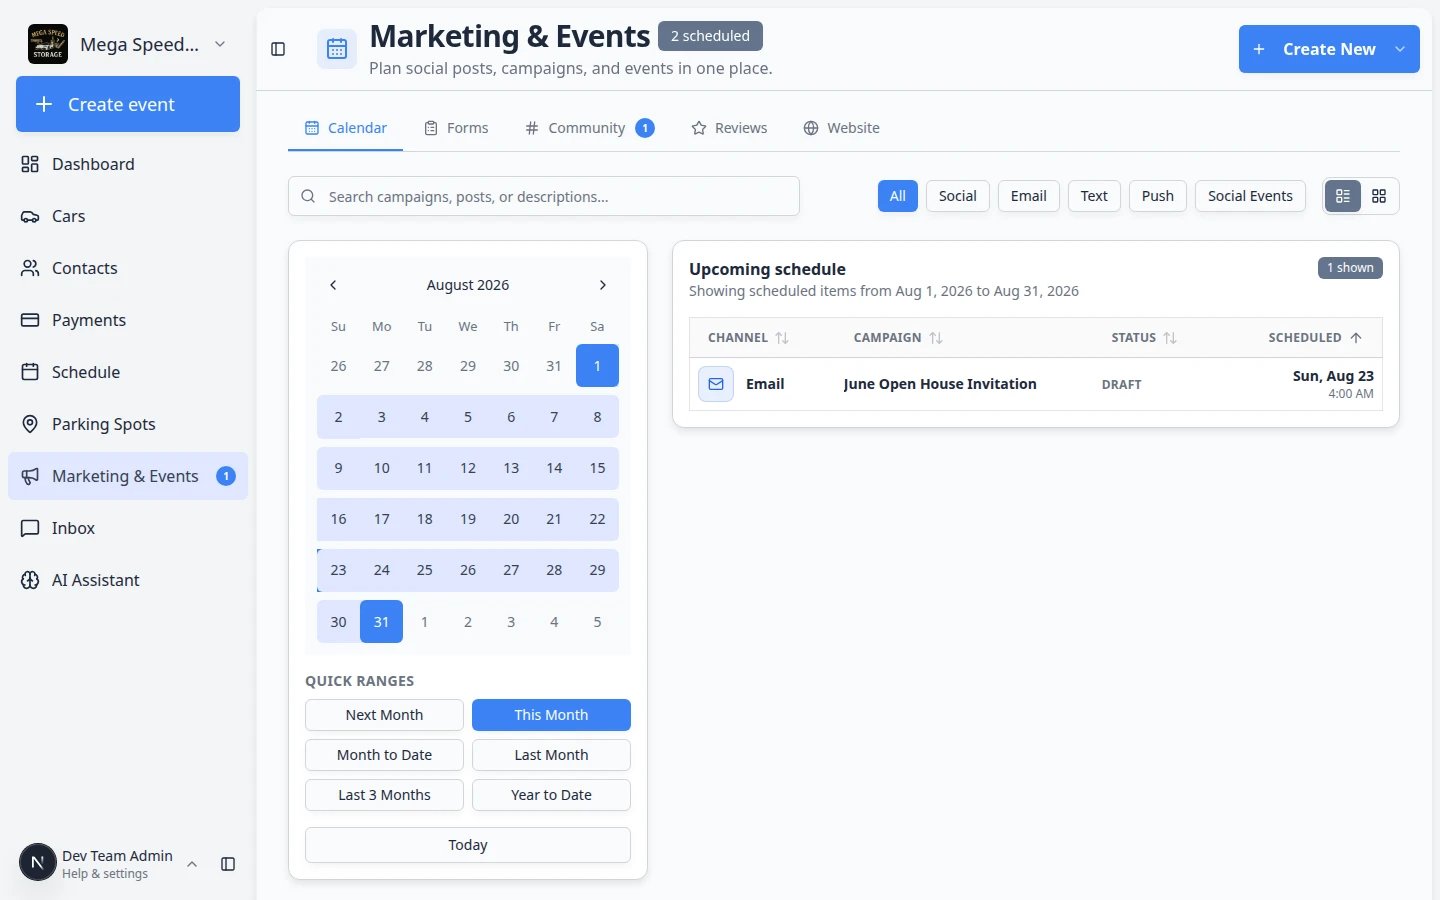
Make sure Calendar is selected at the top of the page.Expected result: You see the month view and an Upcoming schedule list. Use this view to avoid stacking two large sends on the same day.
Push notifications vs emailPush reaches customers who installed your facility app and allowed alerts. Email reaches everyone with an address on file. Many facilities send email first, then a short push reminder the day before an event.
Step 2: Choose the message type
1
Click Create New
Click Create New in the top-right corner of the page. A menu opens with message types.
2
Pick how customers should receive the message
Choose the option that matches your goal:
- Email Campaign — send an email to a group of customers. Best for invitations with photos, links, and longer details.
- SMS Message — send a text (only when texting is enabled for your facility). Best for short reminders and same-day updates. Keep the message brief.
- Push Notification — send a notice to customers who use your facility’s mobile app (only when push notifications are enabled and customers have allowed alerts on their phones). Best for quick alerts inside the app.
- Social Media Post — publish to a connected social account (finish social setup in Settings > Communications first).
- Social Event — create an event with RSVP and check-in (not a simple email blast).
If you chose SMS or Push instead of email
The steps above use Email Campaign as the example. If you picked SMS Message or Push Notification, the Create New Campaign window works the same way—but what you write on the next page is shorter.1
SMS Message campaigns
After you click Create Campaign, open Edit SMS on the campaign page. Type a short message (usually under 160 characters works best). Customers see this text on their phone—not a subject line.Example: “Mega Speed Storage open house July 15, 10 AM–2 PM. Tour our showroom and meet the team. Reply if you have questions.”Expected result: The preview shows your text exactly as it will appear on a phone screen.
2
Push Notification campaigns
After you click Create Campaign, open Edit Push. Add a short title and message. Only customers who installed your facility’s mobile app and allowed notifications will receive it.Why this matters: Push is great for quick reminders, but not every customer has the app—email or text may reach more people.
3
Finish audience and start the campaign the same way
Whether you chose email, SMS, or push, the setup wizard steps are the same: Design, Audience, Schedule, and Review. Continue with Add campaign message, audience, and publish.
Step 3: Name the campaign and set an optional send time
1
Check the Channel
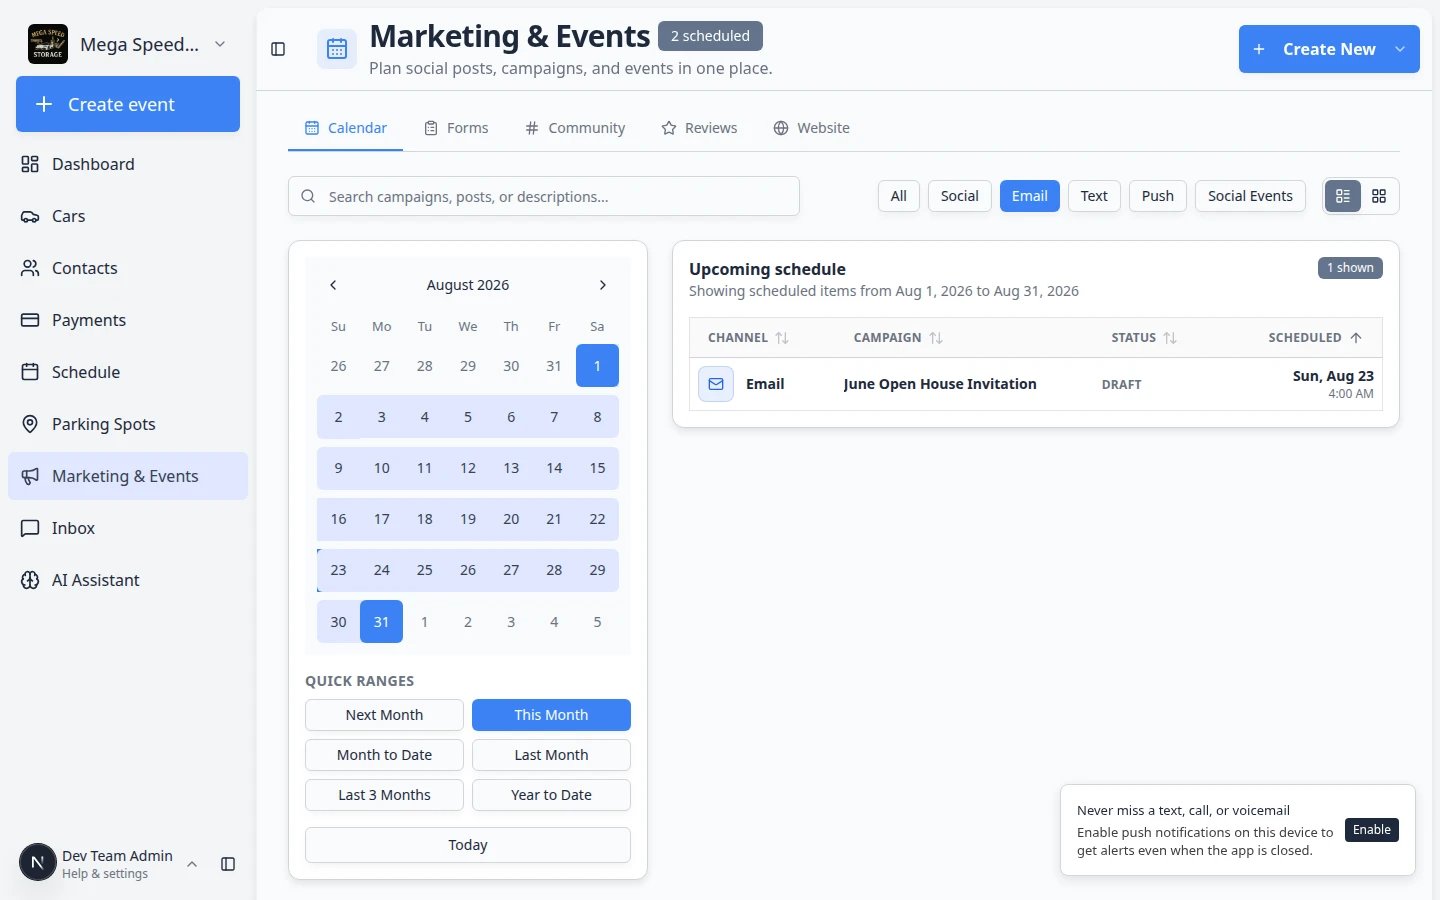
Near the top of the window, Channel shows the type you picked (for example Email). If it is wrong, close the window and choose again from Create New.
2
Enter the Name
In Name, type a label your team will recognize later. Customers usually do not see this exact name.Good examples:
- June Open House Invitation
- Winter Storage Reminder
- Cars and Coffee Instagram Post
3
Set Schedule (optional)
Click Select date/time if you already know when the message should go out. You can leave this blank and set the time on the campaign page later.Why this matters: A send time helps your team plan around other messages and gives the calendar a clear date to display.
4
Click Create Campaign
Click Create Campaign at the bottom of the window.Expected result: The window closes and you land on the campaign detail page for the record you just created.
Step 4: Confirm the setup wizard opens
After Create Campaign, the app opens the setup wizard—not the old single-page layout with separate Publish Campaign buttons.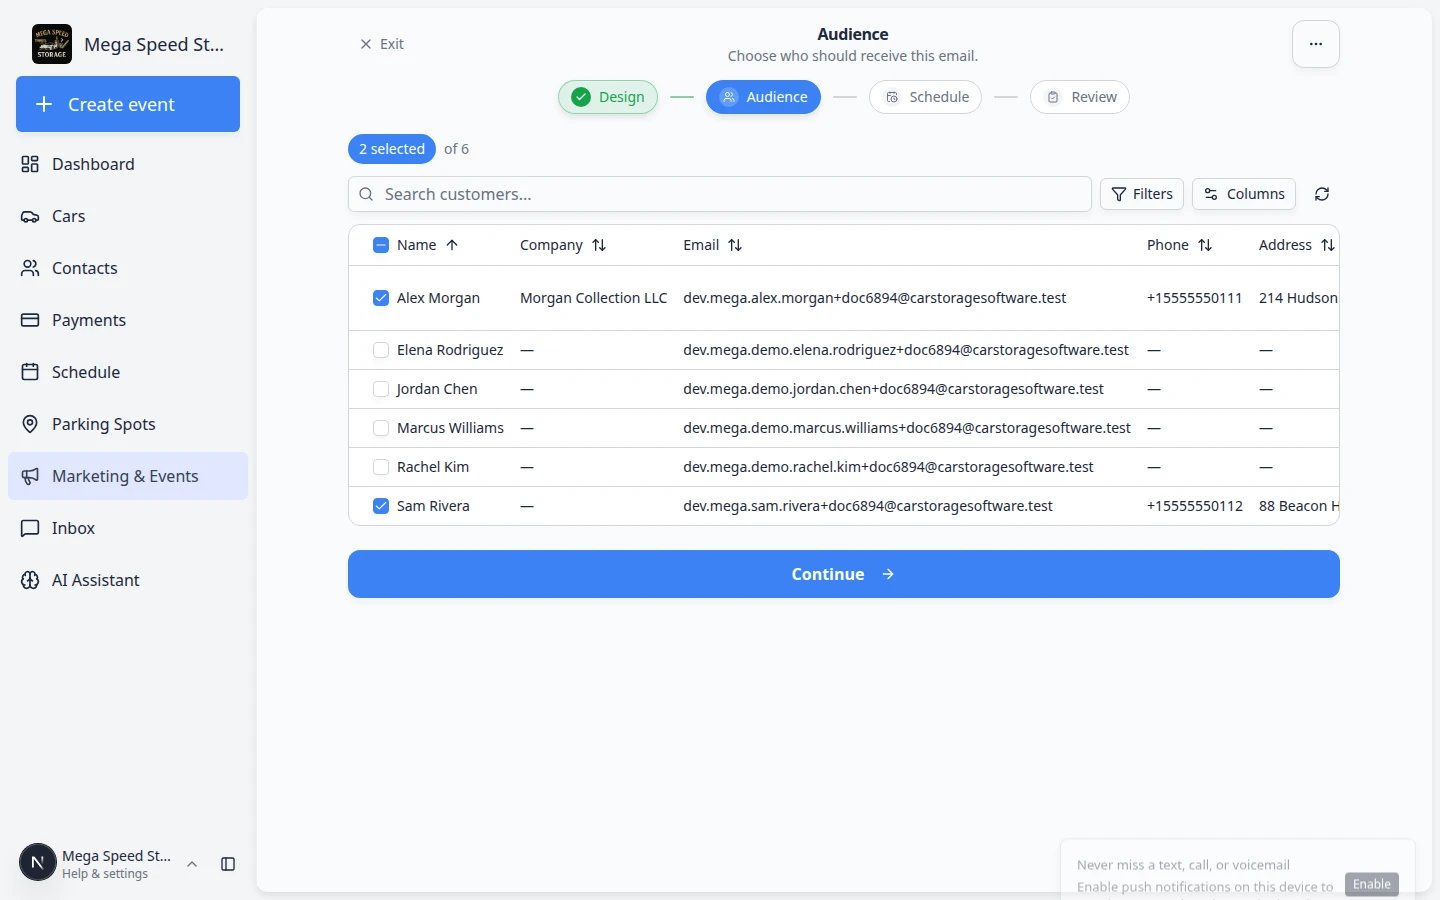
- Step pills across the top: Design, Audience, Schedule, Review
- A draft status on the calendar until you click Start campaign on the Review step
- A large Design Email (or Design SMS / Design Push) button on the first step
What happens next in the setup wizard
You will complete four steps before anyone receives the message. This guide stops after the campaign record exists; use the follow-up guide for each step.1
Design — write what customers will see
On the Design step, click Design Email (or Design SMS / Design Push). Add a subject line and body for email, or the short text for SMS or push.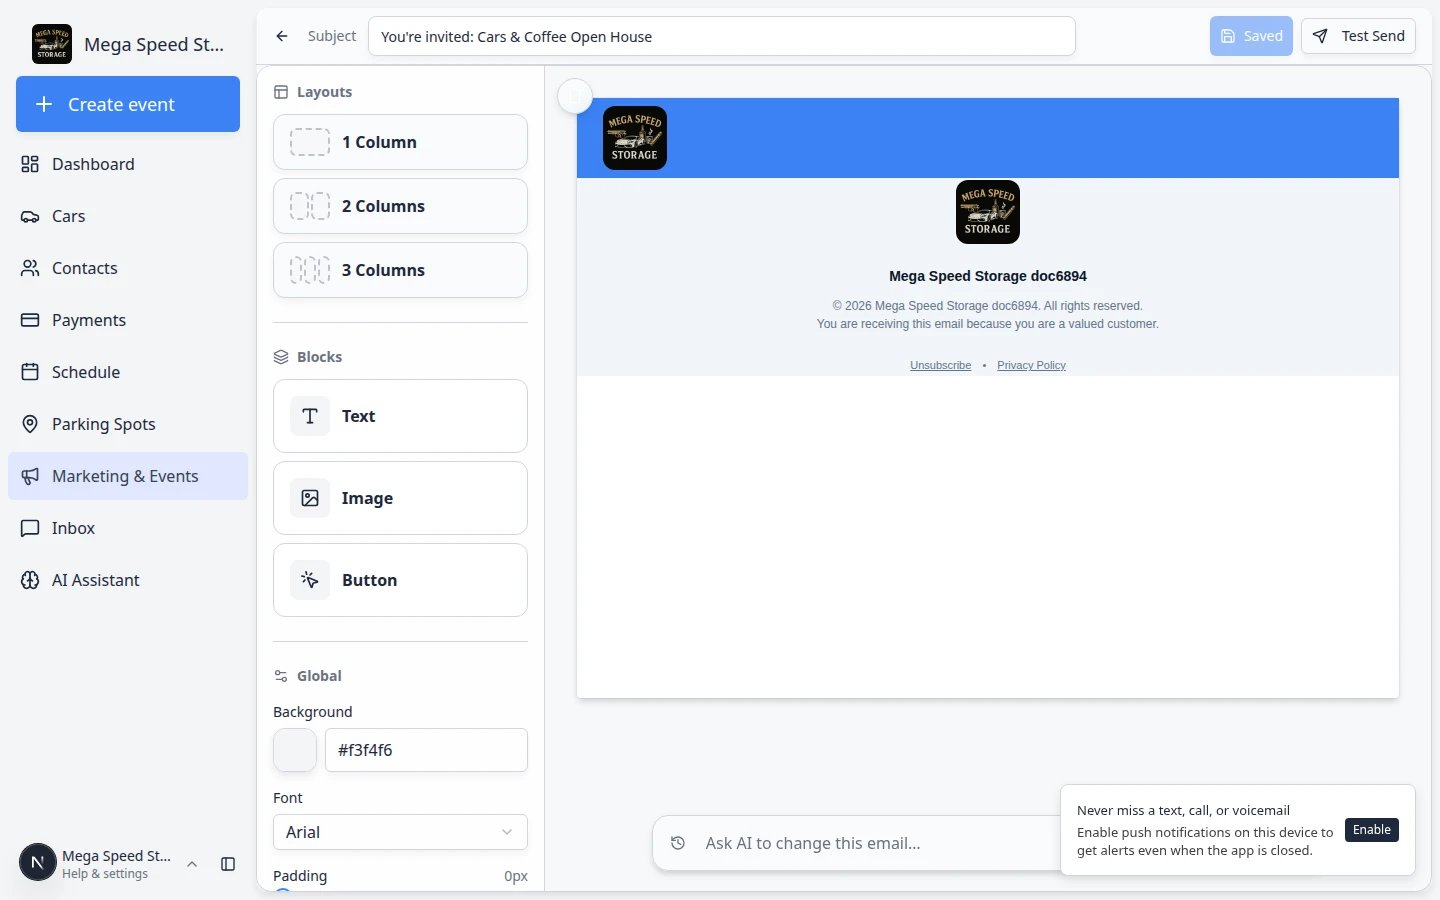
2
Audience — choose who receives it
On the Audience step, check the customers who should receive the campaign. Read the selected of counter before you click Continue.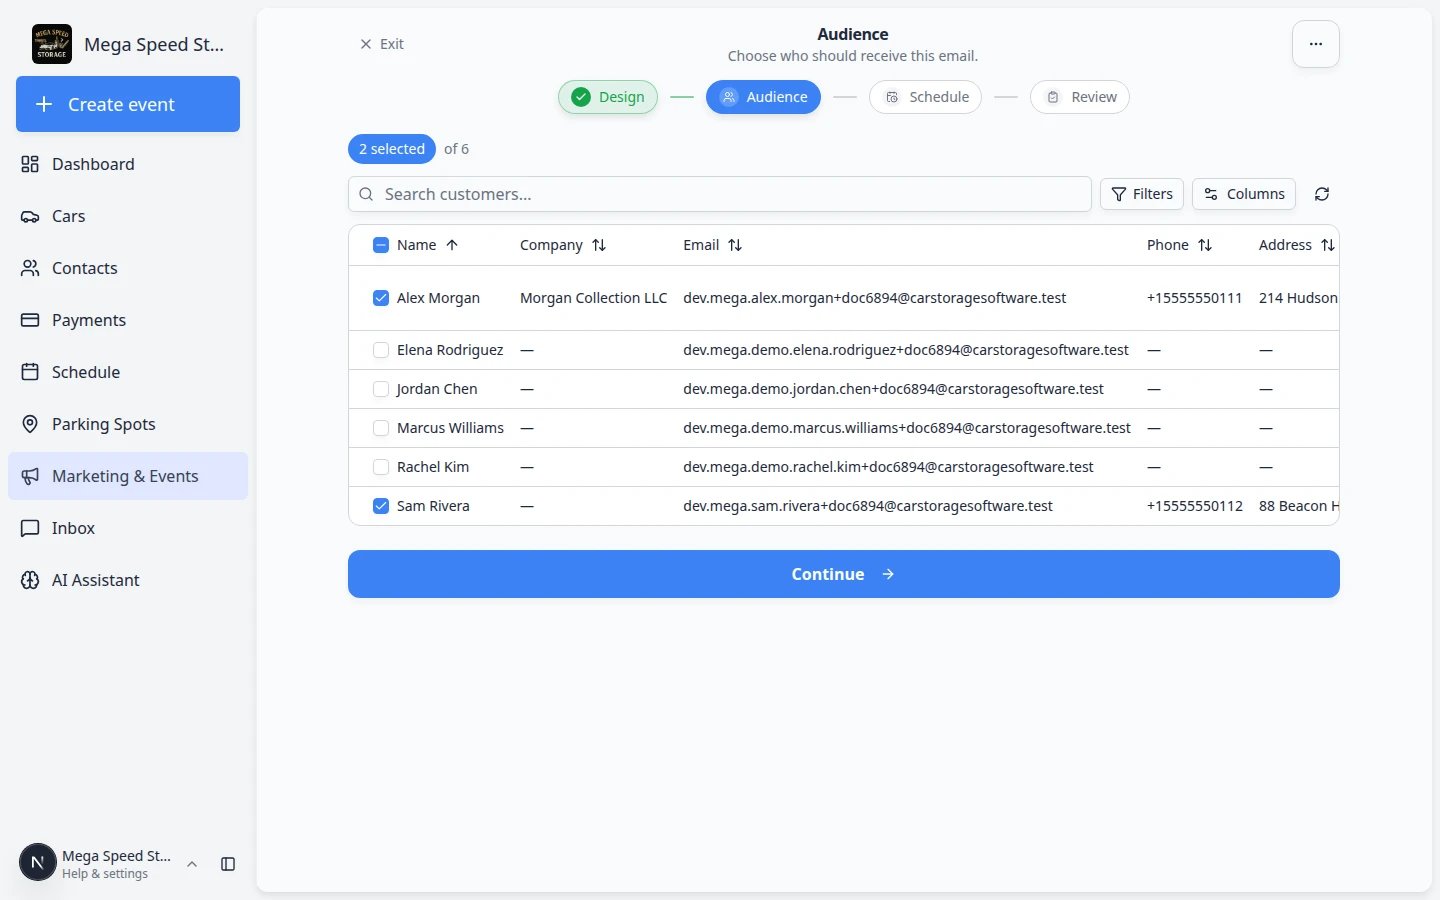
3
Schedule and Review — pick a time and start
On Schedule, pick the send date and time. On Review, read the summary and click Start campaign.Expected result: The campaign moves from draft to scheduled or active, and it appears on the Marketing & Events calendar on the send date.
Common mistakes to avoid
- Do not pick Social Event when you only need a simple email—use Email Campaign instead.
- Do not use a vague campaign name your team cannot search for later.
- Do not assume Create Campaign sent anything—always finish message, audience, and publish.
- Do not send storage news to your entire contact list if only storage customers need it.
Troubleshooting
What to do next
- Add campaign message, audience, and publish — finish and send the campaign.
- Create a text, push, or social campaign — extra tips when you did not choose email.
- Organize your marketing photos and files — add a logo and facility photos before you design the email.
- Marketing & Events overview — see how campaigns fit with community, reviews, and website traffic.
- If the message promotes an event with RSVP, read Create a social event and Review social event RSVPs and attendees.