

What you will accomplish
You will add a working Customer Login button, registration link, or optional branded badge embed to your existing website so visitors can reach the right Car Storage Software page in one click.When to use this guide
Use this guide when you want to connect your existing website (WordPress, Squarespace, Wix, Webflow, or similar) to Car Storage Software. This is useful if you already have a website and want visitors to:- sign in to the customer portal
- request storage online
- learn about your facility
- browse your marketplace
- see a small “Powered by Car Storage Software” badge that links to your facility
Before you start
- Decide what website visitors should do next.
- Know who manages your website.
- Confirm your website builder allows an HTML, embed, code, or iframe block (only needed for the badge embed).
- Test the link or embed before publishing it to your main website.
Step 1: Decide what you want visitors to do
Choose one main action for the website area you are updating. If you are not sure which link belongs on the page, use Choose the right public link to share first. Common choices:1
Customer login
Use this when existing customers need a quick way to open their portal. Follow Share customer login links before adding the link to your website.
2
Registration
Use this when new prospects should request storage or start onboarding. Copy Registration from Shareable links.
3
Facility page
Use this when visitors should learn about your facility before choosing what to do next. Copy Main page from Shareable links.
4
Marketplace
Use this when visitors should browse cars, products, services, or memberships. See Choose the right public link to share for the correct marketplace URL.
5
Branded badge embed (optional)
Use this when you want a small Car Storage Software badge on your site footer or sidebar. The badge shows your facility name and links visitors to Car Storage Software—it is not a full schedule or booking widget.
Expected result
You know whether you need a simple link, a button, or the optional badge embed code.Step 2: Open Website & customer app settings
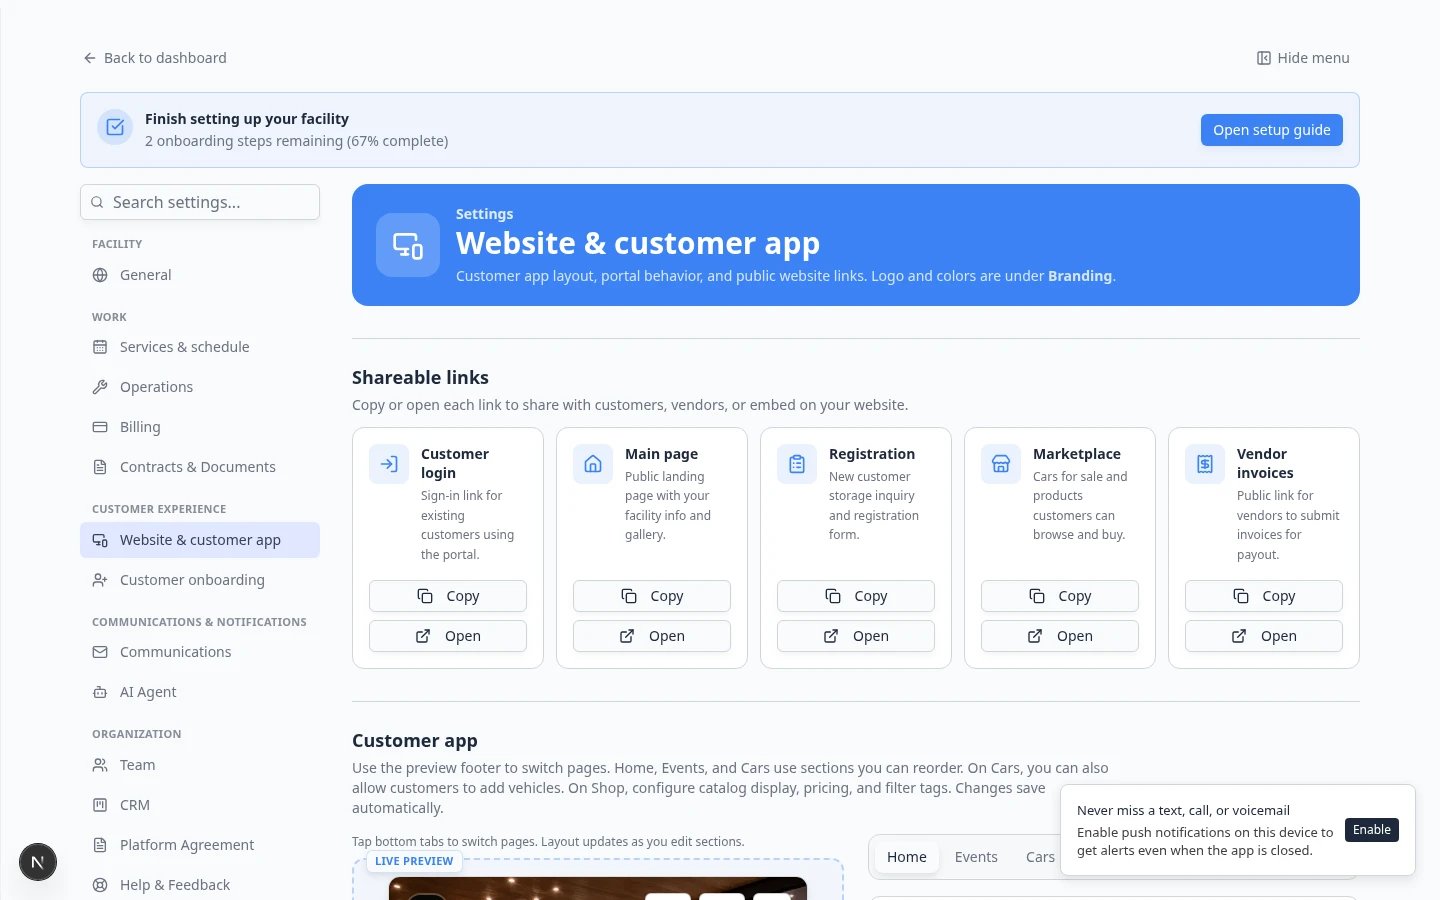
Go to Settings > Website & customer app. Review these areas on one long page—you will scroll past several sections:- Shareable links (near the top) for Customer login, Main page, Registration, Marketplace, and Vendor invoices.
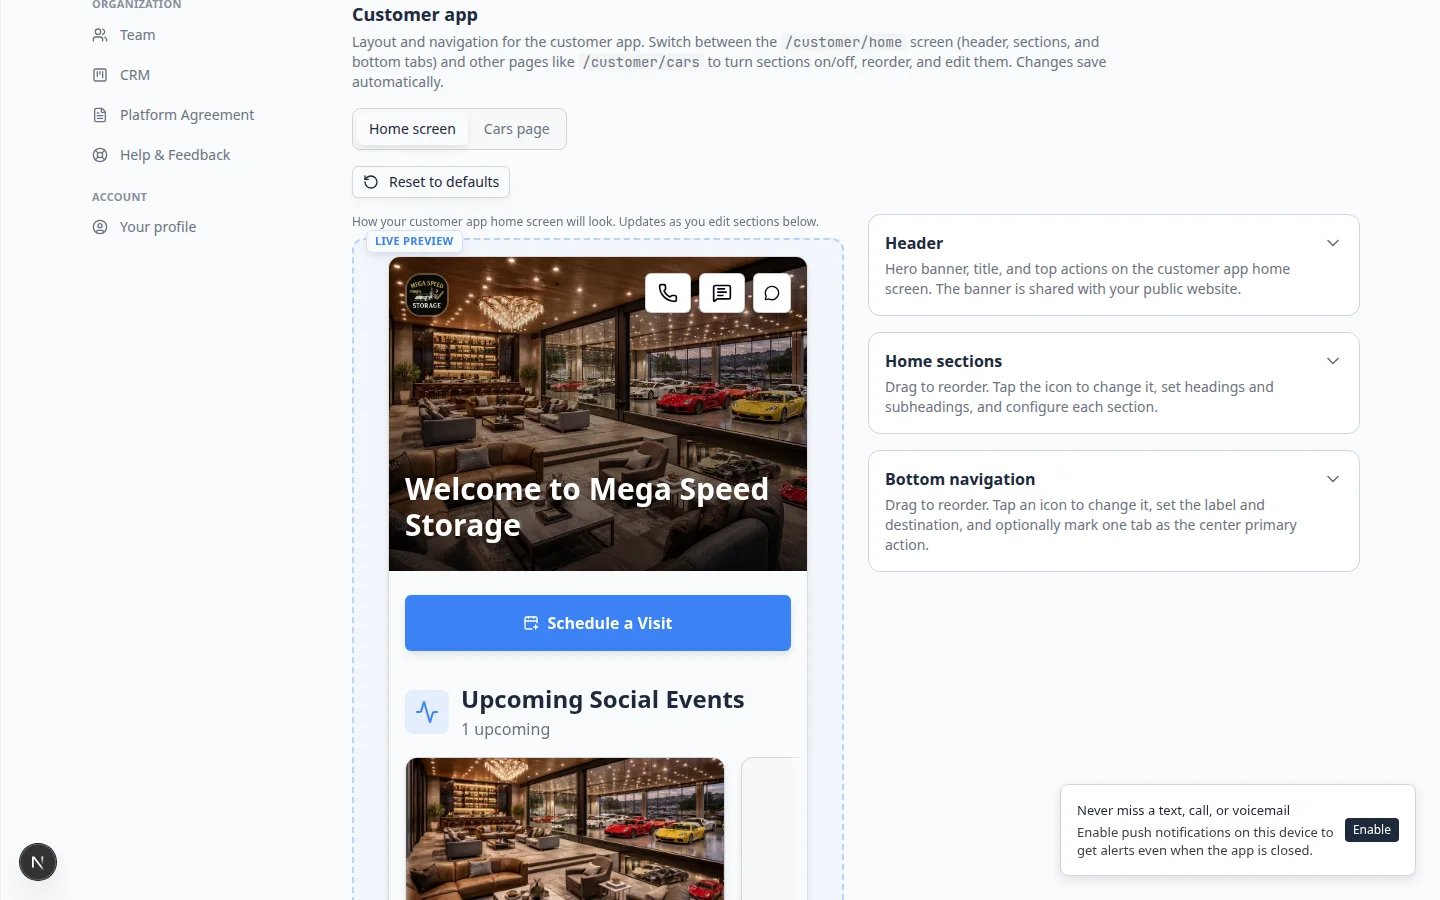
- Customer app for the mobile portal home screen layout (header, home sections, bottom tabs). See Customize the customer mobile app.
- Public website for your Facility slug, page content, and Page editor.
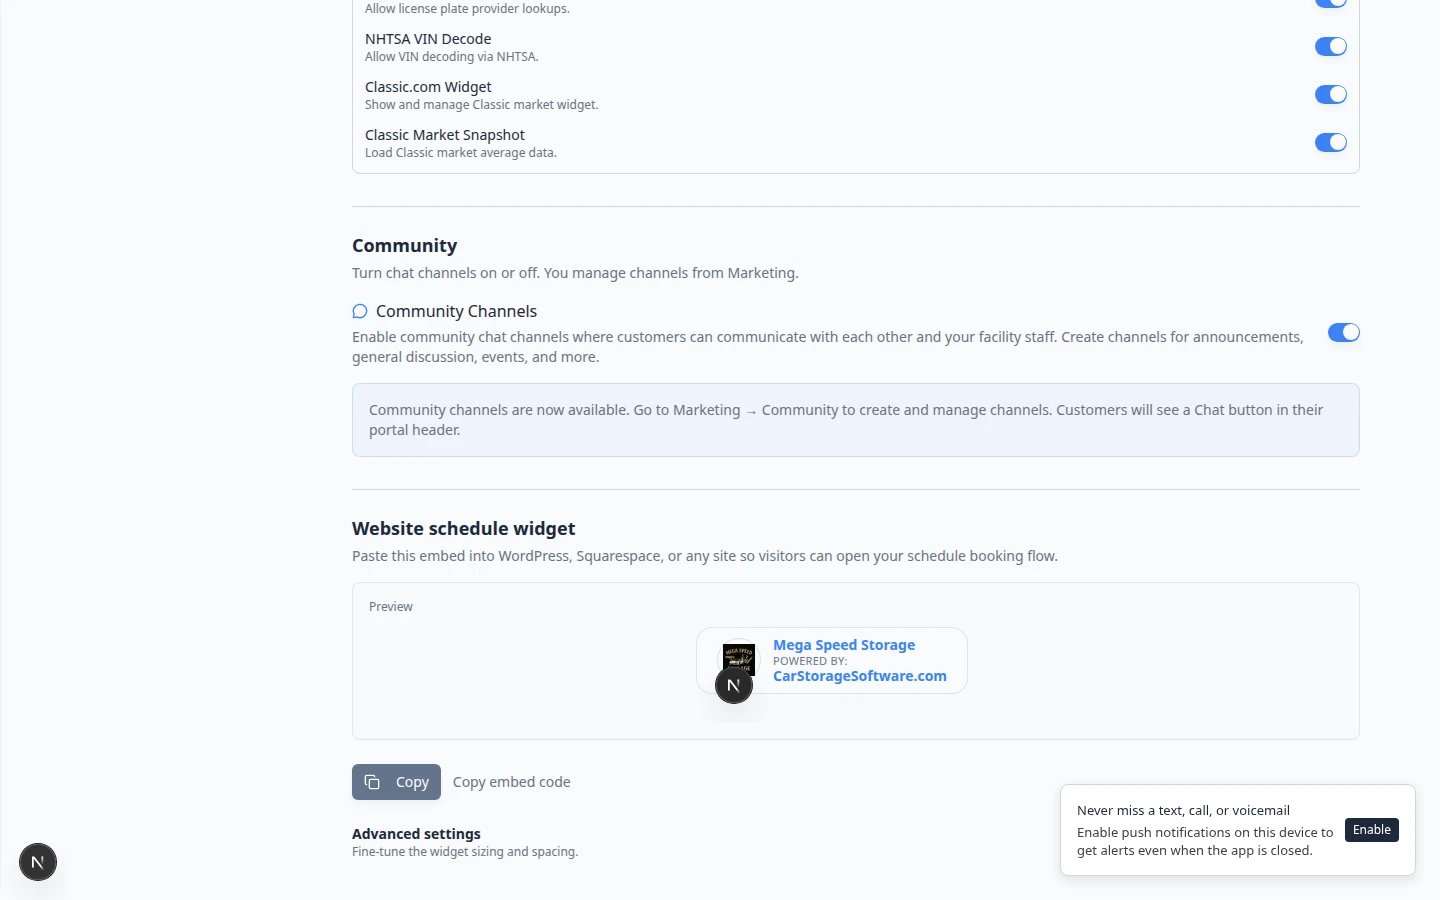
- Website schedule widget (scroll to the bottom) for the optional branded badge embed code.
Step 3: Copy the right link or code
1
Copy a link if you want a button or menu item
Use a link when your website has a button such as Customer Login, Request Storage, View Marketplace, or Register a Vehicle.Copy from the matching Shareable links card.
2
Copy embed code if you want the branded badge
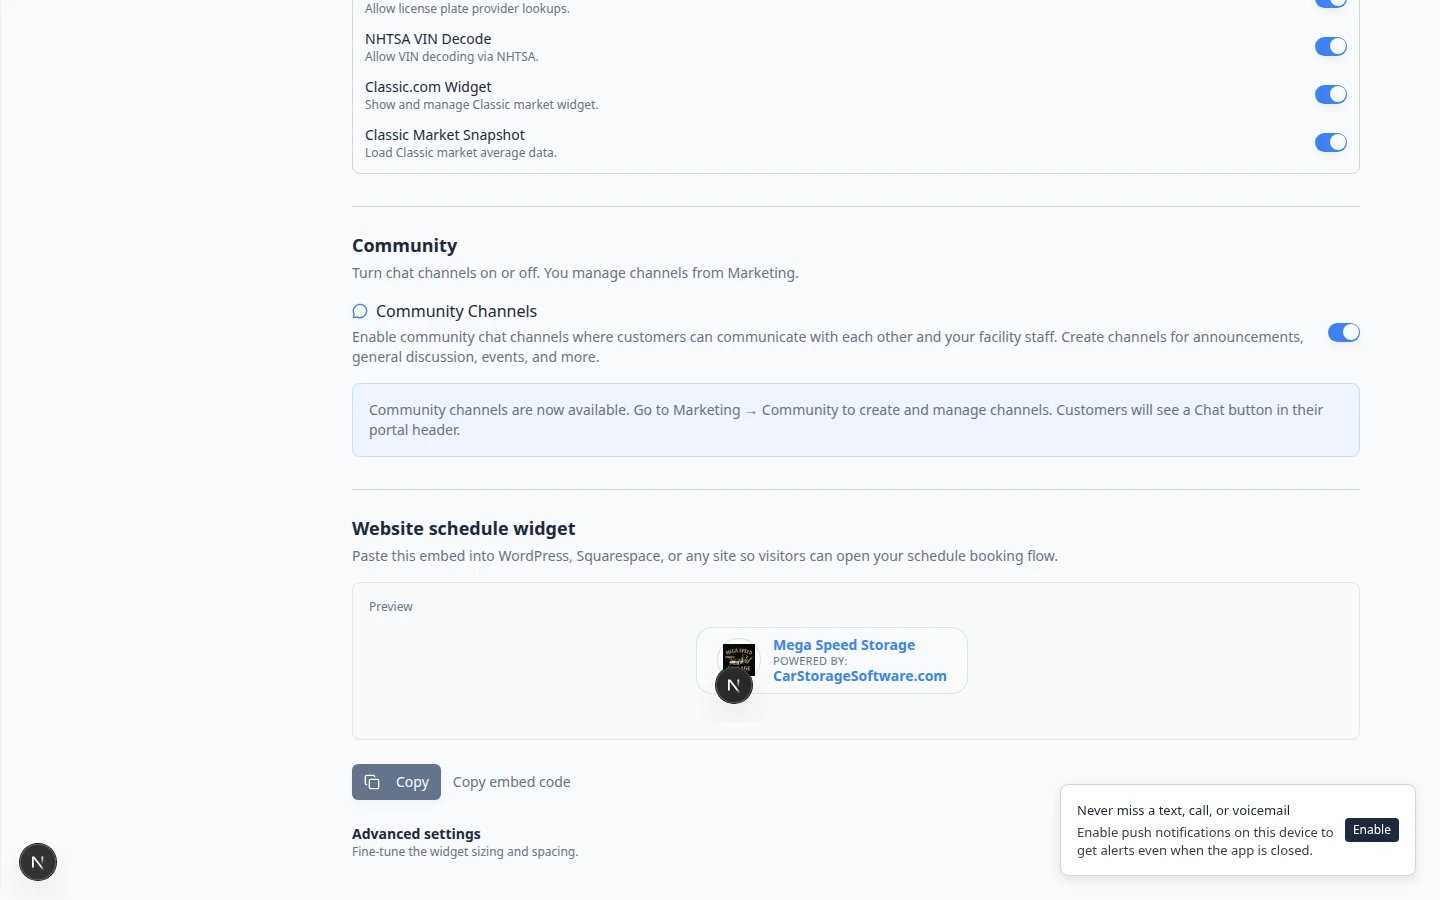
Scroll to Website schedule widget. Click Copy embed code when you want the small badge to appear on your website (for example in a footer).The preview shows how the badge will look. Use Advanced settings only if you need to adjust sizing.
3
Copy the full code or full link
Click Copy. Do not copy only part of the text.Expected result: You have the complete link or embed code ready to paste.
Links and embed code are differentA link sends the visitor to another page when they click a button. Embed code places a small badge inside your existing page. Most facilities use links for customer login and registration; the badge is optional.
The badge is not a booking calendarThe Website schedule widget shows a small branded badge that links to Car Storage Software. It does not embed your full Schedule calendar on your website. Customers still open your facility page or portal to request appointments.
Step 4: Add it to your website builder
The exact steps depend on your website tool, but the idea is the same.1
Open the website page you want to edit
This might be your home page, customer login page, storage page, or contact page.Expected result: You are in edit mode in your website builder—not viewing the live site as a visitor.
2
Add a button, link, or embed block
For a normal link, add a Button or Link block and paste the URL you copied.For embed code, add an HTML, Embed, Code, or iframe block.Why this matters: Website builders treat links and embed code differently. Pasting embed code into a text paragraph usually will not work.
3
Paste the copied text
Paste the full link or full embed code from Car Storage Software.Do not type the link by hand—copying prevents typos that send customers to the wrong page.
4
Label the button clearly
Use plain words customers understand:
- Customer Login for existing customers
- Request Storage or Register for new prospects
- View Vehicles for marketplace links
5
Save or publish the website page
Most website builders have a Save, Update, or Publish button.Expected result: The button or badge appears on your live website.
Tips for common website builders
- In WordPress, look for a Custom HTML block.
- In Squarespace, look for an Embed or Code block.
- In Wix, look for Embed HTML or Custom Embeds.
- In Webflow, look for an Embed element.
Step 5: Test the website page
After the link or embed is added, open your public website like a customer would. Check:- The page loads normally.
- The button, link, or badge is visible.
- The text is easy to understand.
- Clicking it opens the correct Car Storage Software page.
- The page works on a phone-sized screen.
Expected result
Website visitors can reach the right customer flow without needing instructions from your team.Step 6: Run one real test action
After the link or embed is on your website, complete one real test so you know the full customer path works.1
Customer login link
Open the link in a private window. Confirm the sign-in page opens for your facility—not the staff dashboard.Expected result: You see the customer sign-in page with your facility name and an email field.
2
Registration link
Submit one test registration with a name your team will recognize (for example Test Registration).Expected result: A confirmation message appears and the test record shows up in Contacts. See Set up customer registration.
3
Marketplace link
Open the marketplace URL and confirm at least one listing appears with the correct price.Expected result: Shoppers see what you expect before you announce the link.
4
Branded badge embed
Click the badge on your website. Confirm it opens the correct Car Storage Software page.Expected result: The badge is visible, sized correctly, and links to your facility—not a blank page.
What success looks like
- Your website has a clear customer action.
- The link or embed opens the correct page.
- The page works on desktop and mobile.
- Your team has tested the flow before announcing it.