

What you will accomplish
You will link vehicles and documents to one customer so your team and the customer portal show the correct information. This is one of the most important steps before you send a portal invite or ask a customer to pay an invoice online. Linking cars helps your team know who owns each vehicle, schedule the right work, send accurate updates, and show the correct vehicles in the customer portal. Linking documents keeps contracts, agreements, and uploaded files in the same place as the customer history.Before you start
- The customer record must already exist in All Contacts.
- The car must already exist in Cars, unless you plan to add it from the Cars area first.
- Have any PDF files, signed agreements, or other documents ready if you plan to upload documents.
- Make sure you are linking records to the correct customer, especially if two customers have similar names.
Open the customer record
1
Go to Contacts
Open the All Contacts page.
2
Find the customer
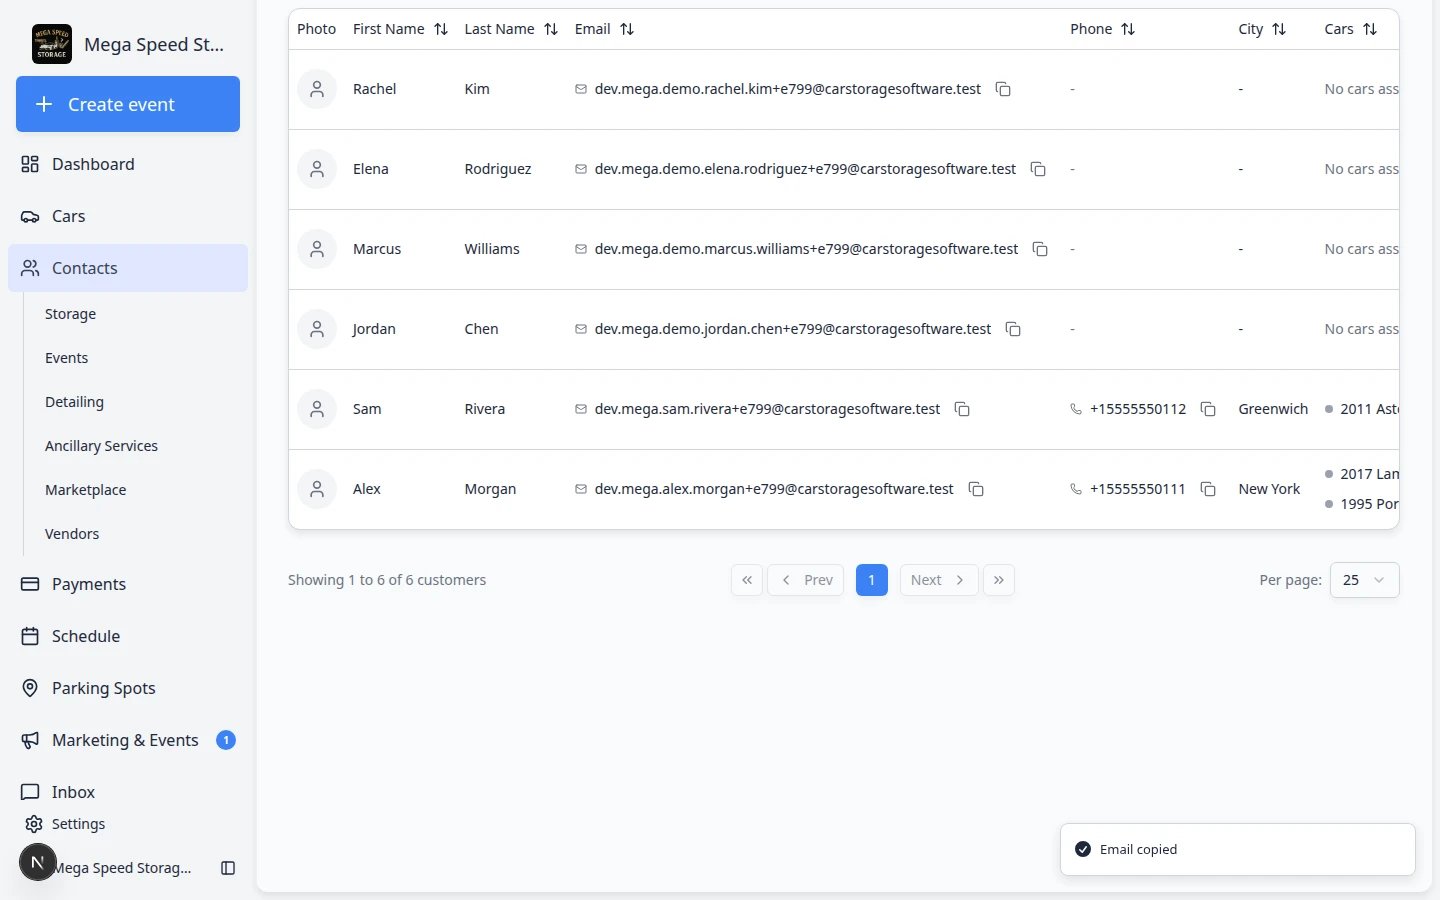
Use the Search field to search by name, email, phone number, or company.
3
Open the detail page
Click the customer row or click View Details.
Link a car to the customer
Scroll to the Customer’s Cars section.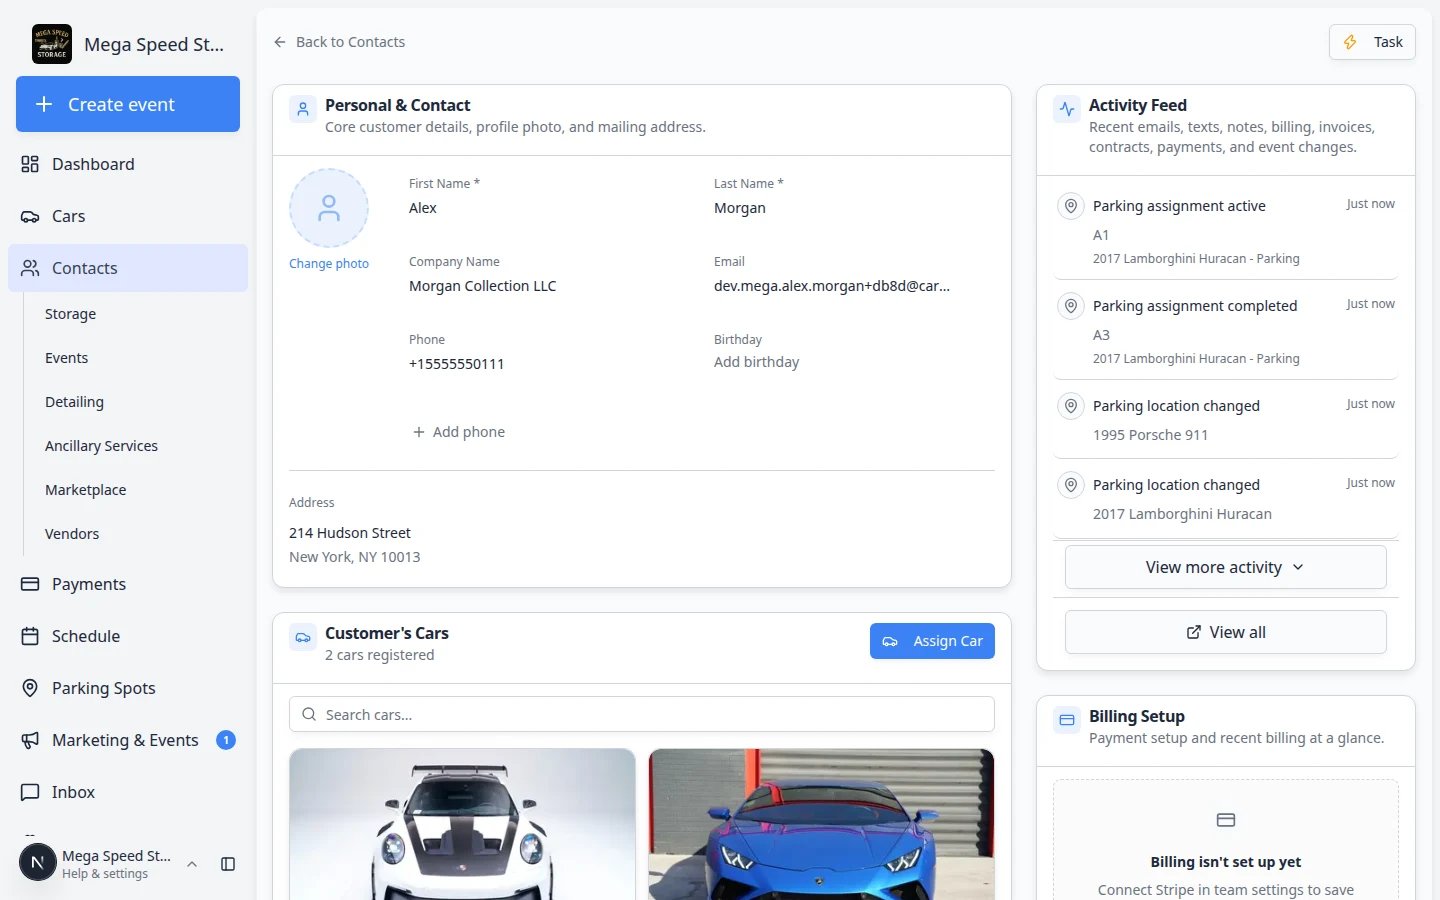
1
Click Assign Car
In the Customer’s Cars section, click Assign Car.
2
Search for the car
In the Assign Car to Customer dialog, click Search and select a car… and type the make, model, year, VIN, or license plate.
3
Choose the correct car
Select the car from the search results.If the car is already assigned to another customer, pause and confirm whether you are correcting ownership or choosing the wrong vehicle.Why this matters: A car can only have one owner at a time in the system. Assigning it here moves ownership to this customer.
4
Click Assign Car
Click Assign Car to save the link.Expected result: The vehicle appears in Customer’s Cars. The car’s owner on the vehicle record should match this customer.
If the car does not exist yet
If you cannot find the car in the search field, create the car first.1
Open Cars
Go to Cars.
2
Add the vehicle
Follow Add a car to create the vehicle record.
3
Return to the customer
Go back to the customer record in All Contacts.
4
Assign the car
Use Assign Car in the Customer’s Cars section.
Link a car from the Cars page (alternate path)
Some teams start on the vehicle record first—for example after photographing a new arrival. You can link the owner from there instead of starting on the customer page.1
Open the car record
Go to Cars, find the vehicle, and open its detail page.
2
Find the owner or customer field
Look for the customer or owner area on the car page (often near the top of the record).
3
Search for the customer
Type the customer’s name or email and select the correct person from the results.Why this matters: Linking from the car page achieves the same result as Assign Car on the customer record—the car appears under Customer’s Cars and in the customer’s portal.
4
Save the car record
Save your changes.Expected result: The customer detail page shows the car under Customer’s Cars, and the car record shows the correct owner.
Link or upload documents
Customer documents can include storage agreements, signed contracts, insurance files, liability waivers, and other paperwork. Keeping documents on the customer record helps your team find paperwork quickly and helps customers see the right files in the portal (when your portal settings allow it).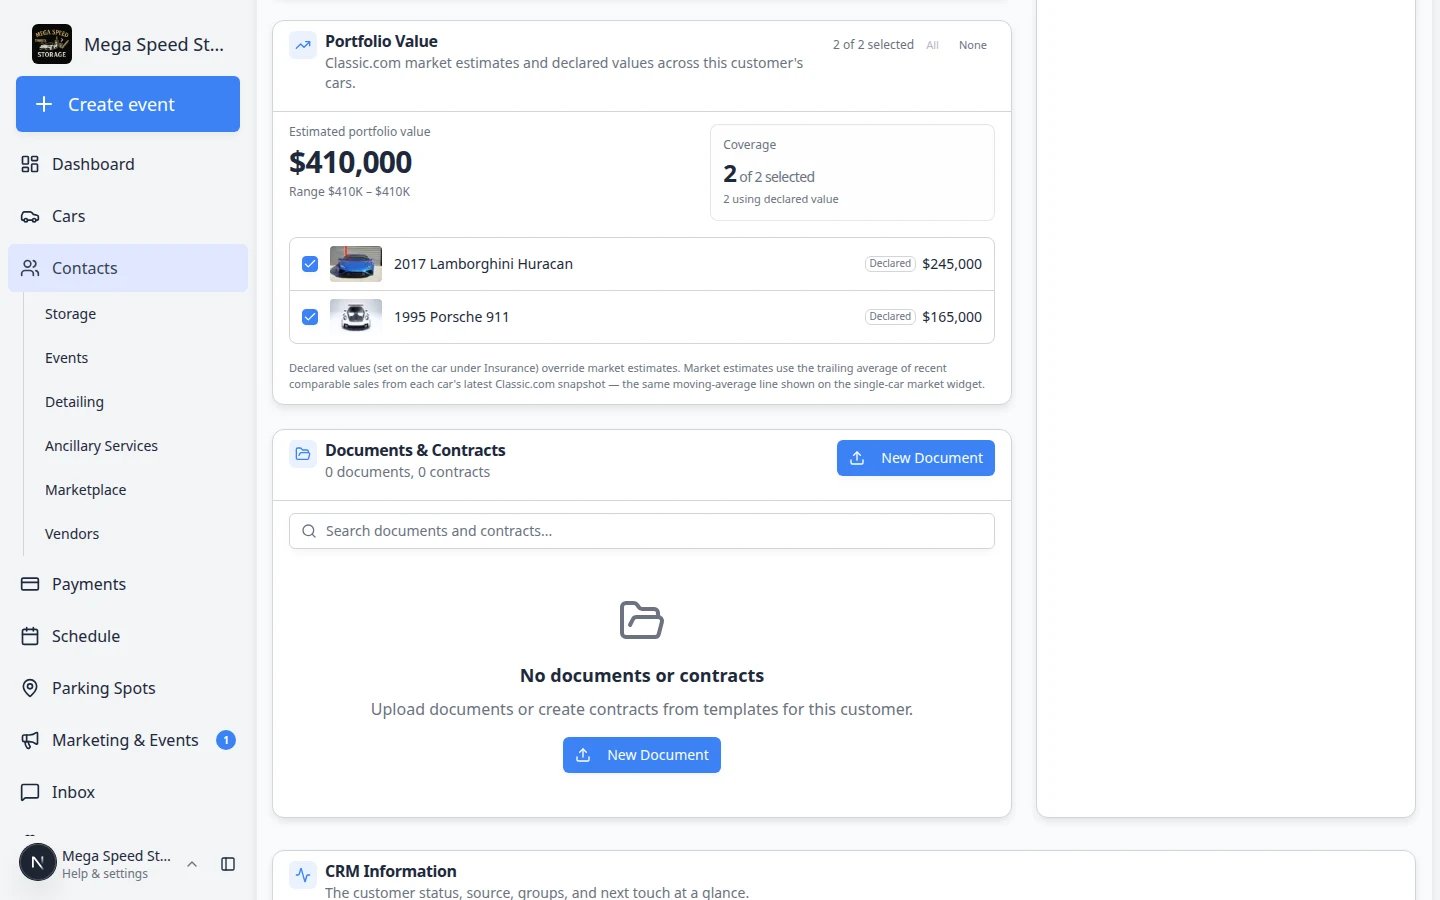
1
Open the customer detail page
Find the customer in All Contacts and open the record.Expected result: You see sections such as Personal & Contact, Customer’s Cars, and Documents & Contracts.
2
Scroll to Documents & Contracts
Scroll until you see Documents & Contracts. The header shows how many documents and contracts are on file.You can use the Search box in this section when the list grows long.
3
Click New Document
Click New Document in the top-right of the Documents & Contracts section.Expected result: The app asks what kind of document you are adding.
4
Choose Contract or General Document
Pick the type that matches your goal: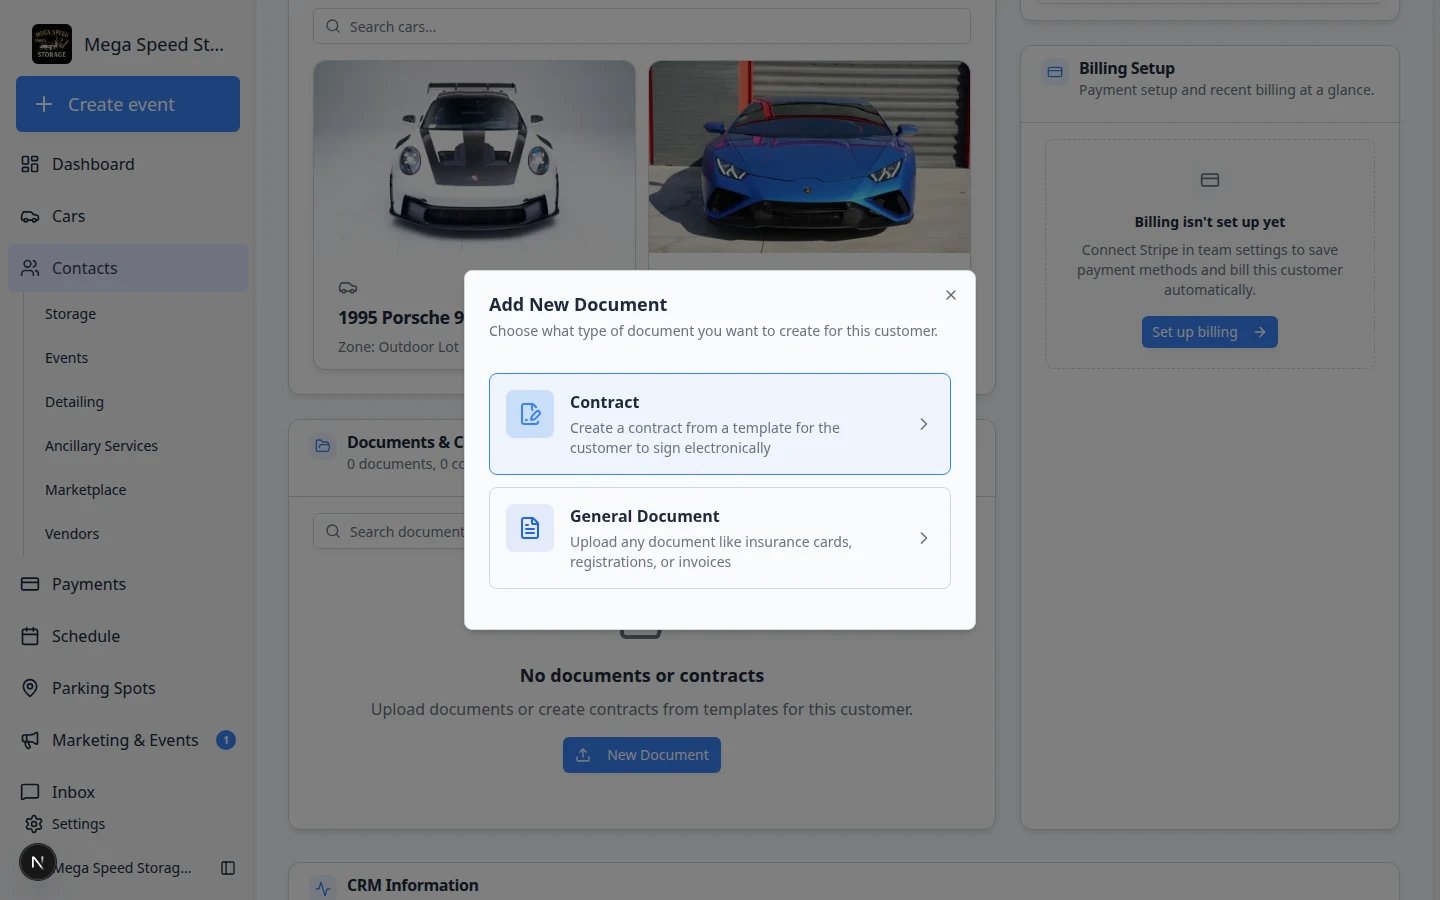
- Contract — The customer must sign electronically (storage agreement, liability waiver, and similar). For the full signing flow, read Send a contract for signature.
- General Document — You only need to store a file (insurance card, registration copy, appraisal PDF). No signature required.
5
Complete the on-screen steps
Follow the prompts to pick a contract template or upload a file. Attach the correct vehicle if the app asks which car the document belongs to.Expected result: The new item appears in the list under Documents & Contracts.
6
Use a clear name
Name the file so anyone on your team understands it—examples: Storage Agreement – Alex Morgan or Insurance Card – Porsche 911.Expected result: Months later, you can still find the right PDF without opening every file.
Check your work
After linking cars or documents, review the customer record:- The Customer’s Cars section shows the correct vehicles.
- The vehicle owner shown on each car is correct.
- Contracts or uploaded files appear under the correct customer.
- Anything the customer should see in the portal is ready before you invite them.
Recommended next steps
After the cars and documents are connected, you can:- Invite the customer to the portal
- Guide the customer through the portal
- Send a contract for signature
- Create an appointment
- Create an invoice