Documentation

How-to guides for Car Storage Software

Practical guides for setting up your facility, managing cars and customers, and running day-to-day operations.

Search documentation

Search documentation guides and how-to articles.

Browse documentation

Events

Test an event setup

Confirm an event type works correctly before customers or staff rely on it.

What you will accomplish

You will run a short practice appointment so you can see the event the same way your team and customers will see it. When you finish, you will know whether the event name, time slots, messages, photos, and resources are ready for real use.

Use this guide after you create or change an event type. Testing catches problems early—confusing names, missing fields, wrong hours, reminders that send at the wrong time, or bays that still allow double booking.

Testing is especially important when customers can book the event themselves.

Before you start

Use a safe test record

Use a real-looking test customer or vehicle when possible. This helps you see the same fields staff will see later.

Create a test appointment from Schedule

This is the fastest way to see how the event behaves on your calendar.

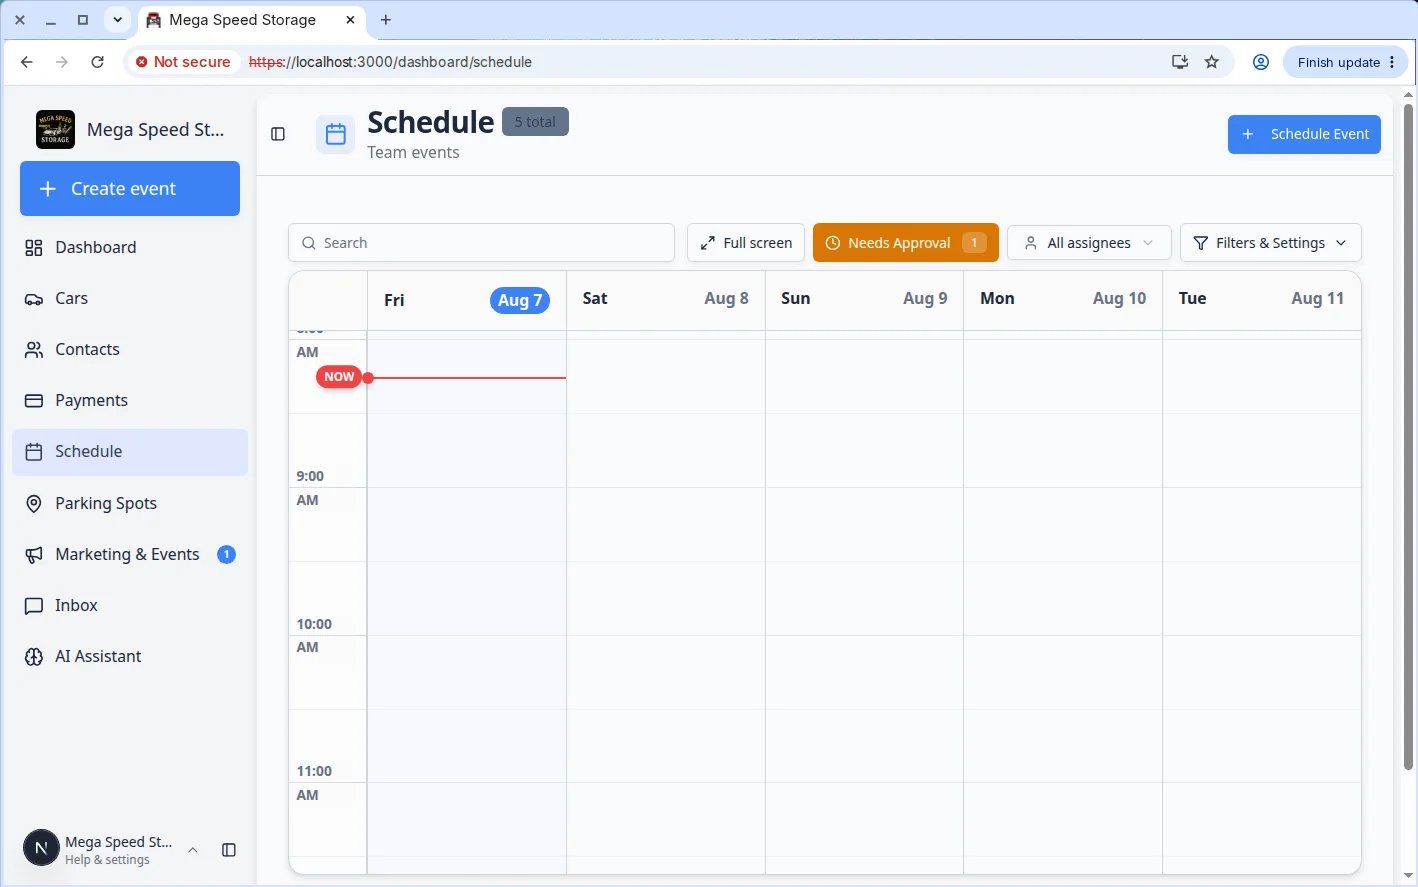
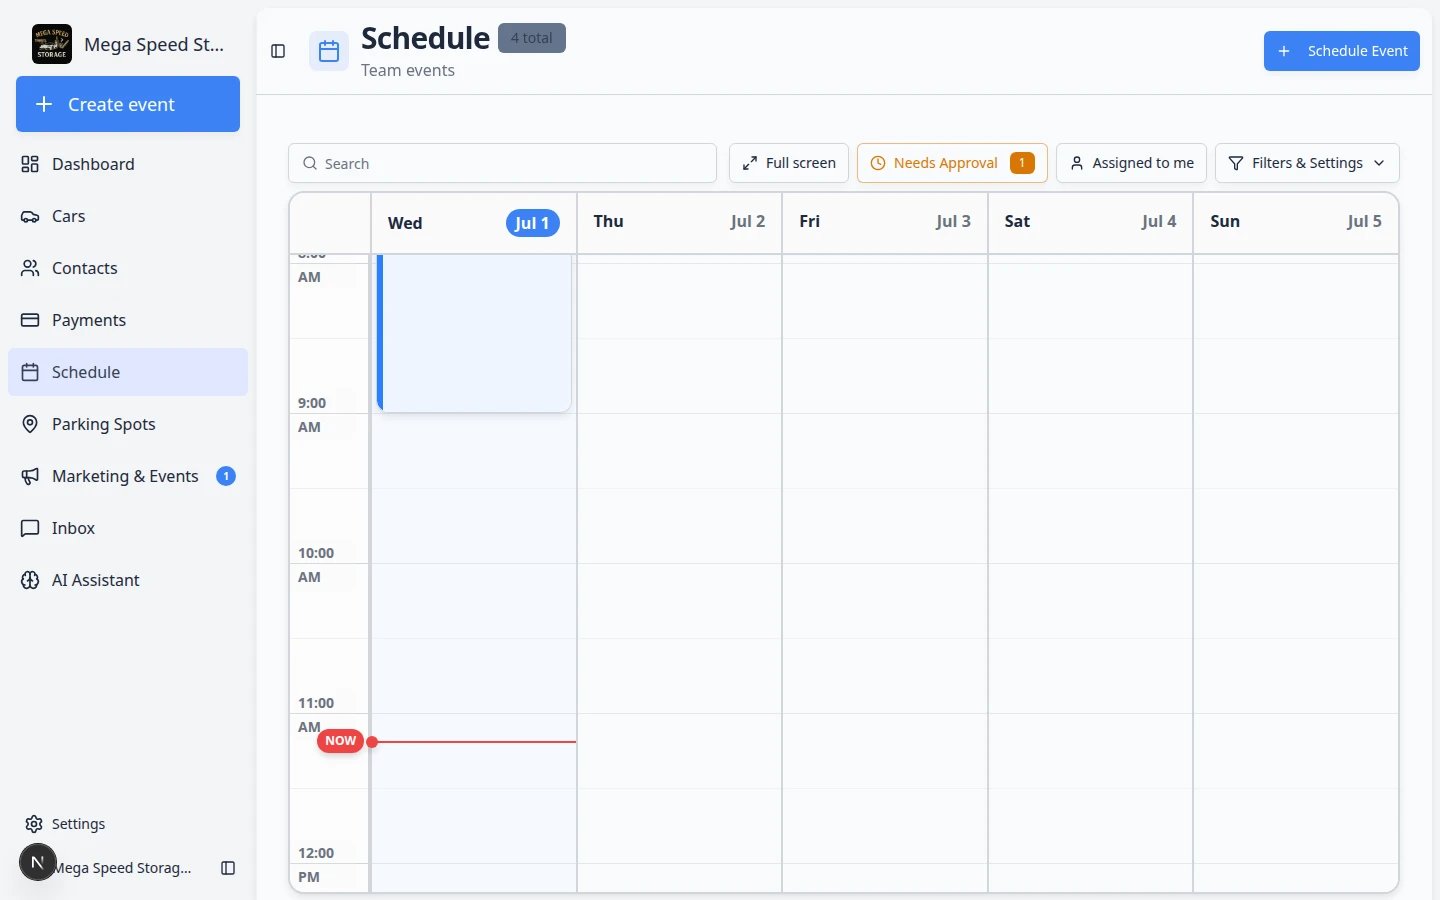
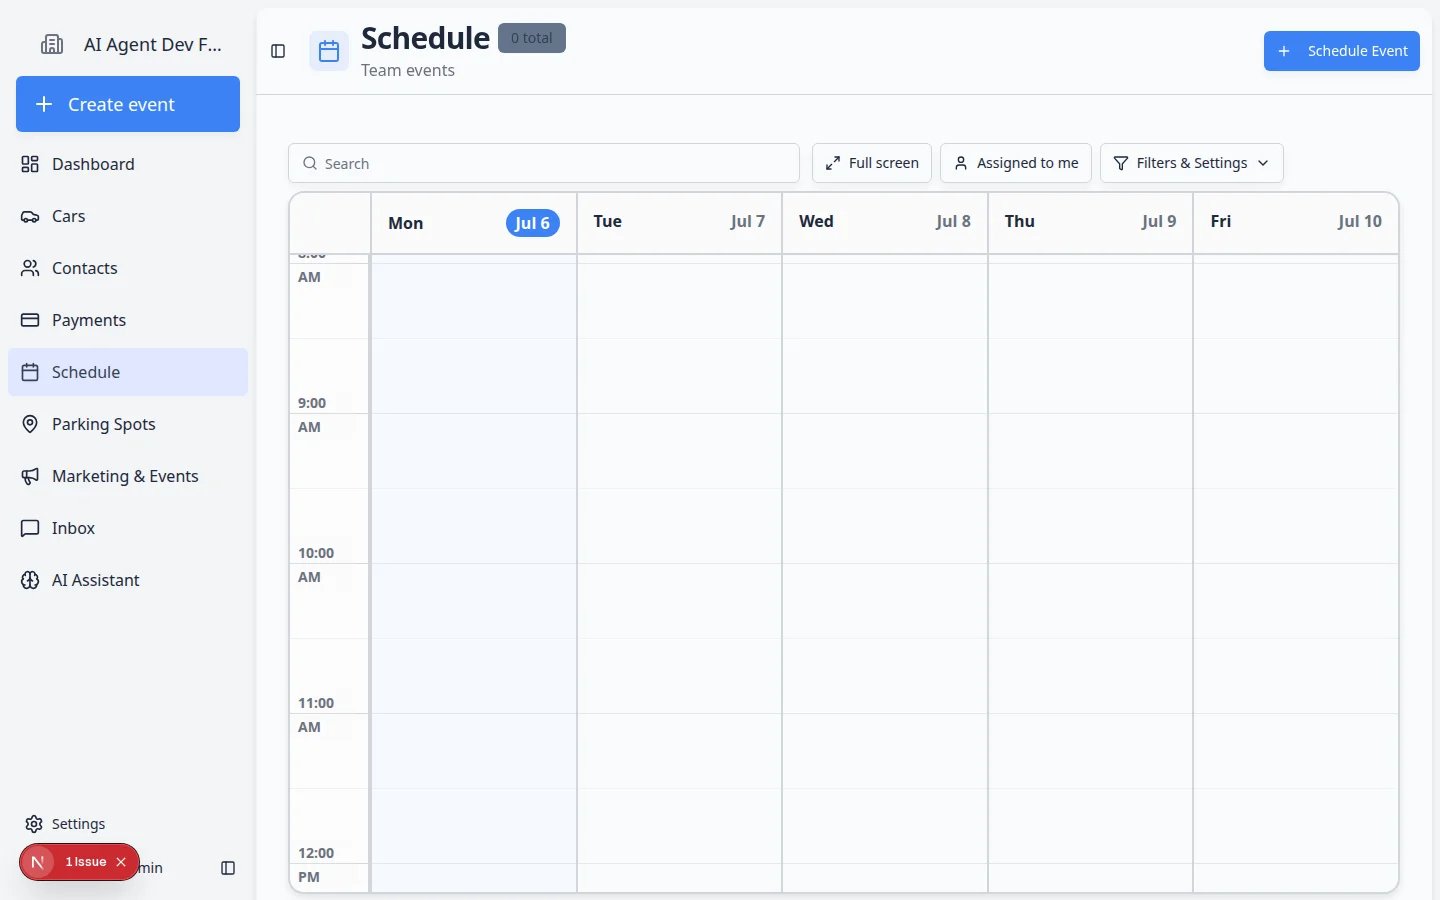
  1. Open Schedule

    In the left sidebar, click Schedule, or go directly to Schedule.

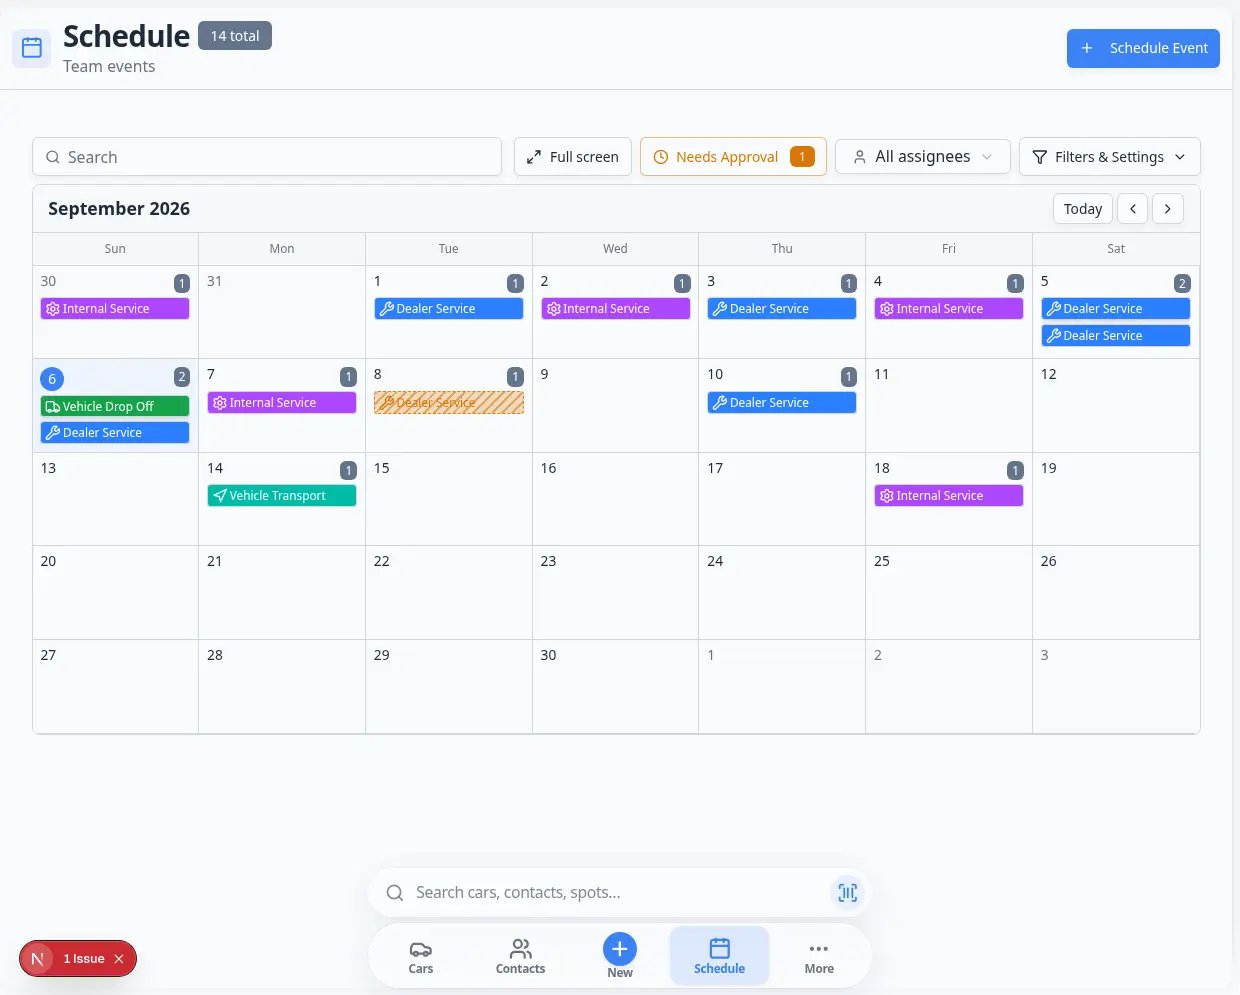
    Expected result: You see your calendar with colored appointment blocks for the days your team already has work scheduled.

  2. Click Schedule Event

    Click Schedule Event in the top-right area of the page.

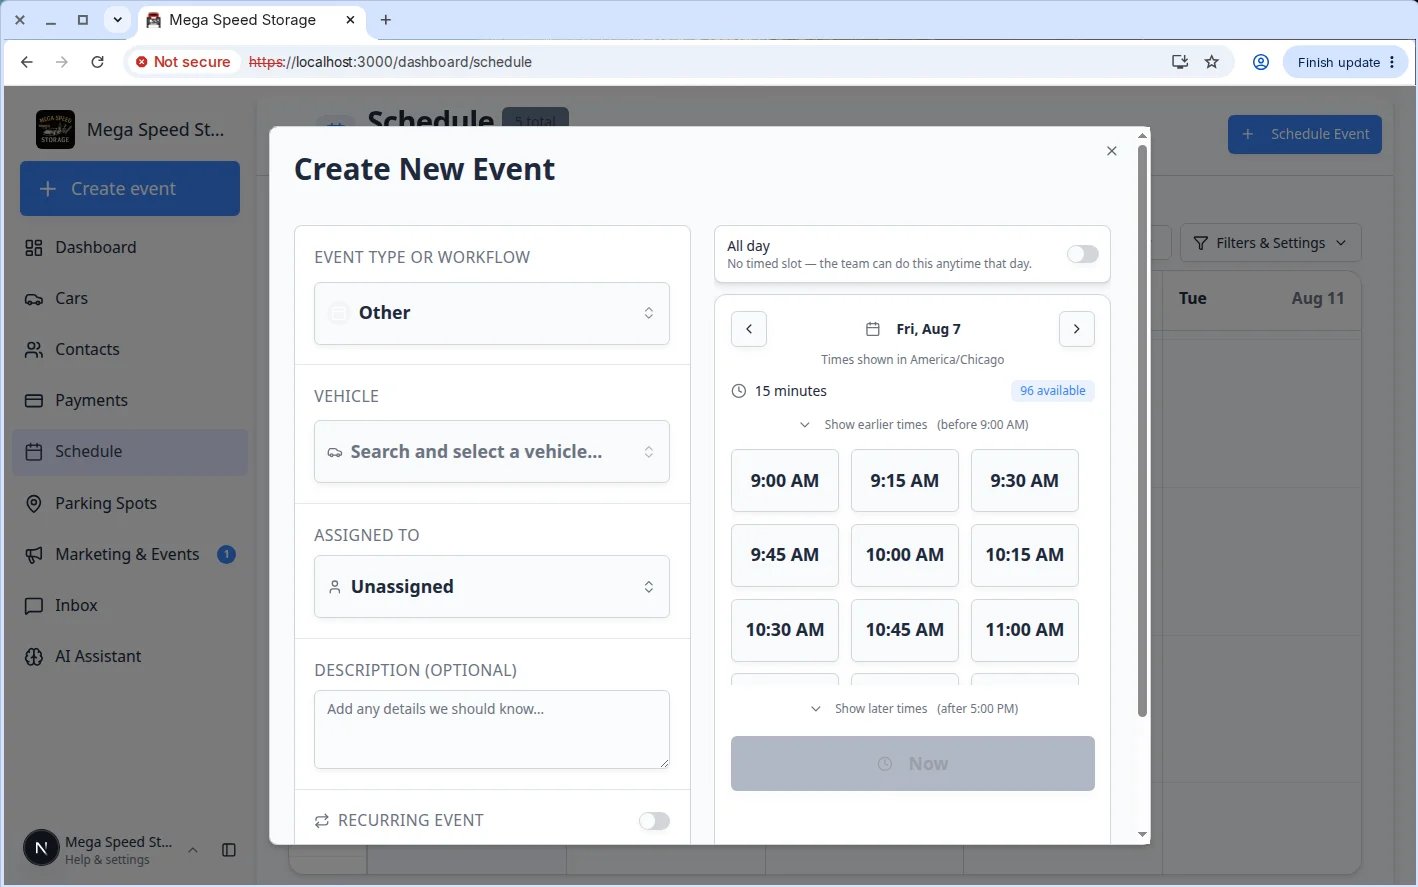
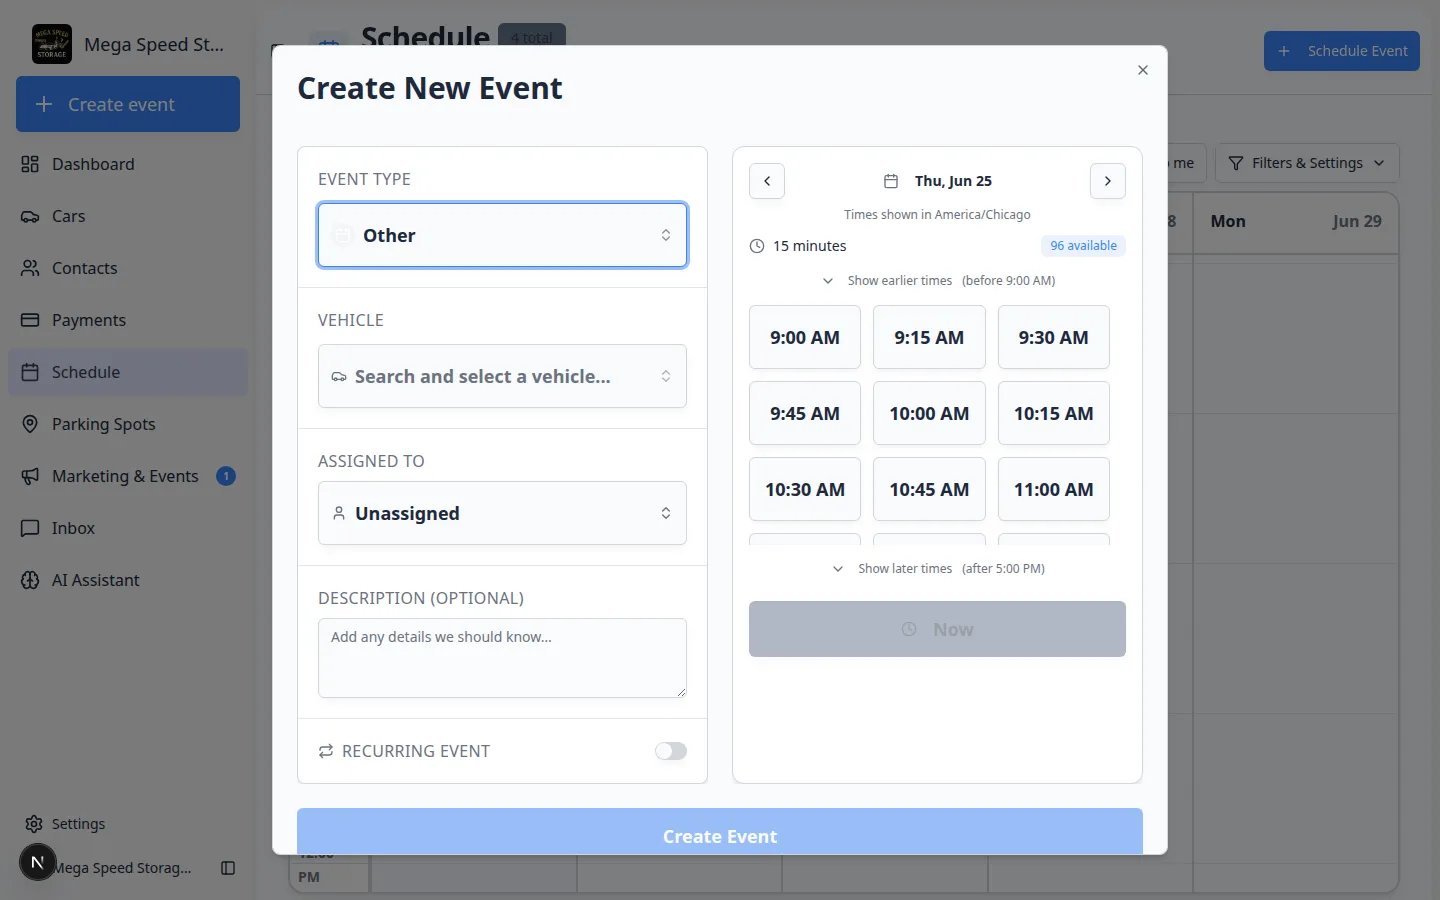
    Expected result: A window titled Create New Event (or Schedule Event) opens.

  3. Choose the event type

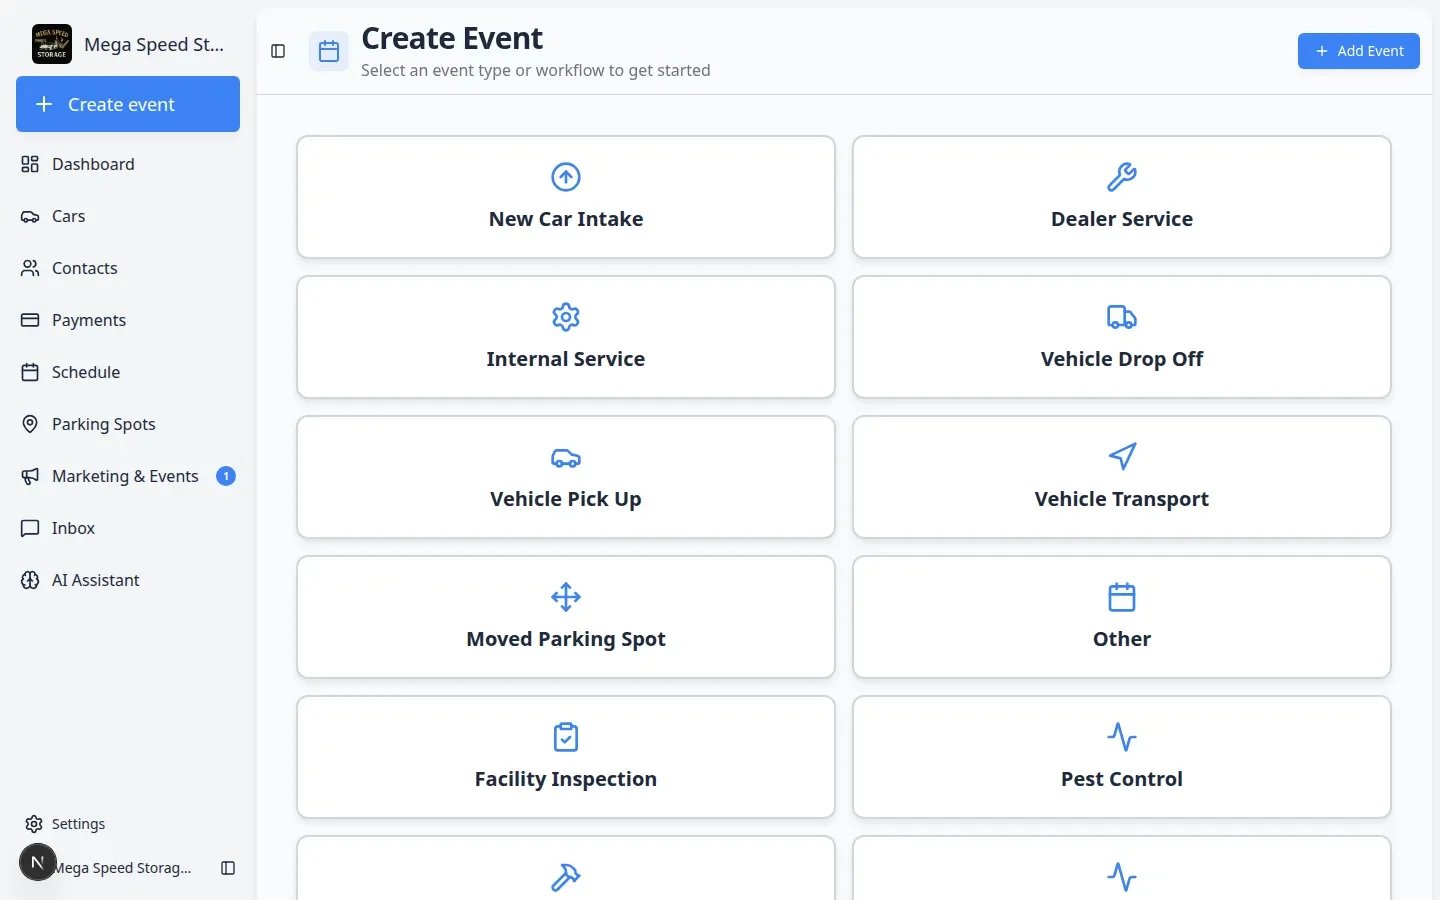
    Open the Event type list and select the event you are testing.

    Check that the name is easy to recognize and not too similar to another event type on the list.

  4. Choose the customer or vehicle if the form asks for one

    If the event is about a vehicle, search for and select a test car.

    If the event is about a customer only, select a test customer.

    If the event is for the whole facility (for example, a calendar block), the form should not require a customer or car.

    Expected result: The correct name appears in the vehicle or customer field before you pick a time.

  5. Choose an option if one appears

    If you created booking options (for example, Basic Detail or Premium Detail), pick one and confirm the option names make sense to a new staff member.

    If no option field appears, your team may use one default length for that event type.

  6. Check available times

    Pick a date on the calendar, then look at the highlighted time slots.

    Confirm the slots match your Scheduling hours, closed days, minimum notice, buffer time, and any resource rules.

    Try a date that should be open and, if you can, a date that should be closed. The closed date should show fewer or no slots.

  7. Add a clear test note

    In Description, type something obvious such as TEST – event setup check. This helps your team spot and remove the appointment later.

  8. Click Create Event

    Review the event type, customer or vehicle, date, time, and notes. Then click Create Event.

    Expected result: The window closes and a new colored block appears on the calendar at the time you chose.

Create New Event dialog on the Schedule page showing event type, vehicle, date picker, and available time slots
Use Schedule Event to test the same form your team uses every day. Check that the right fields appear and that time slots look correct.
Schedule calendar showing multiple colored appointment blocks across the week for different vehicles and event types
After you save a test appointment, it should appear on the calendar like other real work. Look for the correct color, time, and vehicle or customer name.

Check the event on the calendar

After saving, stay on Schedule and review the appointment you just created.

  • The event appears on the correct date and time.
  • The event type name and color are easy to recognize.
  • The right customer, vehicle, or facility information is attached.
  • The assigned staff member, if any, is correct.
  • The appointment length on the calendar looks right for the work (not too short or too long).

Click the appointment block if your team uses that to open details. Confirm the description shows your TEST note.

Open the event workflow from Schedule

If your event type uses photos, checklists, or other steps during the visit, confirm staff can start that workflow from the calendar.

  1. Click the test appointment

    On Schedule, click the colored block for your test event.

    Expected result: A detail panel opens on the right (or a dialog) showing the event name, time, customer, vehicle, and status.

  2. Look for Open Event

    If this event type has a linked workflow, you should see an Open Event button.

    Why this matters: Technicians use Open Event to take photos, complete checklists, and mark work finished—not just read the calendar block.

  3. Walk through one step

    Click Open Event and confirm photo prompts or checklist items appear in the order you expect.

    For day-to-day help, see Run event workflow from Schedule.

Schedule event detail panel showing customer, vehicle, status, and an Open Event button
If Open Event appears, your team can run the full visit from Schedule. If it is missing, review photo rules and event type settings.

Quick verification matrix

Use this table when you want a pass/fail check for each part of the setup.

What you set upHow to testPass signal
Event name and colorCreate appointment on ScheduleBlock is easy to spot; name matches what staff expect
Scheduling hoursPick an open weekday vs a day outside hoursSlots only appear during configured hours
Closed dayPick a blocked holiday date on customer booking; on Schedule month view, look for the marked dayCustomers see Unavailable; month view shows the closure
Booking option durationSave appointment and check block length on calendarBlock length matches the option you chose
Minimum noticeTry booking "today" if notice is 1 dayToday has no slots; tomorrow may
Resource / amenityBook two appointments same time, same baySecond booking blocked or shows conflict
NotificationsSubmit test with notifications onConfirmation email/text arrives (use test contact)
RemindersSchedule appointment 2+ days outReminder sends at configured time (check next day)
Photo rulesOpen event workflow from calendarRequired photo prompts appear in order
Customer bookingUse portal or website booking pageCustomer sees service name and open times

Check the setup areas that affect the appointment

Use this checklist to confirm the event is ready before you tell customers or staff to use it.

  1. Check scheduling

    Try a date that should be available and a date that should not be available.

    Expected result: Open dates show time slots for customers. Closed days show Unavailable on customer booking—or a marked day on the Schedule month view. Staff may still override from Schedule Event when a manager approves.

    Create New Event dialog on a closed date with Unavailable or no time slots shown
    Pick a holiday or whole-shop closed day in the test dialog. Customer-facing booking should show **Unavailable** or no selectable times.

    See Set closed days for events for setup help.

  2. Check booking options

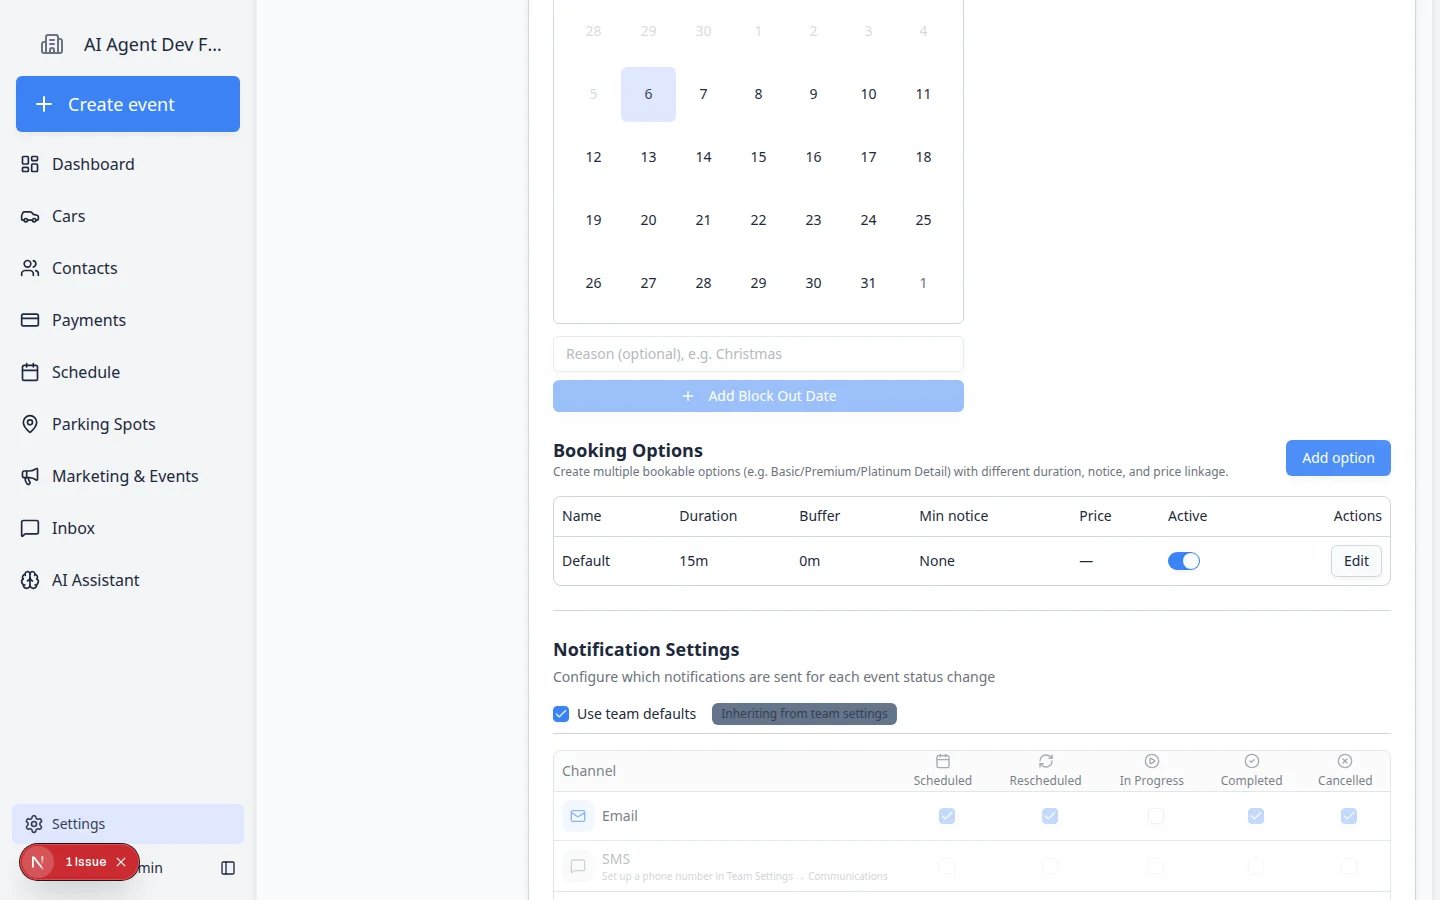
    If the event has options, open Settings > Events & schedule, click Edit on the event type, and scroll to Booking Options.

    Confirm each option has the correct duration, buffer, minimum notice, capacity, and Active status.

    Booking Options table on an event type edit page showing option name, duration, buffer, minimum notice, and active status
    Booking Options are one of the most important places to check before customers use a new event type.
  3. Check notifications and reminders

    On the same event type edit page, scroll to Notification Settings and Reminder Settings.

    Confirm the event uses the correct team defaults or custom settings.

    If you do not want test messages to send, turn off customer email or text channels before testing with a real customer email or phone number. See Set up event notifications and reminders.

  4. Check photo rules

    If photos are required, open the test appointment on Schedule and run the workflow (see Run event workflow from Schedule). Confirm the prompts are clear and in a sensible order.

    For setup help, see Configure photo rules.

  5. Check resources

    If a resource is required (bay, lift, room, or staff), try to book a second appointment at the same time for the same resource.

    Expected result: The app should block the conflicting time or show that the resource is not available.

Test from a car record (optional)

Some events are started from Cars instead of Schedule. If your team uses that path, run this quick check too.
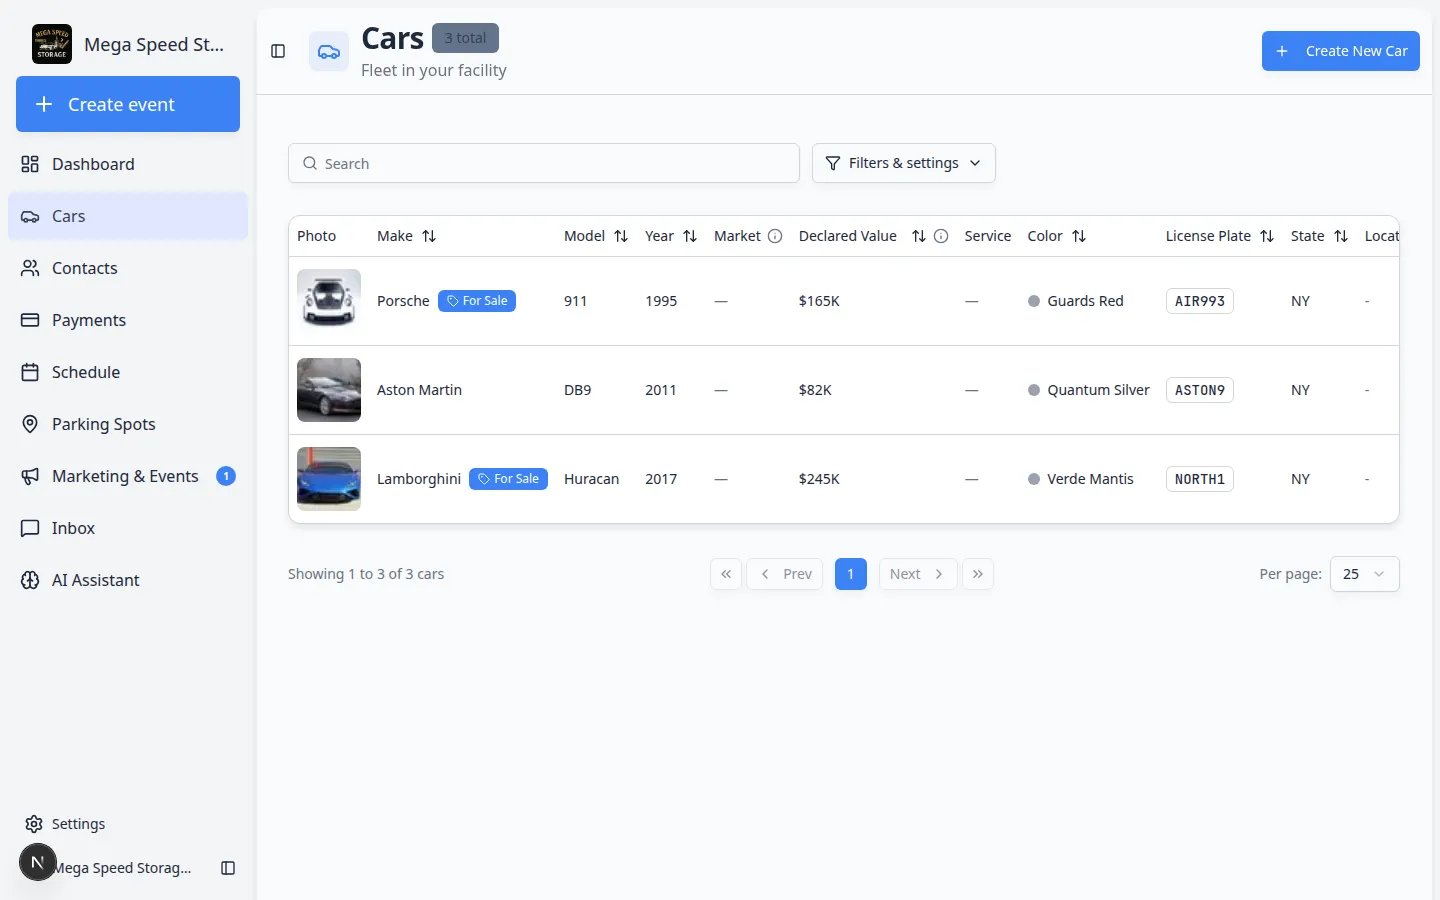
Car detail page for a Lamborghini Huracan showing the Add menu with Create event option
From a vehicle record, open the **+ Add** menu and choose **Create event** when the visit is about that specific car.
  1. Open a test car

    Go to Cars and open a vehicle that fits this event type.

  2. Click Event

    At the top of the car page, click + Add, then choose Create event.

    Why this matters: Starting from the car record saves time—the app already knows which vehicle the visit is for.

  3. Choose the same event type

    Select the event type you are testing and pick a time slot.

  4. Create the event

    Click Create Event and confirm the new event appears in Vehicle Activity on the car page.

    Expected result: The car’s activity list shows the new event with the correct type and time.

For a full walkthrough of car-based events, see Start a car session.

Test the customer-facing path when customers can book it

If Customer Accessible is turned on, test the customer path too.

  1. Confirm Customer Accessible is on

    Open the event type from Settings > Events & schedule and click Edit. In Access & Status, confirm Customer Accessible is on and Active is on.

  2. Open the customer booking area your team uses

    This may be the customer portal, a booking box on your website, a registration page, or a facility web page.

    If you are not sure which page customers use, review Facility Web Pages and Choose the right public link.

  3. Find the event type

    Confirm the event name and description make sense to a customer who has never used your software before.

    Avoid internal shorthand unless your customers already use those words.

  4. Choose a time

    Confirm available times match what you expect from your scheduling test.

  5. Stop before final booking if you do not want messages sent

    If this is only a visual check, stop before submitting the booking.

    If you submit the booking, label it as a test and cancel it after you finish.

Clean up after the test

  1. Open the test appointment

    Find the test appointment on Schedule.

  2. Cancel or delete it if it is not needed

    Remove the test appointment so staff do not treat it like real work.

    For steps, see Cancel or delete a scheduled event.

  3. Keep notes if something was confusing

    If a name, field, reminder, or time slot was confusing, update the event type before real customers use it.

What success looks like

After testing:

  • The event type is easy for staff to choose from the list.
  • The right customer, car, or facility fields appear when someone creates the event.
  • Available times match your real operating process.
  • Booking options have the correct duration, buffer, notice, and capacity.
  • Closed days block the right dates.
  • Messages and reminders are correct and not excessive.
  • Photo prompts and resource rules appear when expected.
  • You removed or cancelled test appointments so the calendar stays accurate.

Troubleshooting
What to do next

After the test works:

  • Tell your team which event type to use and when to use it.
  • If customers can book it, review the public-facing name and description one more time.
  • Use Create an appointment to train staff on day-to-day scheduling.
  • Use Events overview to see how this event fits with your other setup guides.