

What you will accomplish
You will walk through checkout the same way a customer would—from the product list to the cart to the contact form—and confirm names, prices, and staff follow-up locations are correct before you share a marketplace link.When to use this guide
Use this guide before customers buy products, services, memberships, or storage plans from your product marketplace. Run this test when:- You turn on the product marketplace for the first time
- You add a new paid plan or change a price
- A customer reported confusion at checkout
- You are about to put a marketplace link on your website or in an email
Before you start
- Marketplace options are turned on in Settings > Website & customer app.
- The item is active in Payments > Products and services.
- The item has at least one pricing variant customers can select (not Contact for pricing only).
- The item is set to Show on marketplace in Payments > Products and services.
- A manager reviewed the price, billing schedule, and customer-facing description.
- Payment processing is connected if customers will pay by card online.
Step 1: Copy the product marketplace link
1
Open Website & customer app
2
Copy the product marketplace link
On Settings > Website & customer app, find Shareable links near the top.Click Copy on the Marketplace card, then open that link in a private browser window and choose Products in the menu.You can also copy Main page and add
/marketplace/products to the end of the address, or open Marketplace and click View marketplace, then Products.Expected result: You have the customer-facing products link, not a staff dashboard address.Step 2: Open the marketplace like a customer
1
Use a private browser window
Open the copied link in a private or incognito window—or a browser where you are not signed in to the staff dashboard.Why this matters: Customers never see your staff sidebar. You should see what they see.
2
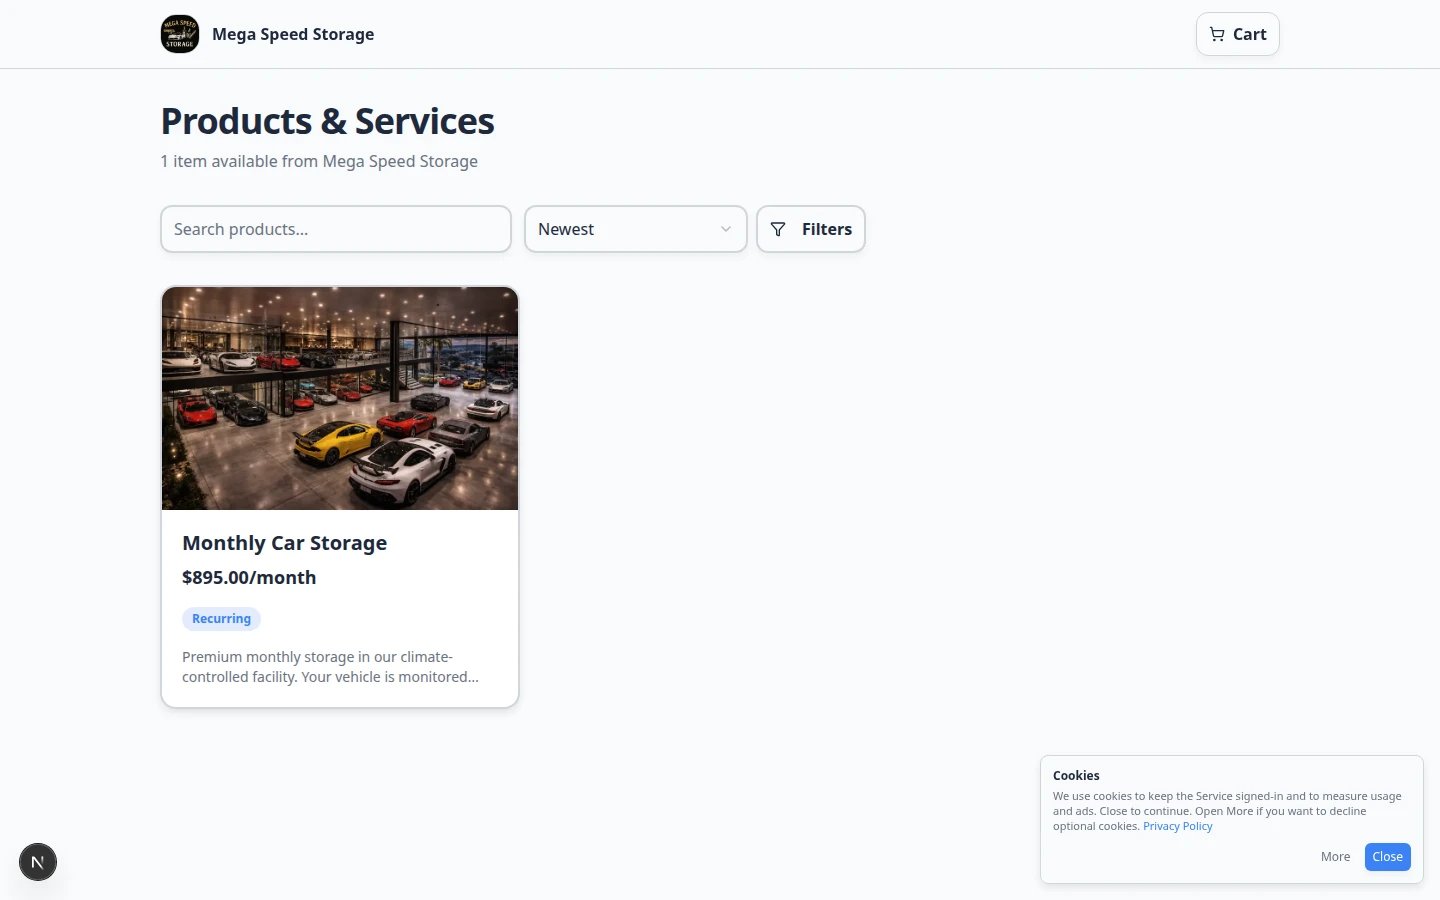
Scan the product list
Check:
- At least one item appears
- Names are clear (for example, “Monthly Climate Controlled Storage”)
- Prices match what your team expects
- Descriptions explain what the customer receives
- Draft or internal-only items are not visible
Step 3: Open the product and add it to the cart
1
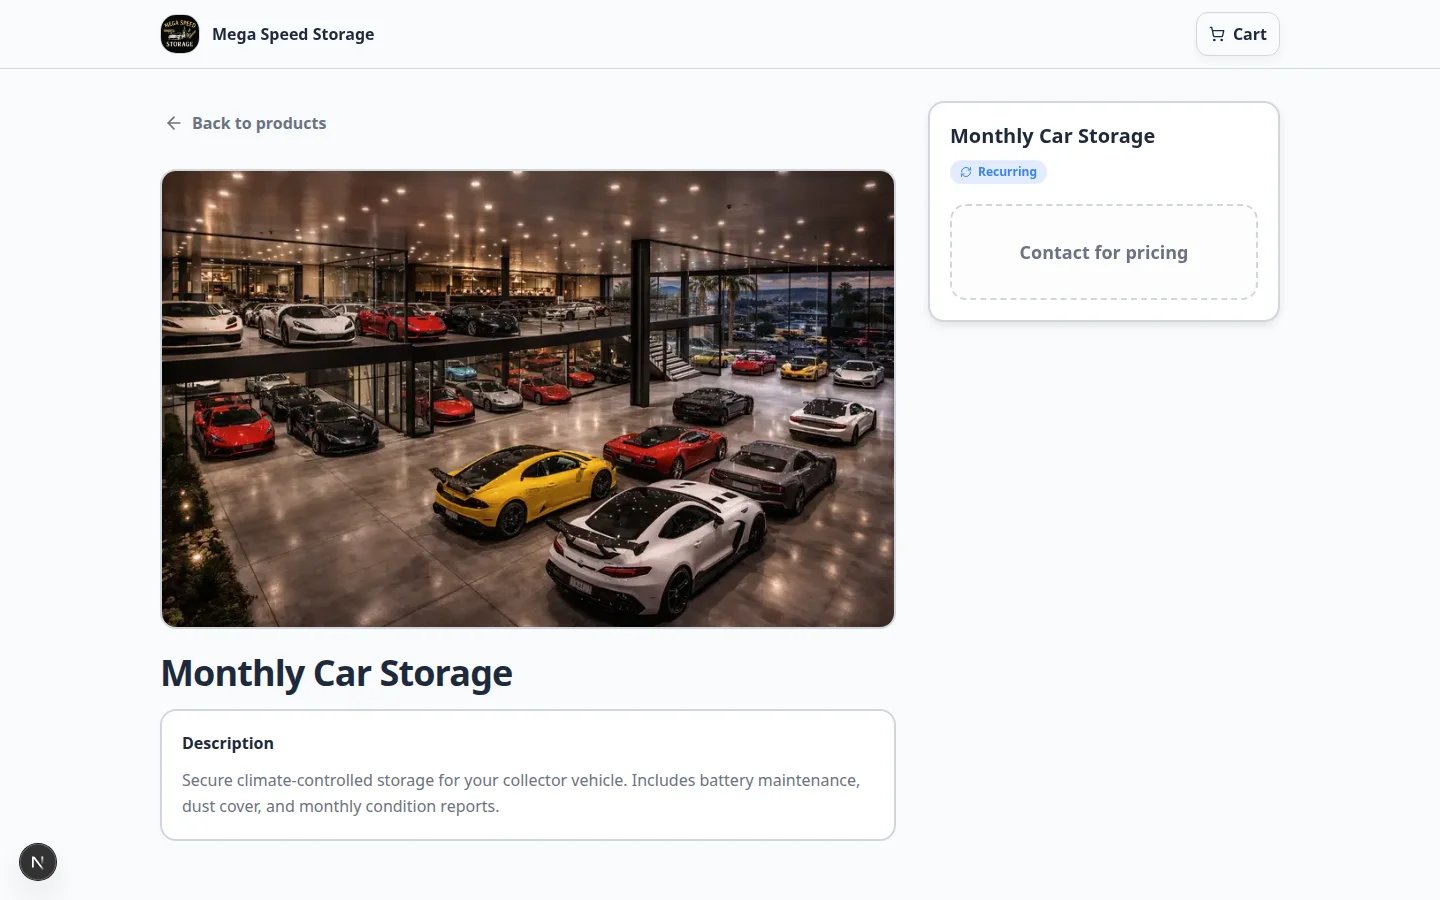
Click the product card
Open the plan or service you want to test.Some products offer more than one price (for example, different storage levels). Click the option that matches what you want to test.If you only see Contact for pricing, the product may not have a pricing variant yet. Open the product in Payments > Products and services, click Add variant, save a price option, then test again.
2
Click Add to cart
Click Add to cart when the button appears.Expected result: The cart shows the correct name, price, and billing schedule (such as monthly).
Step 4: Open checkout and review contact details
1
Click Checkout
From the cart or product flow, click Checkout.
2
Review Your Details
Checkout usually asks for first name, last name, and email first. Some facilities also ask for a phone number.Expected result: The customer knows which fields are required and what happens after they click Continue.
- Your facility name is correct
- The cart summary shows the right product and price
- Repeating charges clearly say monthly or another schedule
- Required fields are marked clearly
Step 5: Complete your facility’s safe test path
Follow your team’s approved test process from here.1
Fill in Your Details
Enter first name, last name, and email. Click Continue.Expected result: The page moves to email verification or payment—depending on your setup.
2
Verify email (if shown)
Check the test inbox for a verification code. Enter the code and click Verify & Continue to Payment (or similar).Why this matters: This step ties the purchase to the correct person before payment. If you skip this during testing, a real customer may get stuck here later.
3
Complete payment (if card payments are on)
Continue only with test card details your facility approves. Stripe may show an embedded payment form on the same page.Expected result: You see a clear success message when payment finishes.
4
Confirm staff follow-up locations
Sign back into the staff dashboard and check Contacts, Payments > Invoices, and Payments > Recurring if the customer bought a repeating plan.
Step 6: Confirm where staff will see the result
After your test, sign back into the staff dashboard and check the places your facility uses:1
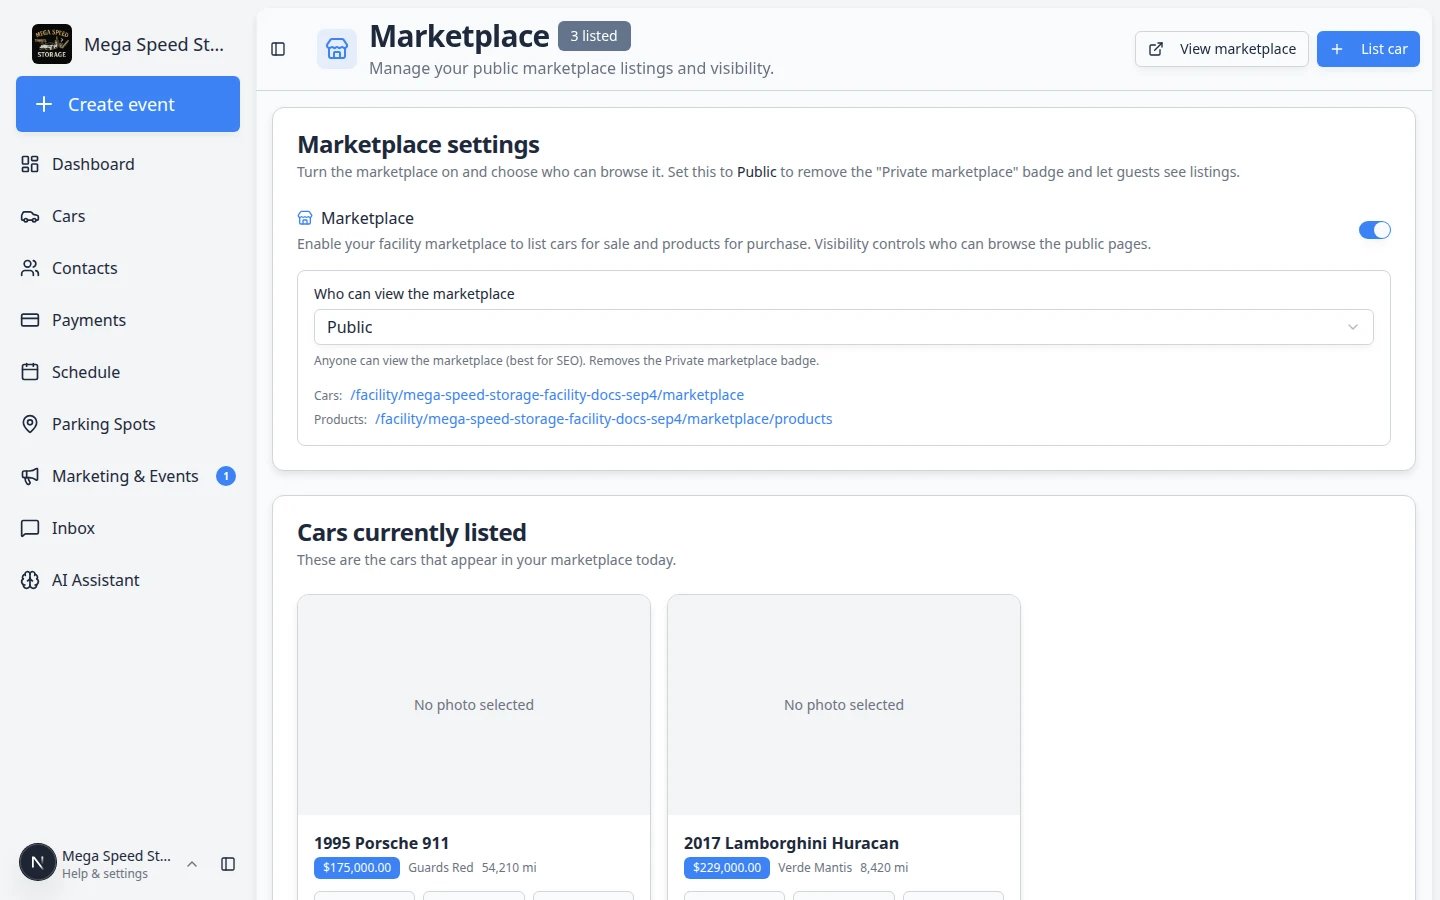
Open Marketplace in the dashboard
Go to Marketplace to confirm listings look correct from the staff side.Expected result: The same products or cars you saw on the public page appear here with the correct status.
2
Check Contacts, Invoices, and Recurring
Open Contacts, Payments > Invoices, and Payments > Recurring if the customer bought a repeating plan.Why this matters: Your team needs to know where the purchase lands before a real customer checks out.
- Contacts for a new or updated customer
- Payments > Invoices for customer billing records
- Payments > Recurring if the customer bought a repeating plan
- Inbox if your team sends follow-up messages from the app
What success looks like
- Only approved items appear on the public marketplace.
- Product, cart, and checkout totals all match.
- A customer can complete contact details without confusion.
- Staff know where the customer record, invoice, or subscription will appear.
- You tested the full path in a private window before sharing the link.
Troubleshooting
What to do next
- Choose the right public link to share when you send marketplace links to customers
- Manage products and services to keep pricing and descriptions accurate
- Go live checklist for public pages before a wide launch