

What you will accomplish
You will create a customer invoice your facility can send, save for review, or charge when payment processing is set up. Use this guide when someone owes your facility money for storage, detailing, transport, event fees, amenities, or another one-time charge. A good invoice uses plain language, correct totals, and the right payment option so the customer can pay without calling your office.New to Payments?If you are not sure which page to use, start with the Payments overview. It explains invoices, quotes, recurring charges, and vendors in plain language.
When to use an invoice (instead of a quote or recurring charge)
Invoice — The amount is decided and you are ready to bill.Quote — The customer should approve pricing first. See Create a quote.Recurring — The same charge repeats on a schedule (for example monthly storage). See Manage recurring billing.
Before you start
- The customer exists in Contacts. If not, add them with Add a customer.
- The customer’s email is correct if you plan to email the invoice.
- You know what you are charging for, the amount, quantity, and whether tax applies.
- Optional: reusable pricing exists in Products & Services so you do not retype line items each time.
- Payment processing is connected in Settings > Billing if you plan to send or charge online. Your team can still save a draft without it.
Open the Invoices page
- Sign in to your facility dashboard.
- In the left sidebar, click Payments.
- Click Invoices, or go directly to Payments > Invoices.
1
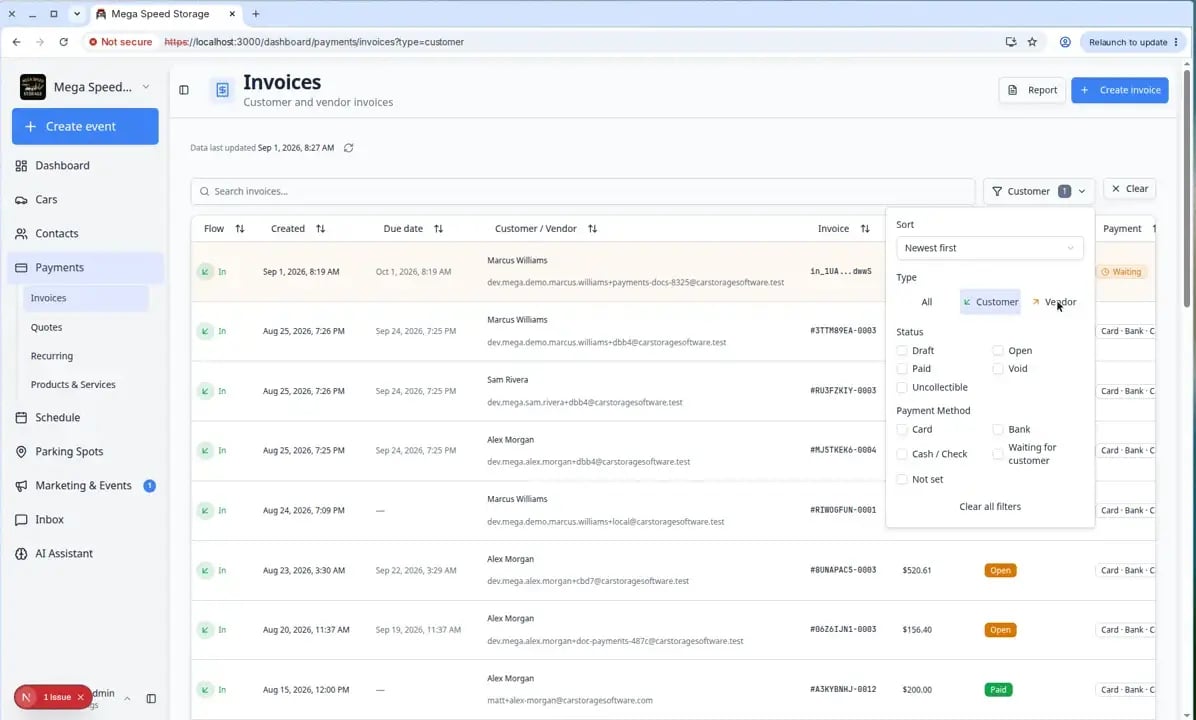
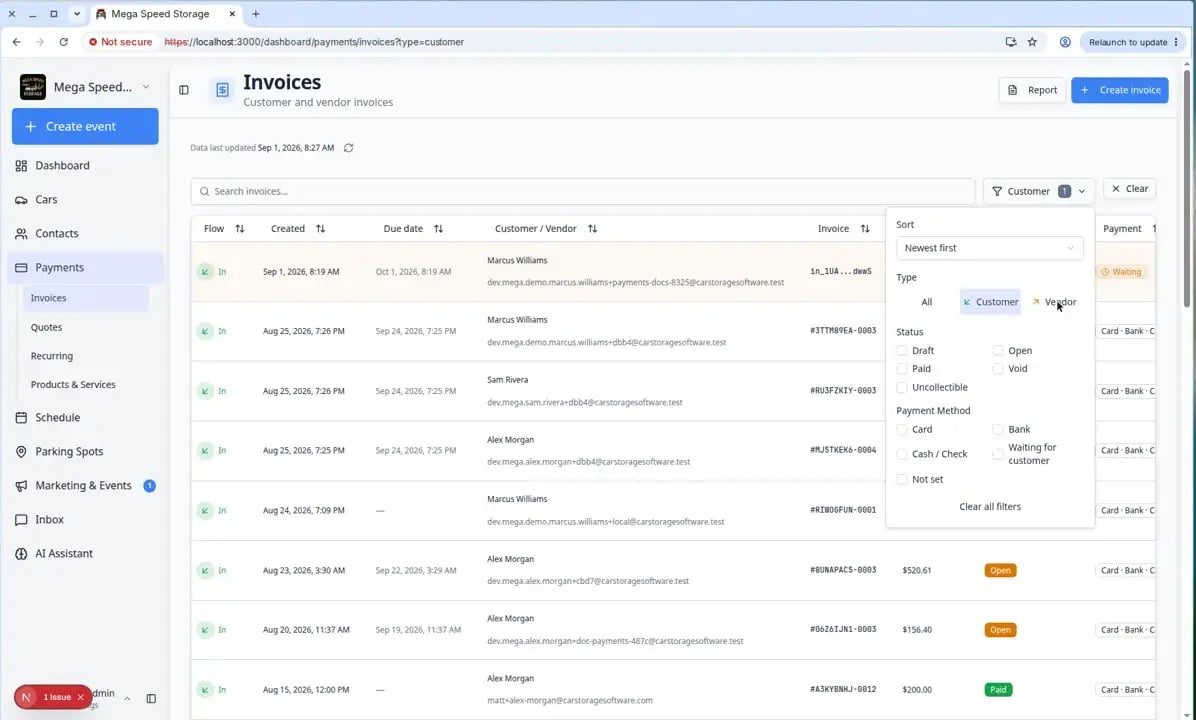
Filter to customer invoices (recommended)
Click Filters on the toolbar. Under Type, click Customer.Why this matters: Vendor rows are bills your facility receives from outside companies. Filtering to Customer keeps your list focused on bills you send.Expected result: Only customer invoices appear. You still see names, invoice numbers, status, amounts, and dates.
Start a new invoice
1
Click Create invoice
In the top-right area of the page, click Create invoice.Expected result: A window titled Issue Invoice opens. (Some teams see Issue Invoice as the main title at the top of the window.)
Creating a bill vs fixing one laterThis guide is for new charges. If you need to void a wrong invoice, lower an open balance, or edit line items after sending, use Void, credit, or correct an invoice.
Choose the customer
1
Search for the customer
Click the customer field and type a name or email. Select the correct person or company from the list.Why this matters: The invoice, payment history, and customer portal all connect to this customer record. Choosing the wrong customer causes payment and email problems later.
2
Confirm the email on the right
After you select a customer, check that the email shown looks correct. This is often where the invoice email will be sent.Expected result: The customer name and email match who should receive the bill.
Customer on statement billing?Some customers receive one combined monthly statement instead of separate invoices for every small charge. If your manager says a customer is on statement billing, confirm the payment behavior matches your facility policy before you send a standalone invoice. Statement settings live in Settings > Billing.
Choose how the customer will pay
Before you add line items, pick what should happen after you create the invoice. The labels may vary slightly, but most facilities see options like these:Charge on file — Use when the customer already saved a card or bank account and your team has permission to charge it now.Send to customer — Use when the customer should receive an email and pay from the invoice link.Auto charge on due date — Use when your team wants the system to collect payment later on the due date (when a saved payment method exists).Request payment preference — Use when the customer must choose how they want to pay before the invoice can move forward. The system emails daily reminders until they choose. You can pause those reminders later on that invoice if they already arranged to pay another way.Save as draft — Use when a manager should review the invoice before anything is sent or charged.
1
Pick the payment behavior
Select the option that matches your facility’s policy and what the customer agreed to.Expected result: The rest of the form updates to match your choice (for example due date or payment method fields).
2
Set the due date when asked
Choose when payment is due. Storage facilities often use the end of the month or a date written in the storage agreement.Expected result: The due date appears on the invoice the customer sees.
Add line items (the charges)
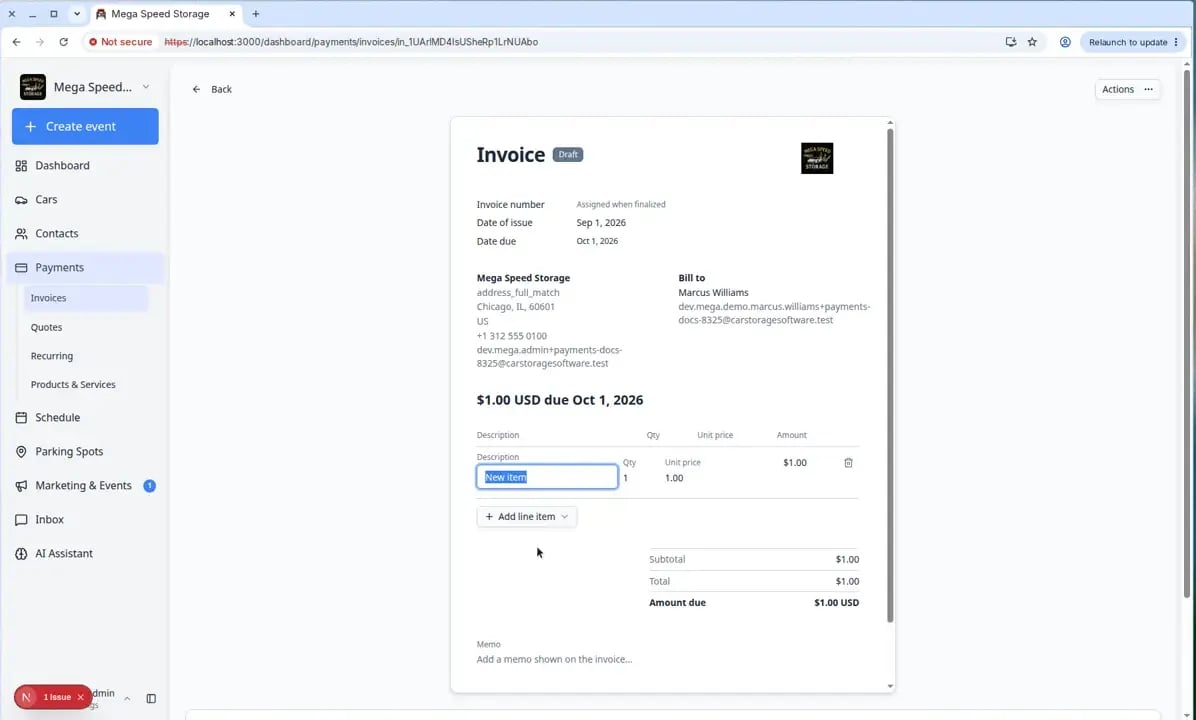
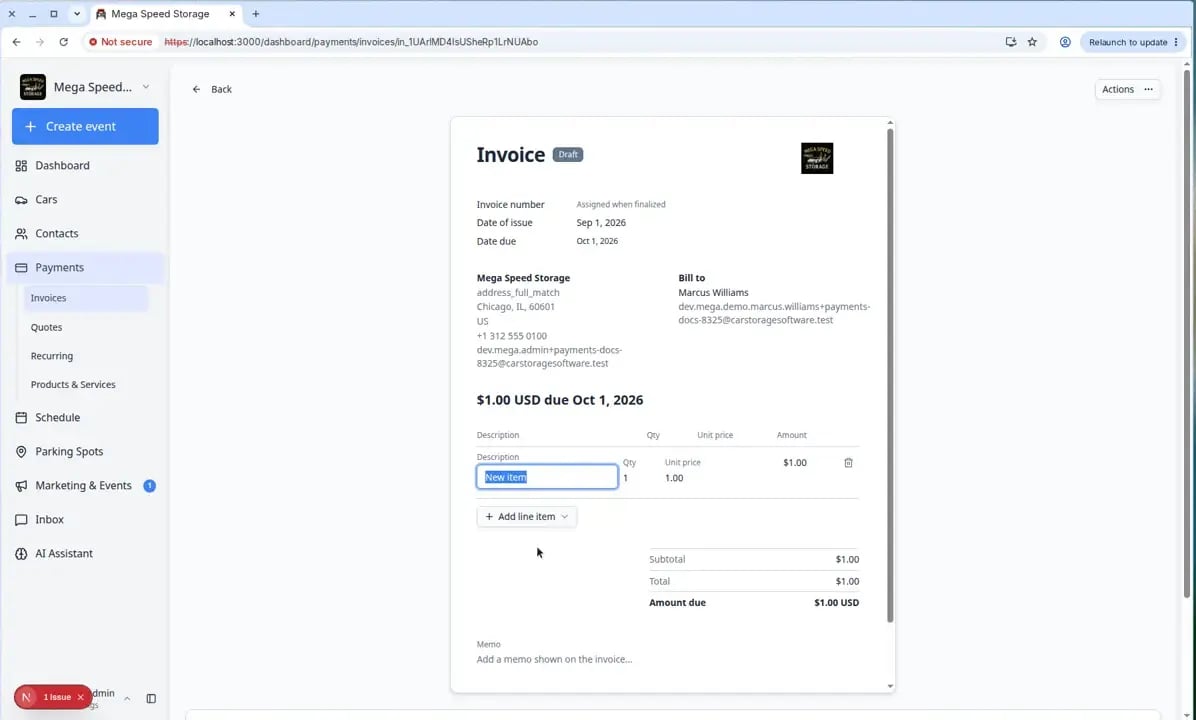
A line item is one charge on the invoice. If your team uses saved pricing, pick a product or service from Products & Services so you do not retype the same charge every month.1
Add the first line item
Choose a saved product or service from your list, or add a custom line item if your team allows it.Use names the customer will recognize, such as May 2026 Climate Controlled Storage, Premium Detail — Porsche 911, or Transport to Werks Reunion.Expected result: The first line shows a description, quantity, unit price, and line subtotal.
2
Check quantity, price, and tax
Review quantity, unit price, and tax for each line. If the charge covers more than one car or month, make sure the quantity is correct.Expected result: Each line shows a subtotal that makes sense for that charge.
3
Add more lines if needed
Click to add another line item for separate services (for example storage plus detailing on the same invoice).
Review totals before you finish
1
Check subtotal, tax, fees, and total
Look at subtotal, tax, any processing fee, and the final total. This is your best chance to catch a mistake before the customer sees the invoice.
2
Click the final button
Click the button at the bottom of the window. The label depends on what you chose—for example Send invoice, Charge now, or Save draft.Expected result: The window closes and a success message may appear.
What success looks like
After you create an invoice: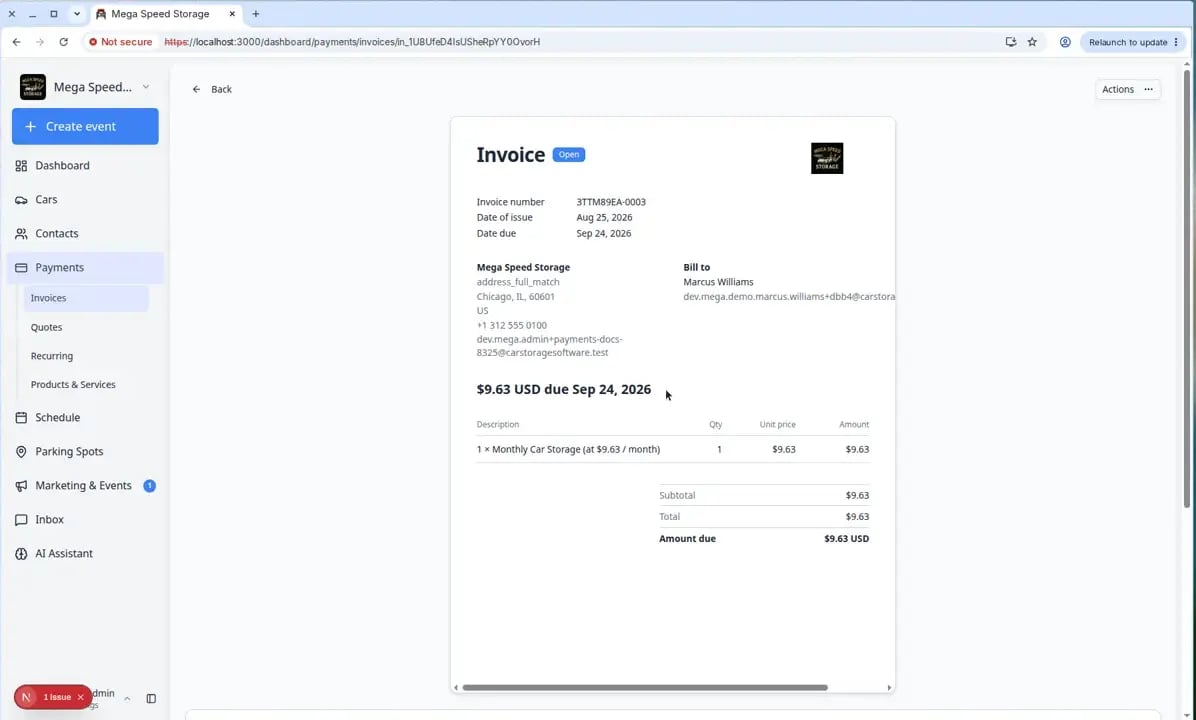
- The invoice appears on Payments > Invoices (use Filters → Type → Customer to find it quickly).
- The Status column shows where things stand—often Draft, Open, Paid, or Waiting for customer.
- If you sent the invoice, the customer can open the link from their email to review or pay.
- Your team can open the invoice later to resend, collect payment, or record cash/check—see Send and collect customer payments.
Common mistakes to avoid
- Do not bill the wrong customer—double-check the name and email before sending.
- Do not use a recurring product for a one-time charge unless that is intentional.
- Do not send the invoice until the total, tax, and due date are correct.
- Do not choose Charge on file unless your team has permission to use the customer’s saved payment method.
Troubleshooting
What to do next
- Invoice created and you need to collect payment → Send and collect customer payments
- Same charge every month → Manage recurring billing
- Customer should approve pricing first → Create a quote
- Building reusable pricing → Manage products and services