

- Who is interested in becoming a customer?
- Where are they in our process?
- What type of customer are they?
- How did they find us?
- When should we follow up?
What you will accomplish
- Name the follow-up stages your team uses (for example New Lead, Contacted, Active Customer).
- Group stages as Lead, Customer, or Former Customer so the Contacts board stays organized.
- Set auto due dates so follow-up does not slip through the cracks.
- Create Customer types, Customer sources, and Vendor types so staff pick consistent labels.
- Confirm the same stage names appear in Contacts Board view.
Before you start
- Write down the real steps your team uses from first inquiry to active customer.
- List the customer types your facility serves, such as storage, events, detailing, or marketplace.
- List common lead sources, such as referral, website, phone call, auction, event, or social media.
- Decide how quickly staff should follow up at each stage.
Open CRM settings
Go to Settings > CRM. The CRM settings page autosaves changes. You may see Autosaves changes, Saving…, or Saved near the top of the page.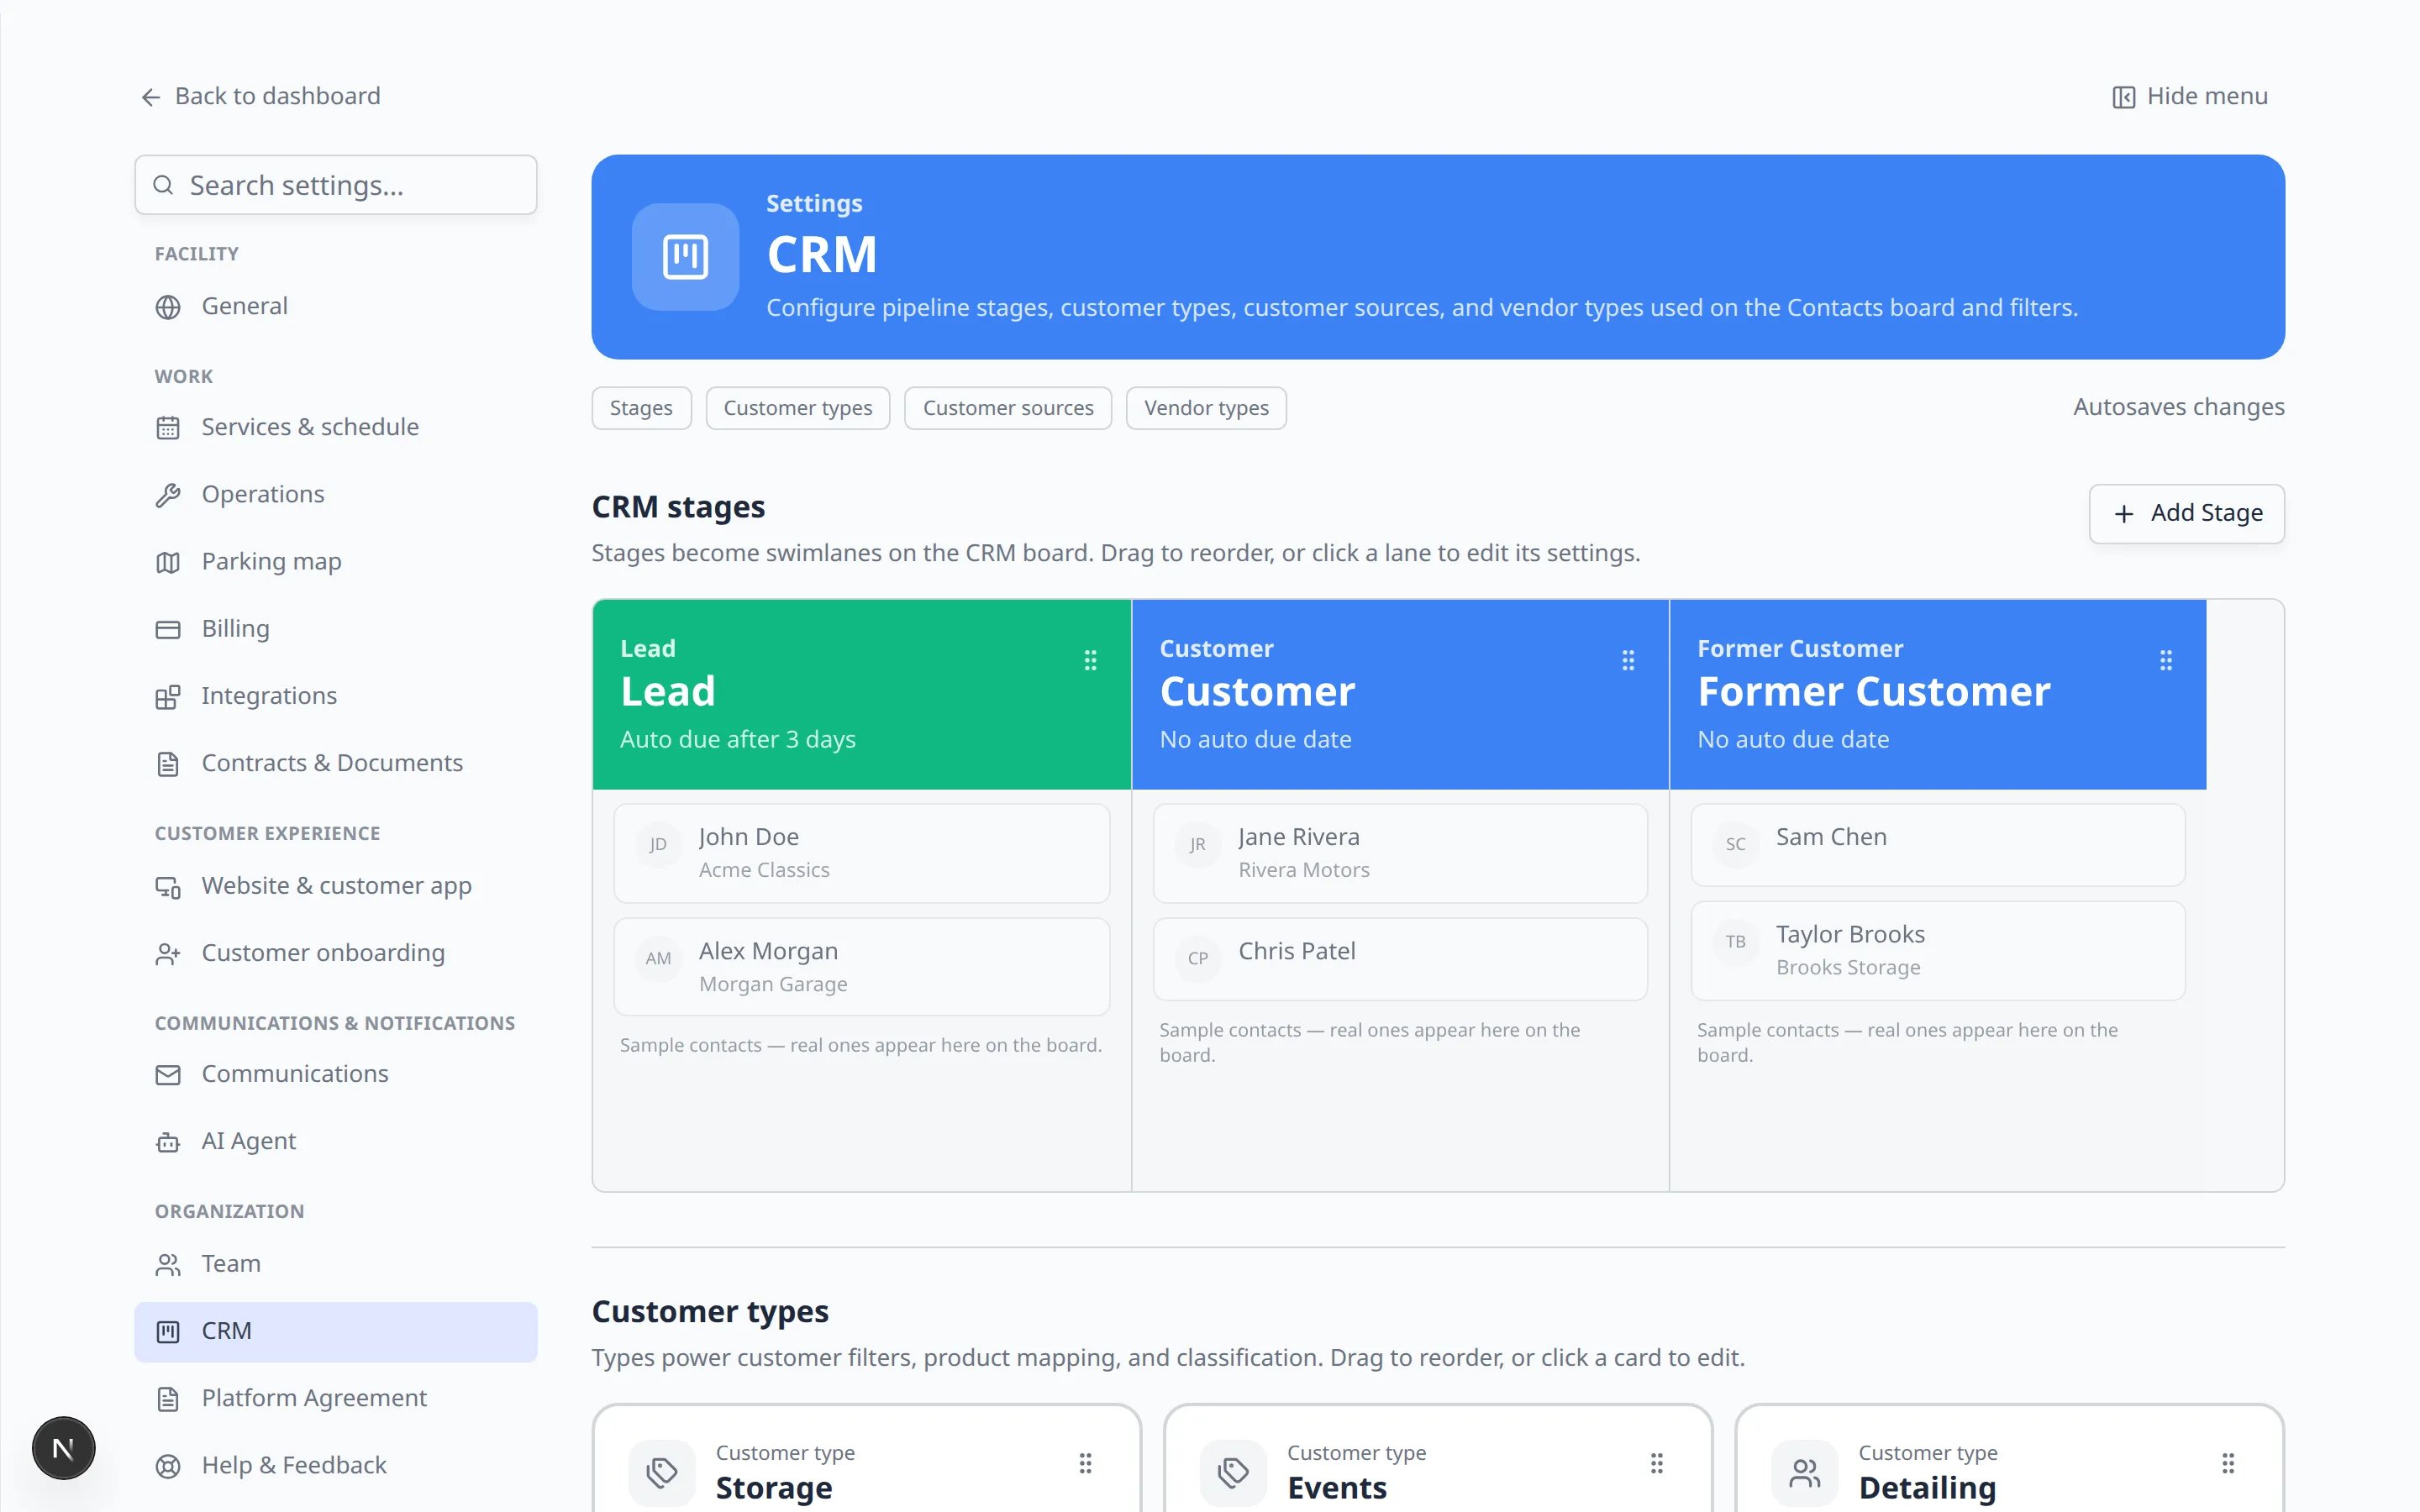
Set up CRM stages
CRM stages become the lanes on your customer relationship board.1
Find CRM stages
On Settings > CRM, find the swimlanes named Lead, Customer, and Former Customer.
2
Review existing stages
Read each stage name. Keep names simple. Good examples include New Lead, Contacted, Tour Scheduled, Proposal Sent, Active Customer, and Former Customer.
3
Click a lane to edit it
Click a lane to change its name, description, and auto due date.The due date is in days. For example, 3 means follow up within 3 days.Why this matters: When a customer sits in Lead too long, your team may forget to call back. Auto due dates turn quiet leads into visible reminders on the Contacts board.
4
Add or reorder stages
Click Add Stage to create a new stage.Drag the handle on a lane to reorder stages into the order your team follows.Expected result: Your relationship board shows stages in the same order your team describes the sales process on the phone.
Confirm stages on the Contacts board
1
Open Contacts
Go to Contacts.
2
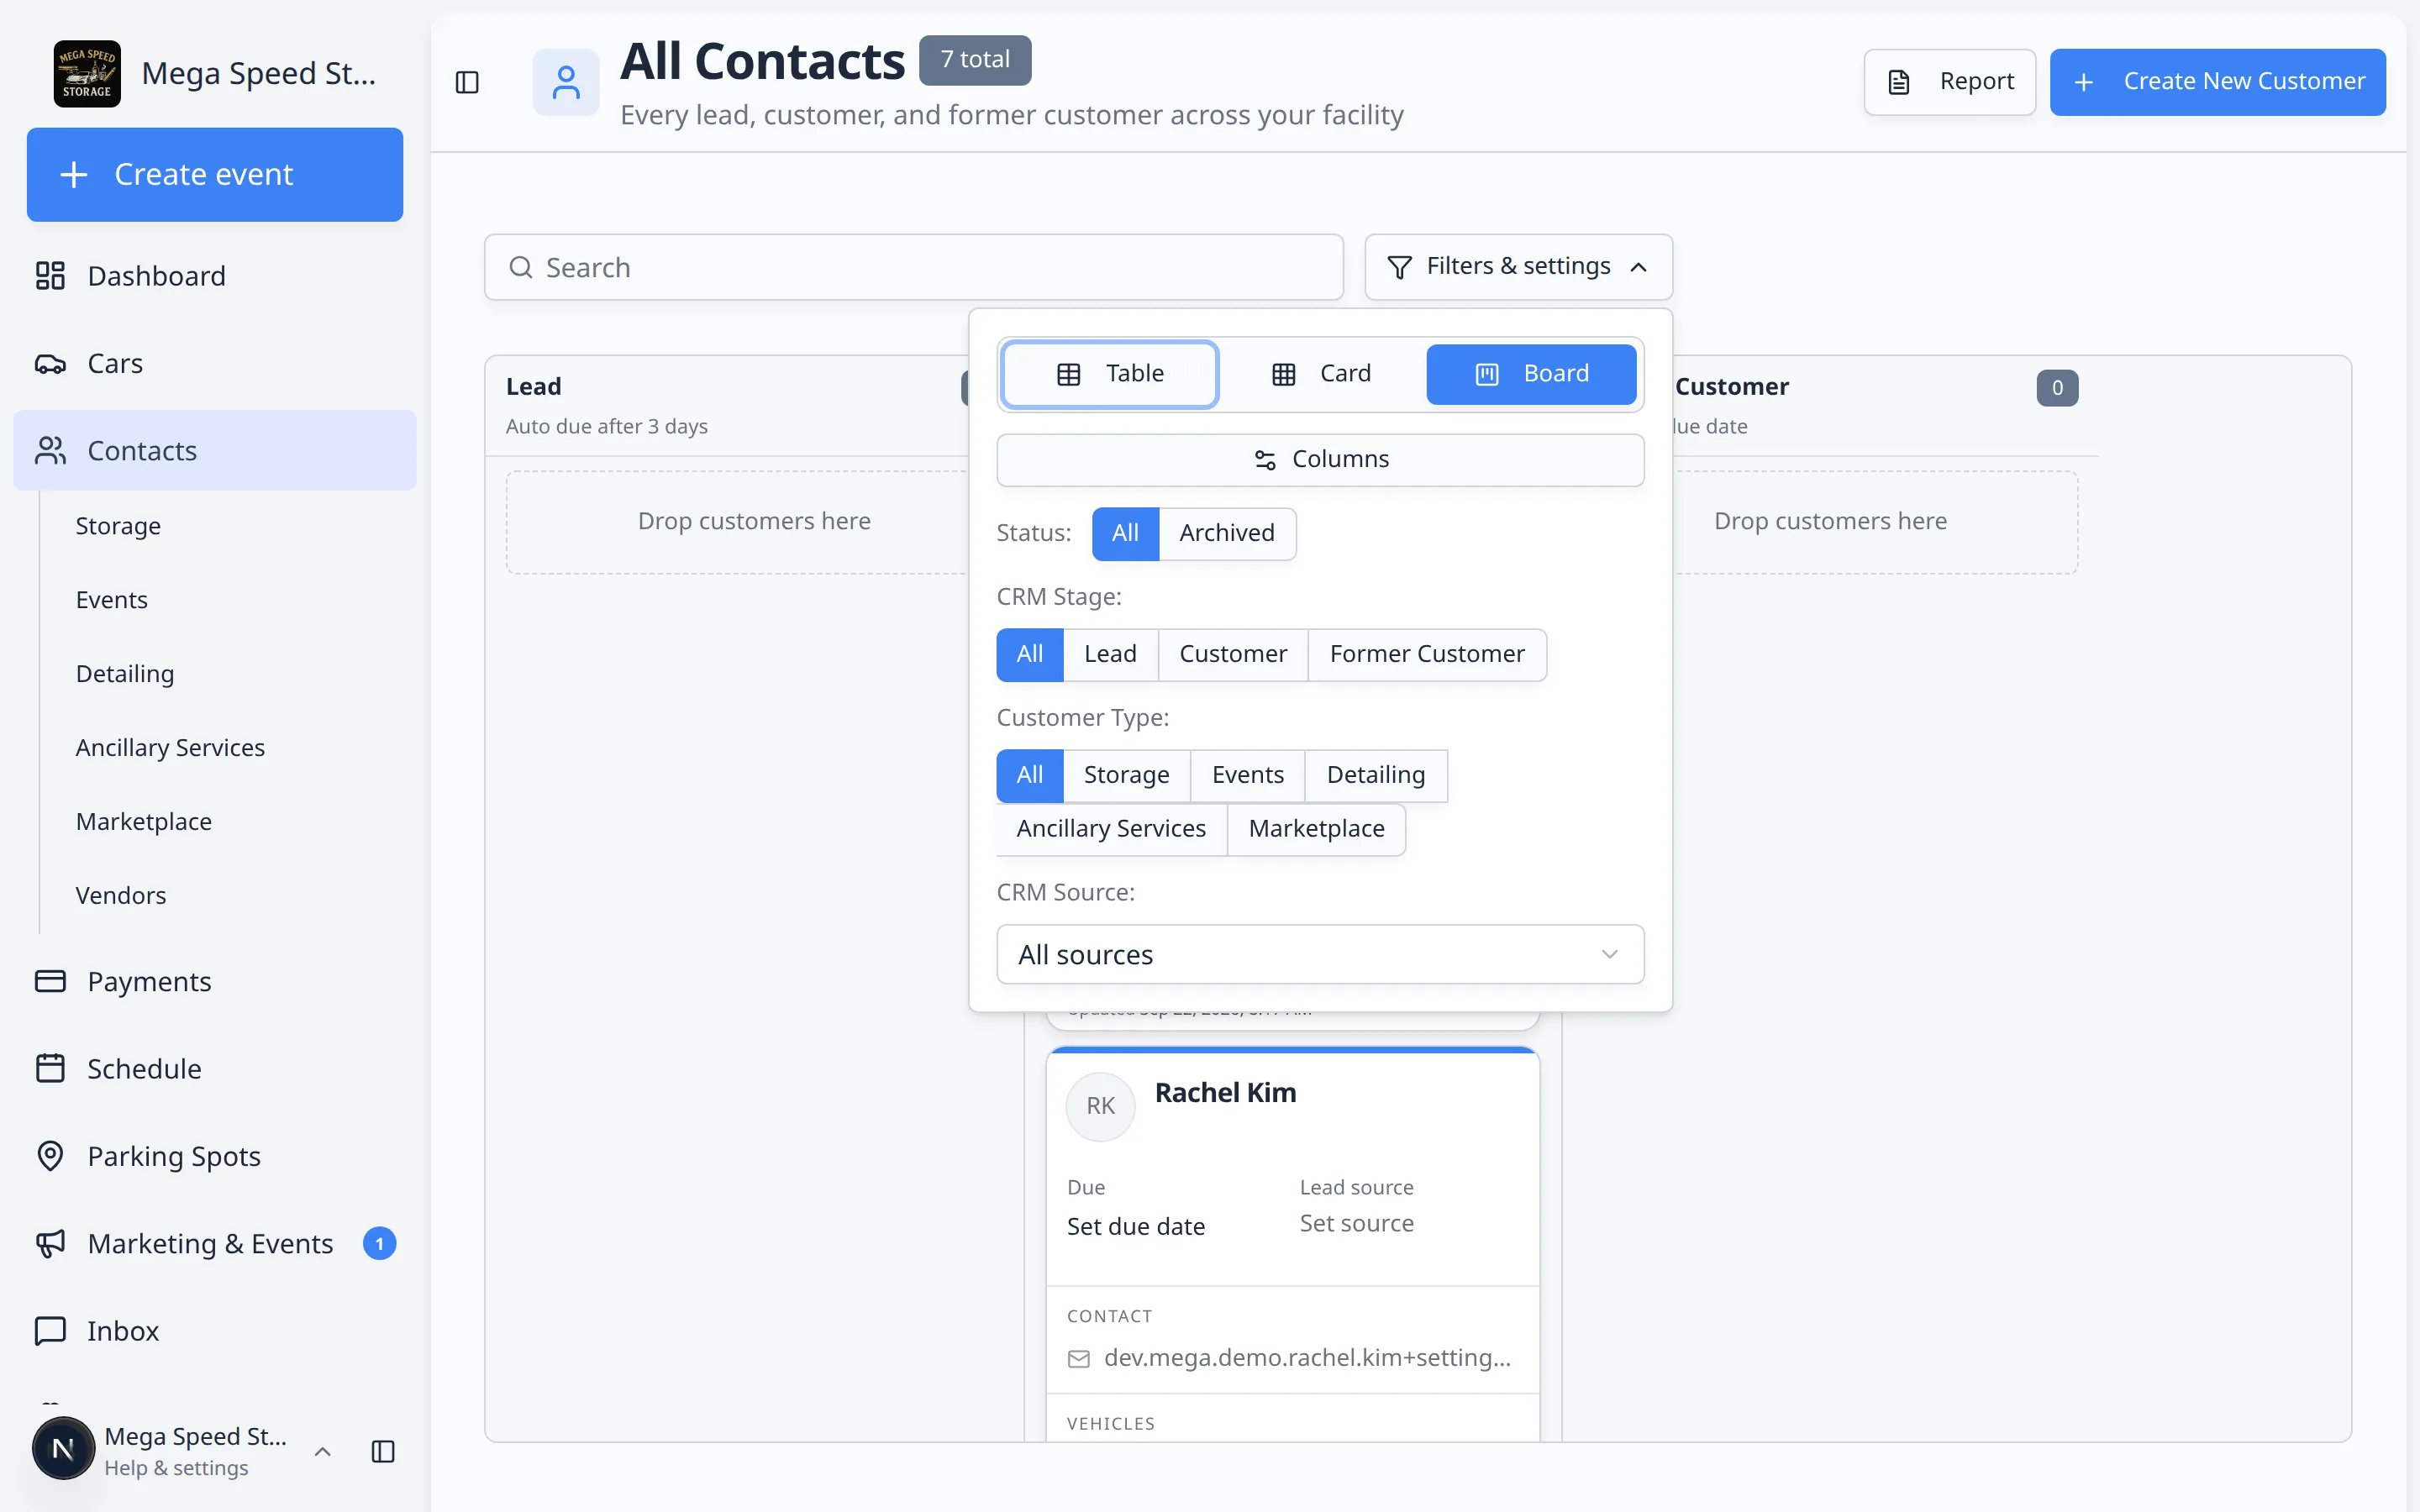
Open Filters & settings and choose Board
Click Filters & settings near the search bar (on a phone it may show only the filter icon).In the panel that opens, click Board.Expected result: You see columns (lanes) with the same stage names you set in CRM settings.
3
Drag one test card (optional)
If you have a test customer in an early stage, drag their card to the next column once to confirm the board groups match your Lead, Customer, and Former Customer lanes.
Set up customer types
Customer types help your team group customers by what they use your facility for.1
Find Customer types
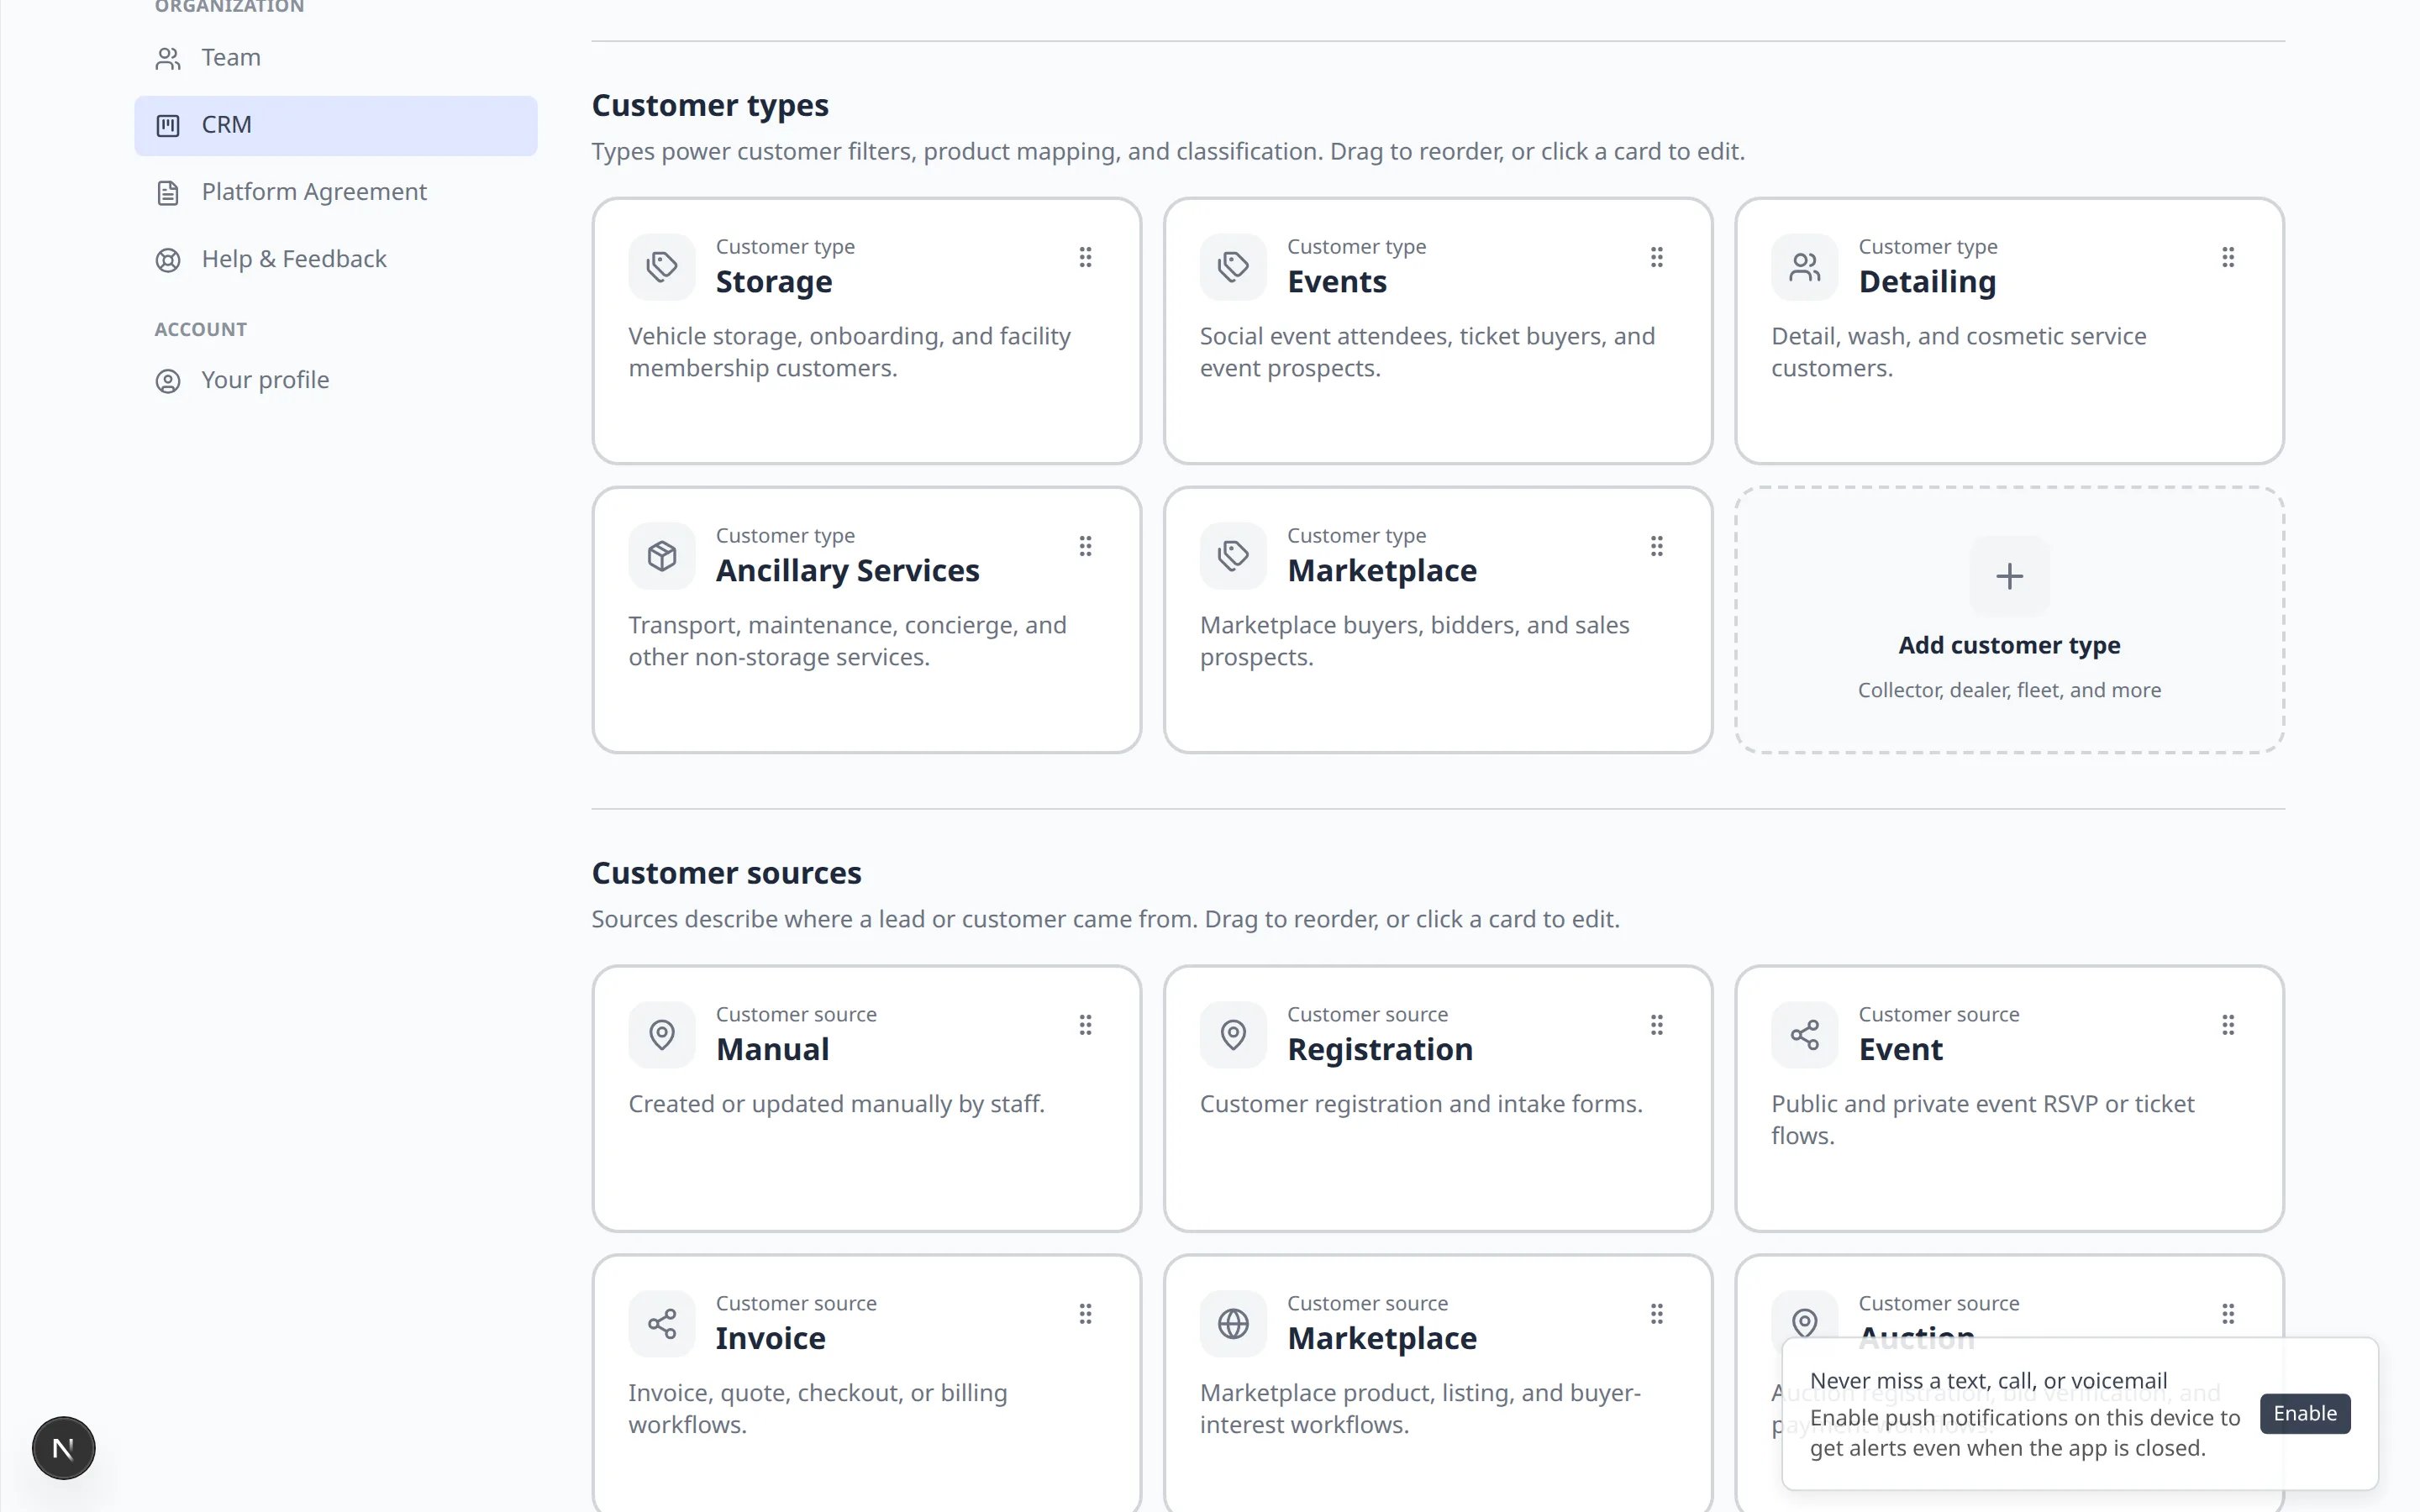
On Settings > CRM, scroll to Customer types, or click Customer types at the top of the page.
2
Review the names
Use names staff will understand, such as Storage, Events, Detailing, Marketplace, or Concierge.
3
Add or edit a type
Click a card to edit it, or add a new type.Use the description field to explain when staff should choose that type.If a type has been used before, consider turning it off instead of deleting it.
Set up customer sources
Sources describe where a lead or customer came from.1
Find Customer sources
Click Customer sources at the top of Settings > CRM.
2
Add the sources your staff asks about
Common examples include Referral, Website, Phone Call, Instagram, Auction, Existing Customer, and Event.
3
Reorder sources
Put the most common sources near the top so staff can find them quickly.
Set up vendor types (optional)
If you work with transporters, detailers, or other vendors, use Vendor types so those contacts stay labeled clearly.1
Find Vendor types
Click Vendor types at the top of the CRM page.
2
Add types your shop actually uses
Examples: Transporter, Detail Shop, Insurance Adjuster, Auction House.Skip this section if you do not track vendors separately.
What success looks like
- CRM stages match your real sales and customer follow-up process.
- Each stage sits in the right swimlane: Lead, Customer, or Former Customer.
- Auto due dates remind staff when follow-up should happen.
- Customer types help group customers by the services they use.
- Sources help your team understand where new leads come from.
Simple example setup
If you are not sure where to start, try a simple setup first:Stages: New Lead, Contacted, Tour Scheduled, Proposal Sent, Active Customer, Former Customer.Customer types: Storage, Detailing, Events, Marketplace, Other.Sources: Referral, Website, Phone Call, Social Media, Event, Existing Customer.You can improve these later after your team uses the CRM for a few weeks.