

What you will accomplish
You will add one or more part entries on a car record, each with a name, optional cost, category, condition, photos, and notes. Expected outcome: Anyone who opens the car sees a Parts table in Vehicle Details that documents what is on the vehicle today.When to track parts on a car
- A customer stores a modified or restored vehicle and you need to know what aftermarket items are installed.
- Your shop installs upgrades during service and wants a paper trail on the car record.
- Insurance or consignment conversations require a list of high-value additions.
- You photograph rare or removable parts so the next teammate knows what belongs with the car.
Before you start
- Open the correct car from Cars.
- Scroll to Vehicle Details on the left side of the car detail page.
- Have part names, costs, and photos ready if you want a complete entry on the first save.
Find the Parts section
1
Open the car record
Go to Cars and click View on the vehicle.Expected result: The car detail page opens with the banner photo and Vehicle Details on the left.
2
Scroll to Parts
Inside Vehicle Details, scroll until you see the PARTS heading with a wrench icon.When no parts exist yet, you may see No parts recorded and a short hint to track modifications and accessories.
3
Click Add Part
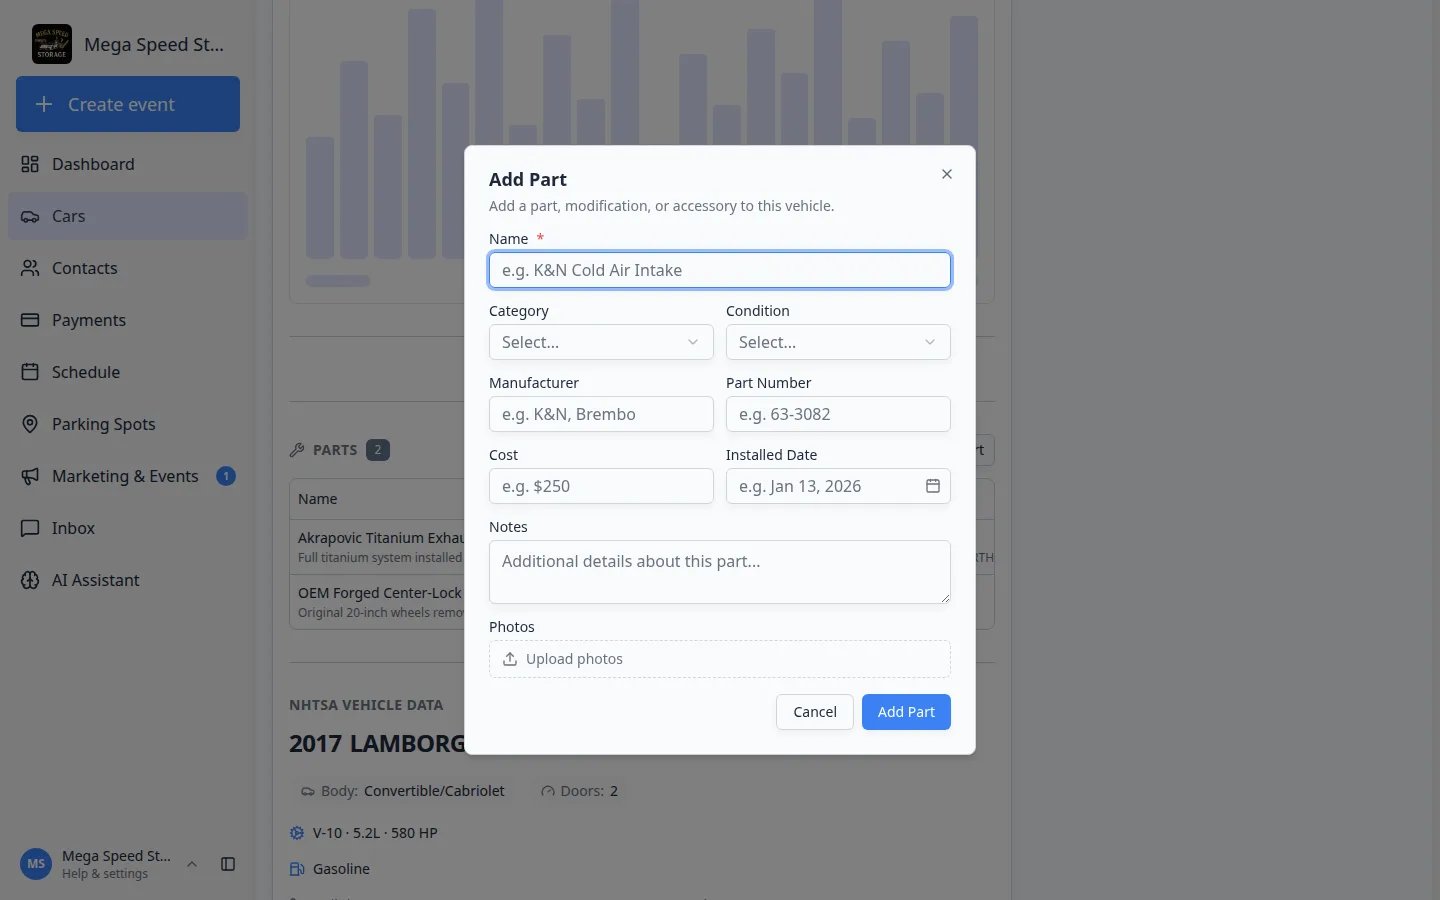
Click the Add Part button on the right side of the PARTS heading.Expected result: A window titled Add Part opens with fields for name, category, manufacturer, and more.
Add a part entry
1
Enter the part name
In Name, type a clear label your whole team will understand—for example Akrapovic Titanium Exhaust or Momo Prototipo Steering Wheel.This field is required. You cannot save without it.
2
Add optional details
Fill in any fields that help your team:
- Manufacturer — who made the part
- Part number — the supplier or OEM number when you have it
- Category — pick a group such as Exhaust, Wheels & Tires, or Interior
- Condition — such as New, Used, or OEM
- Cost — what the customer paid or what your shop charged (helps with insurance totals)
- Installed date — when the part went on the car
- Notes — anything special about installation, removal, or storage
3
Add photos (recommended)
Use Upload photos to attach pictures of the installed part, the box label, or serial numbers.Expected result: A small photo icon appears on the part row after you save, so teammates can open the images without walking to the car.
4
Click Add Part to save
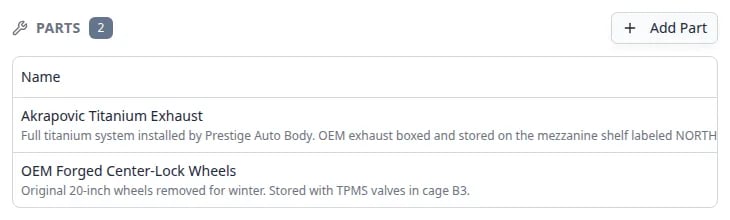
Click Add Part at the bottom of the window.Expected outcome: The part appears in the Parts table on the car record. A badge next to PARTS shows how many entries exist.
Review or remove a part
1
Open photos on a part row
When a row shows a small image icon, click it to open the photos for that part.
2
Edit by removing and re-adding when needed
There is no separate edit button on each row today. To change details, remove the row with the trash icon and add the part again with the corrected information.Why this matters: A quick re-entry keeps the parts list accurate when a cost or install date was typed wrong the first time.
3
Remove a part that was sold or uninstalled
Click the trash icon on the right side of the row. Confirm when the app asks.Why this matters: Remove parts when they no longer belong on the car so insurance and resale lists stay accurate.
Parts vs. service workInstalling a part during a scheduled service event may also appear in the Activity Feed. The Parts table is the inventory list; the activity feed is the timeline of work. Use both when they help tell the full story.
Troubleshooting
What to do next
- Link the car to the correct owner in View and edit vehicle details so invoices and portal access match the parts list.
- Document condition with Start a car session or Review car activity, notes, and photos when you complete related service work.