

What you will accomplish
- Understand which settings control texting, calling, and email in Inbox.
- Confirm your facility has a customer-facing phone number and email domain.
- Choose who should receive alerts when customers need a reply.
- Know how to test Inbox safely before messaging real customers.
Before you start
- You should be signed in as a team member who can open Settings > Communications. Facility owners and admins usually have this access. Other staff need the Inbox permission—ask your admin to review Manage team permissions if the page is blocked.
- Know the phone number your customers already recognize for your facility.
- Know the email address style you want to use, such as service@yourfacility.com.
- Have someone ready to help with website or domain records if the app asks for DNS verification.
- Decide which staff members should watch Inbox and respond to customers.
If Inbox says it is not configured yetWhen phone and email setup are incomplete, Inbox may show a message that Inbox is not configured yet and mention Team Settings. That means the same page as Settings > Communications in the left sidebar—not a separate hidden menu. Finish the steps in this guide, save your changes, then refresh Inbox.
Open communication settings
1
Open Settings > Communications
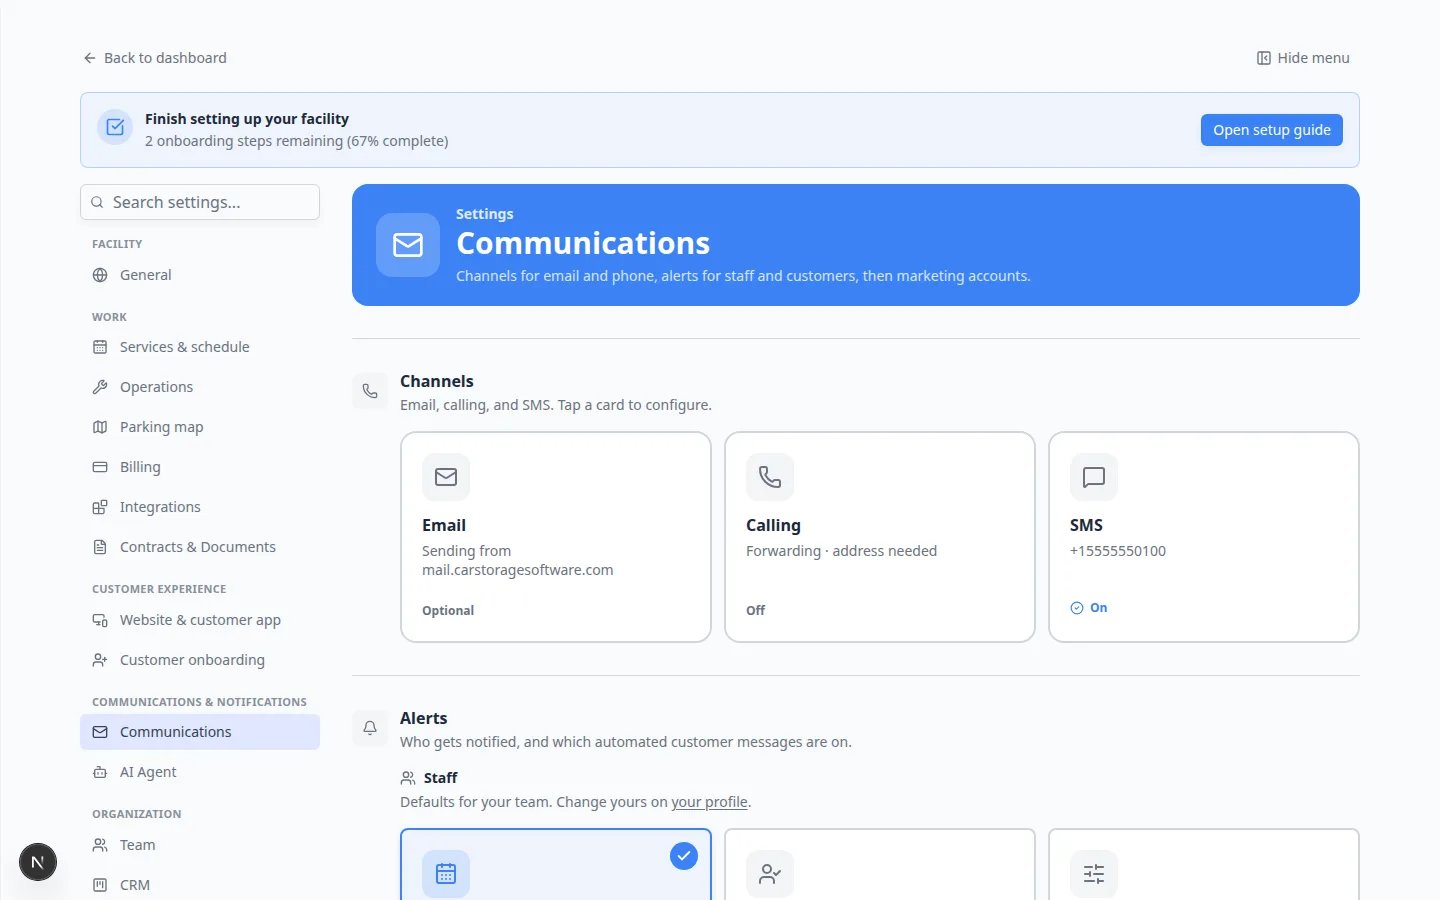
Go to Settings > Communications.This page controls phone and text messaging, email sending, social links, review requests, and notification preferences.
2
Scan the page from top to bottom
The page title is Communications. The subtitle says Channels for email and phone, alerts for staff and customers, then marketing accounts.Work through these areas in order:
- Channels — three cards labeled Email, Calling, and SMS. Tap a card to open its setup.
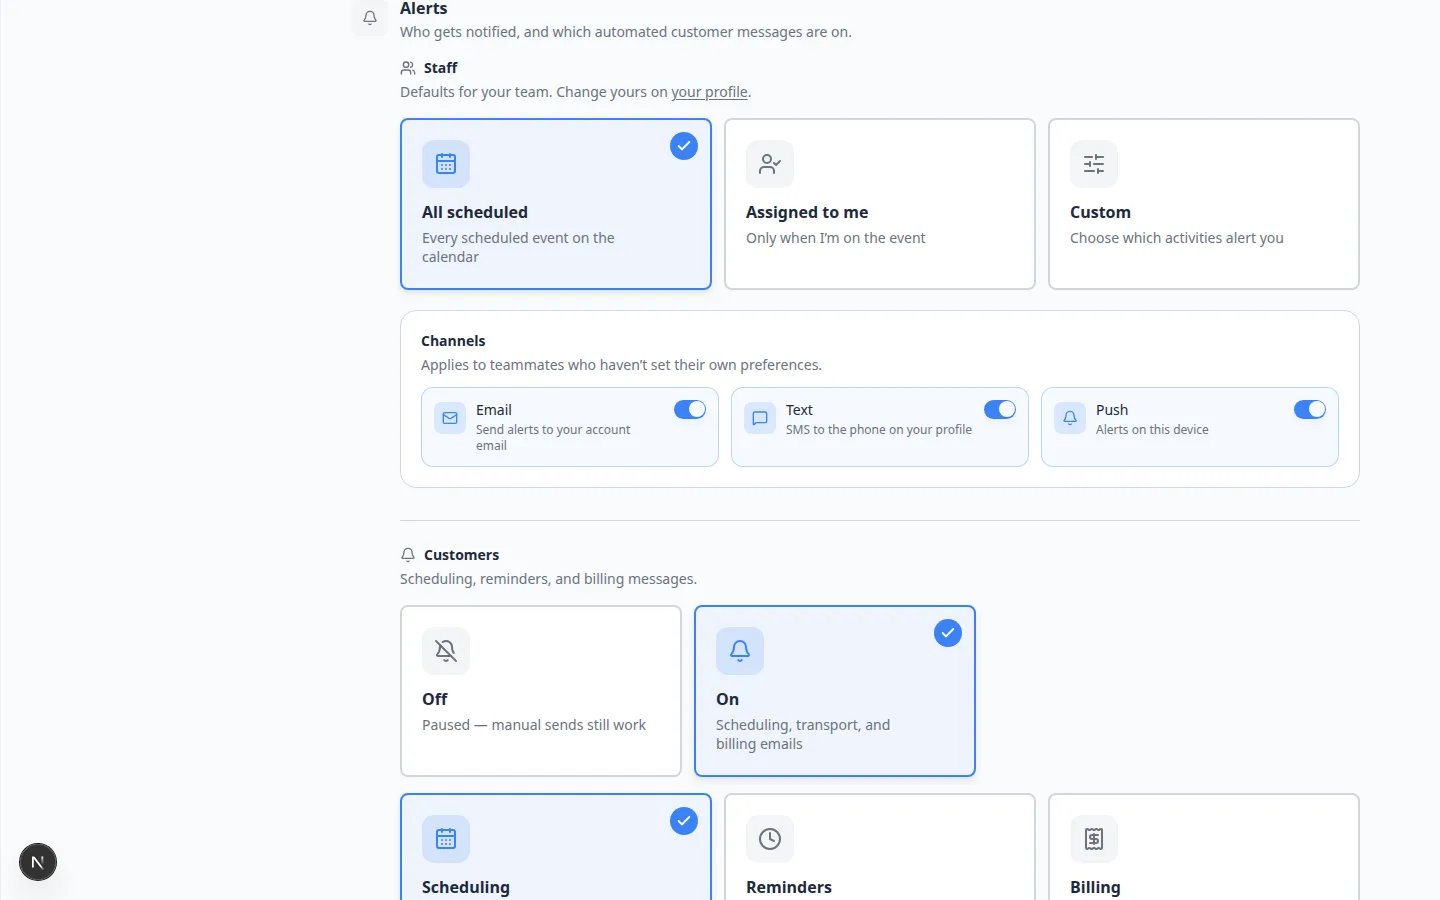
- Alerts — Staff defaults and Customers automated messages.
- Marketing — Instagram, Facebook, and similar accounts. Optional for Inbox.
3
Save your changes
Save any updates before returning to Inbox.If the page shows verification steps, finish those steps before you test texting or email with customers.
Why staff still see Inbox is not configured yetThe yellow banner on Inbox appears when neither phone/SMS nor email sending is fully ready. Your team can still read conversation history, but Text, Email, and Call buttons stay disabled until the steps below are complete. Finish phone setup first if your team texts customers every day.
Check SMS (text messaging)
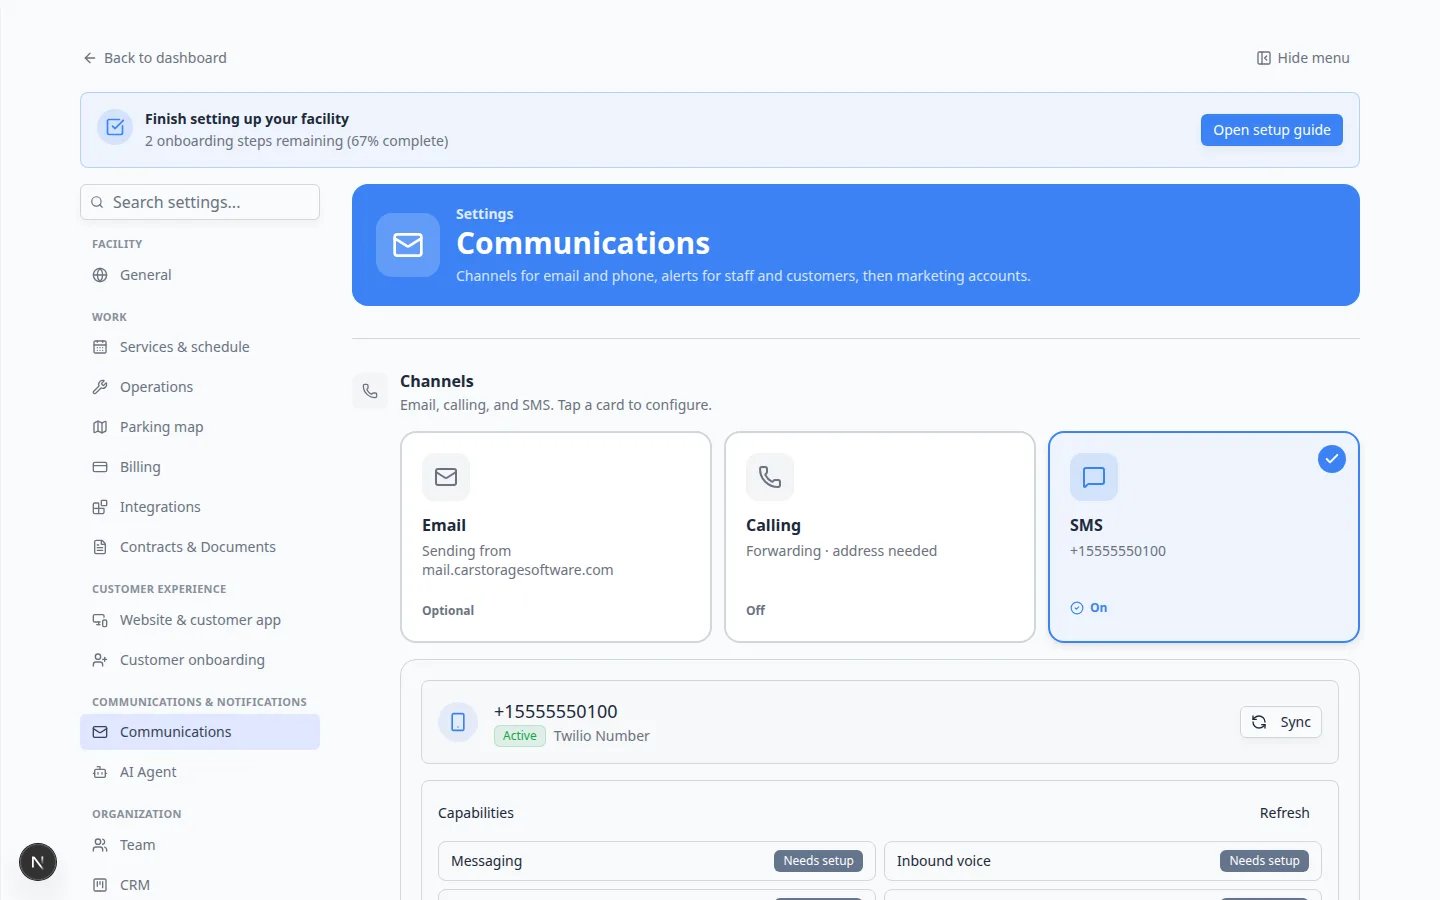
Text setup is the SMS card in Channels. Do this before Calling. Inbox texts and your facility phone number both live here.1
Tap the SMS card
On Settings > Communications, find Channels. The helper line says Email, calling, and SMS. Tap a card to configure.Click the SMS card.Expected result: The card highlights and a setup panel opens under the three cards.
2
Confirm your team has a phone number
When SMS is ready, the card shows your facility number (for example +15555550100) and a green On label.If the card says No number yet and Off, follow the setup in the open panel or ask your admin to connect a number.
3
Return to Inbox and check Text
Open Inbox and select a customer who has a phone number.Expected result: The Text tab at the bottom of the conversation is available (not gray).
Check Calling
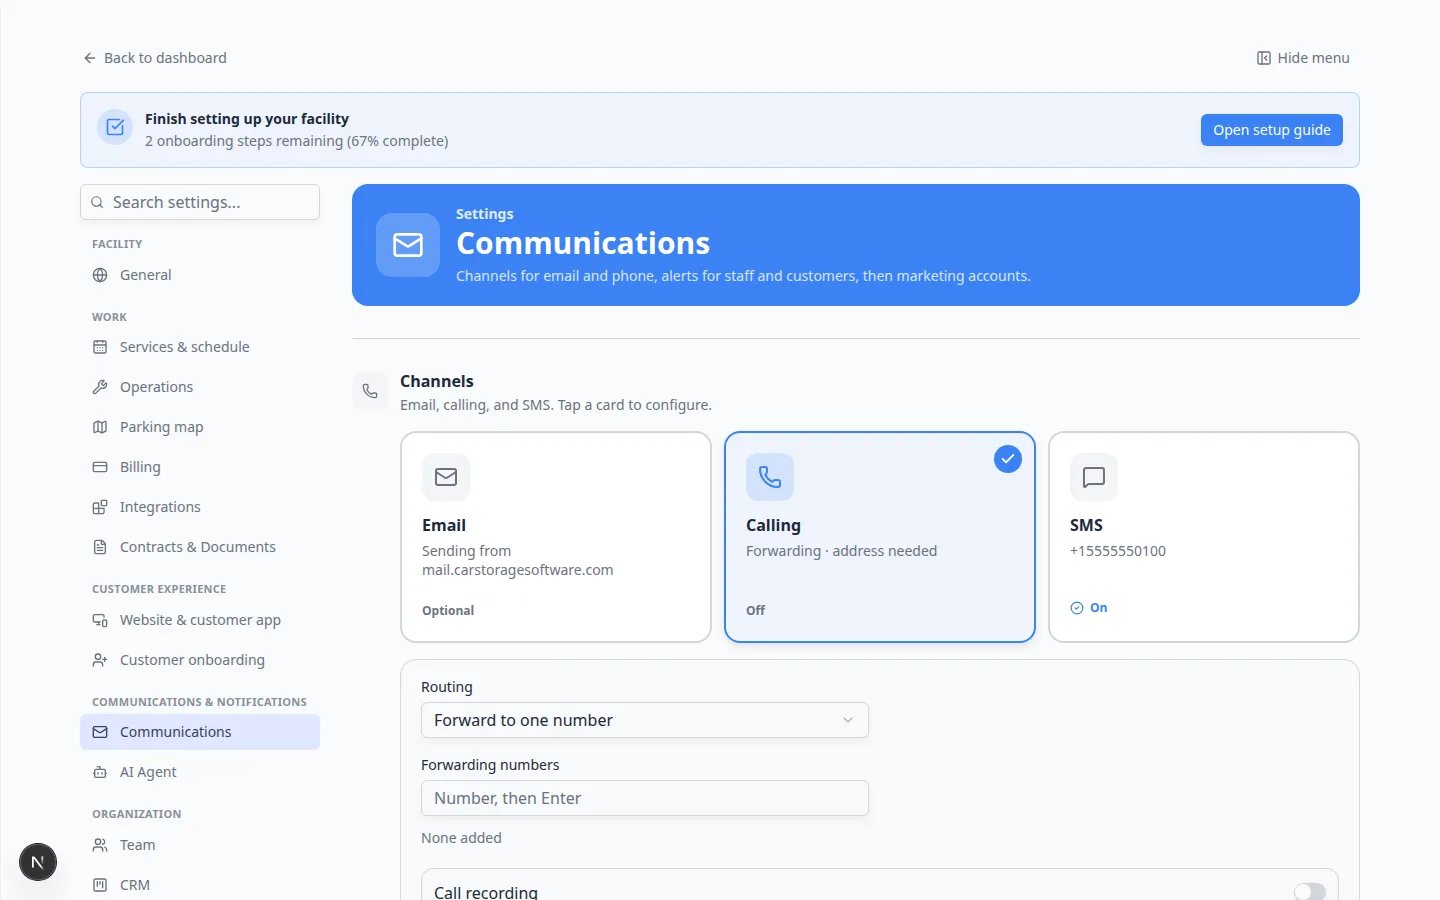
Calling is a separate card from SMS. You need the SMS number first. Then you finish calling so staff can use Call and Quick call in Inbox.1
Tap the Calling card
On the same Channels row, click Calling.
2
If you see Set up SMS number
The panel may say Get an SMS number first, then configure call routing and emergency address.Click Set up SMS number and finish the SMS card, then come back to Calling.
3
Finish address and routing
When a number exists, Calling may still show Off with a note such as Forwarding · address needed.In the open panel you will see Routing (for example Forward to number), Forwarding numbers, and Call recording. Complete the emergency address the page asks for.Why this matters: A phone number without calling setup lets you text, but Call and Quick call stay gray.
Check Email
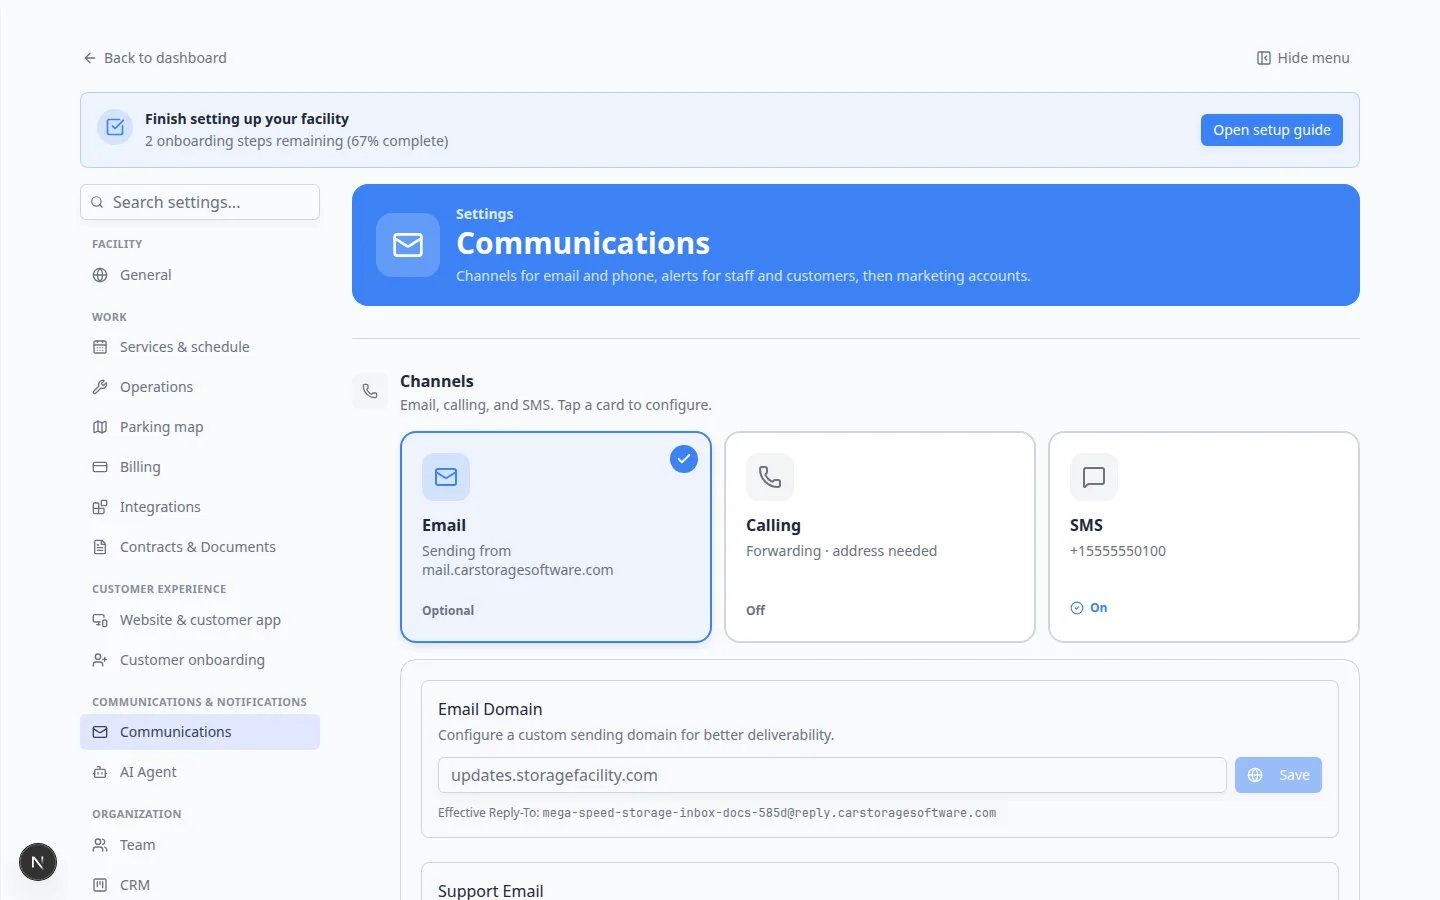
Email setup is the Email card in Channels. It affects Inbox replies, invoice emails, portal invites, and other customer messages.1
Tap the Email card
Click Email in Channels.
2
Read the status on the card
The card footer can say:
- Optional — messages can send from the shared mail.carstoragesoftware.com domain (fine while you get started).
- On — your own domain is verified (or you use a custom domain).
- Off — a domain was started but DNS is not finished yet.
3
Complete verification if requested
If the open panel asks for domain records such as SPF, DKIM, DMARC, or MX, copy them exactly and send them to the person who manages your website or domain.You do not need to finish a custom domain on day one. Optional is enough to practice Inbox email.
4
Return to Inbox and test email
Open Inbox, choose a customer with an email address, click Email, and confirm Subject and Write your email… are available.
Check Alerts
Alerts sits below Channels. The helper line says Who gets notified, and which automated customer messages are on.1
Review Staff defaults
Under Alerts, find the Staff heading. The line under it says Defaults for your team. Change yours on your profile.Choose one card:
- All scheduled — every scheduled event on the calendar
- Assigned to me — only when I am on the event
- Custom — choose which activities alert you
2
Set your own alerts on Your profile
Click your profile in that sentence, or open Settings > Your profile.Why this matters: The Communications page sets team defaults. Each person still chooses how they want to be pinged.
3
Review Customers alerts (optional for Inbox setup)
Below Staff, find Customers. The line says Scheduling, reminders, and billing messages.Choose Off (Scheduling & transport paused — billing still sends) or On (Scheduling, transport, and billing emails). Then you may see Scheduling, Reminders, and Billing cards.These messages go to customers automatically. They are not required for sending a manual Inbox reply, but they keep pickup times and invoices from depending on one person remembering to text.
4
Skip Marketing until Inbox works
Marketing (Instagram, Facebook, and similar) is further down the page. You can leave it for later. It does not turn Inbox Text, Email, or Call on or off.
Test before you message customers
After you save settings, confirm each channel works before real customers depend on replies.1
Open Inbox and check the yellow banner
Go to Inbox.Expected result: The yellow Inbox isn’t configured yet banner is gone when at least one channel (text or email) is ready. If the banner remains, return to Settings > Communications and finish the missing section.
2
Pick an internal test customer
Use a customer record your team controls, such as a staff-owned test account.Why this matters: A test message to a real customer can cause confusion. Use someone on your team who expects the test.
3
Send one small test text or email
Follow Start a new Inbox conversation or Send an email from Inbox with that test customer.Check that Text, Email, and Call buttons look active (not gray) when the customer has phone and email on file.Expected result: The message appears in the timeline. Texts should show DELIVERED when SMS is configured.
4
Confirm staff alerts (optional)
Ask one front-desk teammate to open Overview on another browser tab, then send a test message to your facility line.Expected result: The teammate sees the conversation in the Inbox panel or receives a browser notification when alerts are enabled.
5
Fix setup before going live
If buttons stay gray or messages fail, return to Settings > Communications and finish the missing step.
Quick setup checklist
Use this table before you tell staff Inbox is ready:What success looks like
After setup:- Inbox shows available Text, Email, and Call options when setup is complete and the customer has contact details on file.
- Customer messages are sent from a phone number or email domain your customers recognize.
- Staff know who is responsible for watching Inbox.
- Your team completed a small internal test before using the channel with customers.