

Open the event
On the Schedule, click the event, then Open Event. When you finish, the app brings you back to the Schedule.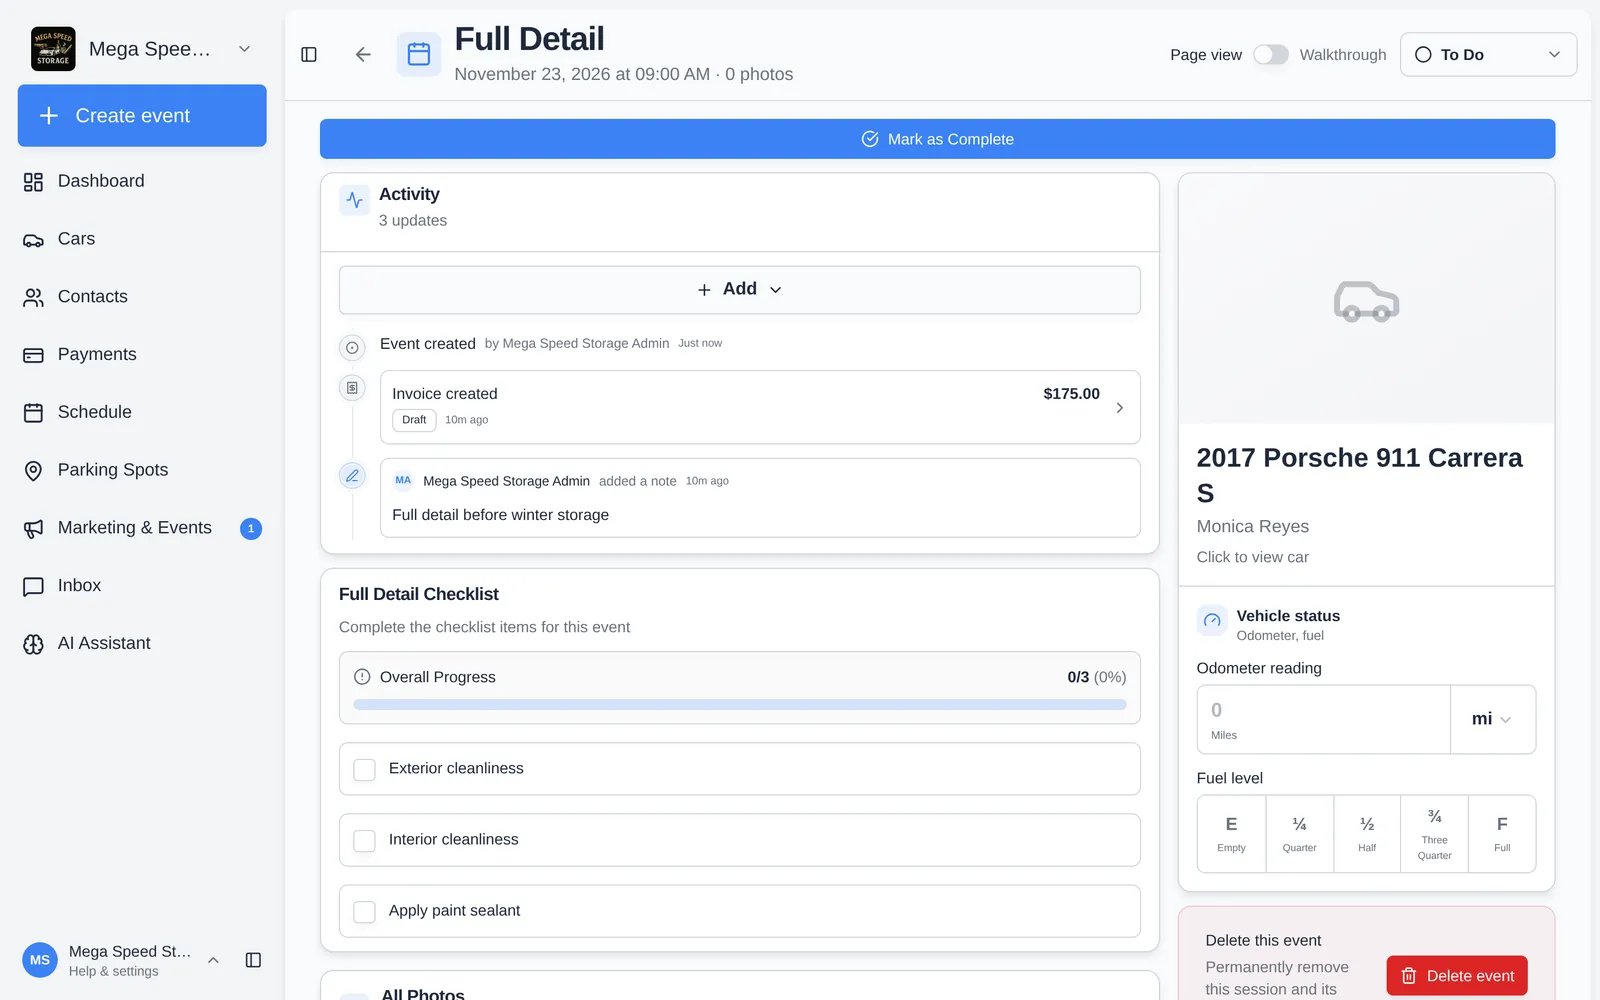
Work through the event
1
Set the status
Use the status menu at the top right. By default the stages are To Do, In Progress, and Done, or your own custom stages. The status dialog can also set a Due date and change Assigned to.
2
Complete the checklist
Tick each item in the checklist card. Required items must be ticked before you can finish.
3
Take photos
In All Photos, click Upload or take photo, or click Open walkthrough to be guided through each required shot (for example front, rear, interior). Mark damage on a photo if you find any.
4
Record readings and signature
Fill in Odometer reading, Fuel level, Tire pressure, or Engine start in the right-hand column if the event asks for them. If a Signature is required, have the customer or driver sign on the device.
5
Record where the car went
If the event moves the car, pick its new location in Parking location or Where did the car go?: a Parking spot, Parking zone, Vendor, Customer, Additional contact, or Other destination.
6
Finish the event
Click the blue button at the top. Its label tells you what’s still missing, such as Continue to fuel level or Continue to parking. When everything’s done it reads Mark as Complete. Confirm in Mark event as complete?
Use walkthrough mode on a phone
Switch Page view to Walkthrough (top of the page) for a step-by-step flow that shows one task at a time: photos, readings, checklist, signature, and parking. It’s the easiest way to run an intake or inspection on a phone. Some event types open the walkthrough automatically.Add notes, invoices, and quotes
In Activity, click Add to add a note (type @ to tag a teammate), a photo, an invoice, or a quote. Everything you add appears in the event’s timeline, along with status changes.Multi-step workflows
Workflows show a Workflow Steps list. Click Start or Continue on each step, or Skip for optional steps. If the workflow needs a vehicle, you’ll see Link vehicle first until one is assigned.Troubleshooting
- The finish button says “Do all required steps”: something required is missing (a checklist item, photo, reading, or signature). Click the button and the walkthrough takes you to it.
- Can’t find the checklist or photos: the event type doesn’t have them turned on. See Set up the event walkthrough.