

Before you start
The event type you need must exist and be active. See Create an event type.Create the event
1
Open Create New Event
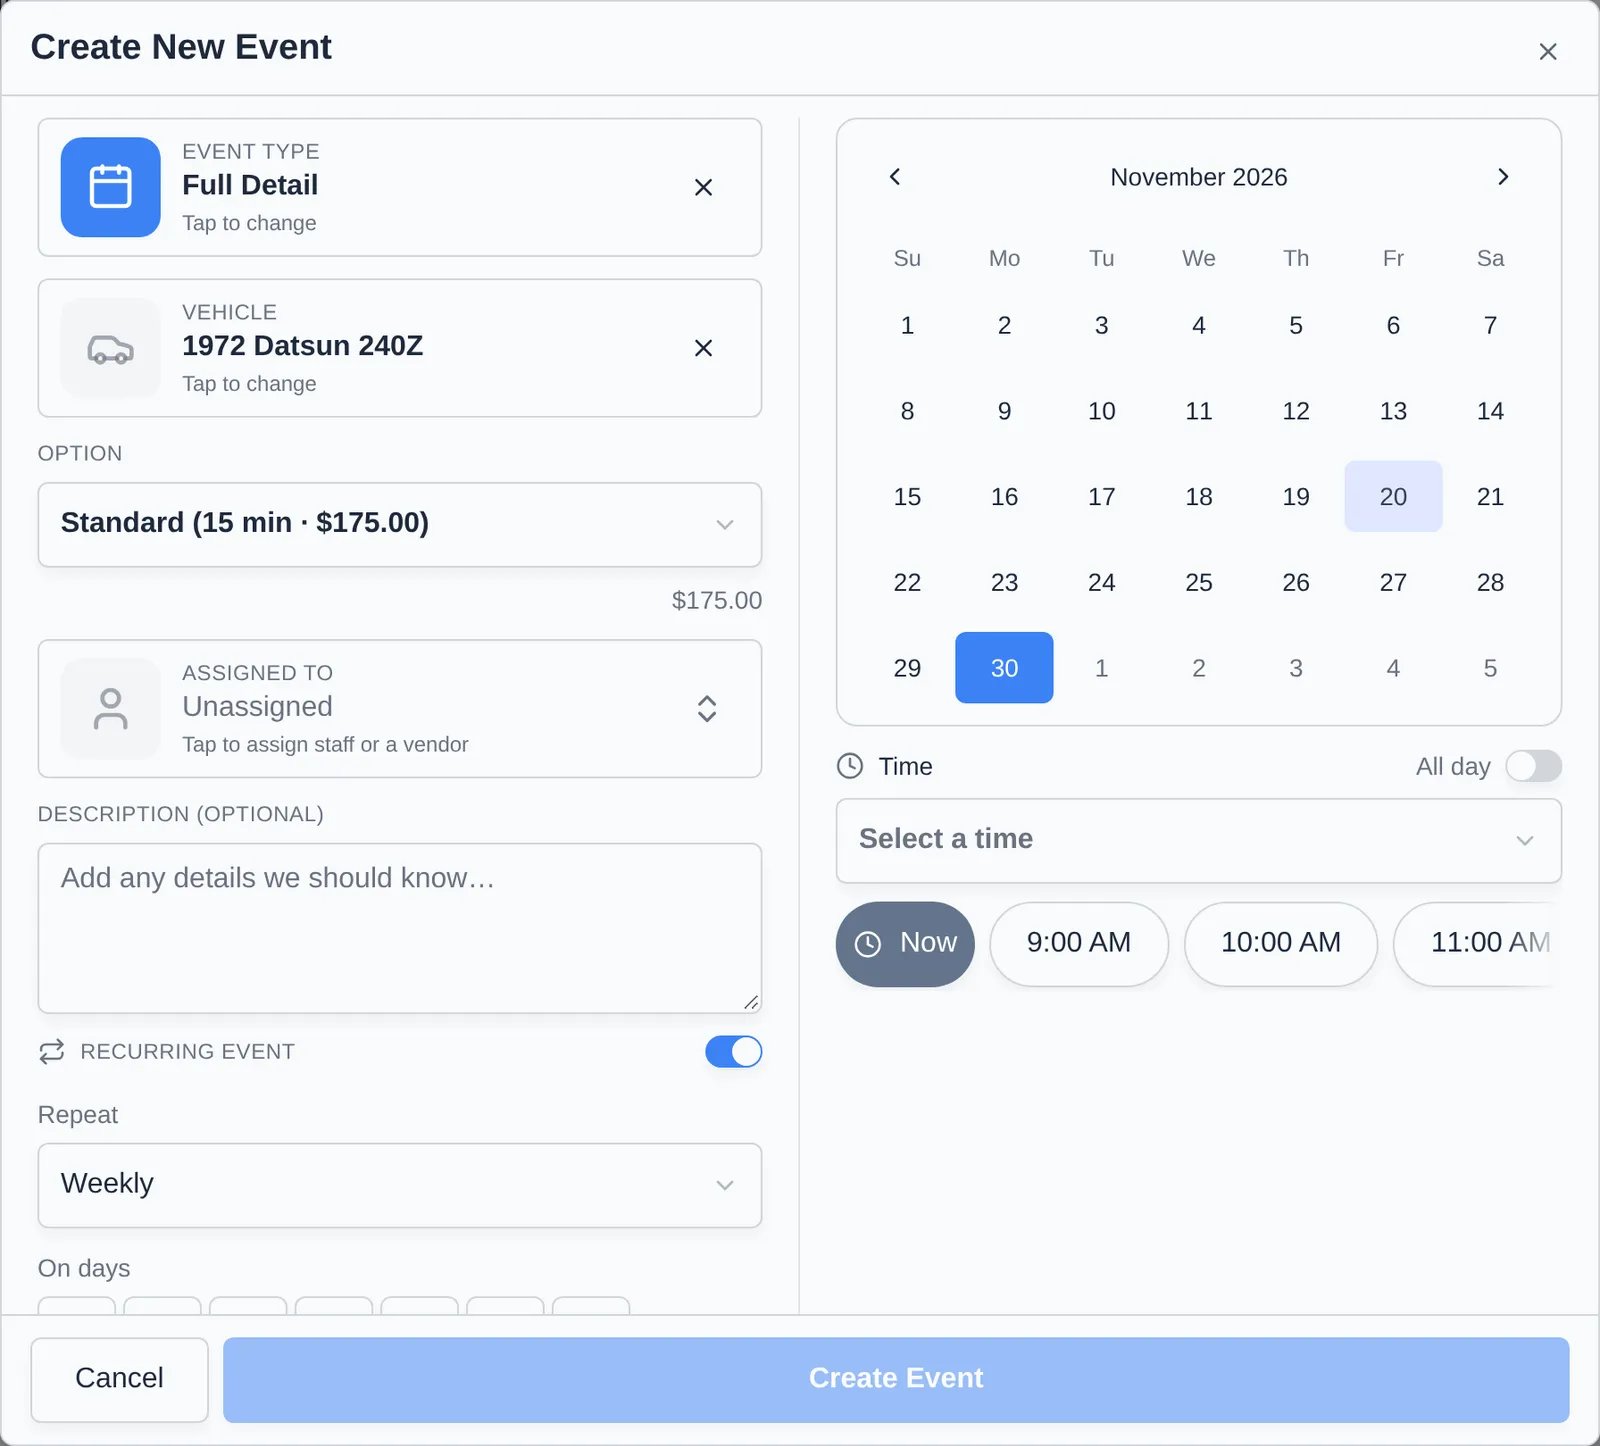
On the Schedule, click Schedule Event (top right). You can also click Create Event on This Day from a day in Month or 2-week view, or start from Create event in the sidebar, which lists your services as tiles.
2
Pick the event type
Click the Event type card and choose a type. Types are grouped by what they attach to. The fields below change to match:
- Vehicle events ask for a Vehicle. The customer comes from the vehicle’s owner.
- Customer events ask for a Customer.
- Facility events (inspections, maintenance) need neither.
3
Pick the vehicle or customer
Search by name, make, model, or plate. Some intake types let you leave the vehicle empty and add it at check-in with the VIN scanner. In that case pick Who is dropping off? under Customer.
4
Choose the option (if shown)
If the event type has more than one price tier, pick one under Option. The tier sets the price and the default length.
5
Assign it (optional)
Click Assigned to and pick team members, a staff group, or a vendor. See Assign team members and vendors.
6
Add a description
Type notes for the team in Description. Some event types require one before you can save.
7
Pick the date and time
Choose a day on the calendar on the right, then pick a time from Select a time or tap a suggested time. Tap Now for work that’s starting right away.
8
Click Create Event
If customer messages are on for your team, you’ll see Notify the customer? Choose Yes to send the booking confirmation or No to skip it. The event appears on the Schedule.
Make it all day
Turn on All day next to Time. The event has no start time and shows in the all-day row at the top of the calendar. Use it for work that takes the whole day, such as a full paint correction.Repeat the event
Turn on Recurring Event, then set:
A summary such as “Weekly until Feb 20, 2027” appears under the fields. Repeating events show a repeat icon on the calendar.
For care that repeats on every car under a plan (monthly start-ups, tire checks), use a service plan instead.
Block time
To keep a slot or day free (staff meeting, holiday, maintenance), pick the Calendar Block event type. Choose the Date, a Start Time and End Time (or turn on All day), add an optional Reason, and click Create Event. Blocks show as grey striped areas on the calendar. To close the whole facility to bookings for a day, add a closed day instead.Schedule a workflow
Workflows appear in the Workflows group of the event type list. Pick one, choose the Date and Start Time for the first step, and the app puts every step on the calendar. Now starts the workflow right away and opens it.Troubleshooting
- “This time isn’t available”: the time breaks a booking rule or clashes with another booking. Review the reasons listed and click Continue anyway if you still want it.
- “Please select a vehicle” or “Please select a customer”: the event type needs one. Pick it, or choose a different event type.
- “Please add a description before scheduling”: this event type requires a description.
- No Assigned to card: only team admins can assign while creating an event. Anyone can assign afterwards from Edit Event.