

Before you start
You need the Schedule permission. Open the event type from Settings → Services & schedule and click Walkthrough in the step bar.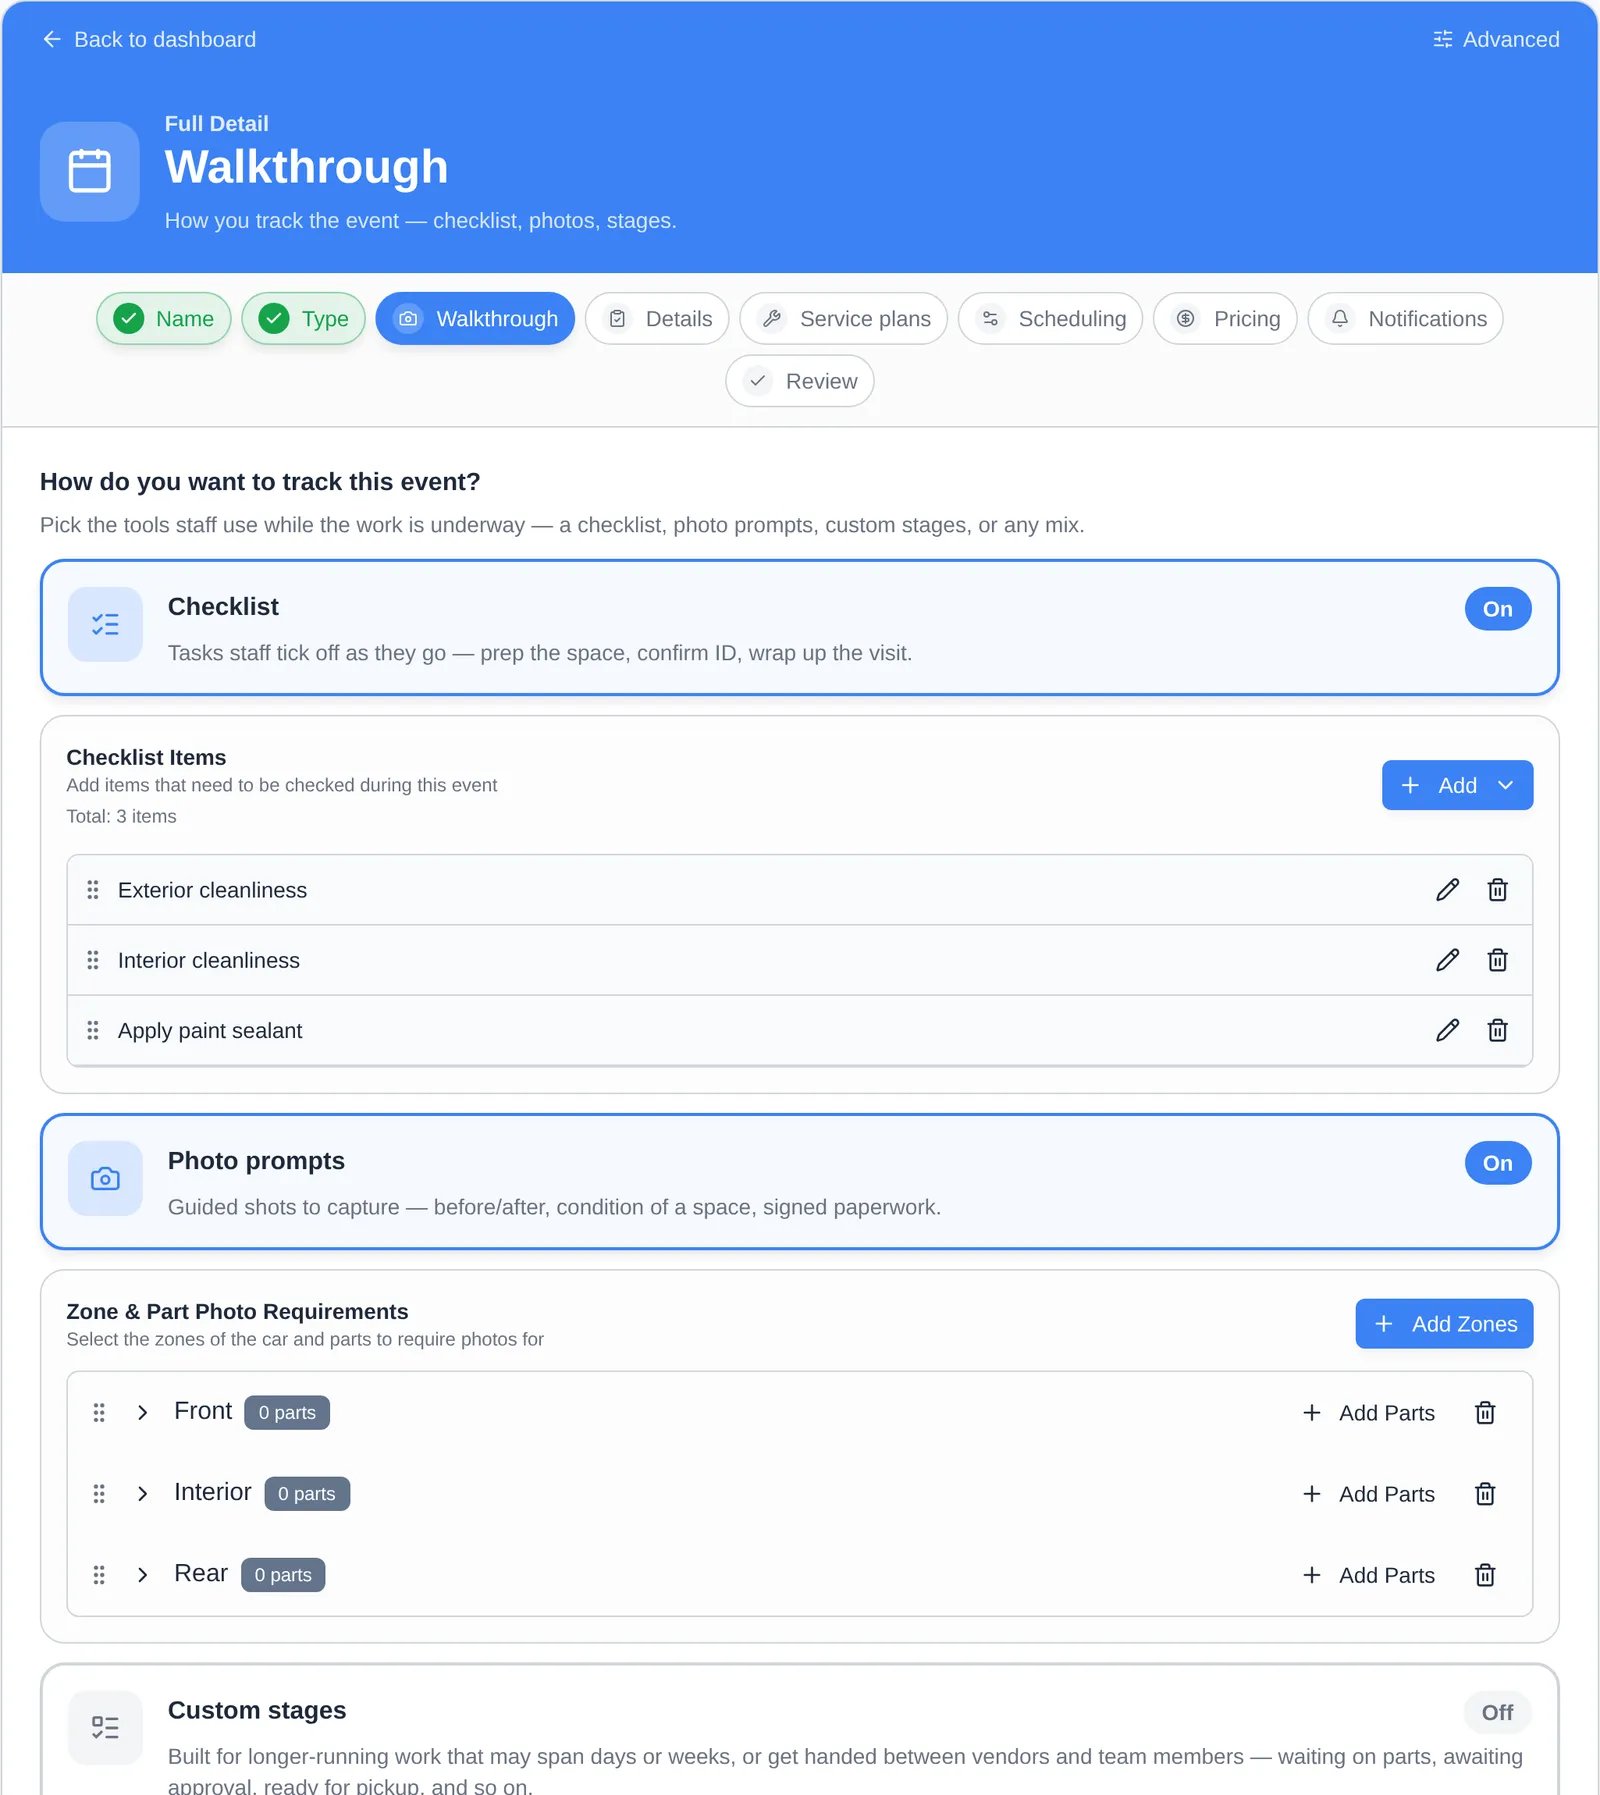
Add a checklist
1
Turn on Checklist
Click the Checklist card so it shows On.
2
Add items
Click Add → Checklist Item. Pick a suggestion from the list, or type an Item Name and click Add Item ”…”. Turn on Required if the event can’t be finished until it’s ticked. Add a Description for instructions.
3
Group items (optional)
Click Add → Group to create sections, then choose a Group when you add items. Drag items to reorder them.
Require photos
1
Turn on Photo prompts
Click the Photo prompts card.
2
Add zones
Click Add Zones. Type a zone name such as “Front”, “Rear”, or “Interior” and press Enter to create it, or pick one your team already uses. Click Done.
3
Add parts to a zone (optional)
Click Add Parts on a zone to ask for specific shots (for example “Driver door”). Mark each part Required or Optional and add an instruction for staff.
Track longer work with custom stages
For work that takes days or gets handed between people (waiting on parts, at the paint shop, ready for pickup), turn on Custom stages. Click Add status and pick from Defaults, your Team library, or Create new custom status…. Each stage belongs to a category (To Do, In Progress, Blocked, or Done) and can auto-assign the event to someone and set a due time. Drag stages to set their order. The order sets the columns in the Schedule’s Progress view.Extras
Shown when the checklist or photo prompts are on:Choose what staff must record
Click Details in the step bar. For each field, choose Required (must be filled in before finishing), Optional (shown but never blocks), or Off (hidden):- Vehicle events: Odometer reading, Fuel level, Tire pressure, Engine start.
- All events: Notes, Signature.