

Before you start
- Stripe is connected and card payments are active. See Connect payment processing.
- Tap to Pay is switched on for your facility. This happens automatically the first time your Stripe account becomes active, and it needs a facility address (Terminal requires a business address). If the Tap to Pay buttons described below are missing on a customer, ask support to enable it.
- A facility iPhone XS or later with a recent iOS, and the Car Storage Software Utilities app. Install it from Settings > Download apps. See Use the staff apps.
- The person doing the one-time setup on the phone is a facility admin. Payments from the desk need the payments permission.
Set up the iPhone (once per phone)
1
Sign in to the Utilities app as a facility admin
Until Tap to Pay is set up, the app’s home screen is the setup screen.
2
Tap Set up Tap to Pay on iPhone
Review and accept Apple’s Tap to Pay on iPhone Terms and Conditions. Only an admin is shown the terms. Other staff see “Ask a facility admin to set up Tap to Pay on iPhone”.
3
Read How to accept contactless payments
Apple’s short tutorial on how customers should hold their card or phone. You can reopen it any time from How to tap on the charge screen or from the Account screen.
Take a payment on the phone
1
Tap Take a payment
Under Who’s paying? search for the customer, or skip if it is a walk-up payment with no customer.
2
Pick an invoice (optional)
If the customer has open invoices, pick one to fill in its remaining amount, or choose another amount.
3
Enter the amount
Fill in Amount, and optionally What’s this for? and Receipt email, then tap Continue.
4
Tap Charge and hold the card to the phone
The button reads Charge with the amount. Hold the customer’s card near the top of the phone until you see confirmation. The screen shows Approved when it goes through.
5
Offer a receipt
A receipt is emailed automatically when a receipt email was set. Otherwise enter one and tap Email receipt. If a charge is declined, the customer was not charged, and you can send Email payment record.
Save a card on file on the phone
From the home screen tap Save a card on file, search for the customer, and pick them. The phone prepares the card setup and the customer taps their card straight away. The card then appears under the customer’s payment methods.Send a charge from the desk
Use this when the customer is standing at the desk and the phone or reader is in someone’s hand.1
Open the customer
On a contact’s Billing Setup card, under Payment methods on file, click Charge to take a payment. To save a card instead, open Add payment method and choose Tap to Pay. Both open the same Tap to Pay dialog.
2
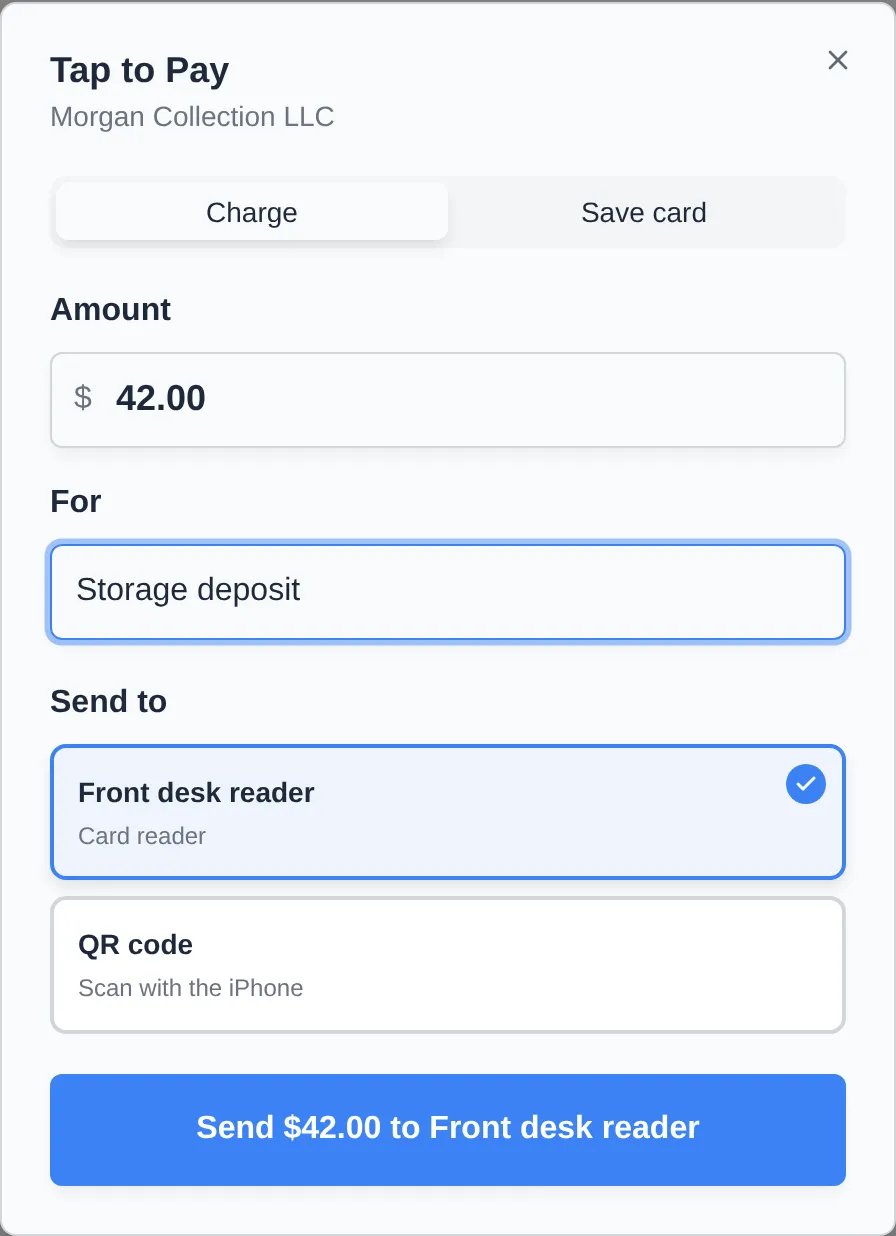
Enter the amount
On the Charge tab fill in Amount and, optionally, For. The Save card tab has no amount.
3
Choose where to send it under Send to
The list shows each staff iPhone signed in to the Utilities app (yours is marked “(you)”) and each card reader. QR code appears when no phone is signed in yet. If only one destination exists it is picked for you.
4
Click Send
The button reads Send with the amount and device name. The dialog then shows Sent to phone, Opened on phone, or Sending to reader, and Waiting for tap once the customer can tap. It ends with Paid and the amount.
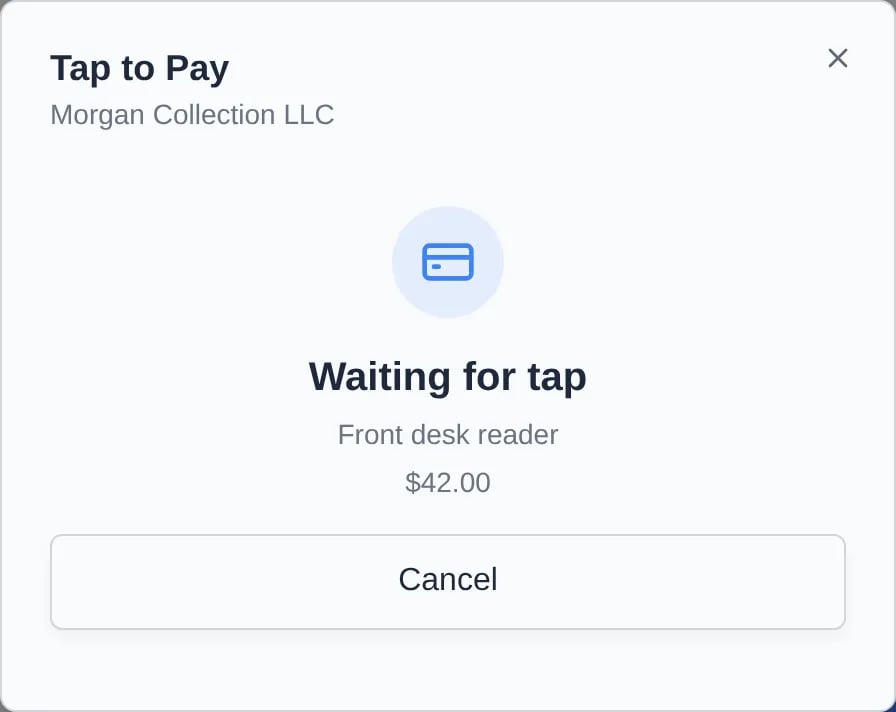
- Cancel stops the request. Send again appears after a cancel.
- If it fails, the dialog says Didn’t go through with the reason and offers Try again.
- Sending a new charge to a phone replaces whatever it was still waiting on.
- On a computer, the QR code option shows a code plus a 15-minute link. Scanning it with the facility iPhone opens the Utilities app on that customer.
New customer registration
If your team fills in the public registration form with a customer standing there, the confirmation screen says “Save their card with Tap to Pay on iPhone to finish” and shows the same send-to-device panel.Add a smart reader
Under Payment devices on Settings > Download apps, click Add reader, type the Code shown on the reader’s screen (for examplequick-brown-fox), set a Name (default “Front desk”), and click Add. The reader then appears in Send to as a Card reader. The same list shows each connected phone, and the trash button removes a device.
Put a payment on a customer’s balance and invoices
A payment taken with no customer, or one that has not yet been credited, shows in a Tap to Pay payments list with the date, card brand and last four digits, the note, and “No customer” if none was attached. The list is on the Payments overview (payments with no customer only) and in the Account Balance card on each customer (that customer’s own, plus ones with no customer).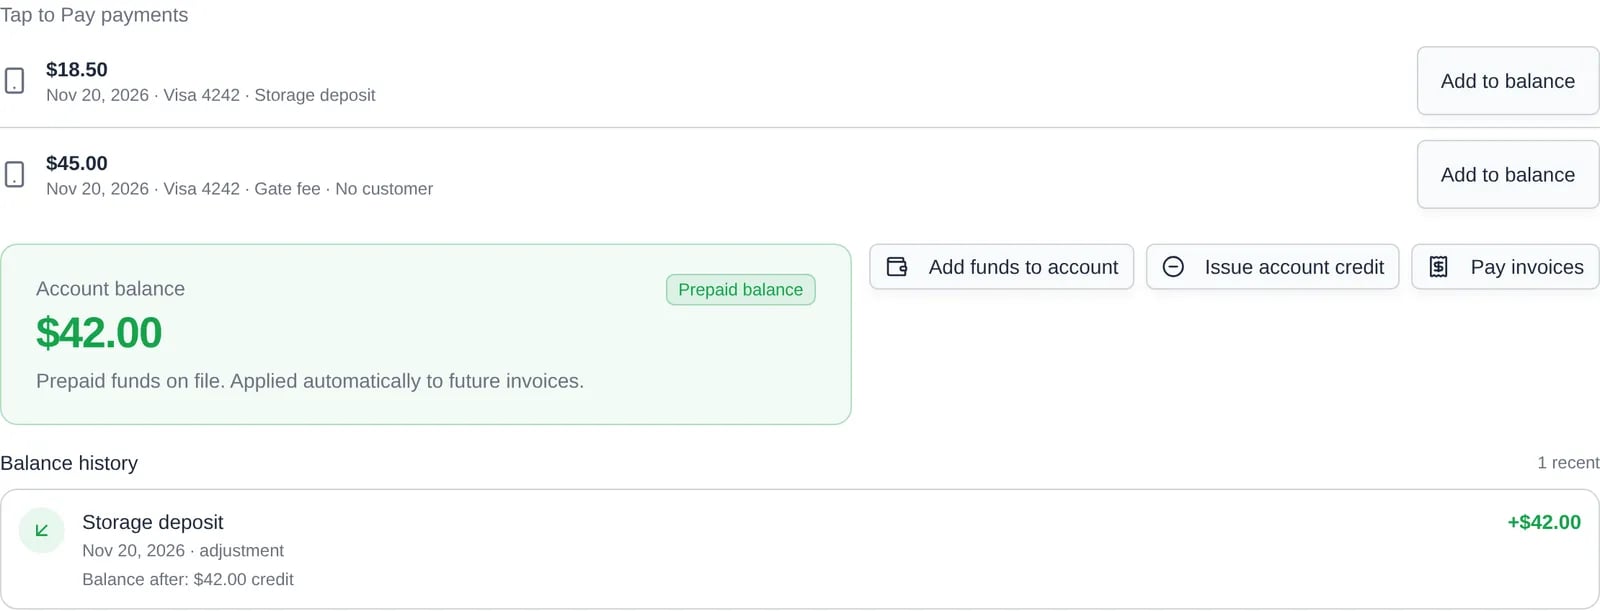
1
Click the button on the row
On Payments overview a payment with no customer says Apply to customer. On a customer record, or for a payment already tied to a customer, it says Add to balance.
2
Choose the customer (overview only)
In the Apply to customer dialog pick the customer and click Add to balance.
3
Pay invoices from it
The amount is added to the customer’s balance, a message confirms it, and Pay from balance opens so you can pick invoices to pay with it right away. Close it to leave the credit on the balance, where it applies to future invoices.
